Getting started with managed.hopsworks.ai (Azure)#
Managed.hopsworks.ai is our managed platform for running Hopsworks and the Feature Store in the cloud. It integrates seamlessly with third-party platforms such as Databricks, SageMaker and KubeFlow. This guide shows how to set up managed.hopsworks.ai with your organization's Azure account.
Prerequisites#
To follow the instruction on this page you will need the following:
- An Azure resource group in which the Hopsworks cluster will be deployed.
- The azure CLI installed and logged in.
Permissions#
To run all the commands on this page the user needs to have at least the following permissions on the Azure resource group:
Microsoft.Authorization/roleDefinitions/write
Microsoft.Authorization/roleAssignments/write
Microsoft.Compute/sshPublicKeys/generateKeyPair/action
Microsoft.Compute/sshPublicKeys/read
Microsoft.Compute/sshPublicKeys/write
Microsoft.ContainerRegistry/registries/operationStatuses/read
Microsoft.ContainerRegistry/registries/read
Microsoft.ContainerRegistry/registries/write
Microsoft.ManagedIdentity/userAssignedIdentities/write
Microsoft.Resources/subscriptions/resourcegroups/read
Microsoft.Storage/storageAccounts/write
You will also need to have a role such as Application Administrator on the Azure Active Directory to be able to create the hopsworks.ai service principal.
Resource providers#
For managed.hopsworks.ai to deploy a cluster the following resource providers need to be registered on your Azure subscription.
Microsoft.Network
Microsoft.Compute
Microsoft.Storage
Microsoft.ManagedIdentity
Microsoft.ContainerRegistry
Note
To run these commands you need to have the following permission on your subscription: Microsoft.Network/register/action
az provider register --namespace 'Microsoft.Network'
az provider register --namespace 'Microsoft.Compute'
az provider register --namespace 'Microsoft.Storage'
az provider register --namespace 'Microsoft.ManagedIdentity'
az provider register --namespace 'Microsoft.ContainerRegistry'
Other#
All the commands have been written for a Unix system. These commands will need to be adapted to your terminal if it is not directly compatible.
All the commands use your default location. Add the --location parameter if you want to run your cluster in another location. Make sure to create the resources in the same location as you are going to run your cluster.
Step 1: Connect your Azure account#
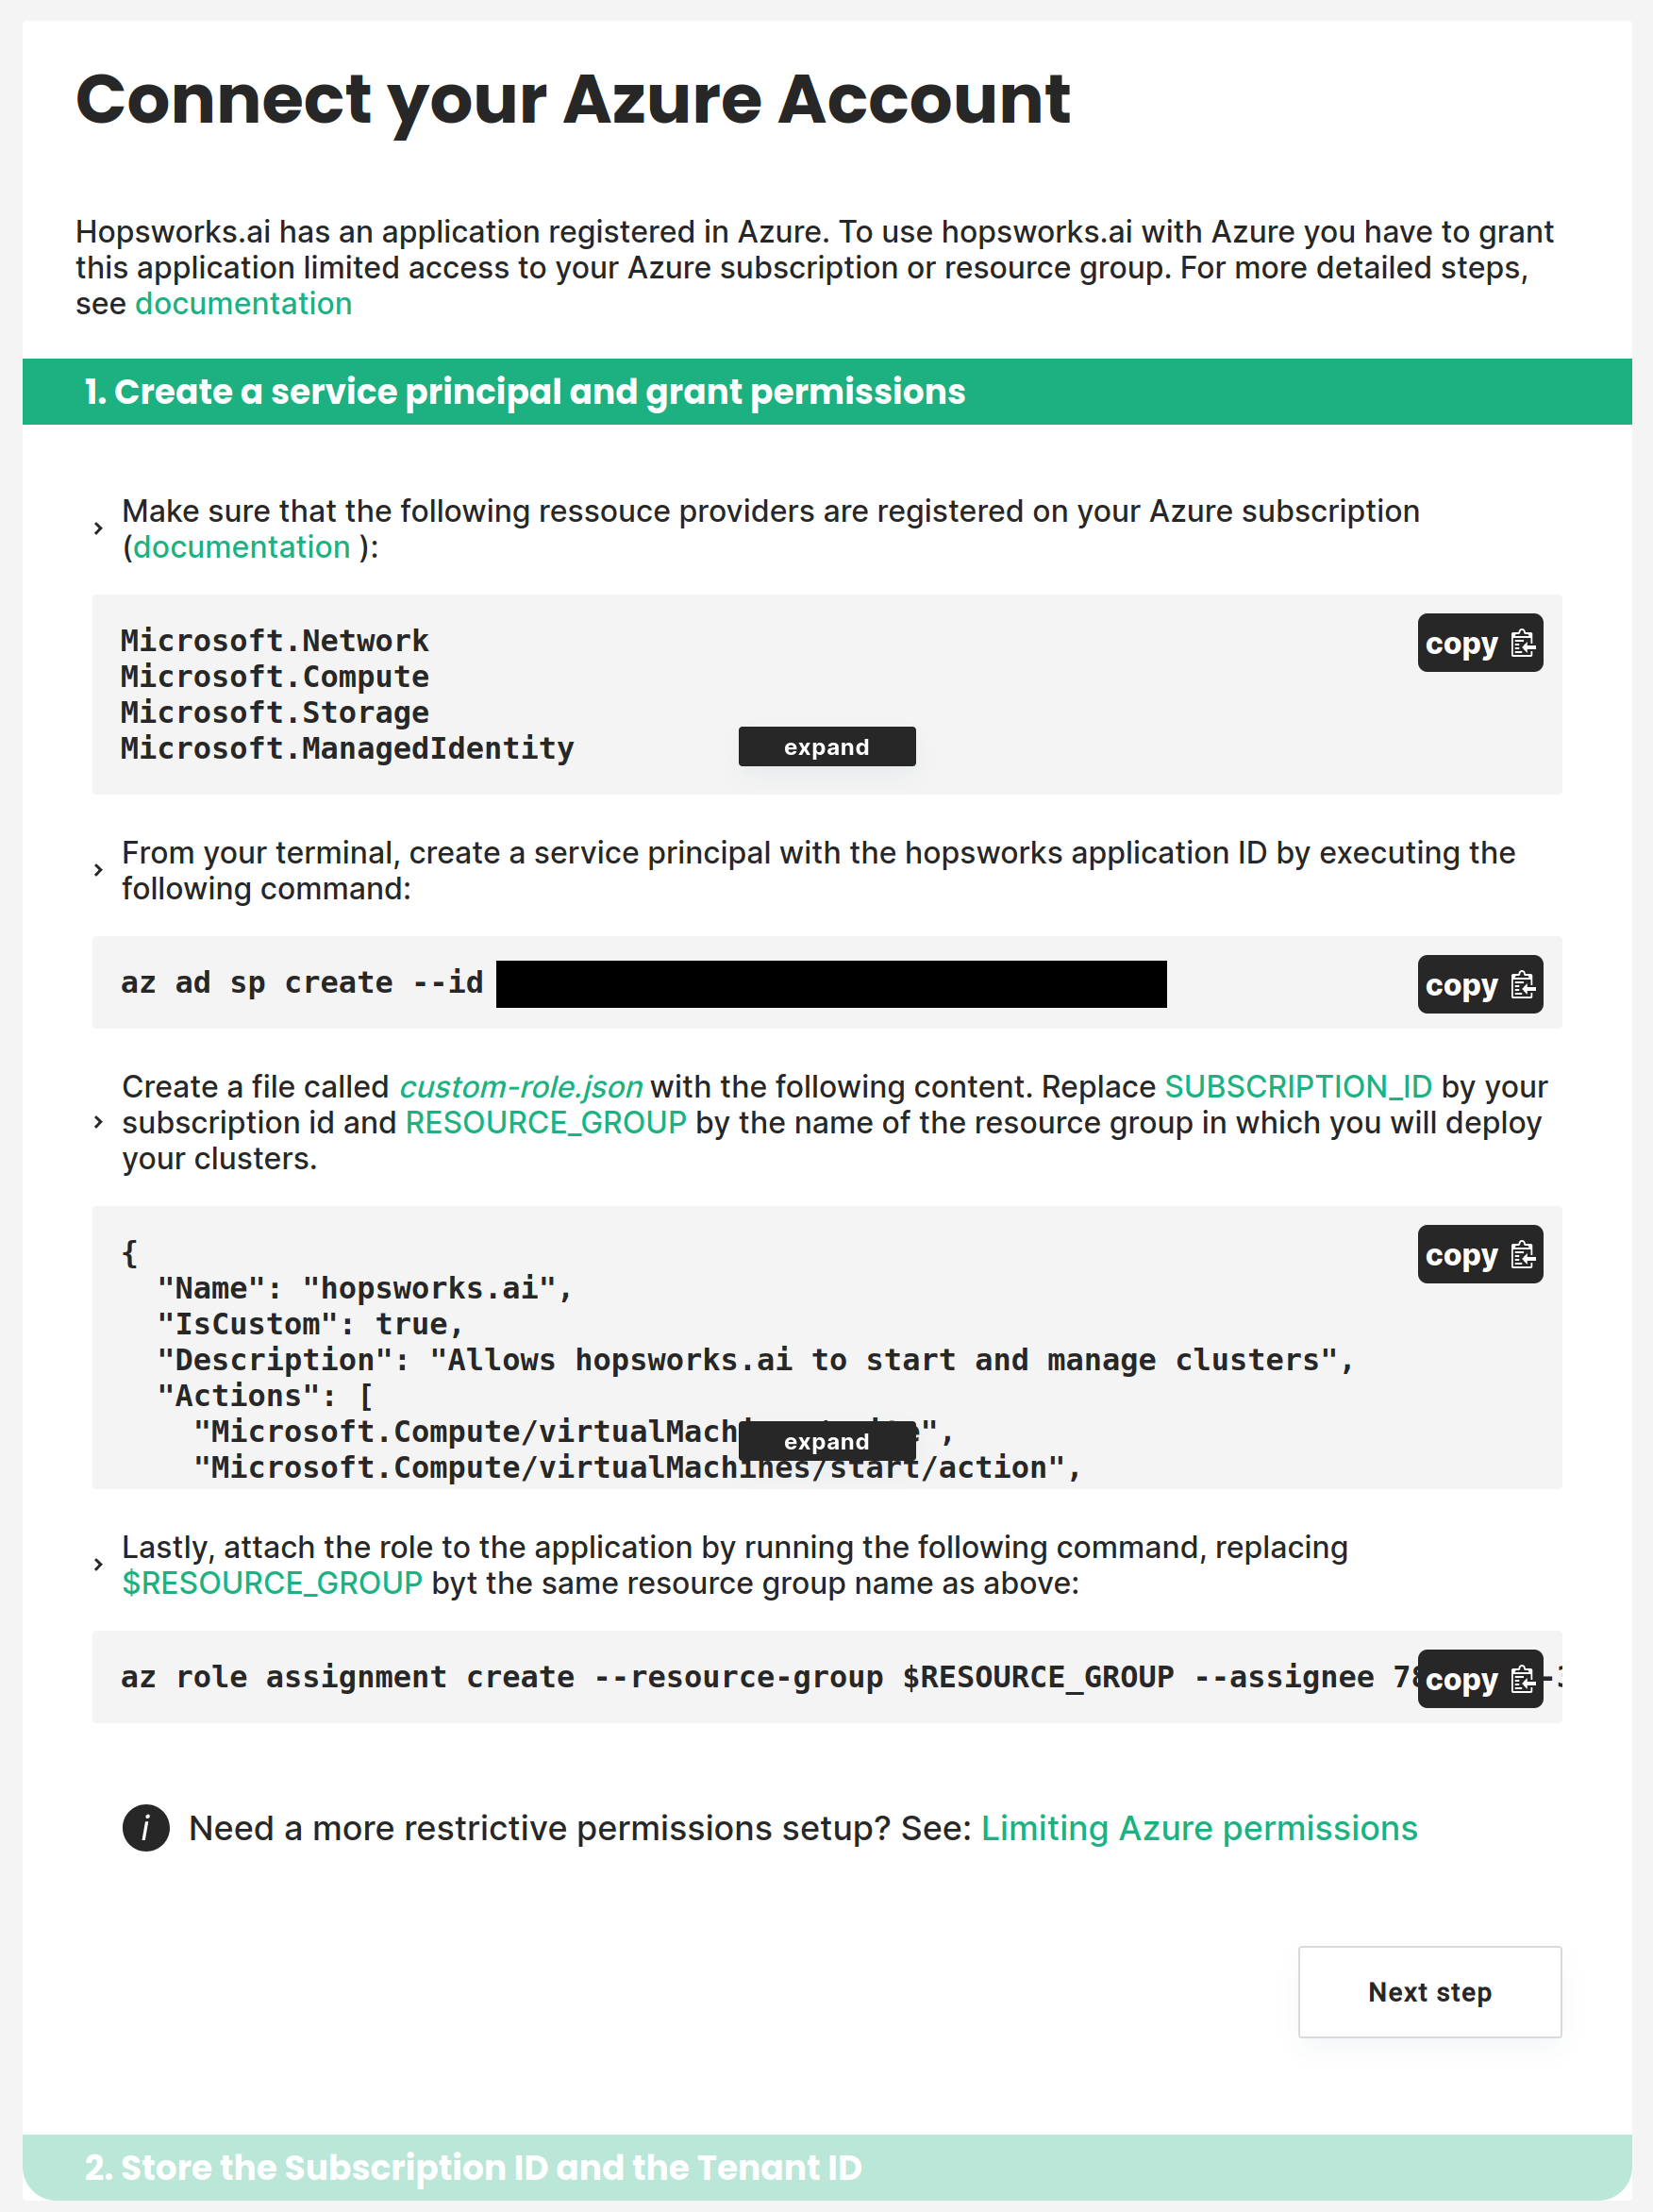
Managed.hopsworks.ai deploys Hopsworks clusters to your Azure account. To enable this, you have to create a service principal and a custom role for managed.hopsworks.ai granting access to your resource group.
Step 1.1: Connect your Azure account#
In managed.hopsworks.ai click on Connect to Azure or go to Settings and click on Configure next to Azure. This will direct you to a page with the instructions needed to create the service principal and set up the connection. Follow the instructions.
Note
it is possible to limit the permissions that are set up during this phase. For more details see restrictive-permissions.
Step 2: Create a storage#
Note
If you prefer using terraform, you can skip this step and the remaining steps, and instead, follow this guide.
The Hopsworks clusters deployed by managed.hopsworks.ai store their data in a storage container in your Azure account. To enable this you need to create a storage account. This is done by running the following command, replacing $RESOURCE_GROUP with the name of your resource group.
az storage account create --resource-group $RESOURCE_GROUP --name hopsworksstorage$RANDOM
Step 3: Create an ACR Container Registry#
The Hopsworks clusters deployed by managed.hopsworks.ai store their docker images in a container registry in your Azure account. To create this storage account run the following command, replacing $RESOURCE_GROUP with the name of your resource group.
az acr create --resource-group $RESOURCE_GROUP --name hopsworksecr --sku Premium
To prevent the registry from filling up with unnecessary images and artifacts you can enable a retention policy. A retention policy will automatically remove untagged manifests after a specified number of days. To enable a retention policy, run the following command, replacing $RESOURCE_GROUP with the name of your resource group.
az acr config retention update --resource-group $RESOURCE_GROUP --registry hopsworksecr --status Enabled --days 7 --type UntaggedManifests
Step 4: Create a managed identity#
To allow the hopsworks cluster instances to access the storage account and the container registry, managed.hopsworks.ai assigns a managed identity to the cluster nodes. To enable this you need to:
- Create a managed identity
- Create a role with appropriate permission and assign it to the managed identity
Step 4.1: Create a managed identity#
You create a managed identity by running the following command, replacing $RESOURCE_GROUP with the name of your resource group.
identityId=$(az identity create --name hopsworks-instance --resource-group $RESOURCE_GROUP --query principalId -o tsv)
Step 4.2: Create a role for the managed identity#
To create a new role for the managed identity, first, create a file called instance-role.json with the following content. Replace SUBSCRIPTION_ID by your subscription id and RESOURCE_GROUP by your resource group
{
  "Name": "hopsworks-instance",
  "IsCustom": true,
  "Description": "Allow the hopsworks instance to access the storage and the docker repository",
  "Actions": [
      "Microsoft.Storage/storageAccounts/blobServices/containers/write",
      "Microsoft.Storage/storageAccounts/blobServices/containers/read",
      "Microsoft.Storage/storageAccounts/blobServices/write",
      "Microsoft.Storage/storageAccounts/blobServices/read",
      "Microsoft.Storage/storageAccounts/listKeys/action",
      "Microsoft.ContainerRegistry/registries/artifacts/delete",
      "Microsoft.ContainerRegistry/registries/pull/read",
      "Microsoft.ContainerRegistry/registries/push/write"
  ],
  "NotActions": [

  ],
  "DataActions": [
      "Microsoft.Storage/storageAccounts/blobServices/containers/blobs/delete",
      "Microsoft.Storage/storageAccounts/blobServices/containers/blobs/read",
      "Microsoft.Storage/storageAccounts/blobServices/containers/blobs/move/action",
      "Microsoft.Storage/storageAccounts/blobServices/containers/blobs/write"
  ],
  "AssignableScopes": [
    "/subscriptions/SUBSCRIPTION_ID/resourceGroups/RESOURCE_GROUP"
  ]
}
az role definition create --role-definition instance-role.json
Finally assign the role to the managed identity by running the following command, replacing $RESOURCE_GROUP with the name of your resource group.
az role assignment create --resource-group $RESOURCE_GROUP --role hopsworks-instance --assignee $identityId
Note
It takes several minutes between the time you create the managed identity and the time a role can be assigned to it. So if we get an error message starting by the following wait and retry: Cannot find user or service principal in graph database
Step 5: Add an ssh key to your resource group#
When deploying clusters, managed.hopsworks.ai installs an ssh key on the cluster's instances so that you can access them if necessary. For this purpose, you need to add an ssh key to your resource group.
To create an ssh key in your resource group run the following command, replacing $RESOURCE_GROUP with the name of your resource group.
az sshkey create --resource-group $RESOURCE_GROUP --name hopsworksKey
Note
the command returns the path to the private and public keys associated with this ssh key. You can also create a key from an existing public key as indicated in the Azure documentation
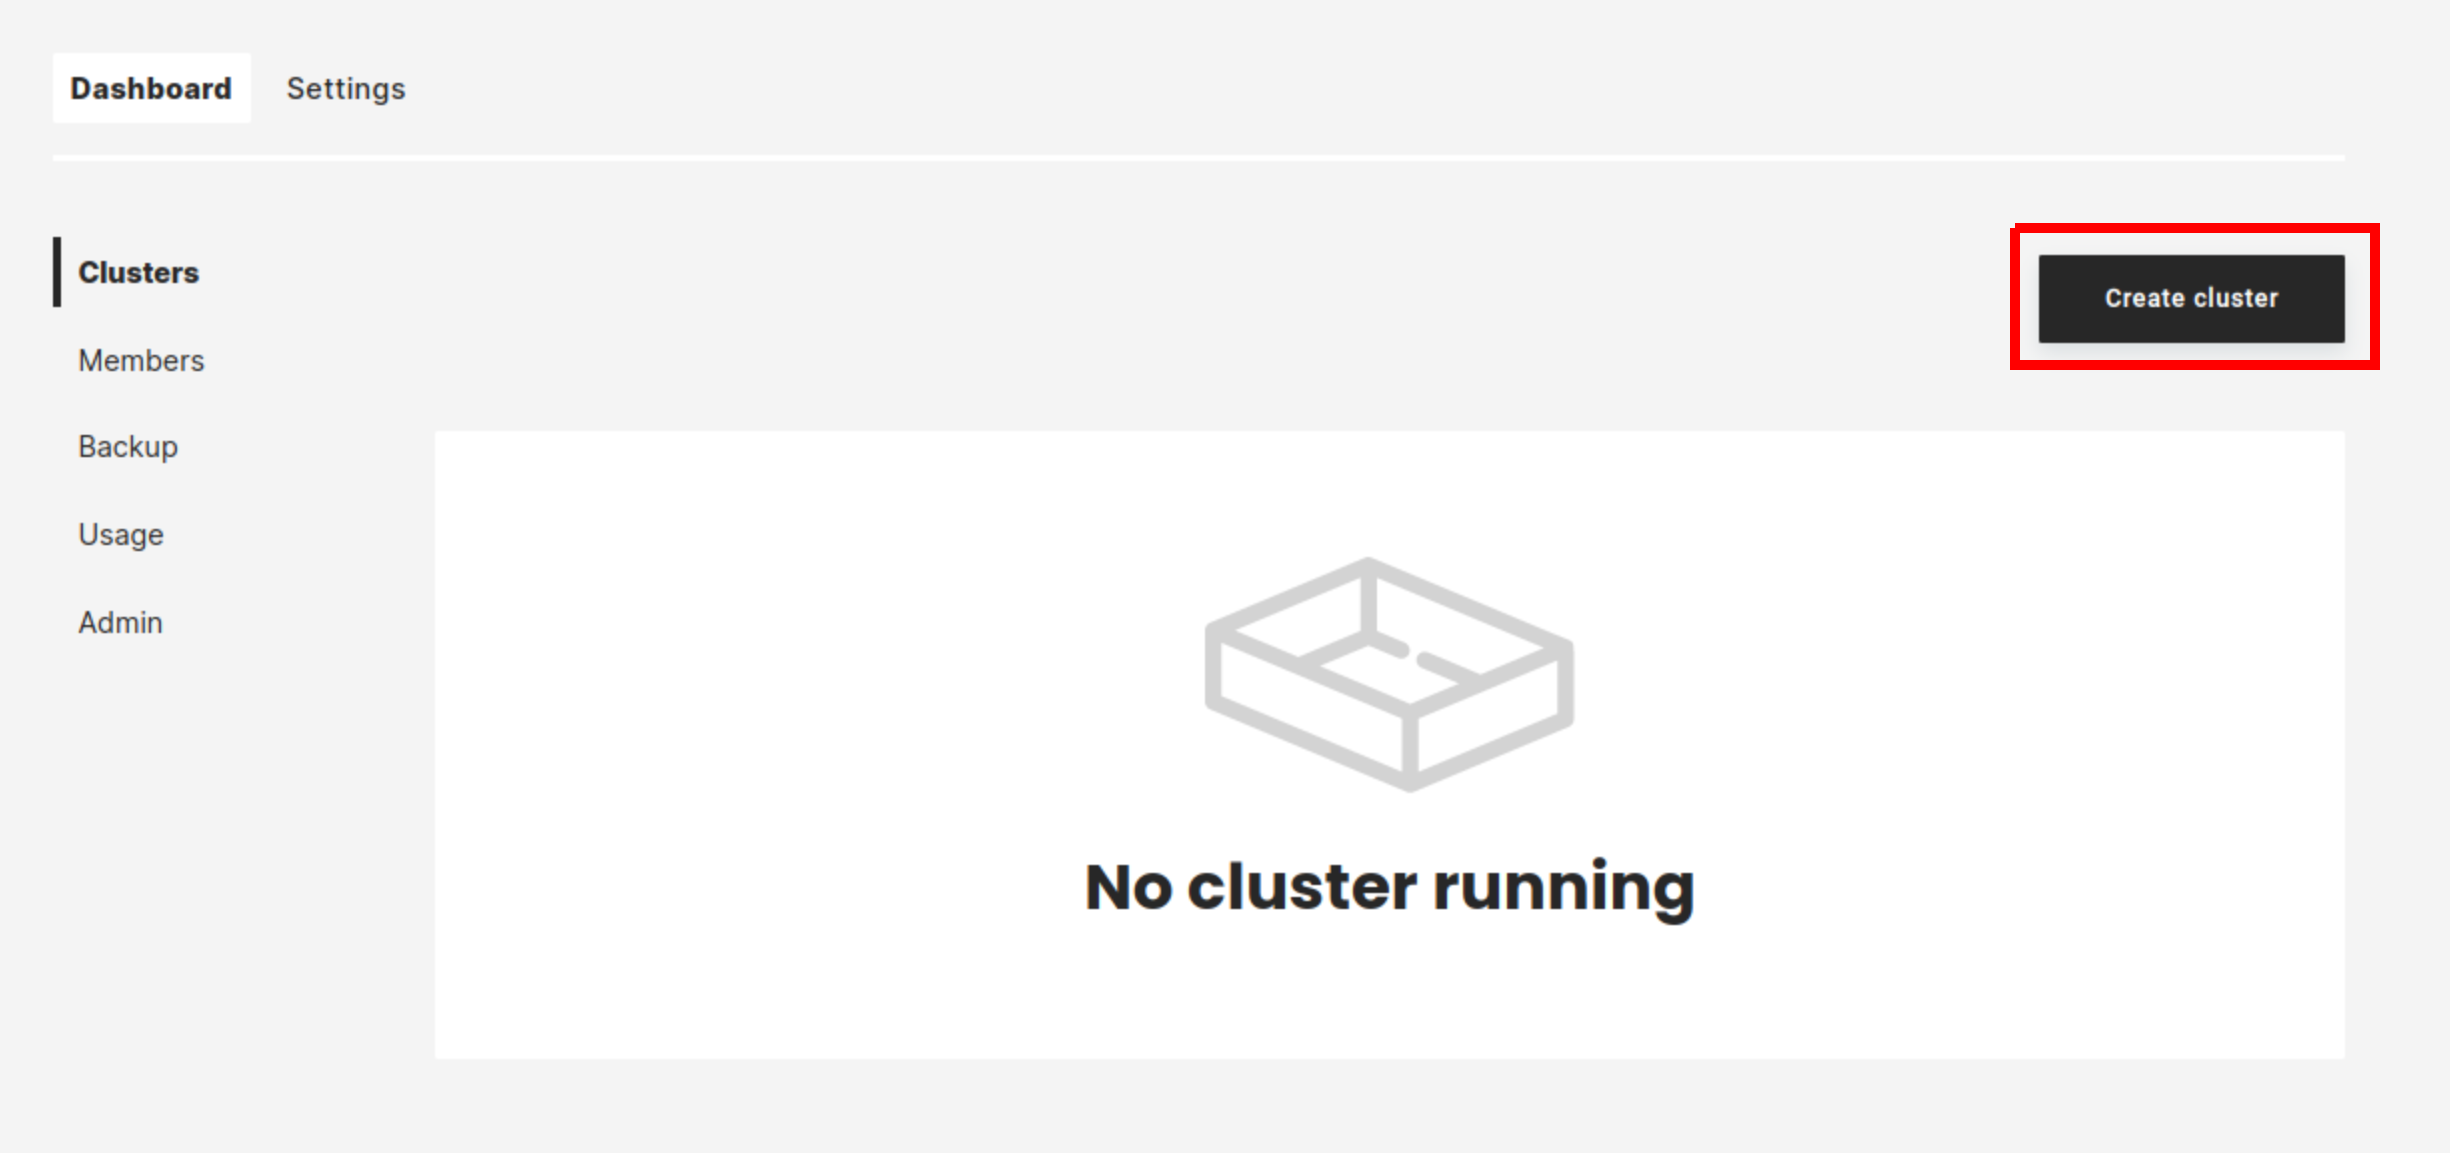
Step 6: Deploy a Hopsworks cluster#
In managed.hopsworks.ai, select Create cluster:
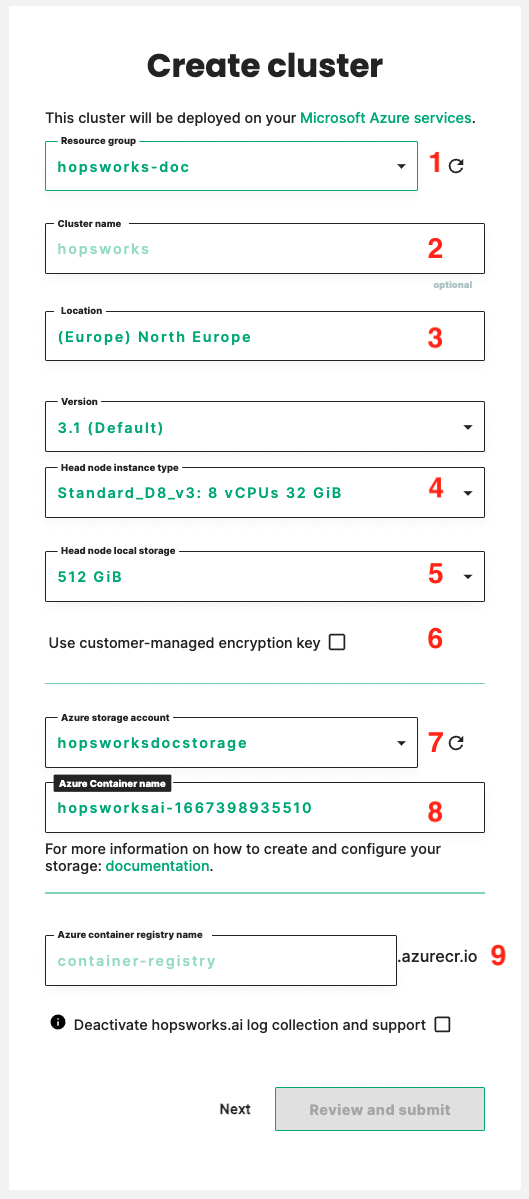
Select the Resource Group (1) in which you created your storage account and managed identity (see above).
Note
If the Resource Group does not appear in the drop-down, make sure that the custom role you created in step 1.1 has the Microsoft.Resources/subscriptions/resourceGroups/read permission and is assigned to the hopsworks.ai user.
Name your cluster (2). Your cluster will be deployed in the Location of your Resource Group (3).
Select the Instance type (4) and Local storage (5) size for the cluster Head node.
Check if you want to Use customer-managed encryption key (6)
Select the storage account (7) you created above in Azure Storage account name. The name of the container in which the data will be stored is displayed in Azure Container name (8), you can modify it if needed.
Note
You can choose to use a container already existing in your storage account by using the name of this container, but you need to first make sure that this container is empty.
Enter the Azure container registry name (9) of the ACR registry created in Step 3.1
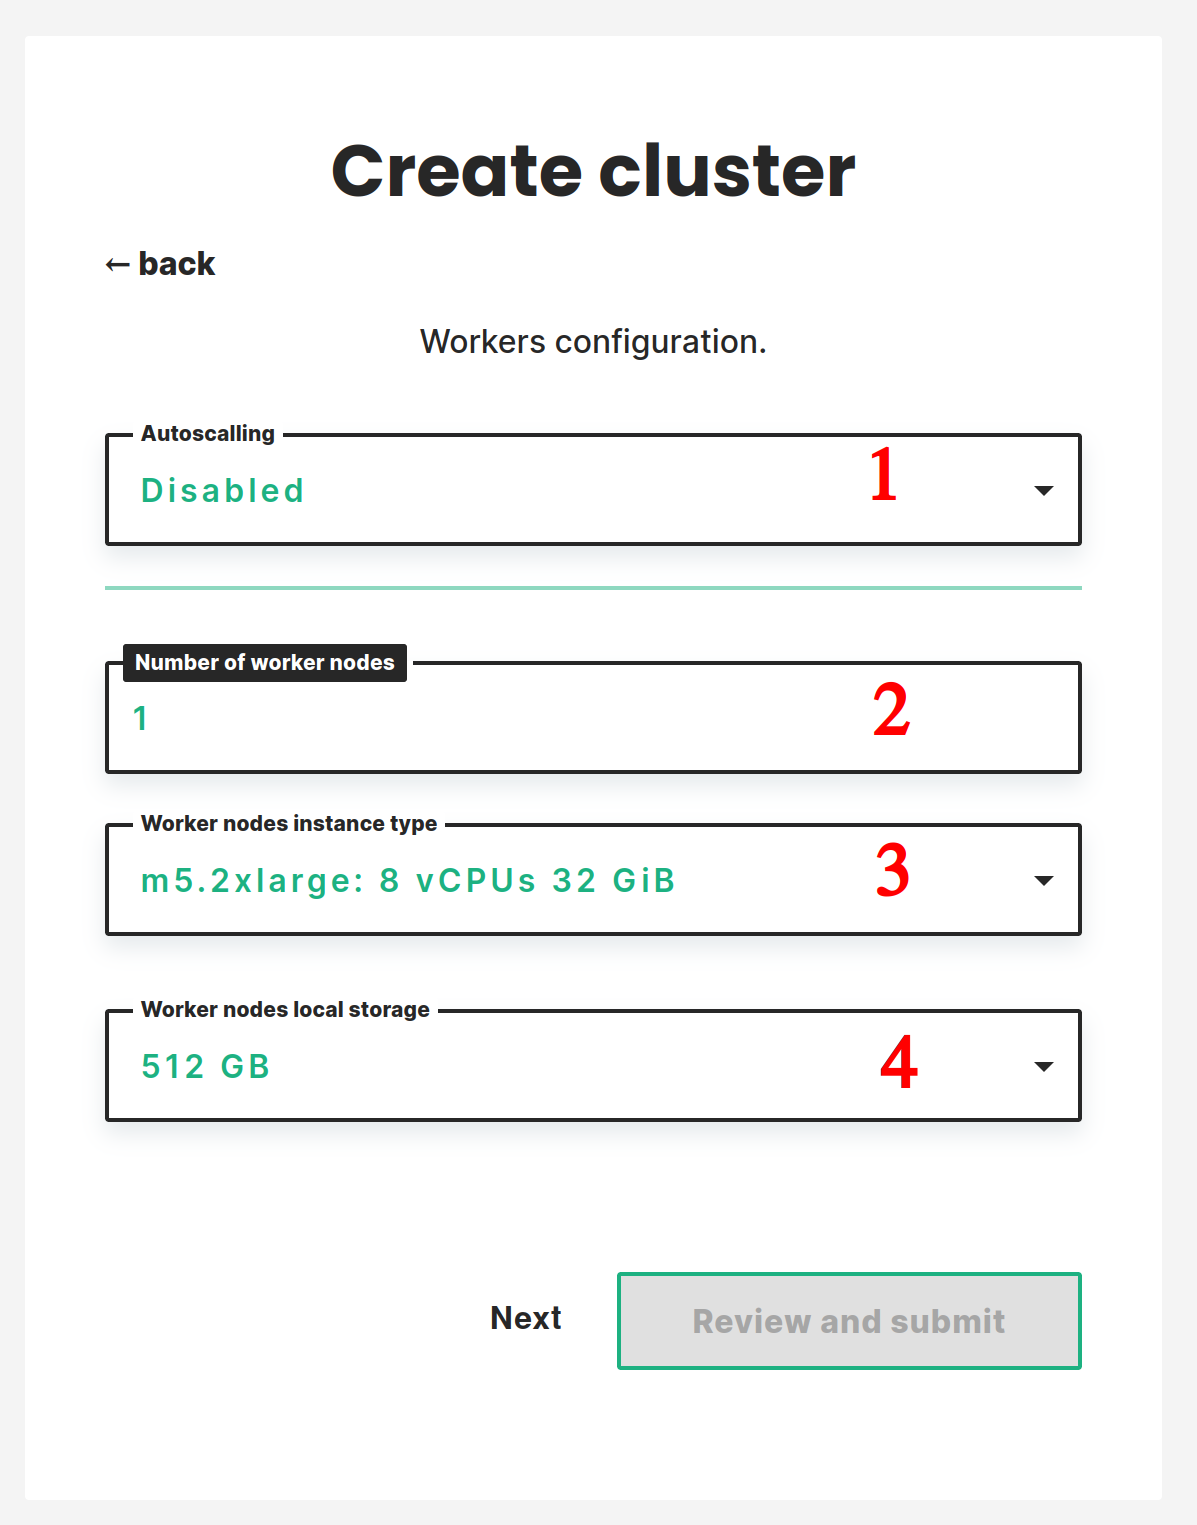
Press Next:
Select the number of workers you want to start the cluster with (2). Select the Instance type (3) and Local storage size (4) for the worker nodes.
Note
It is possible to add or remove workers or to enable autoscaling once the cluster is running.
Press Next:
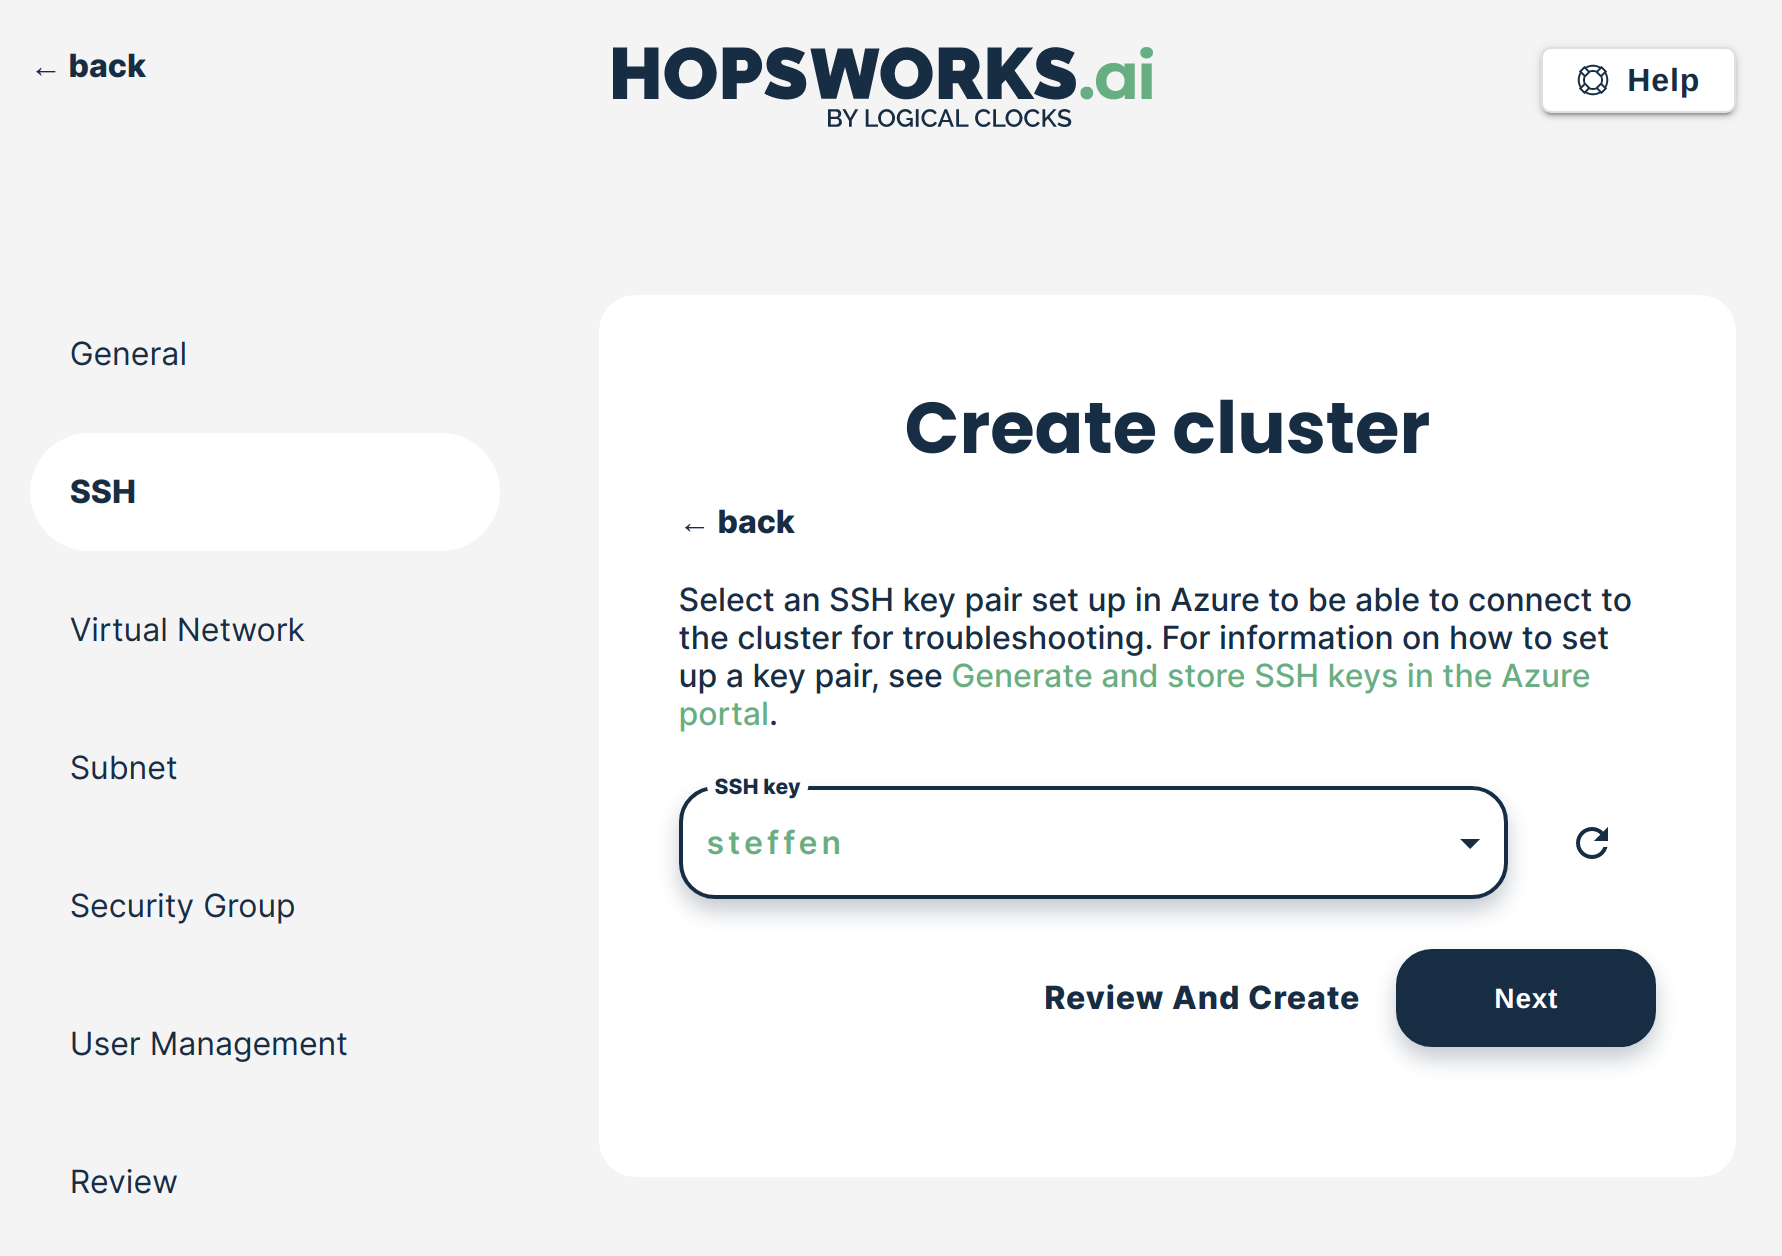
Select the SSH key that you want to use to access cluster instances:
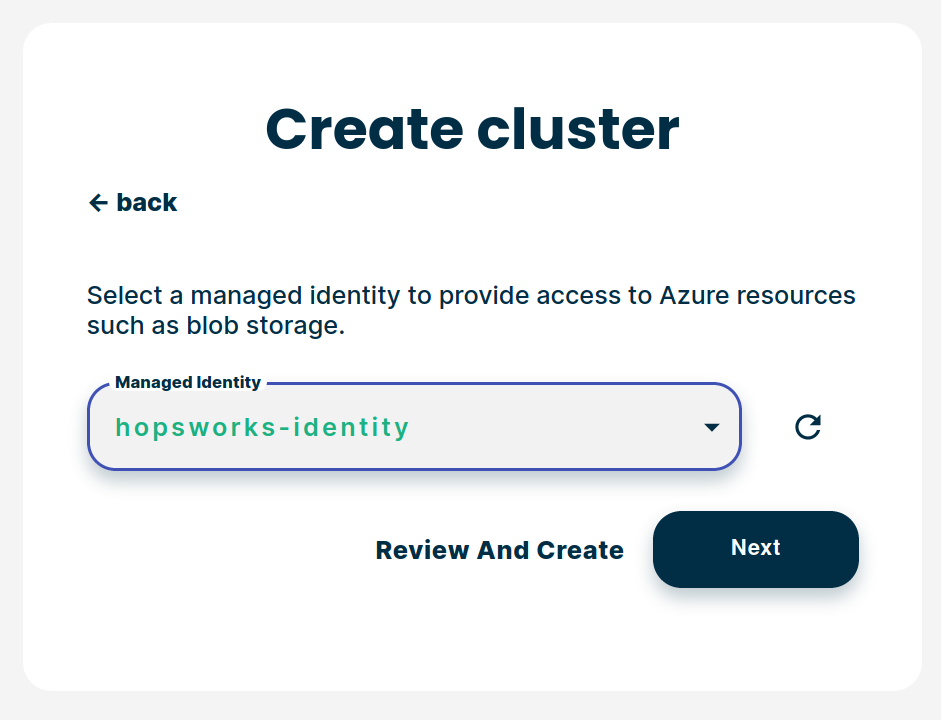
Select the User assigned managed identity that you created above:
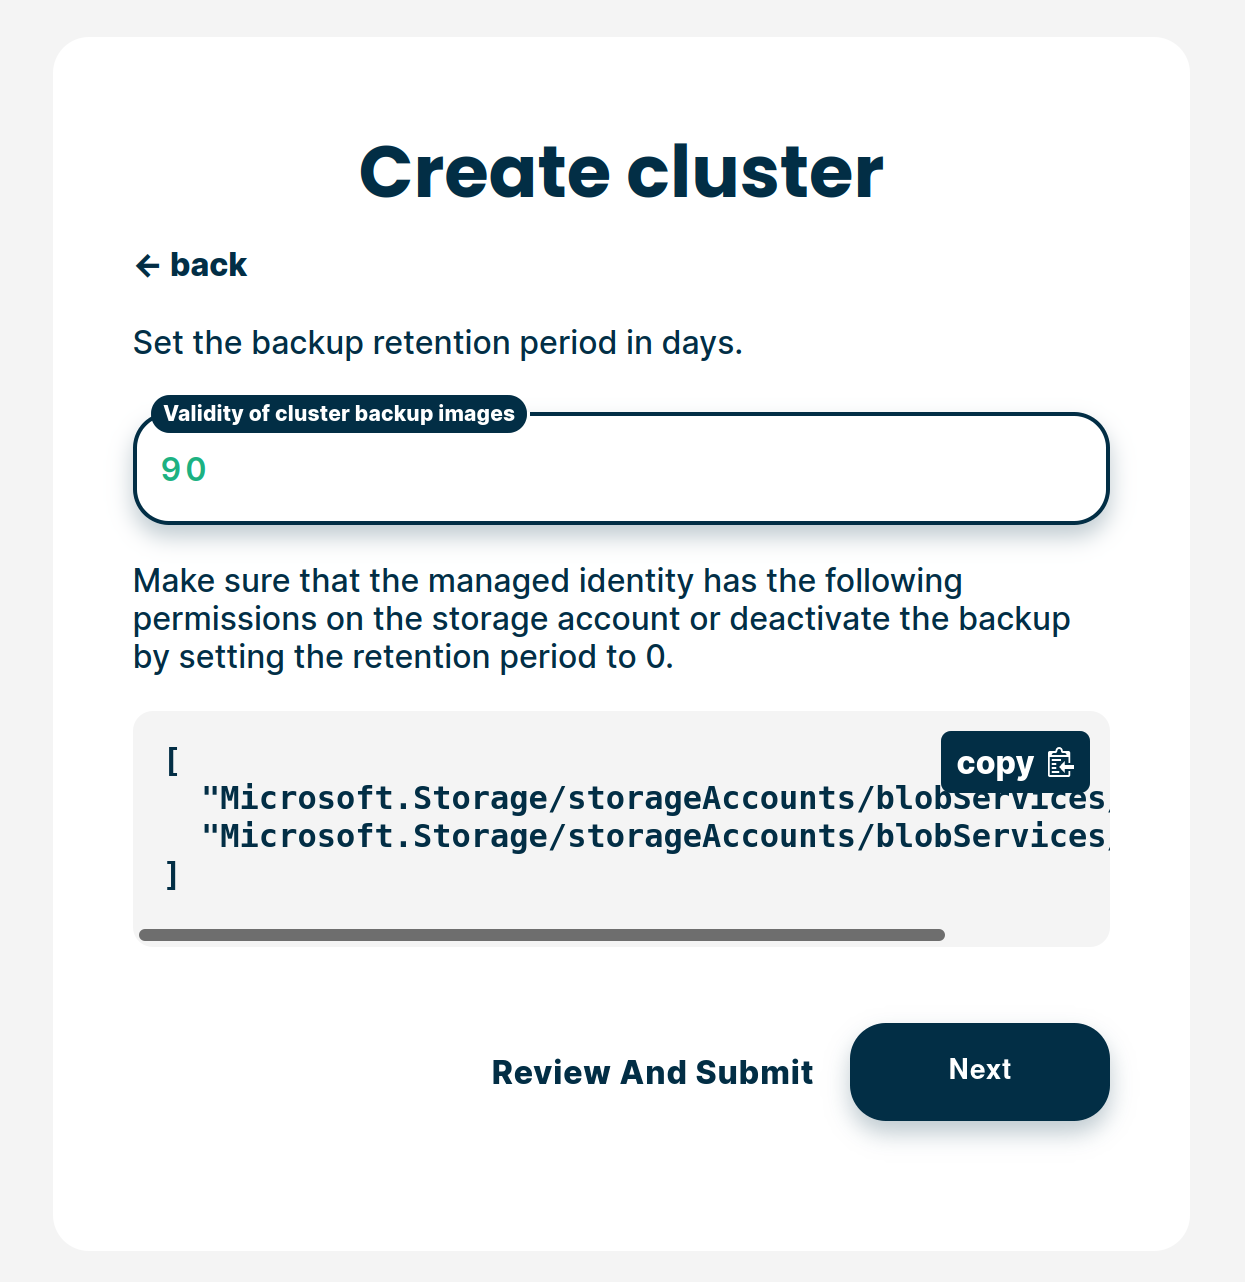
To backup the Azure blob storage data when taking a cluster backup we need to set a retention policy for the blob storage. You can deactivate the retention policy by setting this value to 0 but this will block you from taking any backup of your cluster. Choose the retention period in days and click on Review and submit.
Review all information and select Create:

Note
We skipped cluster creation steps that are not mandatory. You can find more details about these steps here
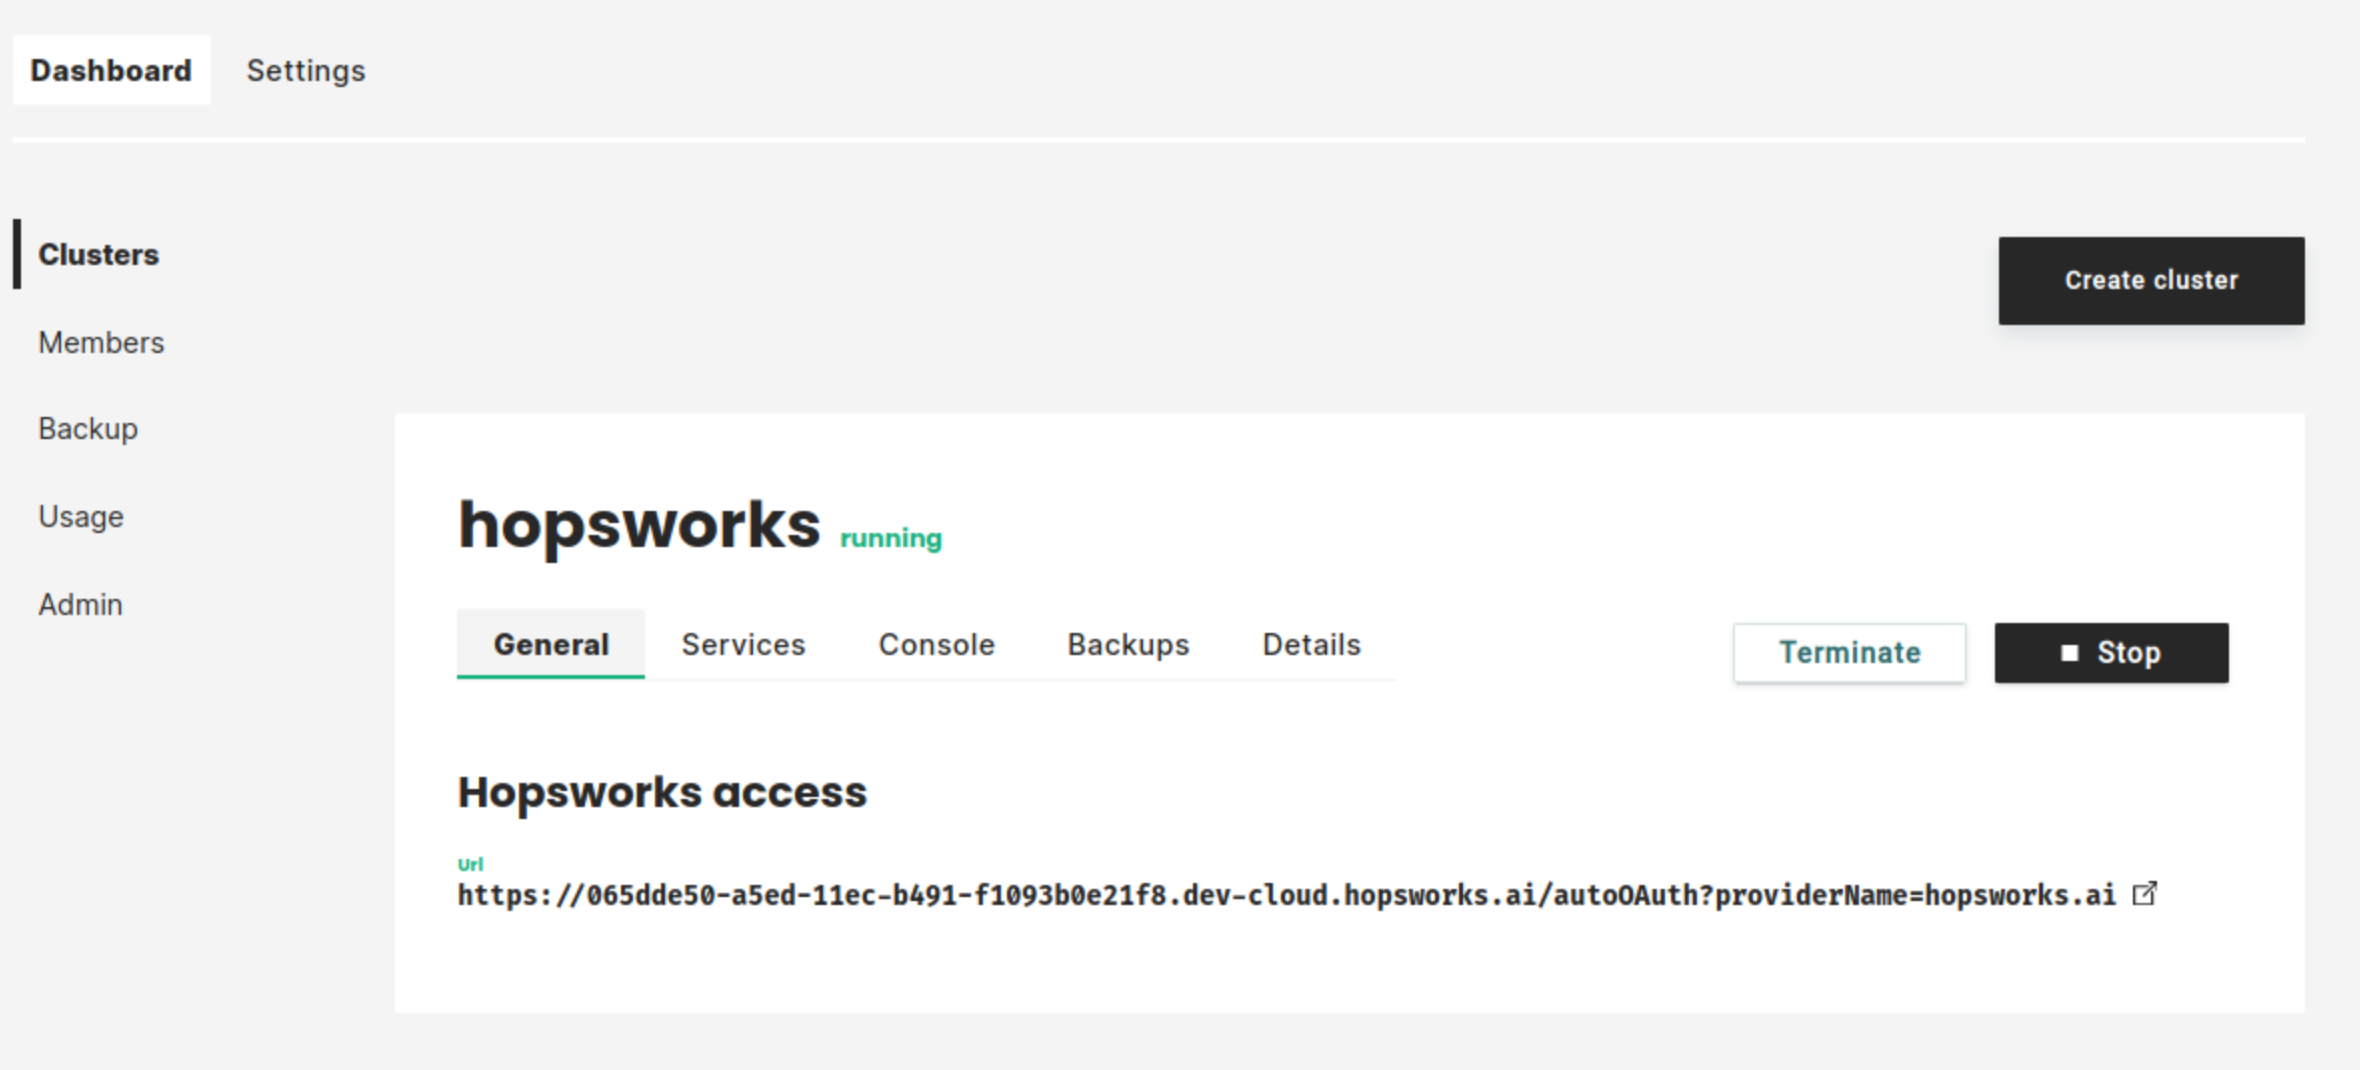
The cluster will start. This will take a few minutes:
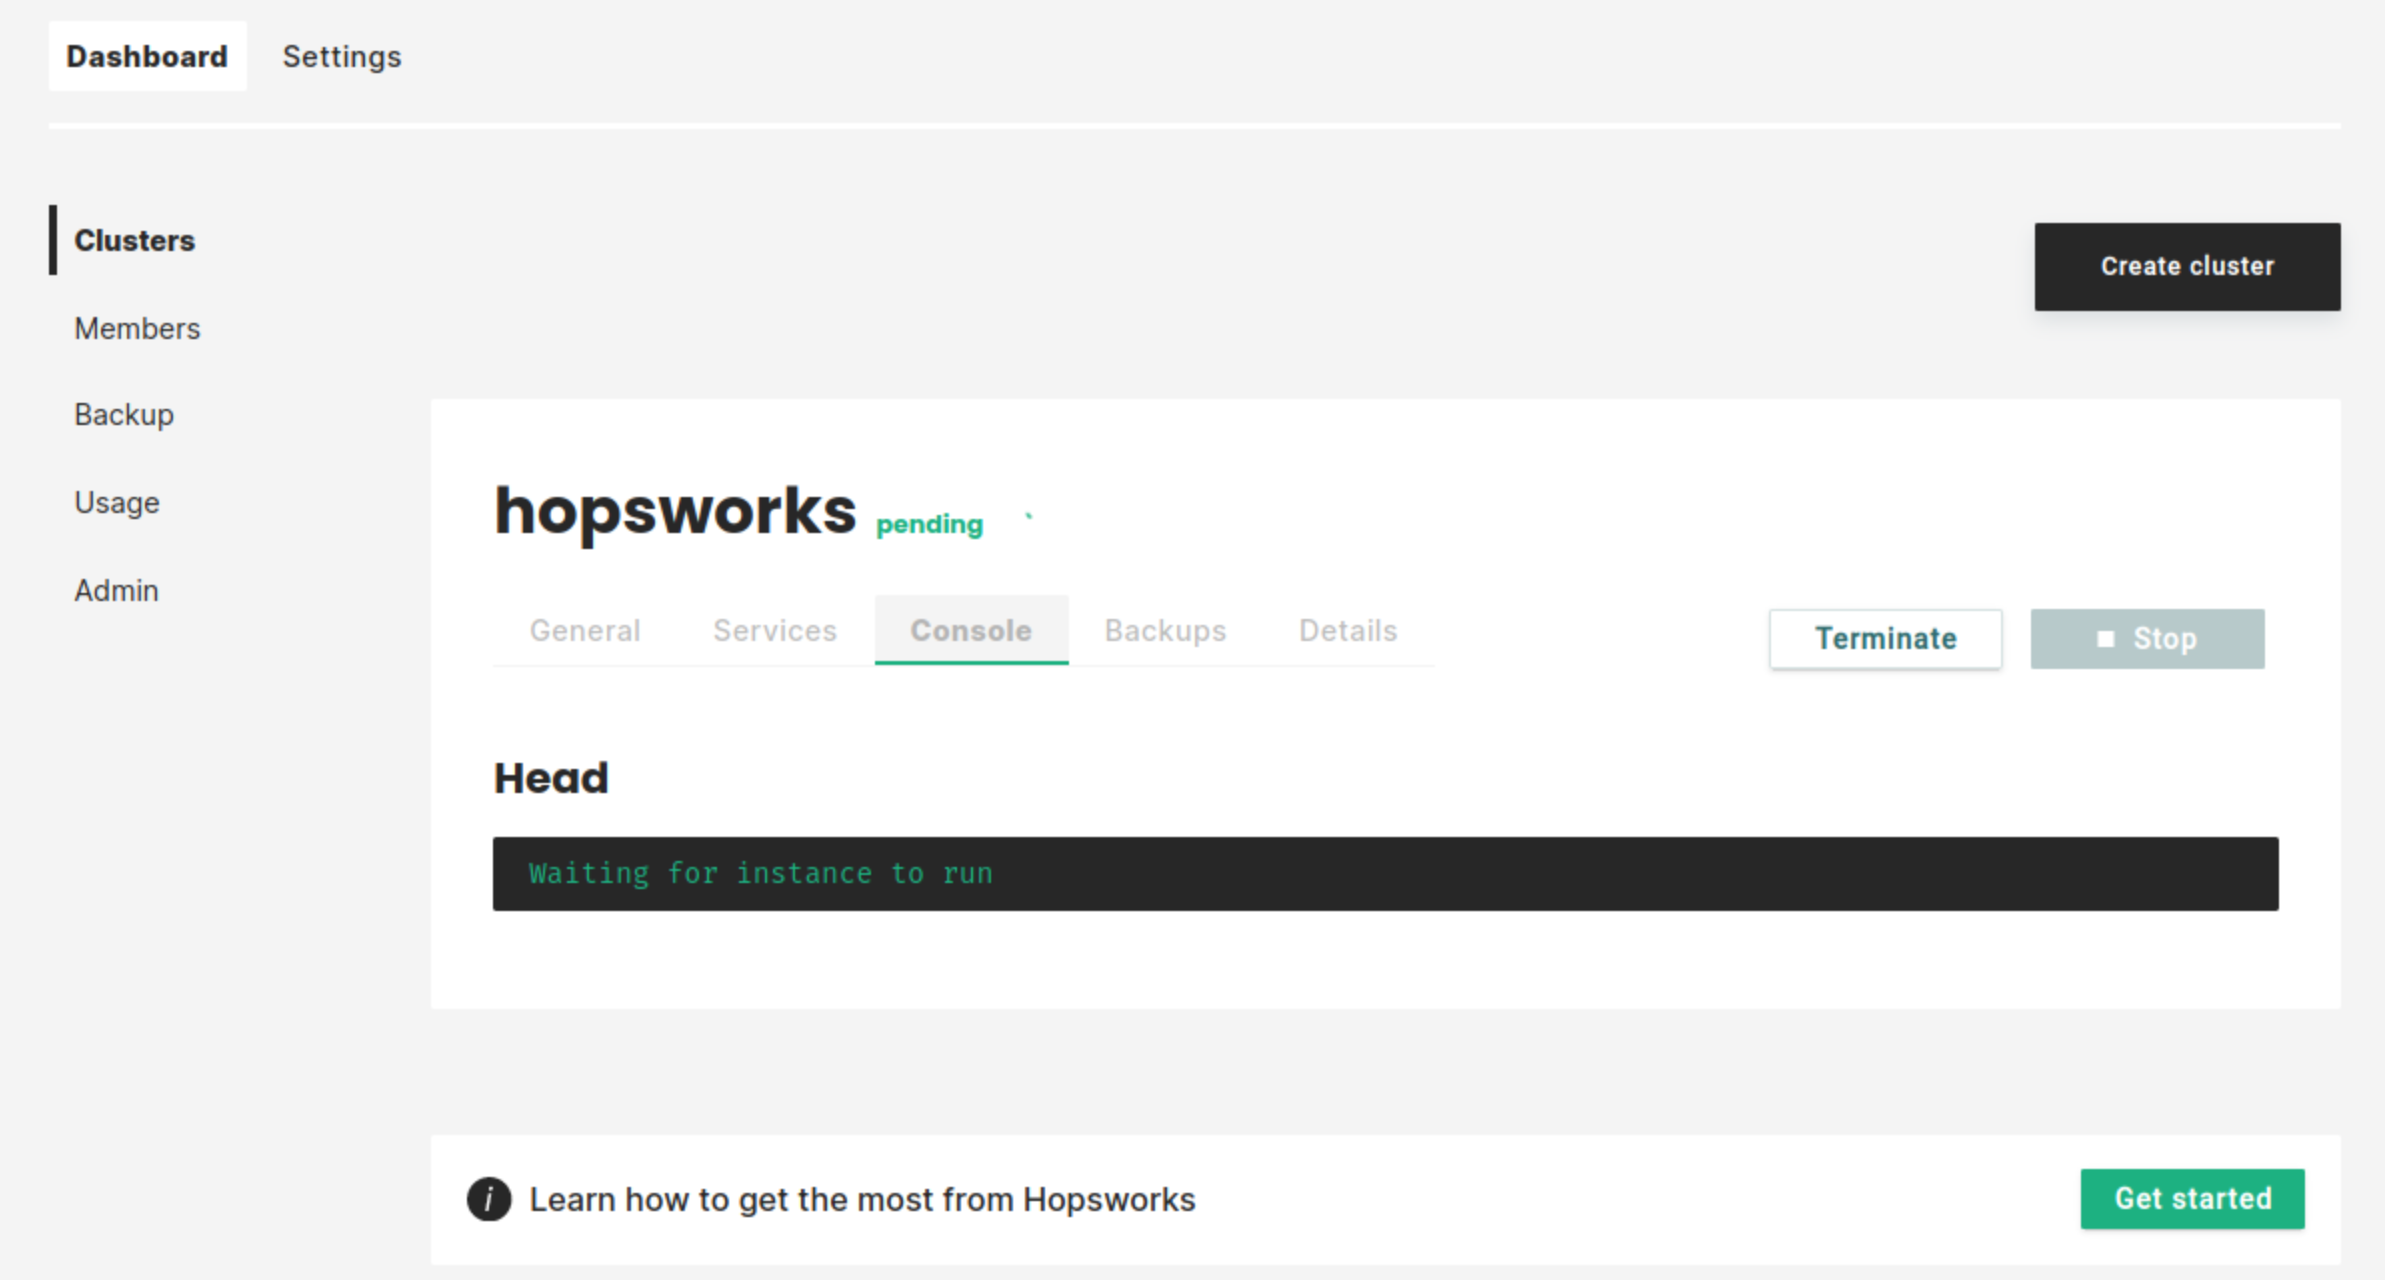
As soon as the cluster has started, you will be able to log in to your new Hopsworks cluster. You will also be able to stop, restart or terminate the cluster.
Step 7: Next steps#
Check out our other guides for how to get started with Hopsworks and the Feature Store:
- Make Hopsworks services accessible from outside services
- Get started with the Hopsworks Feature Store
- Follow one of our tutorials
- Follow one of our Guide
- Code examples and notebooks: hops-examples