Autoscaling#
If you run a Hopsworks cluster version 2.2 or above you can enable autoscaling to let managed.hopsworks.ai start and stop workers depending on the demand.
Enabling and configuring the autoscaling#
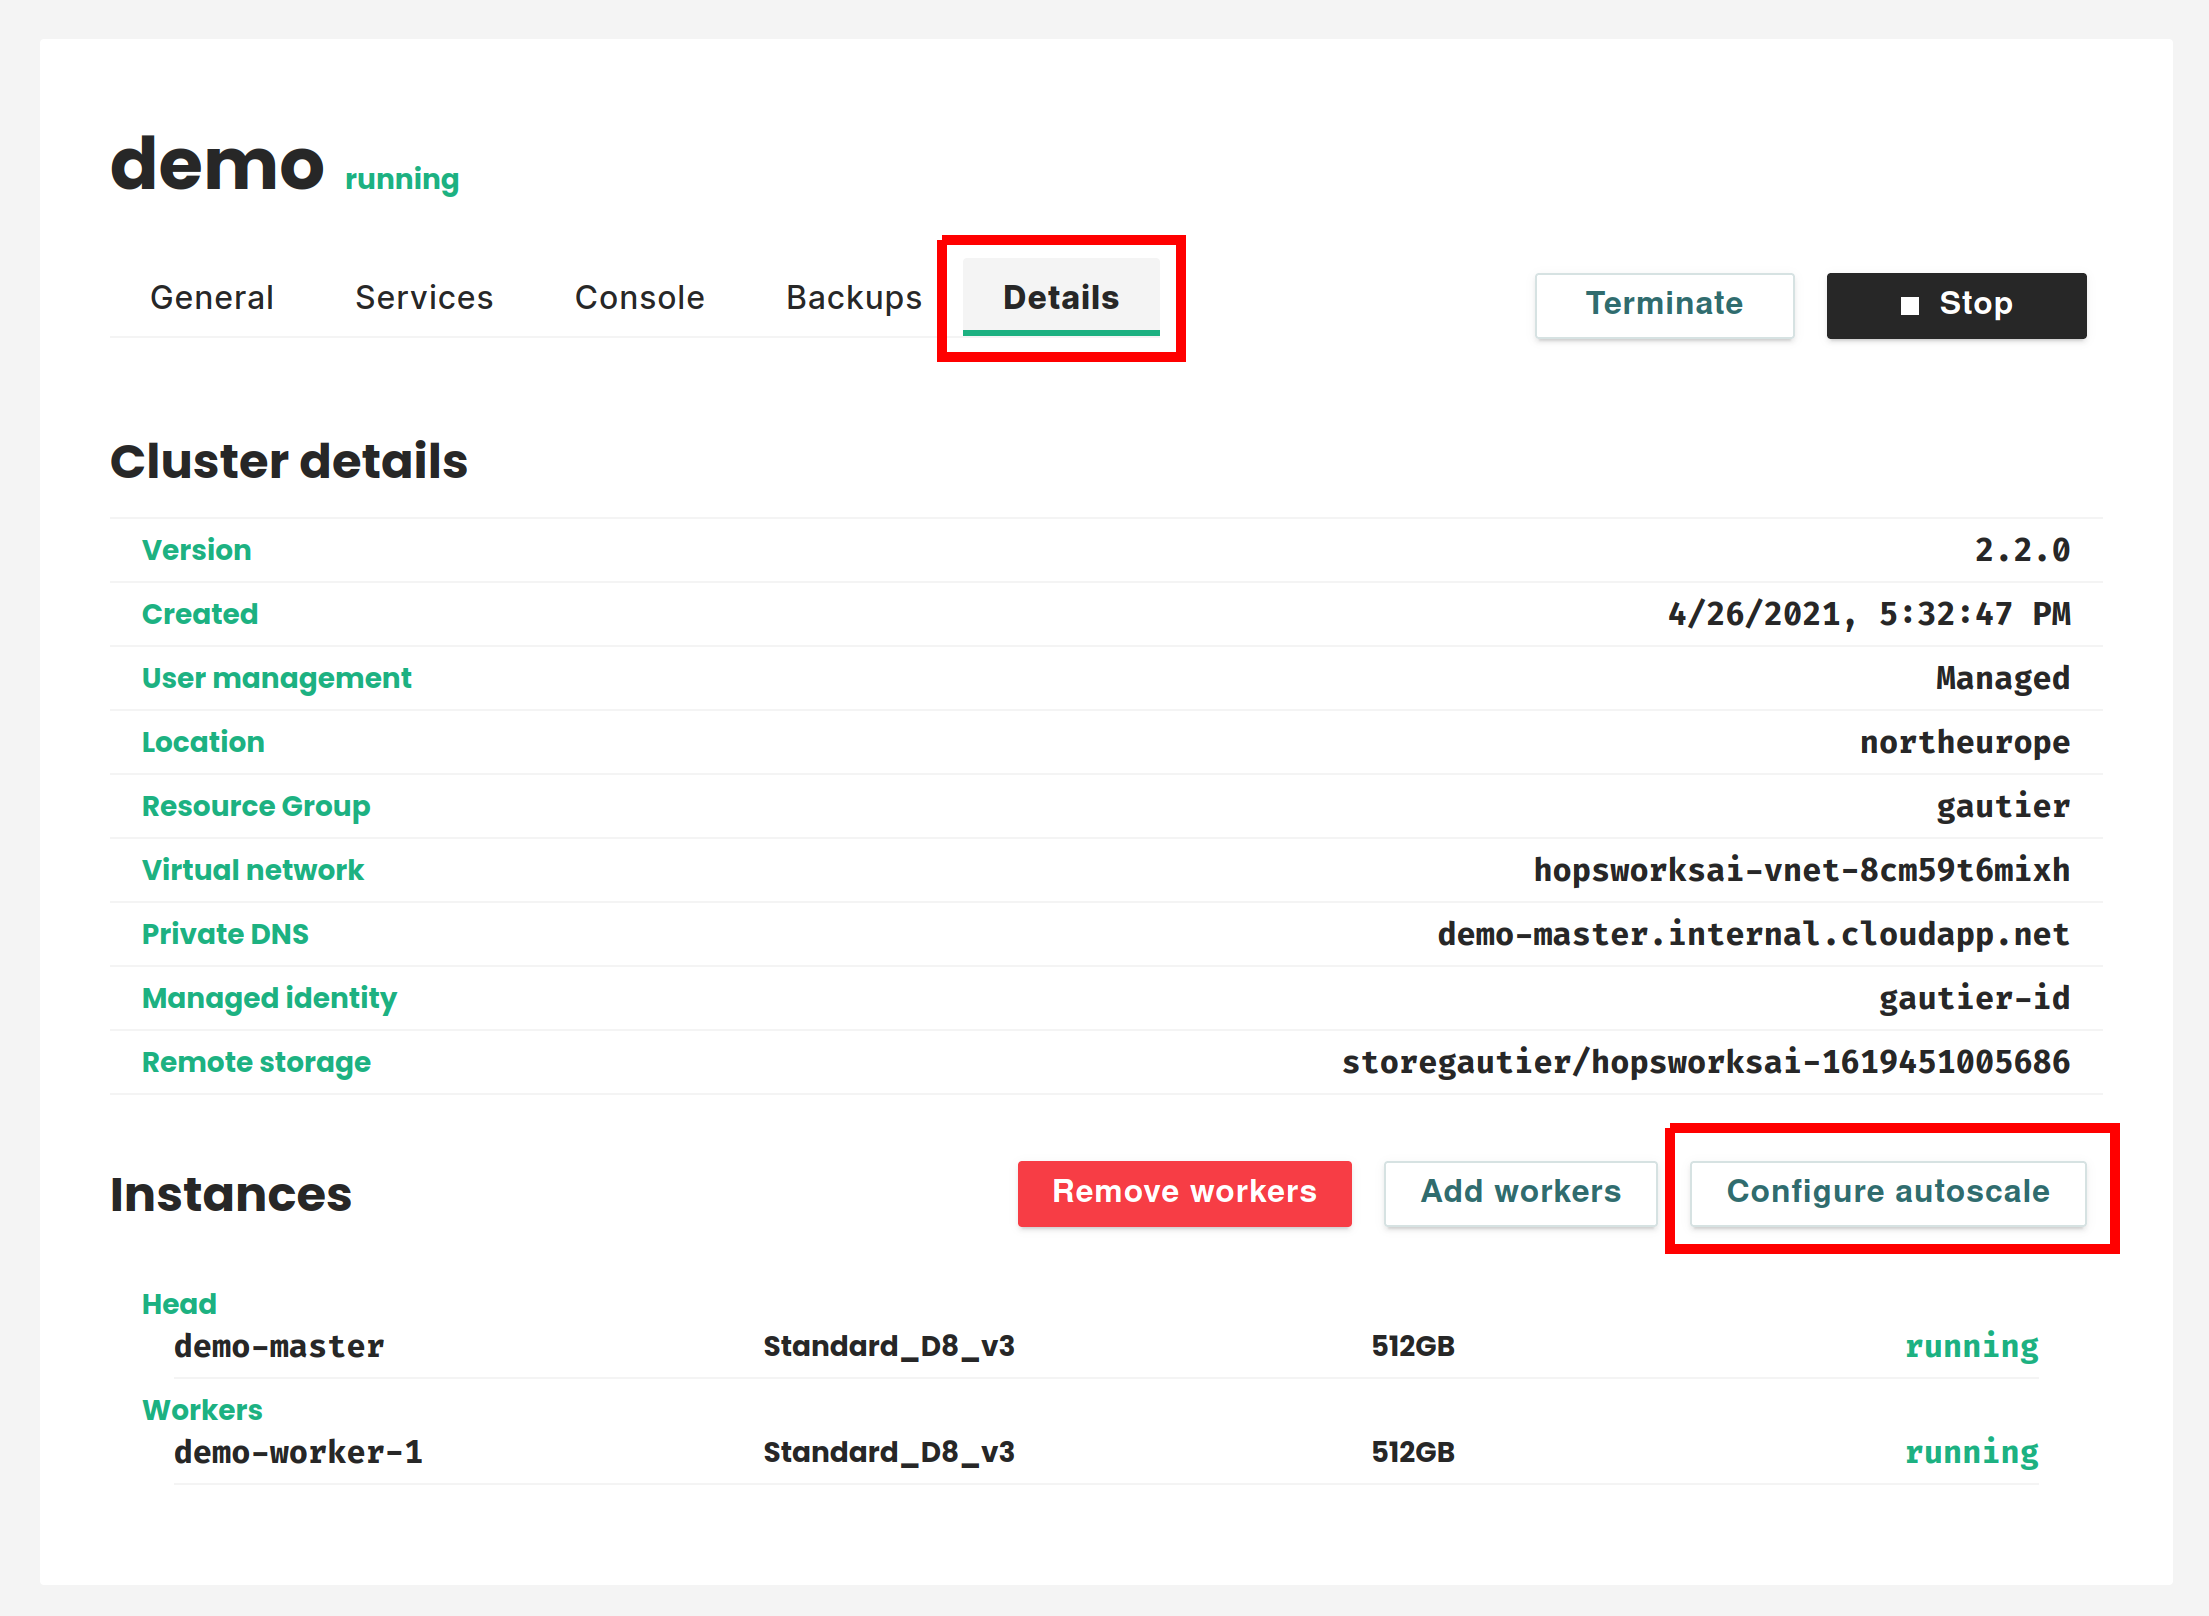
Once you have created a cluster you can enable autoscaling by going to the Details tab and clicking on Configure autoscale. You can also set up autoscaling during the cluster creation. For more details about this see the cluster creation documentation (AWS, AZURE).
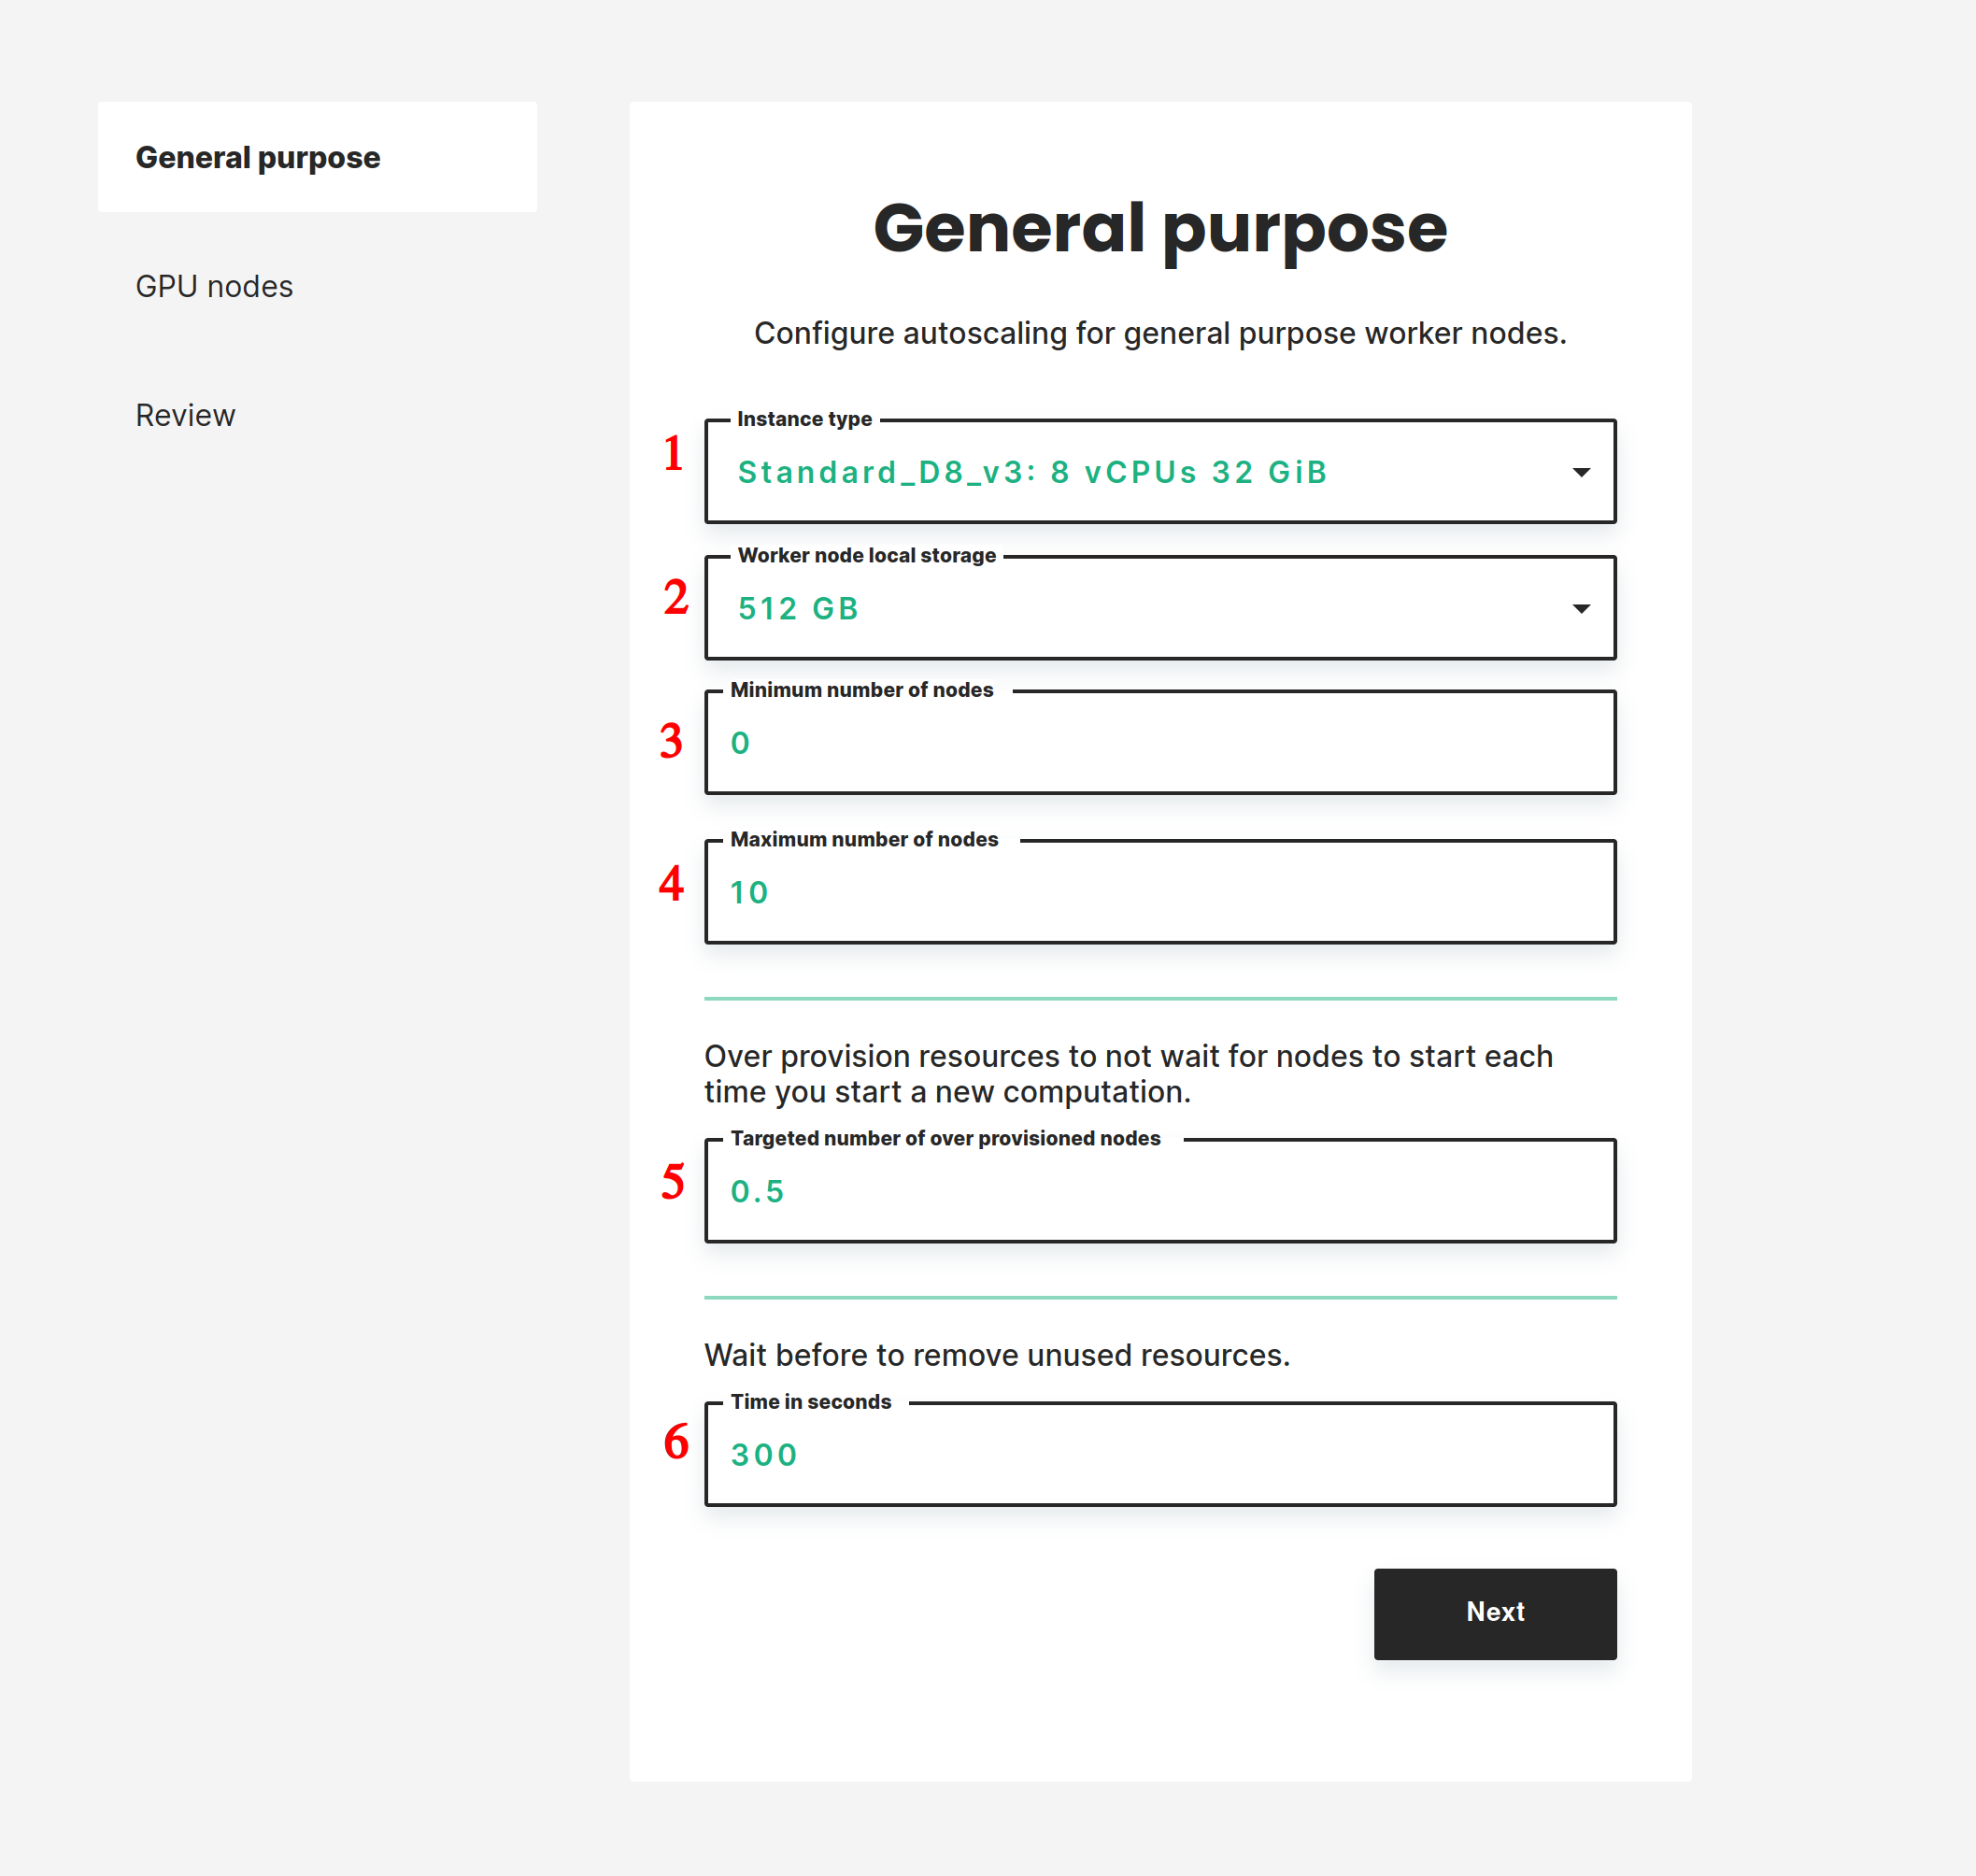
Once you have clicked on Configure autoscale you will access a form allowing you to configure the autoscaling. This form is in two parts. In the first part, you configure the autoscaling for general-purpose compute nodes. In the second part, you configure the autoscaling for nodes equipped with GPUs. In both parts you will have to set up the following:
- The instance type you want to use. You can decide to not enable the autoscaling for GPU nodes by selecting No GPU autoscale.
- The size of the instances' disk.
- The minimum number of workers.
- The maximum number of workers.
- The targeted number of standby workers. Setting some resources in standby ensures that there are always some free resources in your cluster. This ensures that requests for new resources are fulfilled promptly. You configure the standby by setting the amount of workers you want to be in standby. For example, if you set a value of 0.5 the system will start a new worker every time the aggregated free cluster resources drop below 50% of a worker's resources. If you set this value to 0 new workers will only be started when a job or notebook request the resources.
- The time to wait before removing unused resources. One often starts a new computation shortly after finishing the previous one. To avoid having to wait for workers to stop and start between each computation it is recommended to wait before shutting down workers. Here you set the amount of time in seconds resources need to be unused before they get removed from the system.
Note
The standby will not be taken into account if you set the minimum number of workers to 0 and no resources are used in the cluster. This ensures that the number of nodes can fall to 0 when no resources are used. The standby will start to take effect as soon as you start using resources.
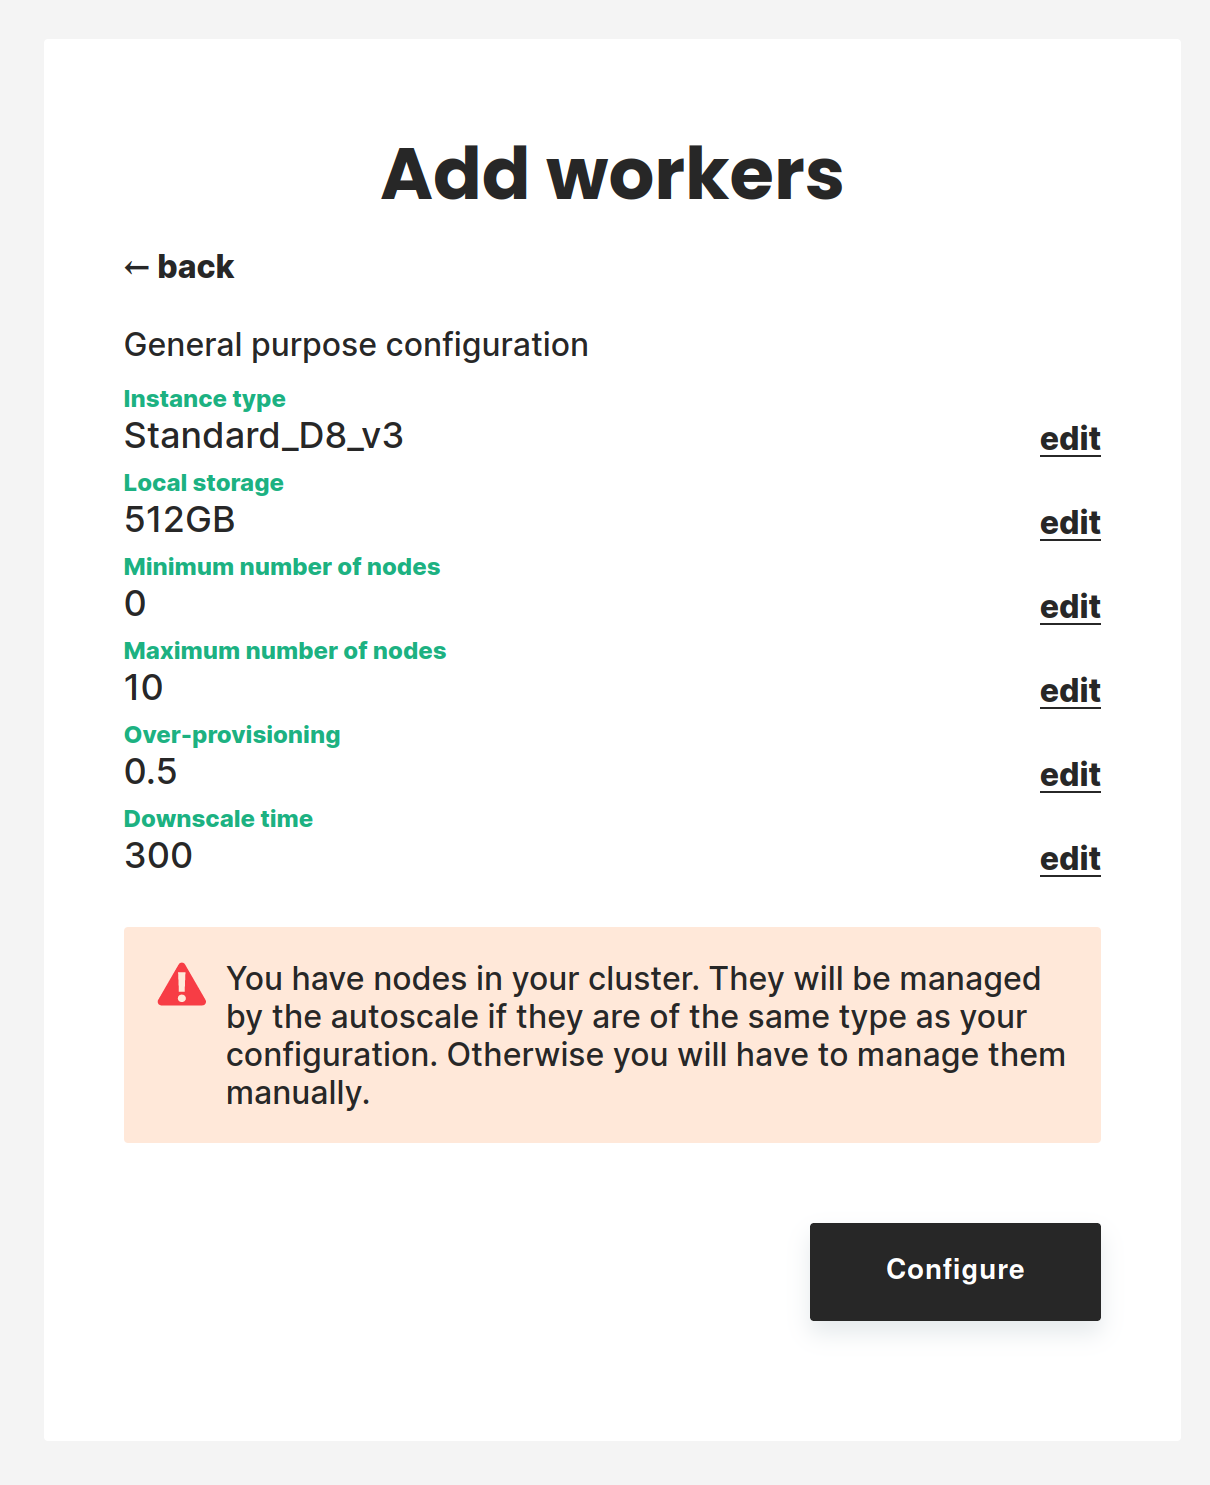
Once you have set your configuration you can review it and enable the autoscaling.
Note
There are two scenarios if you already have workers in your cluster when enabling the autoscaling:
- The preexisting workers have the same instance type as the one you set up in the autoscaling. In this case, the autoscaling system will manage these workers and start or stop them automatically.
- The preexisting workers have a different instance type from the one you set up in the autoscaling. In this case, the autoscaling will not manage these nodes but you will still be able to remove them manually.
Modifying the autoscaling configuration#
You can update the autoscale configuration by going to the Details tab of the cluster and clicking on Configure autoscale. You will then go through the same steps as above. Note that if you change the instance type, nodes that currently exist in the cluster with a different instance type will not be managed by the autoscale system anymore and you will have to remove them manually.
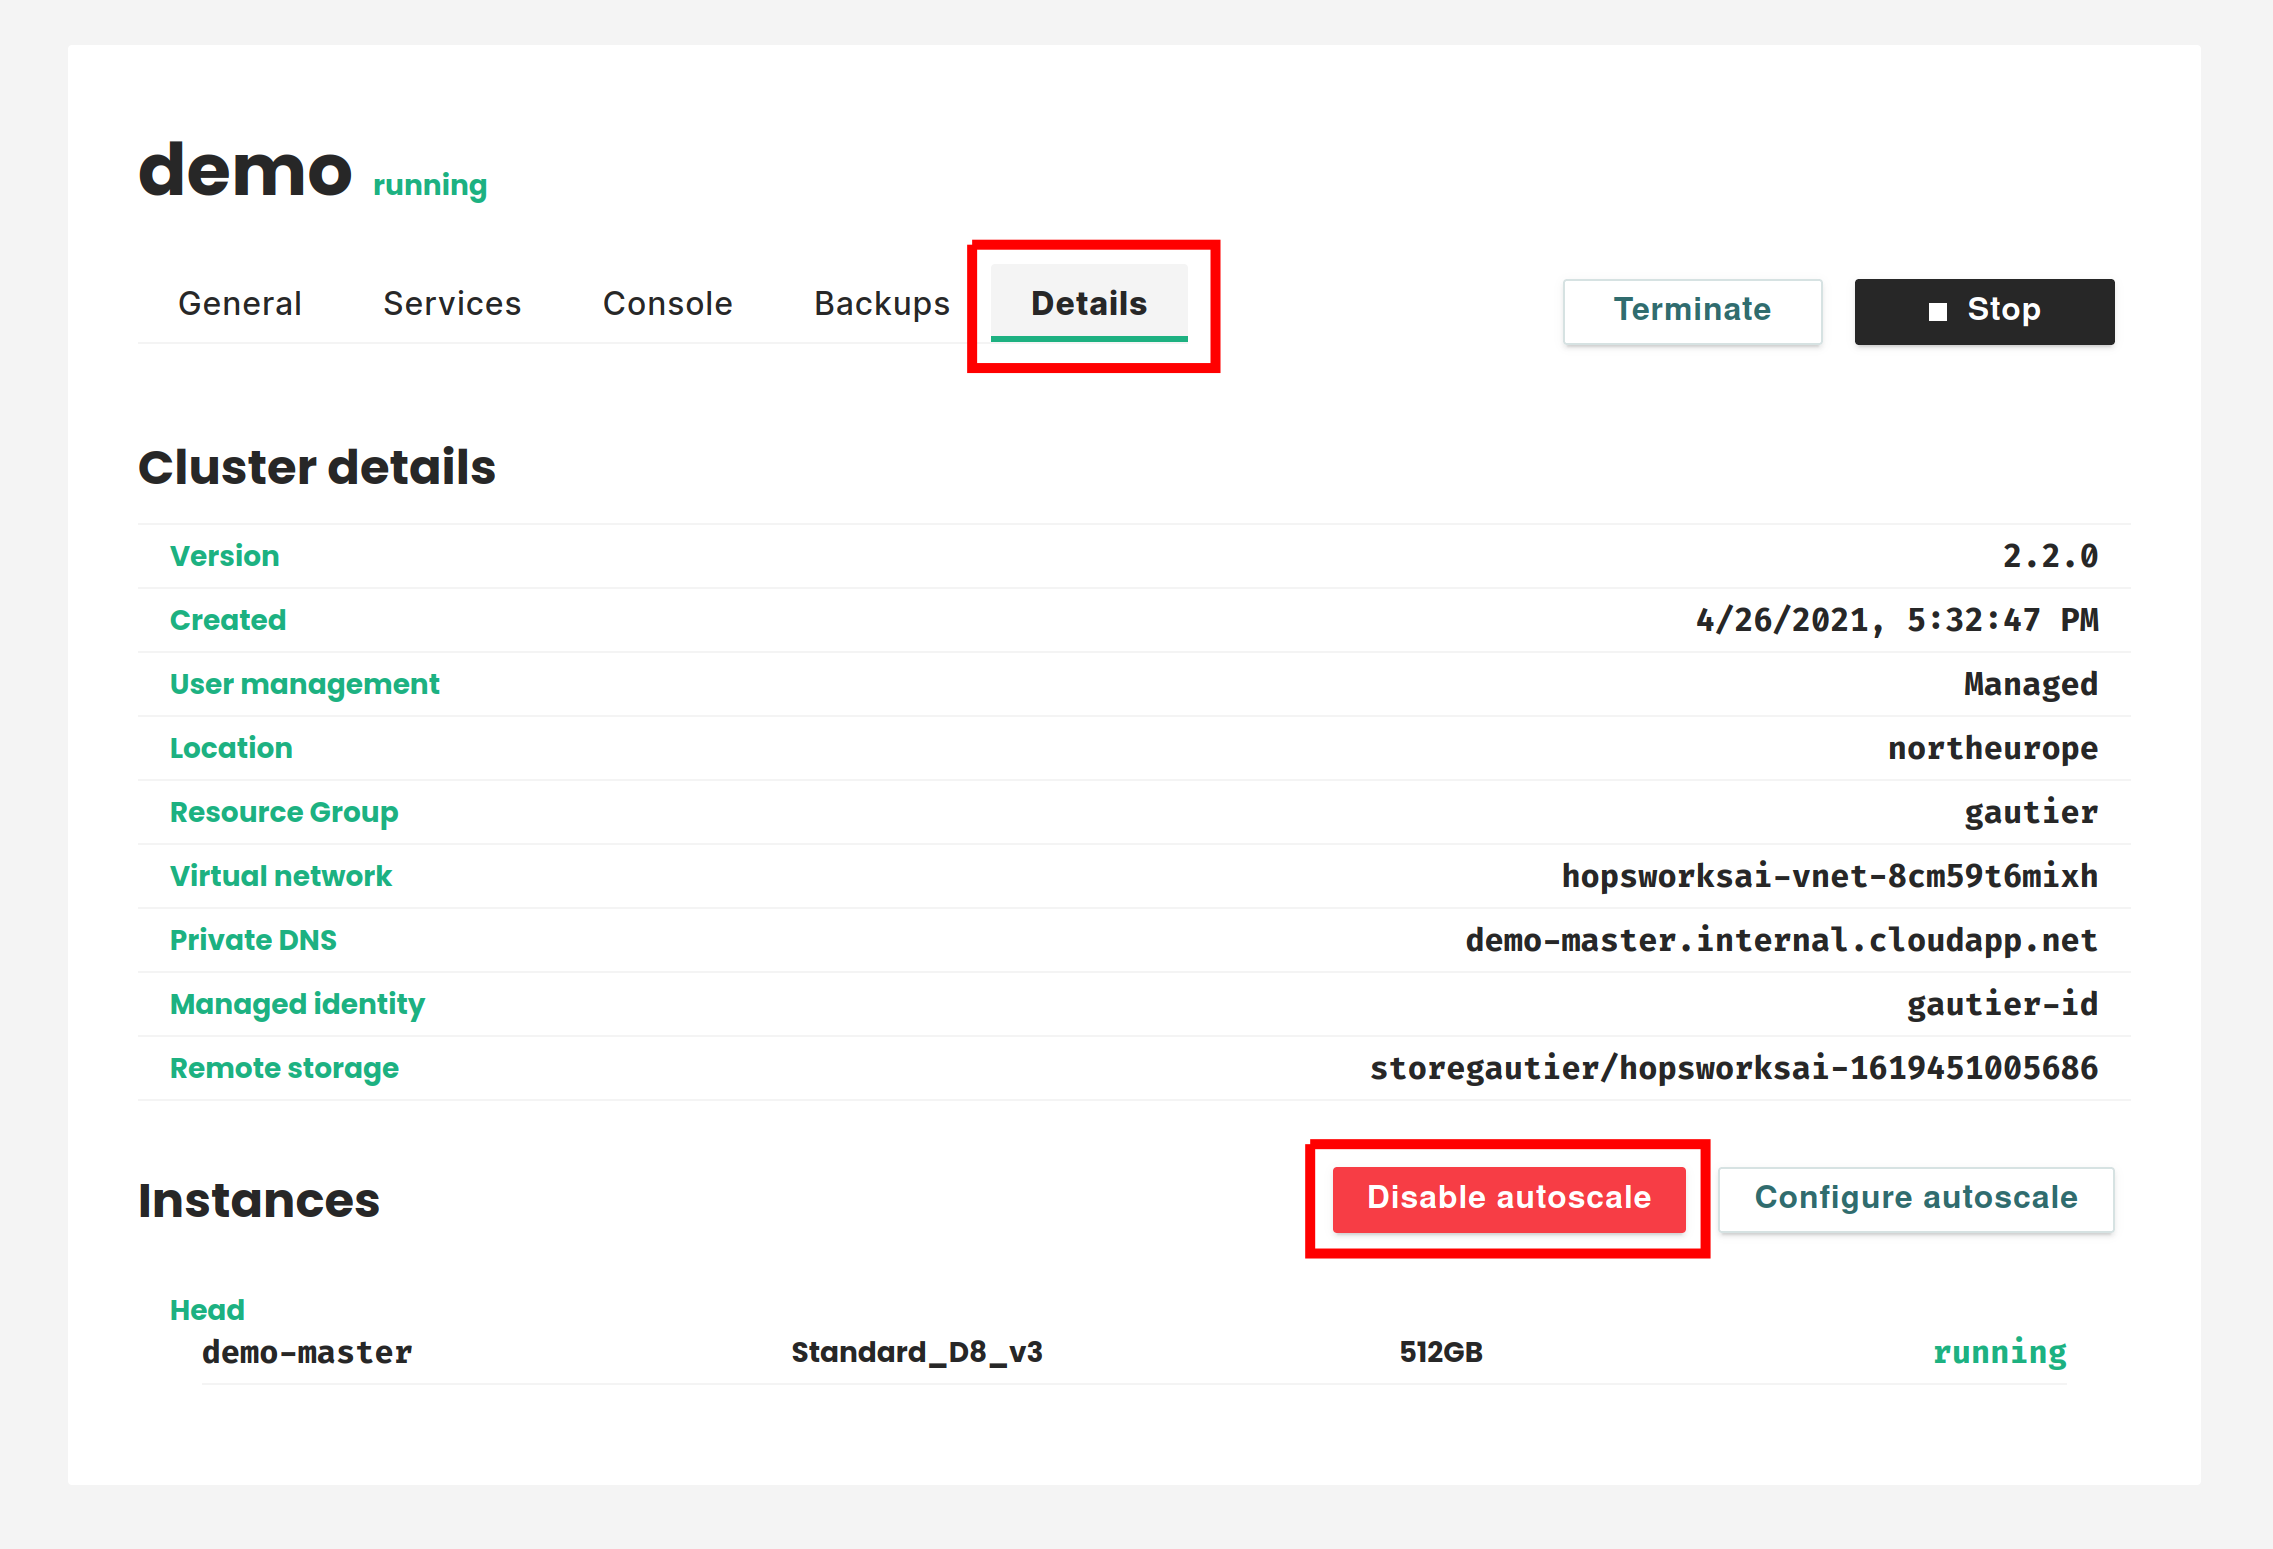
Disabling the autoscaling#
To disable the autoscaling go to the Details tab, click on Disable autoscale and confirm your action. When you disable autoscaling the nodes that are currently running will keep running. You will need to stop them manually.