How to manage your clusters in managed.hopsworks.ai#
Introduction#
Managed.hopsworks.ai is our managed platform for running Hopsworks and the Feature Store in the cloud. On this page, you will get an overview of the different functionalities of the managed.hopsworks.ai dashboard.
Prerequisites#
If you want to navigate the to the different tabs presented in this document you will need to connect managed.hopsworks.ai and create a cluster. Instructions about this process can be found in the getting started pages (AWS, Azure, GCP)
Dashboard overview#
The landing page of managed.hopsworks.ai can be seen in the picture below. It is composed of three main parts. At the top, you have a menu bar (1) allowing you to navigate between the dashboard and the settings. Bellow, you have a menu column (2) allowing you to navigate between different functionalities of the dashboard. And finally, in the middle, you find pannels representing your different clusters (3) and a button to create new clusters (4).
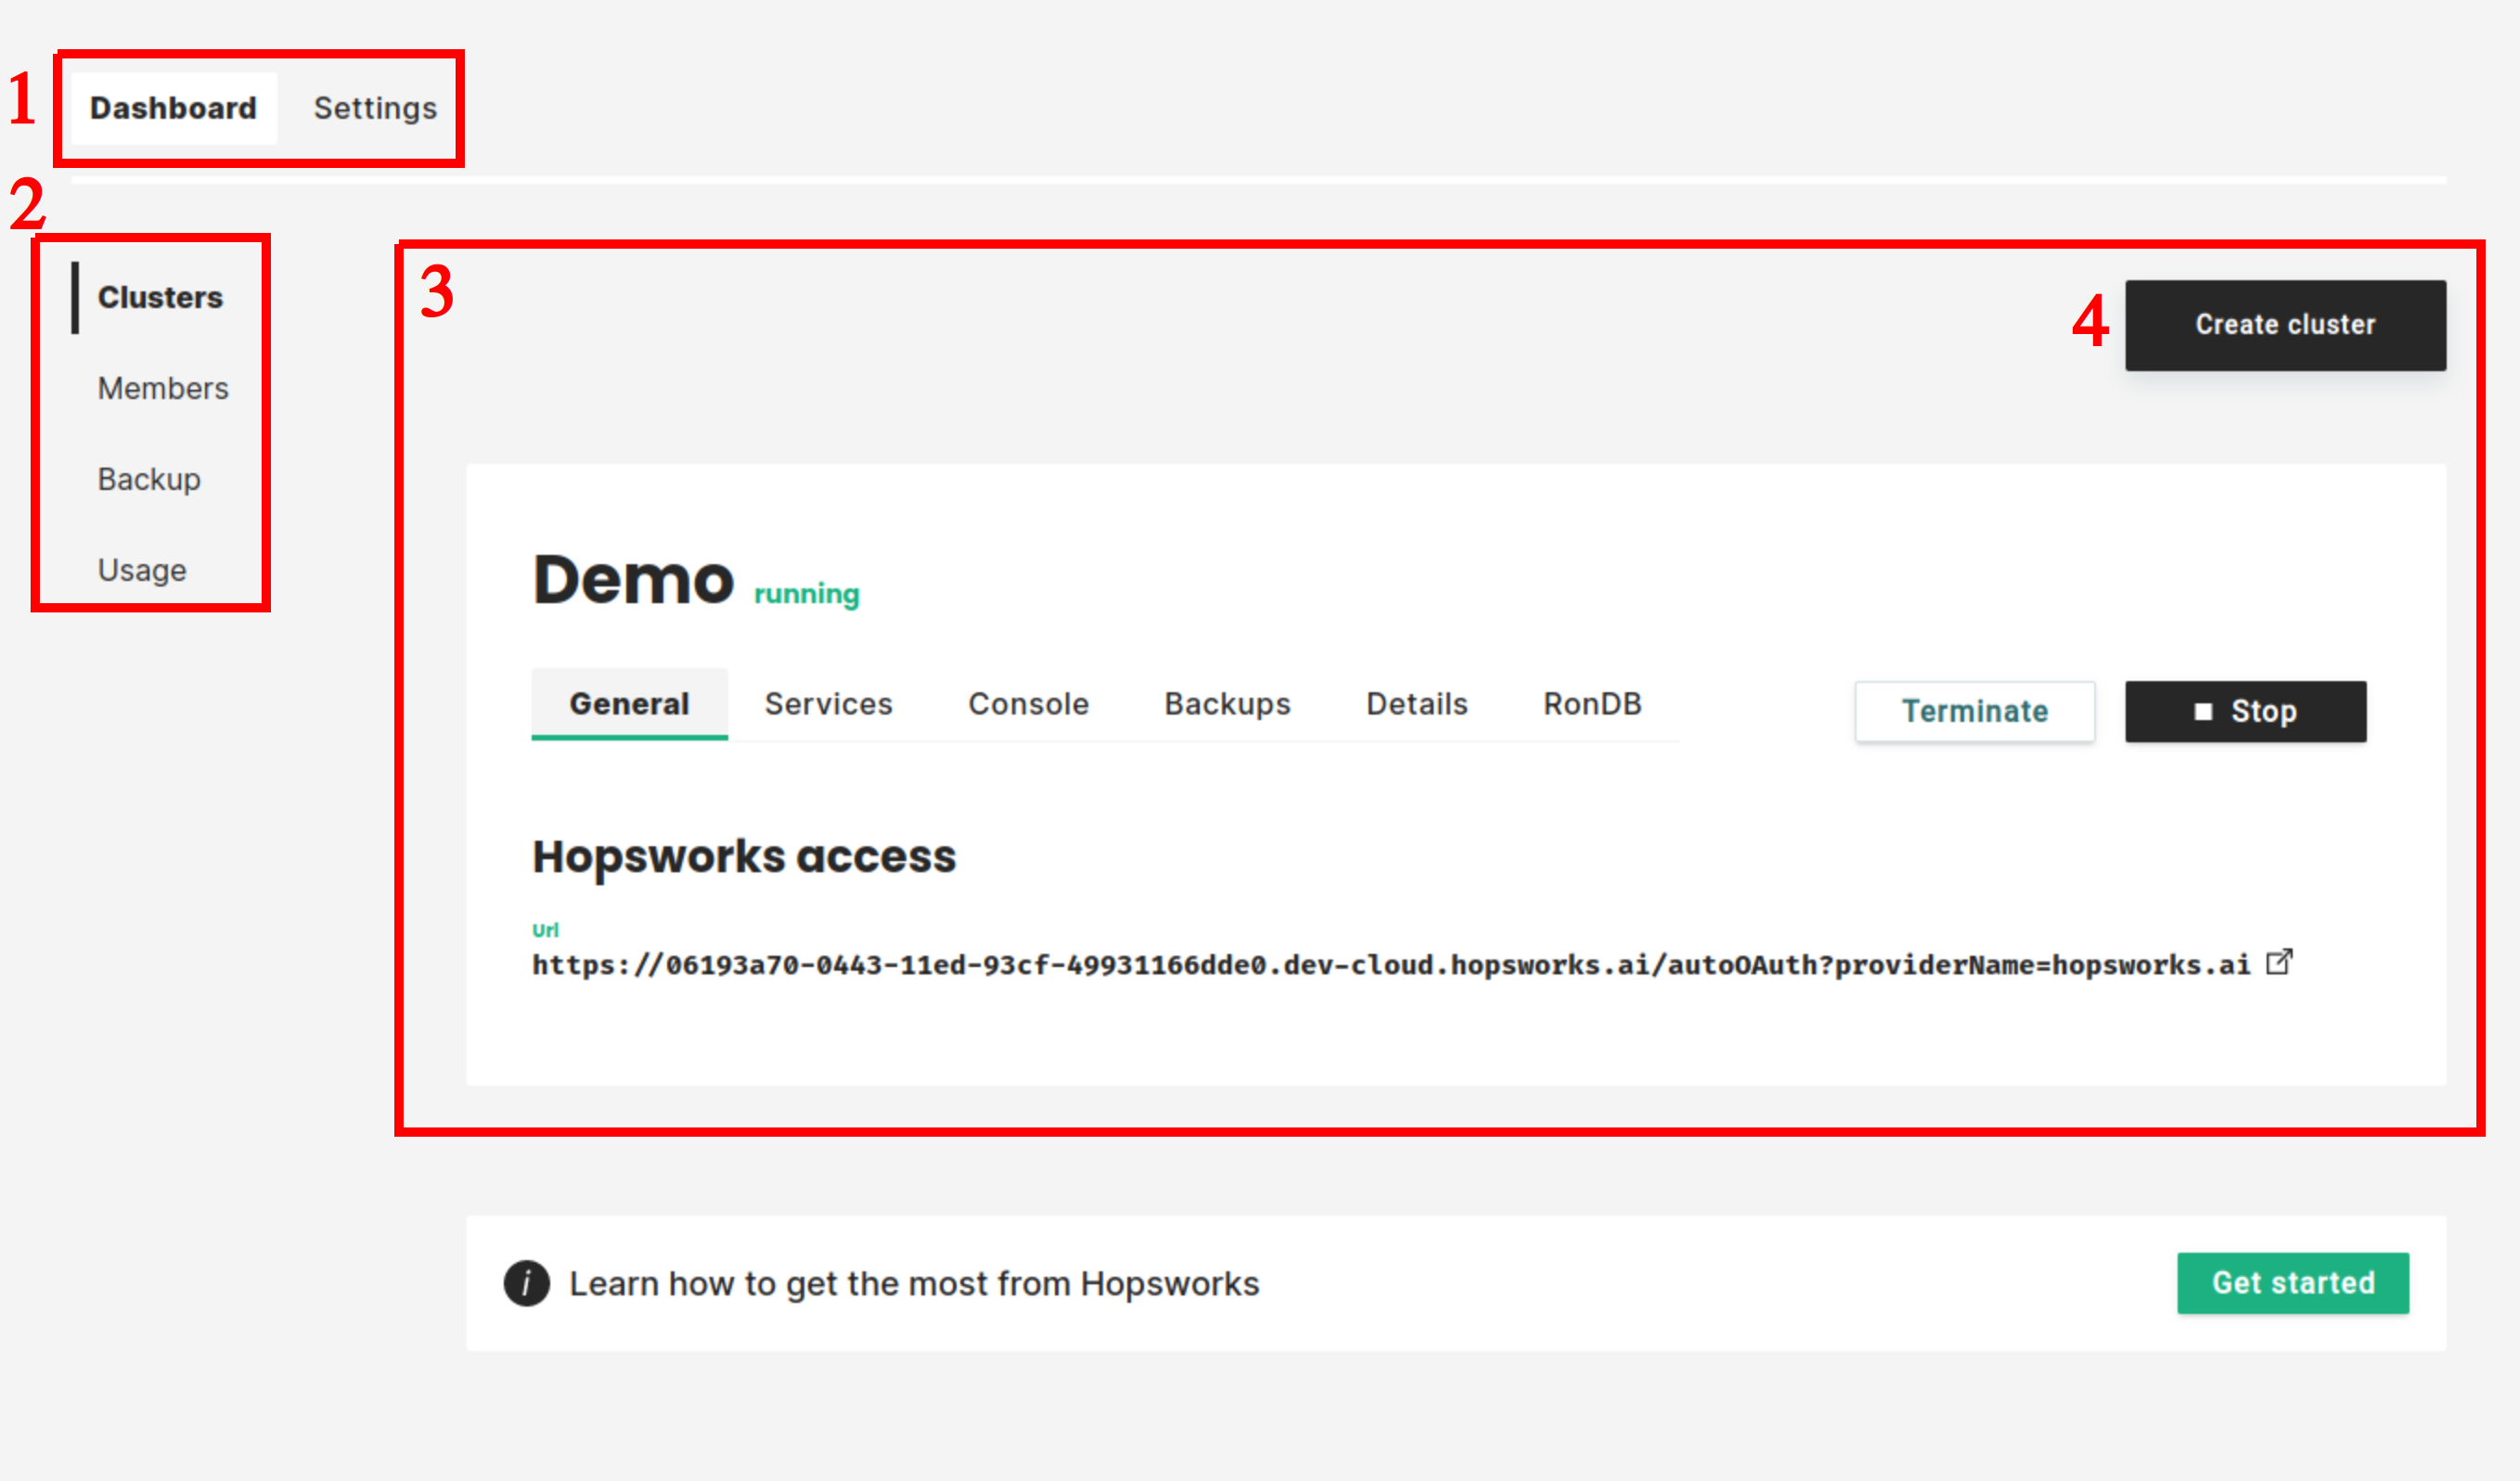
The different functionalities of the dashboard are:
- Clusters: the landing page which we will detail below.
- Members: the place to manage the members of your organization (doc).
- Backup: the place to manage your clusters' backup (doc).
- Usage: the place to get your credits consumption.
Managing your clusters in the cluster panel#
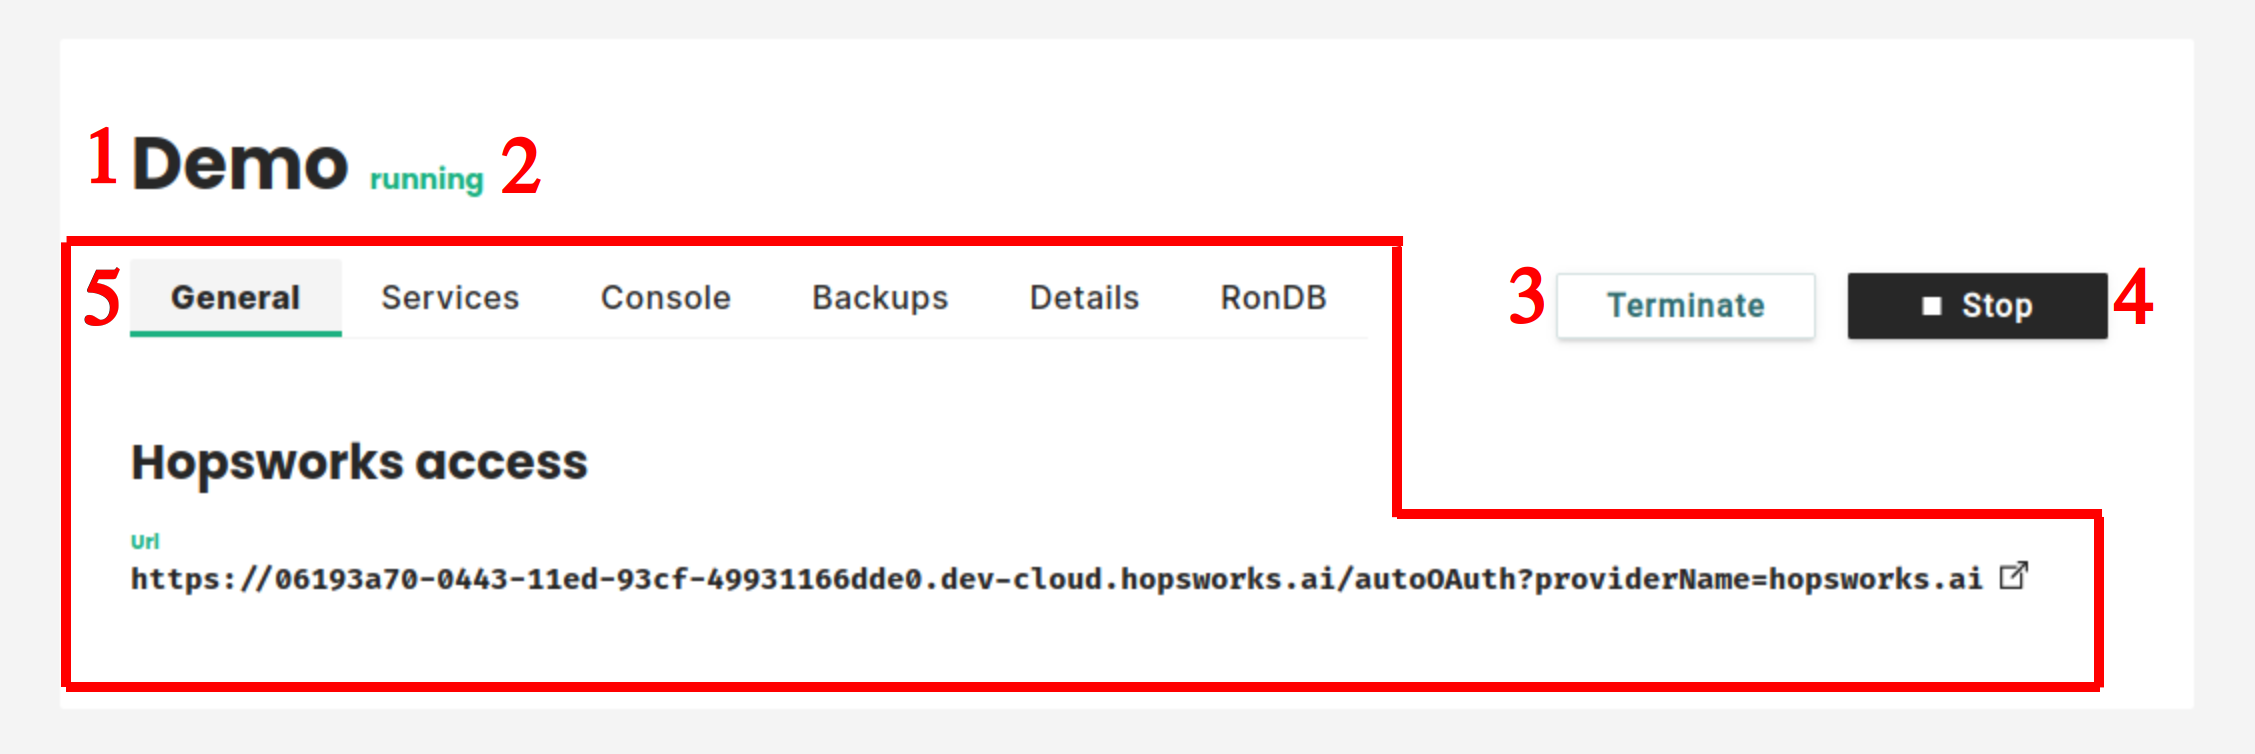
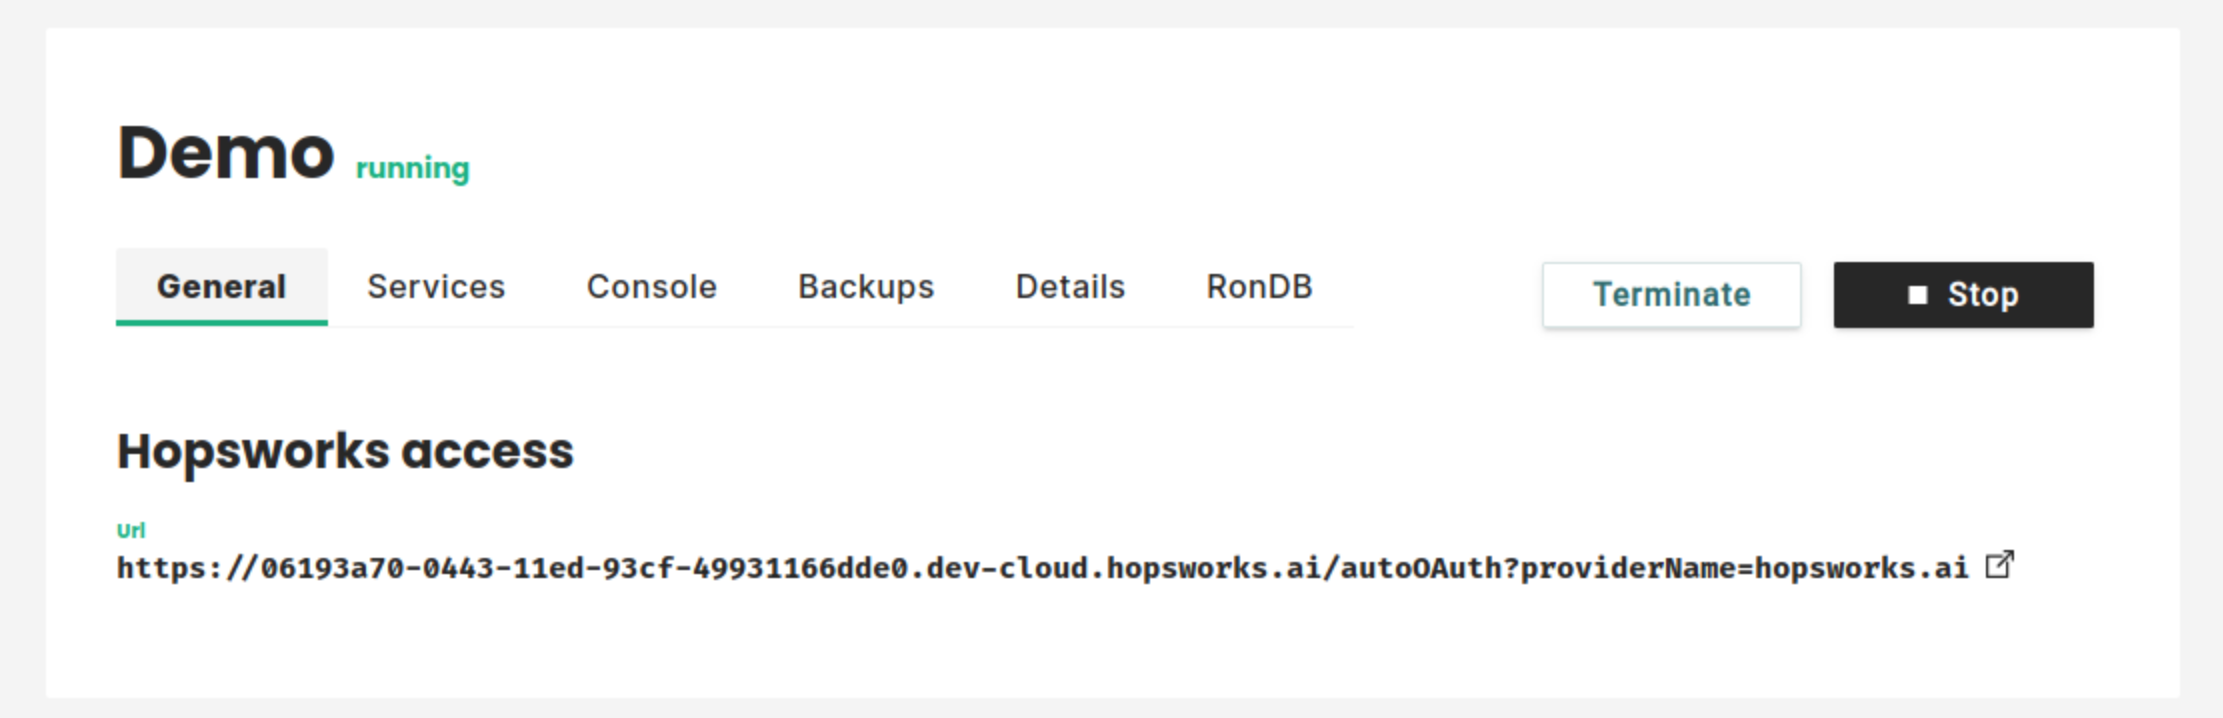
The cluster panels contain the name of the cluster (1), its state (2) a button to terminate the cluster (3), a button to stop the cluster (4) and different tabs to manage the cluster (5). You will now learn more details about these actions and tabs.
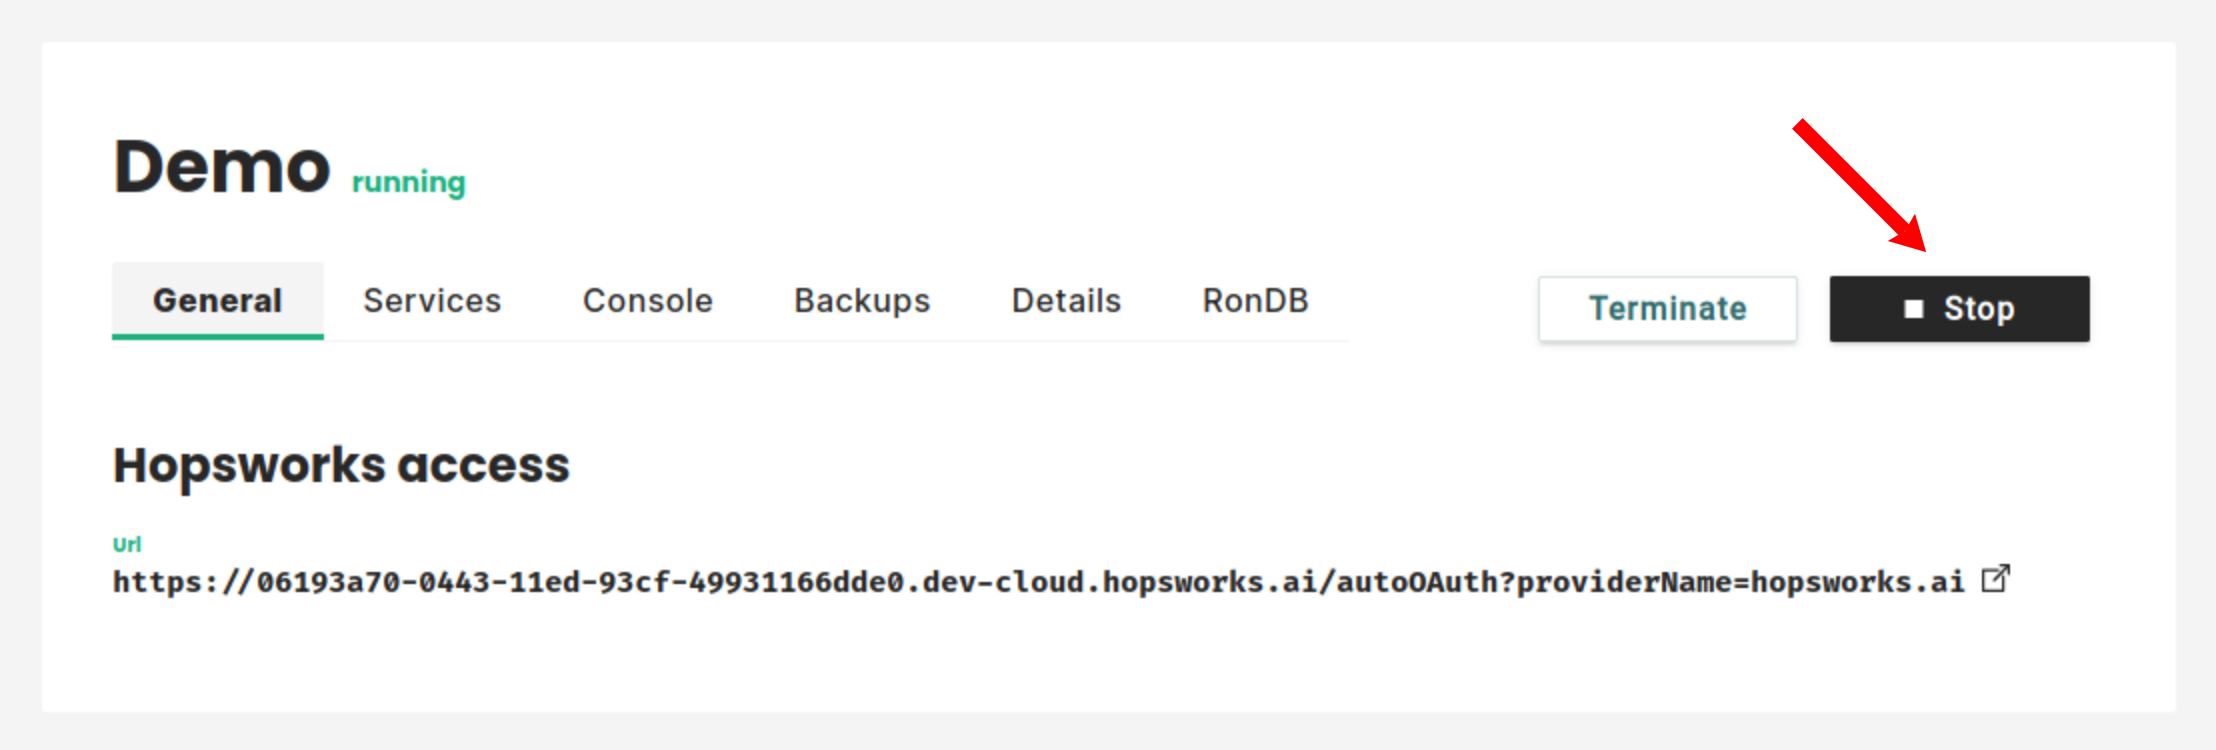
Stop the cluster#
To stop a cluster click on the Stop button on the top right part of the cluster panel. Stopping the cluster stop in instances it is running on and delete the workers nodes. This allows you to save credits in managed.hopsworks.ai and in your cloud provider.
Terminate the cluster#
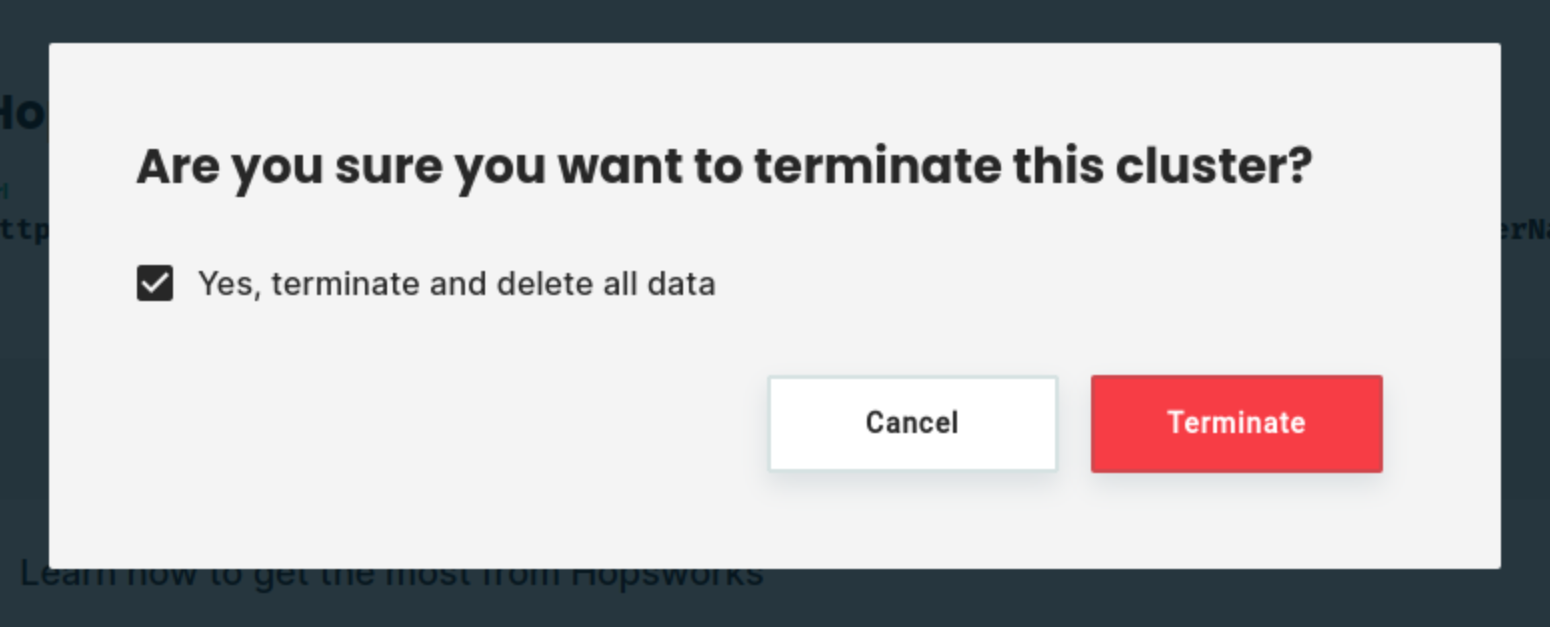
To terminate a cluster click on the Terminate button on the top right part of the cluster panel.
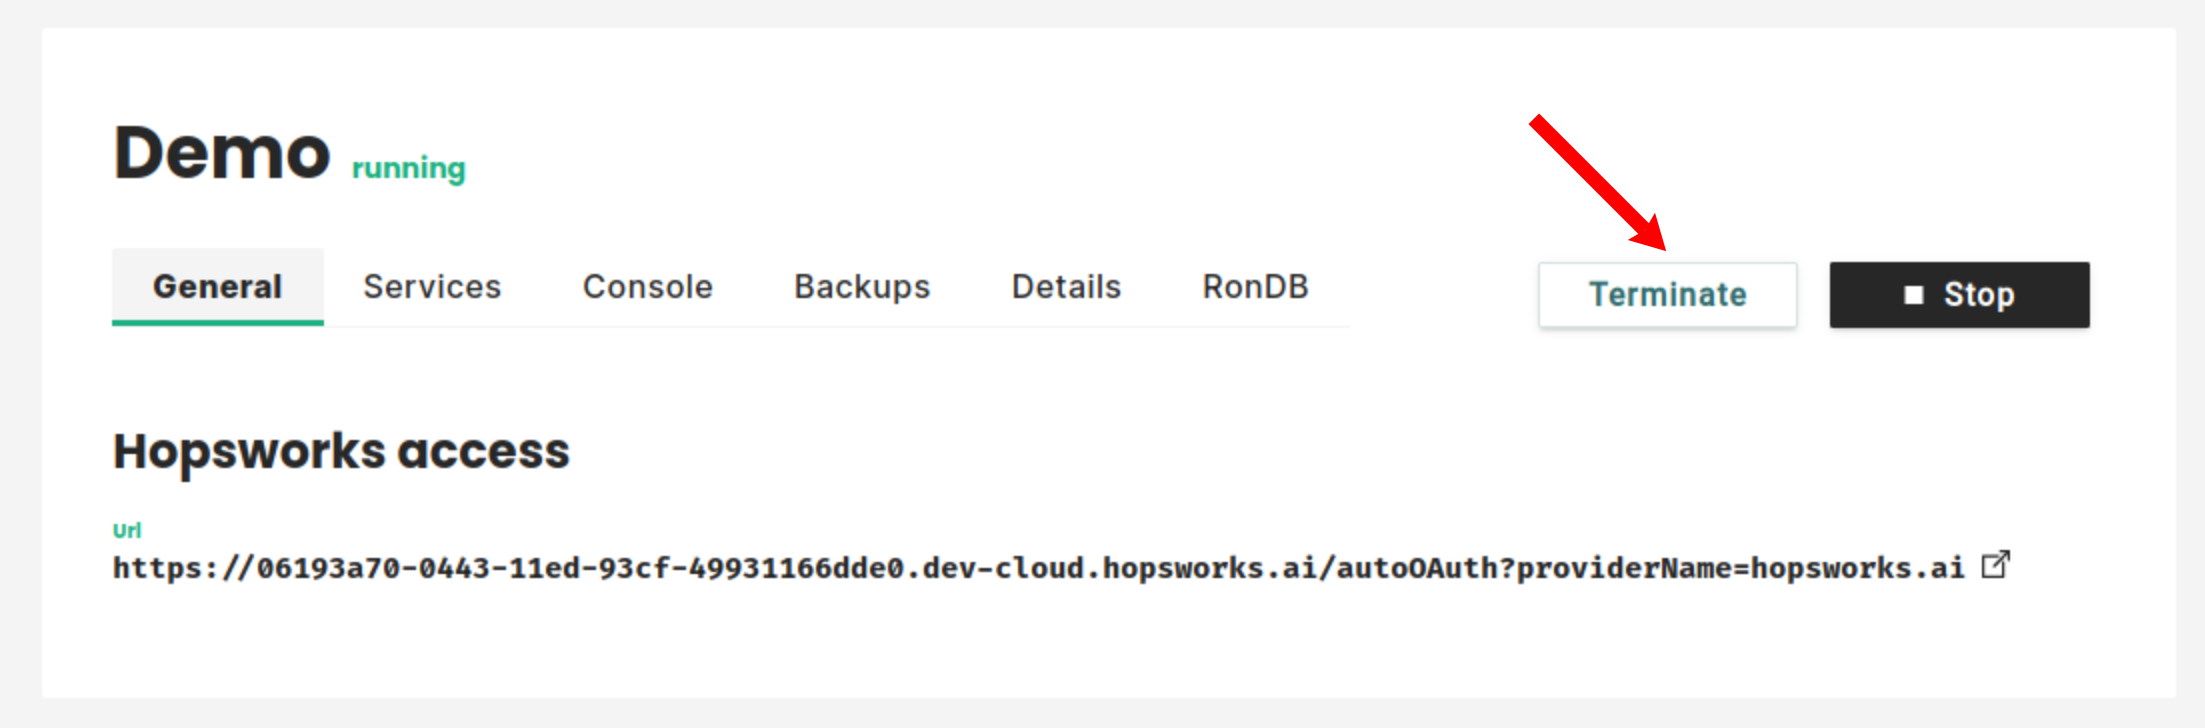
Terminating the cluster will destroy it and delete all the resources that were automatically created during the cluster creation. To be sure that you are not terminating a cluster by accident you will be asked to confirm that you want to terminate the cluster. To confirm the termination, check the check box and click on Terminate.
Note
Terminating a cluster does not delete or empty the bucket associated with the cluster. This is because this bucket is needed to restore a backup. You can find more information about backups in the backup documentation.
The general tab#
The General tab gives you the basic information about your cluster. If you have created a cluster with managed users it will only give you the URL of the cluster. If you have created a cluster without managed cluster it will also give you the user name and password that were set for the admin user at cluster creation.
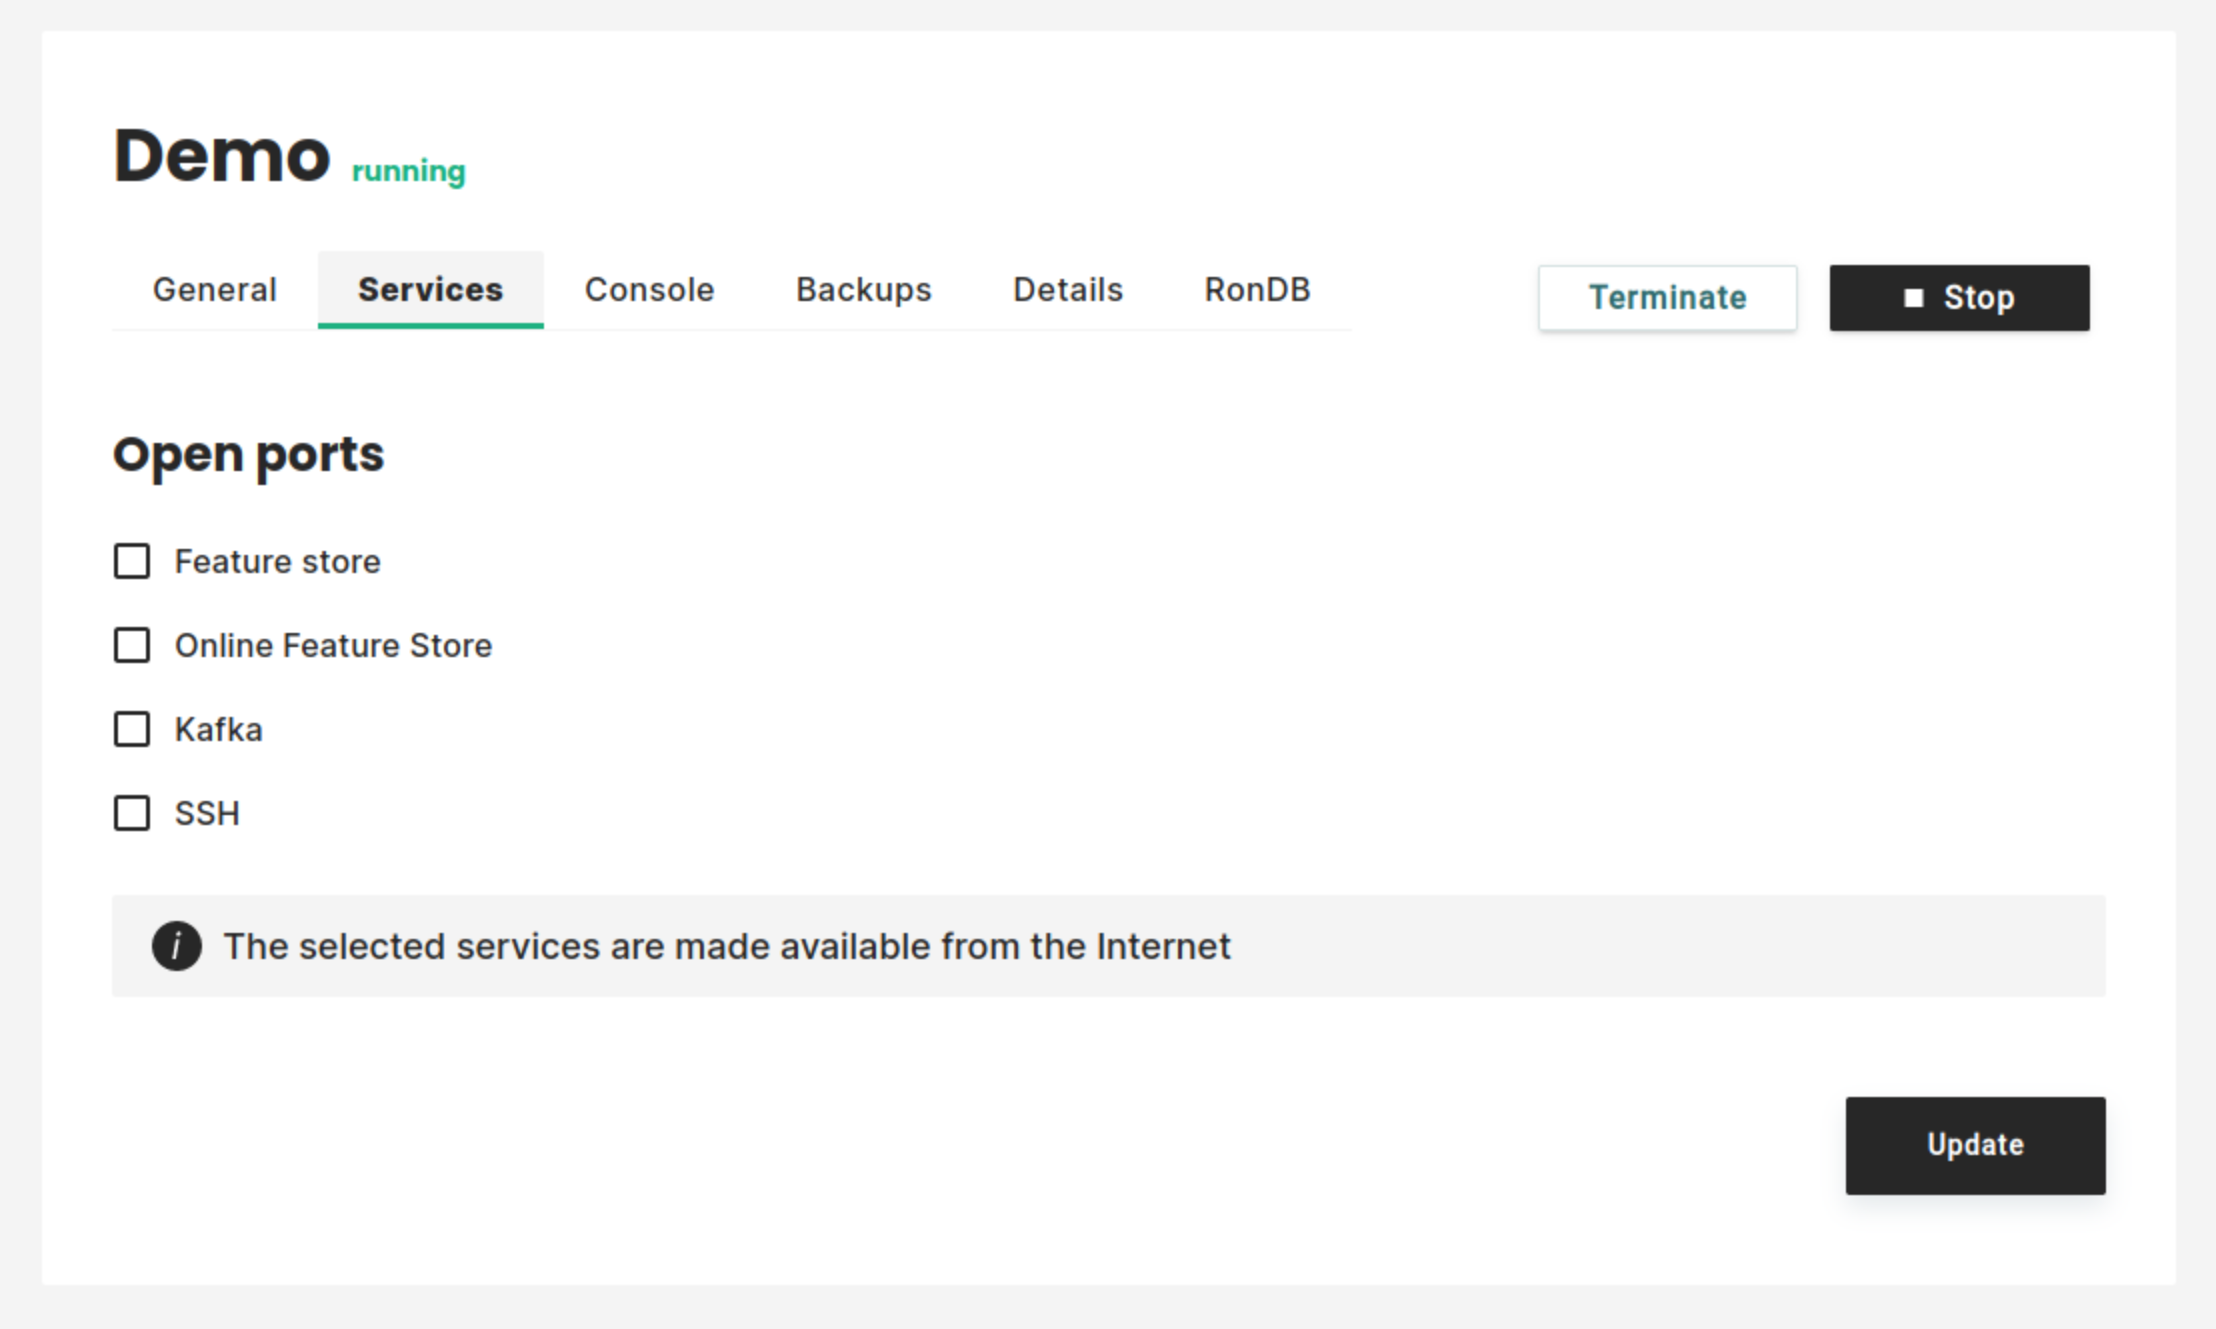
Manage the services in the services tab#
The services tab shows which service ports are open to the internet on your cluster. More details can be found in the services documentation.
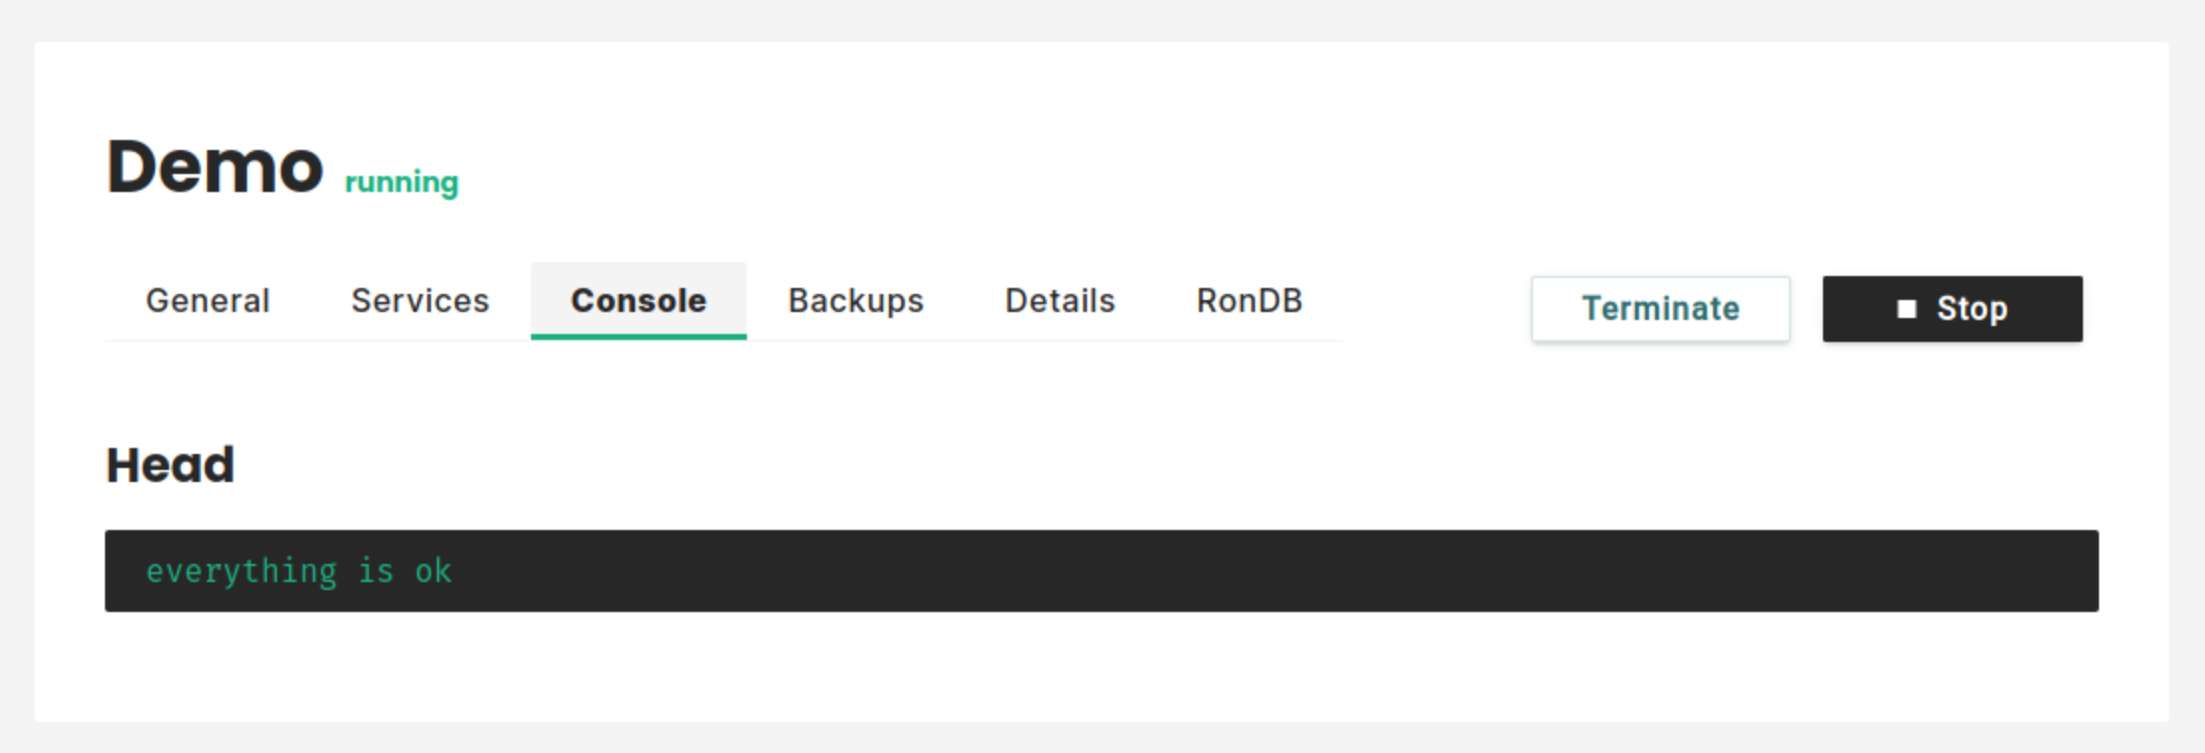
Get information about your cluster state in the Console tab#
The console tab display more detailed information about the current state of your cluster. If your cluster is running and everything is as planned it will only say "everything is ok". But, if something failed, this is where you will find more details about the error.
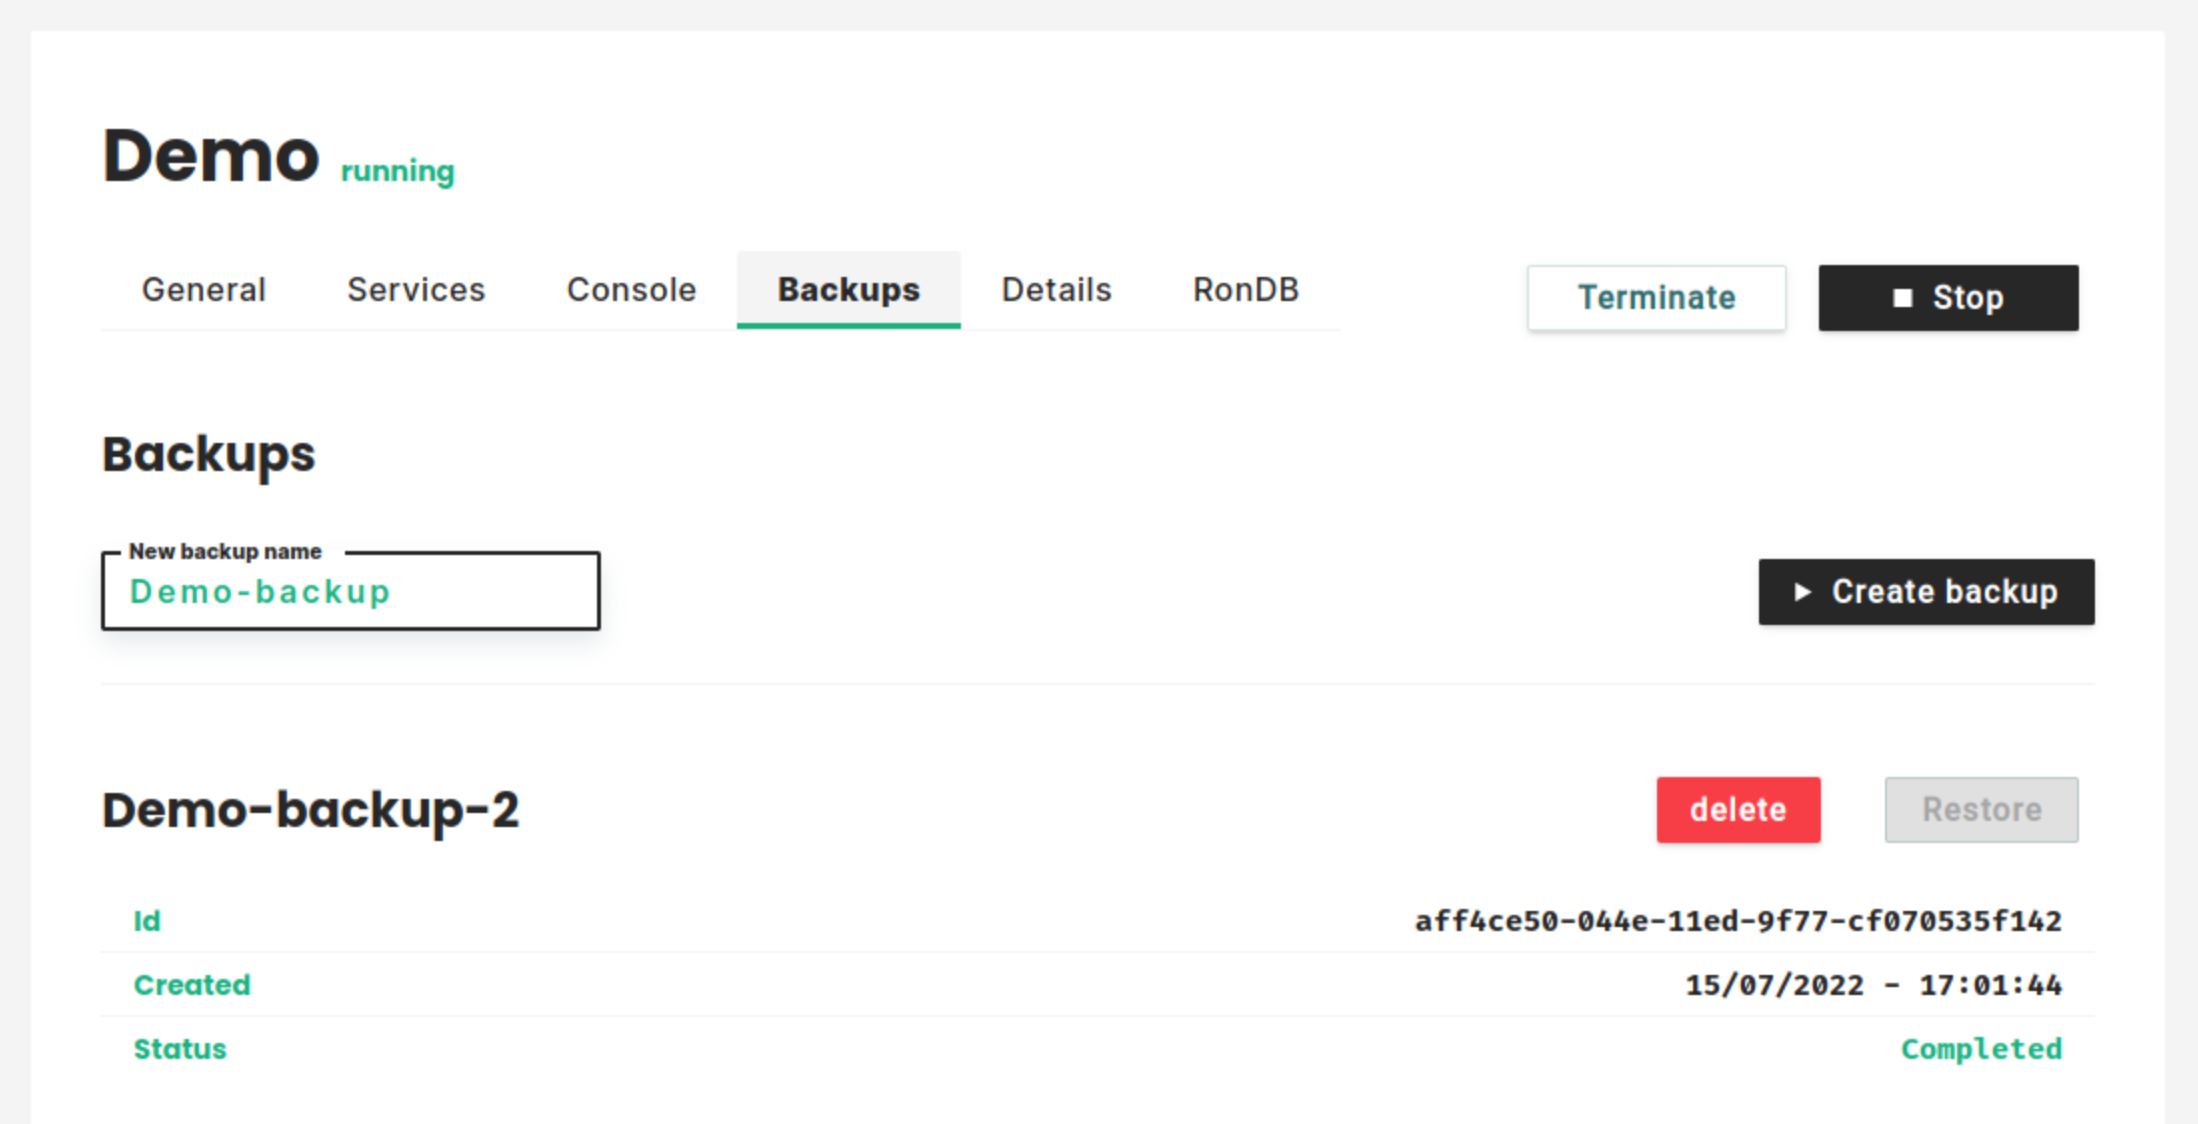
Manage your backups in the Backups tab#
The backups tab is where you create and manage backups for your cluster. You can find more details about the backups, in the backups documentation.
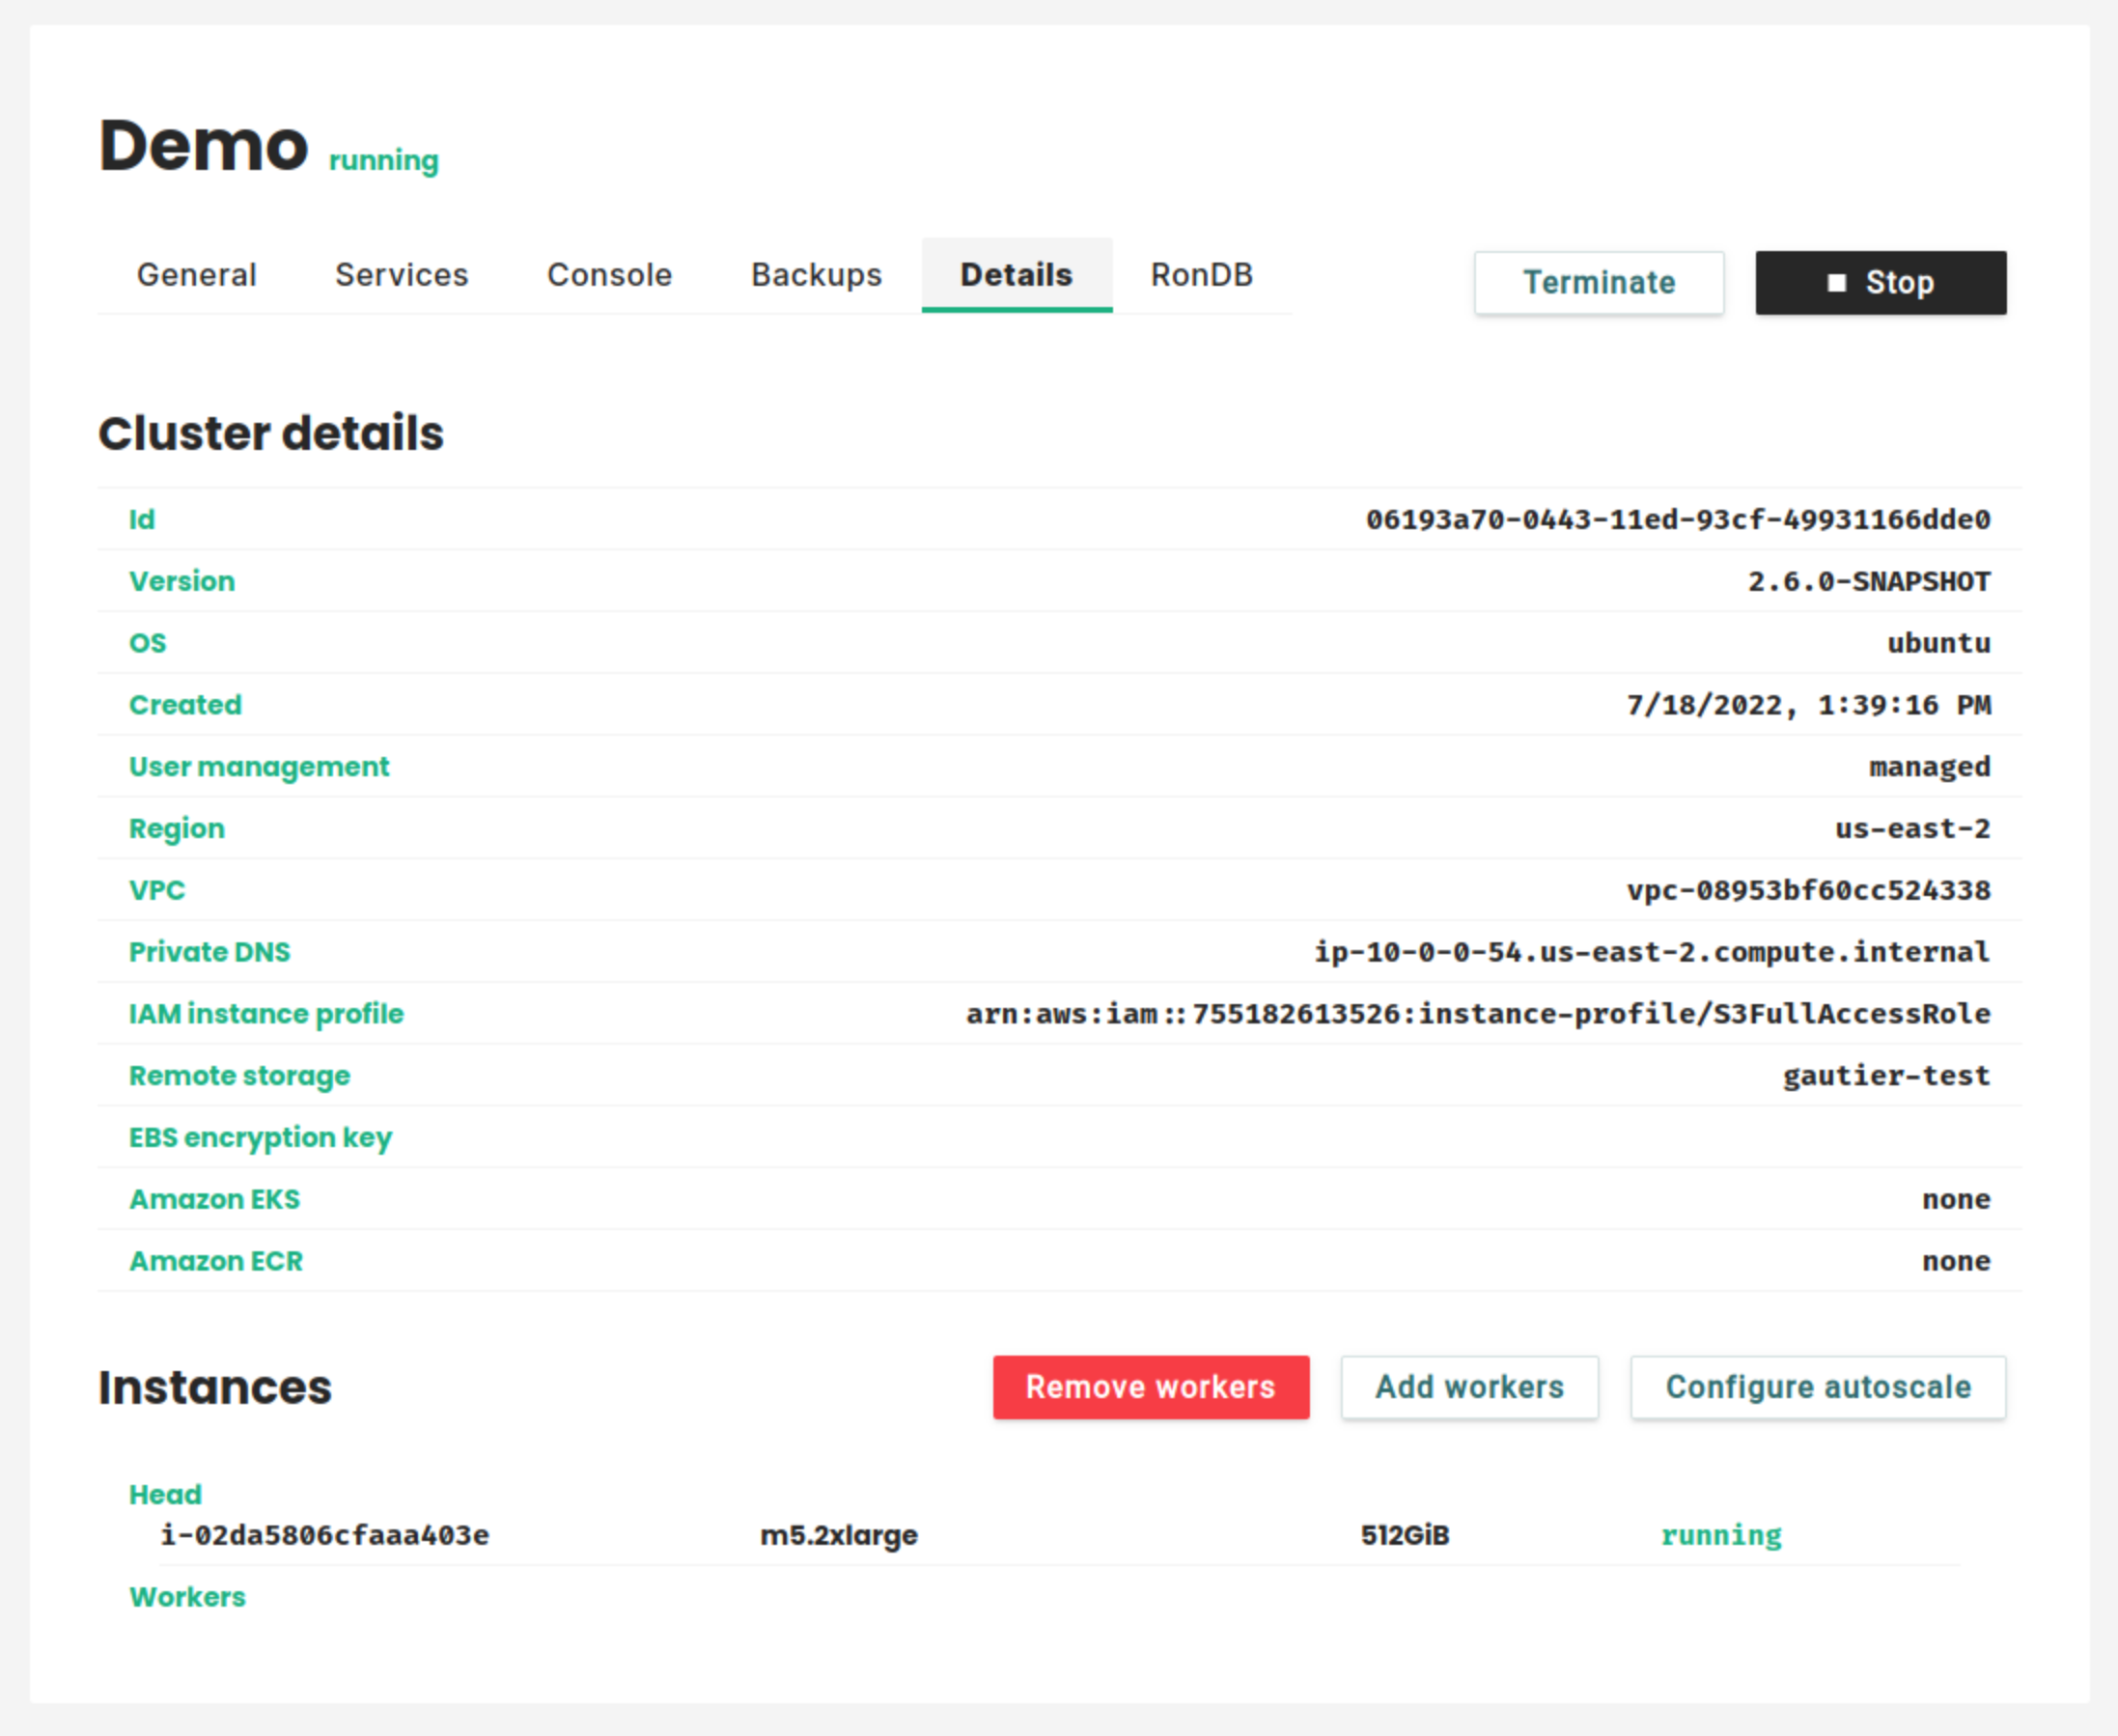
Get more details and manage your workers in the Details tab#
The Details tab provides you with details about your cluster setup. It is also where you can add and remove workers or configure the autoscaling.
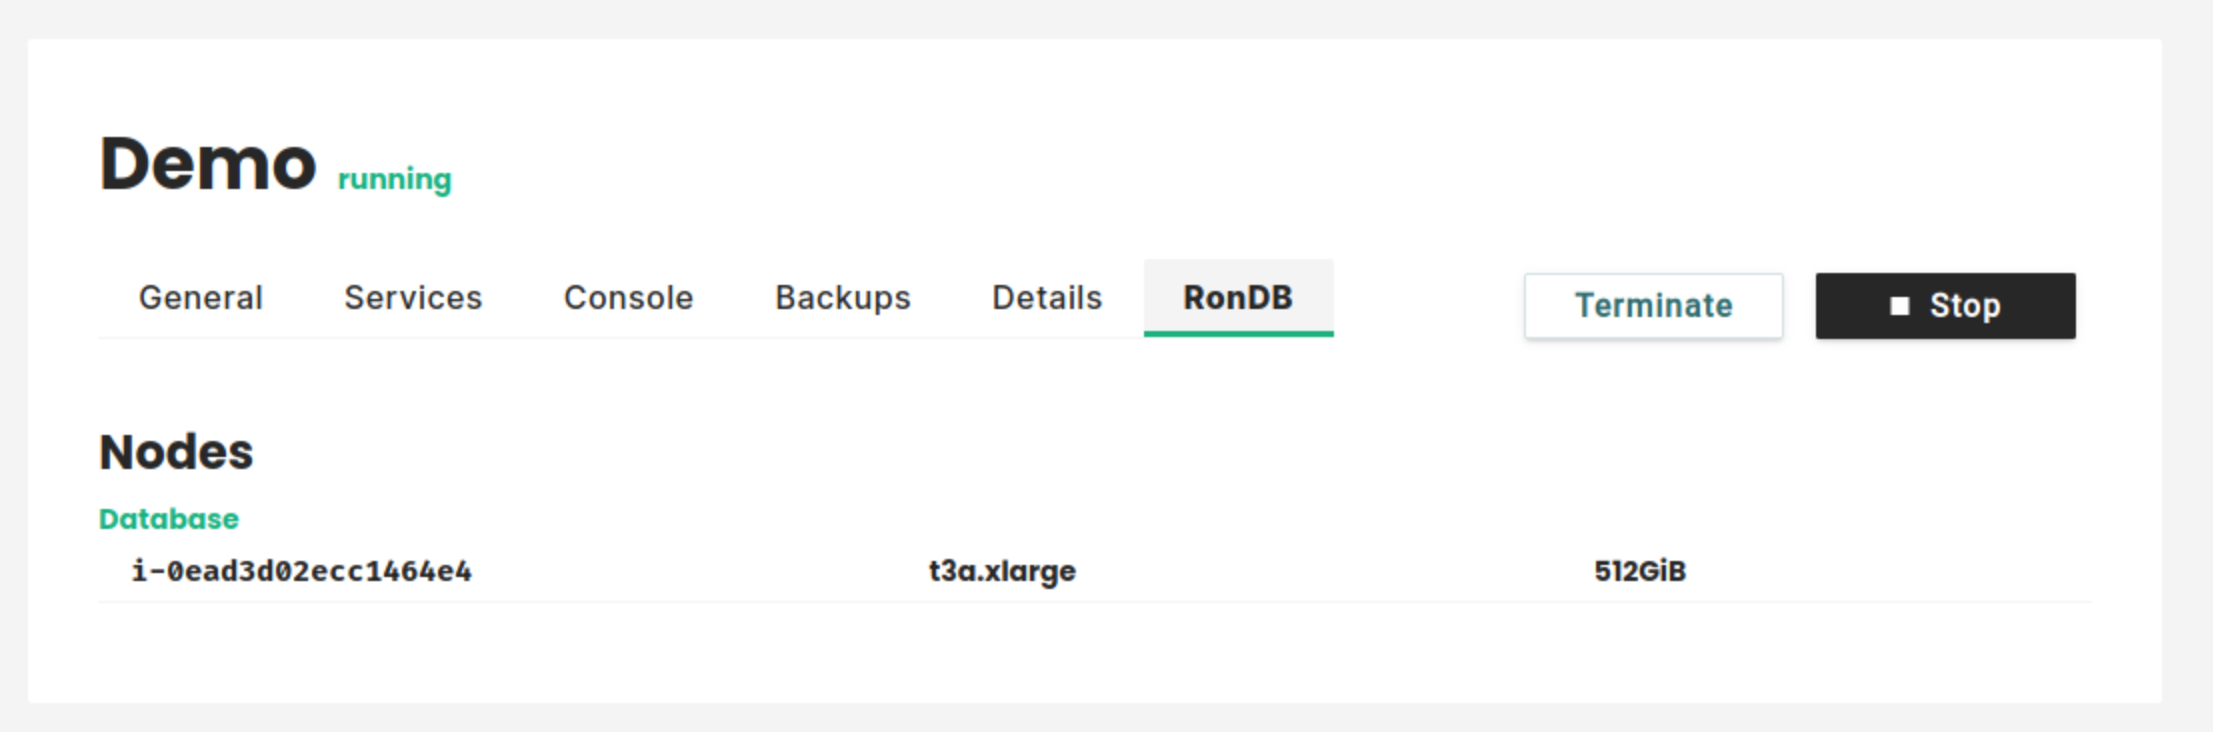
Get more details about your cluster RonDB in the RonDB tab#
The RonDB tab provides you with details about the instances running RonDB in your cluster. This is also where you can scale up Rondb if needed.
Conclusion#
You now have an overview of where your different cluster information can be found and how you can manage your cluster. To go further you can learn how to add and remove workers or configure the autoscaling on your cluster or how to take and restore backups.