How To Add Members To A Project#
Introduction#
In this guide, you will learn how to add new members to your project as well as the different roles within a project.
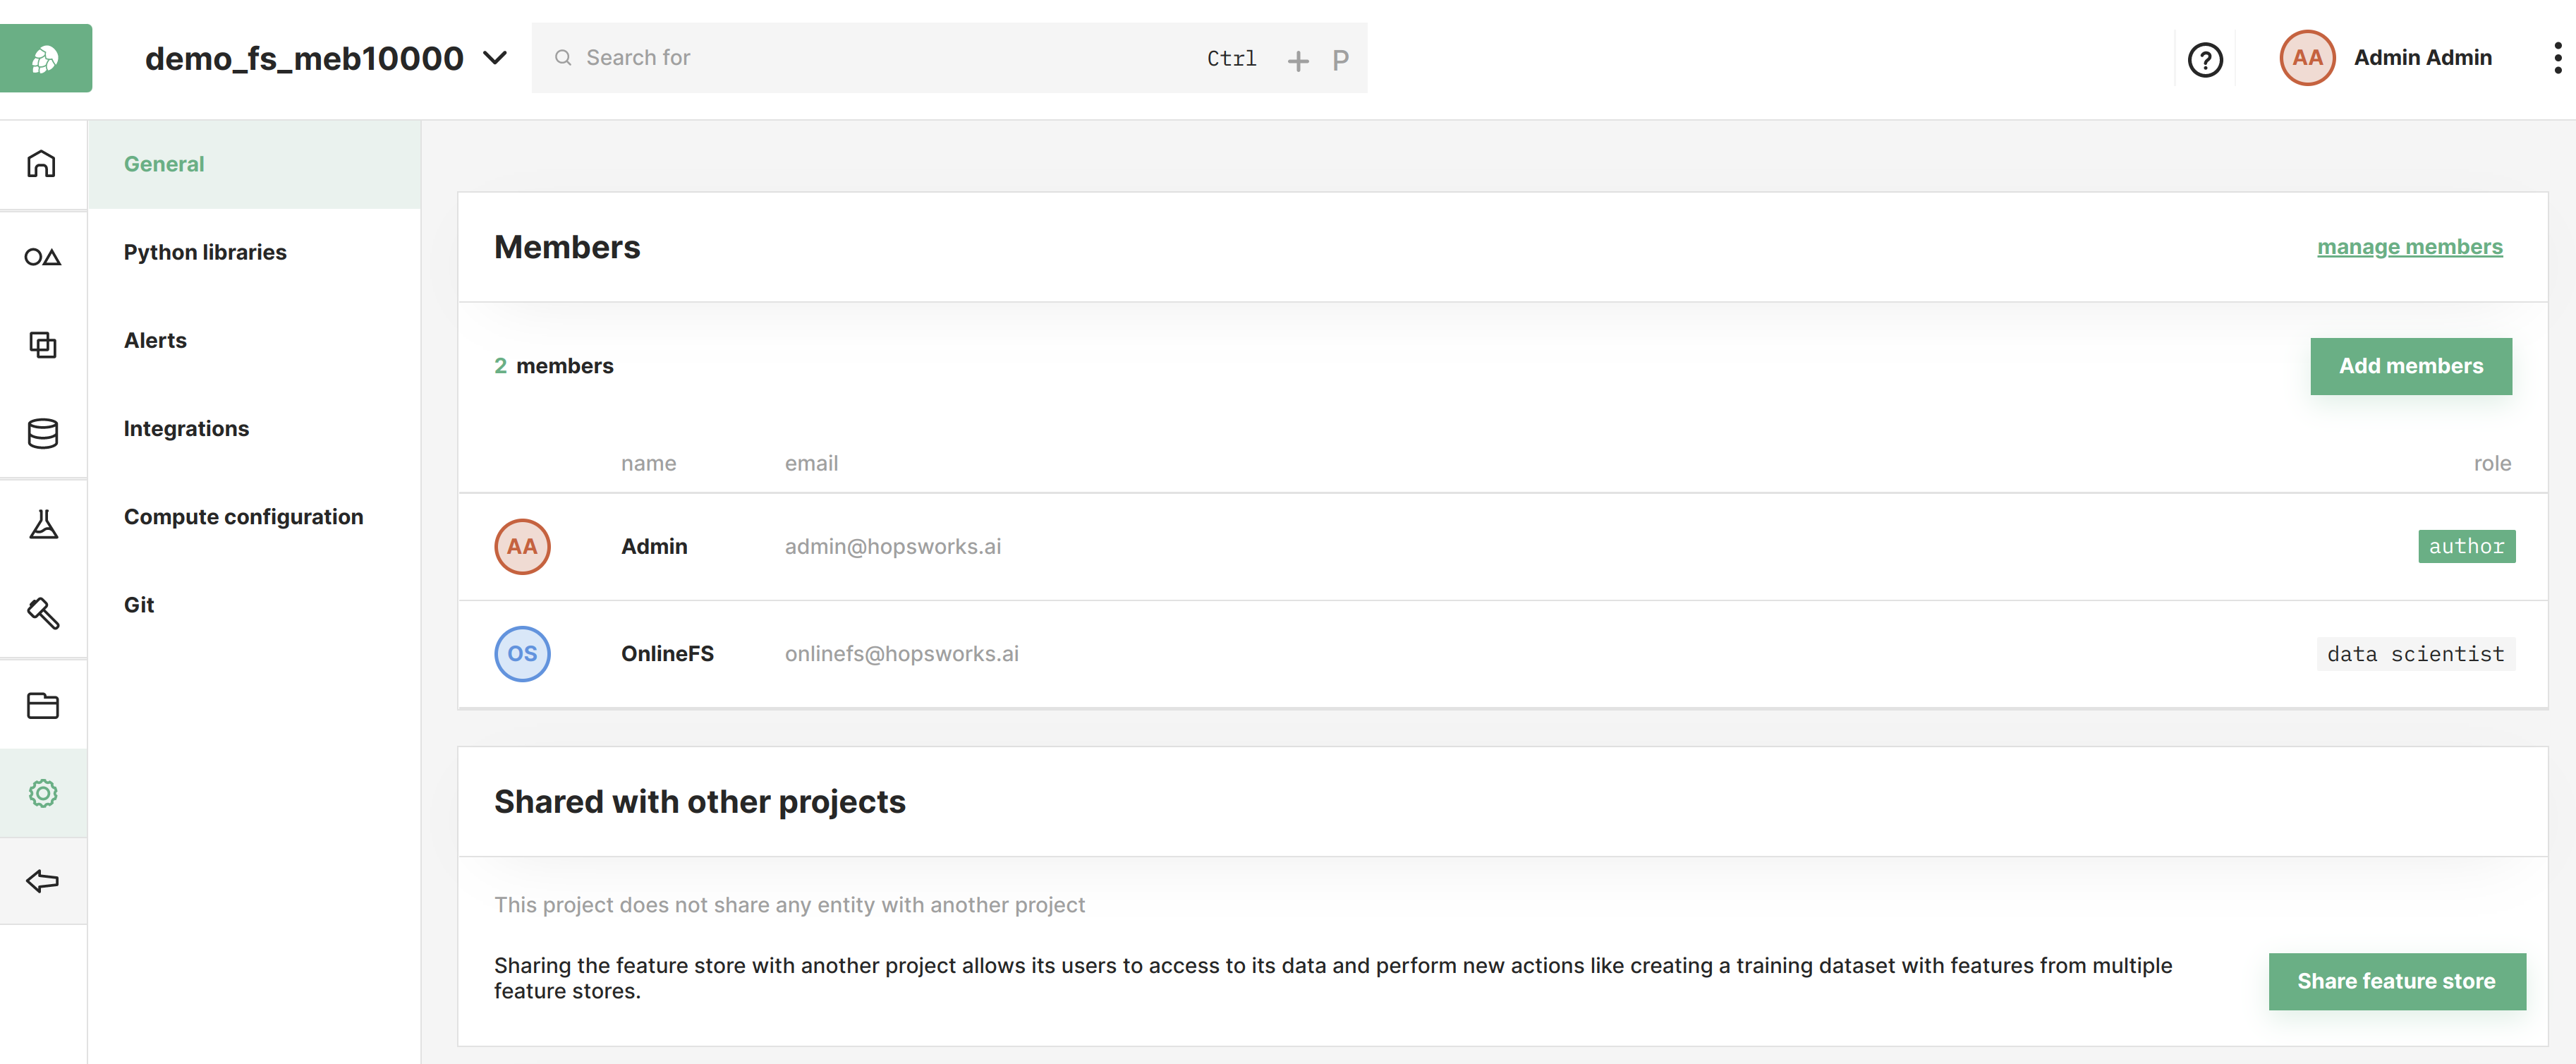
Step 1: Members list#
On the Project settings page, you can find the General section, which lists the members of the project.
Step 2: Add a new member#
Next click Add members and a dialog where users can be invited will appear. Select the users to invite.
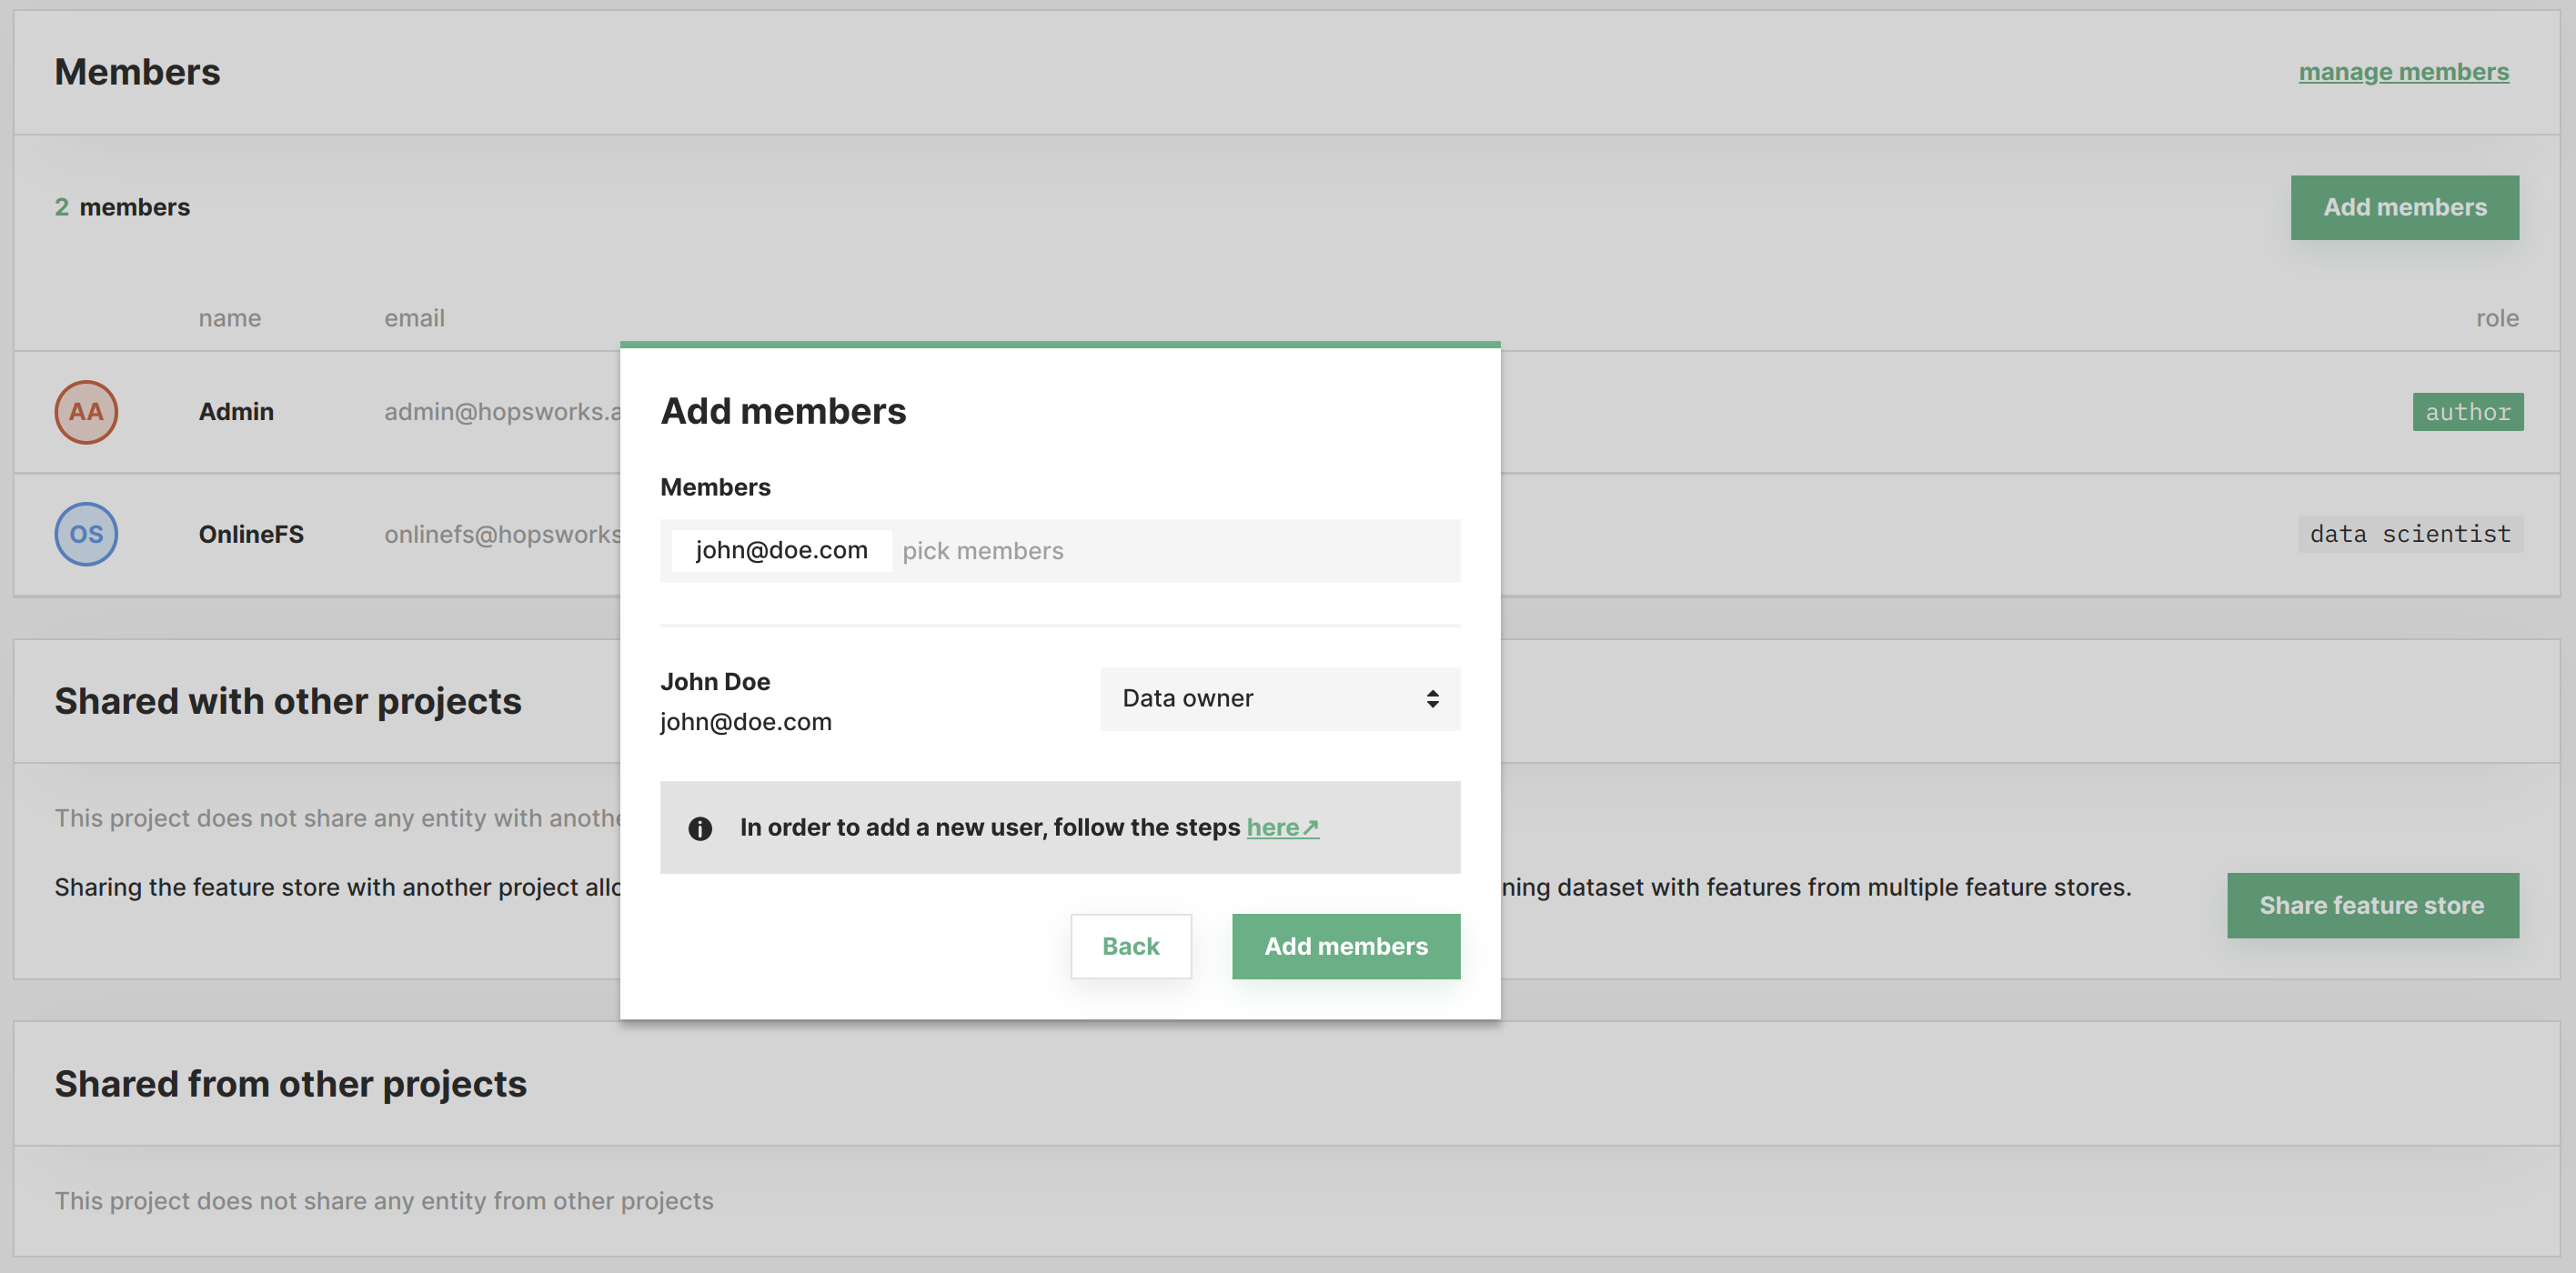
Subsequently, the selected project members can be assigned to 2 different roles, depending on the privileges necessary for him/her to fulfill their needs.
Data owner#
Data owners hold the highest authority in the project, having full control of its contents.
They are allowed to: - Share a project - Manage the project and its members - Work with all feature store abstractions (such as Feature groups, Feature views, Storage connectors, etc.)
It is worth mentioning that the project's creator (aka. author) is a special type of Data owner. He is the only user capable of deleting the project and it is impossible to change his role to Data scientist.
Data scientist#
Data scientists can be viewed as the users of data.
They are allowed to: - Create feature views/training datasets using existing features - Manage the feature views/training datasets they have created
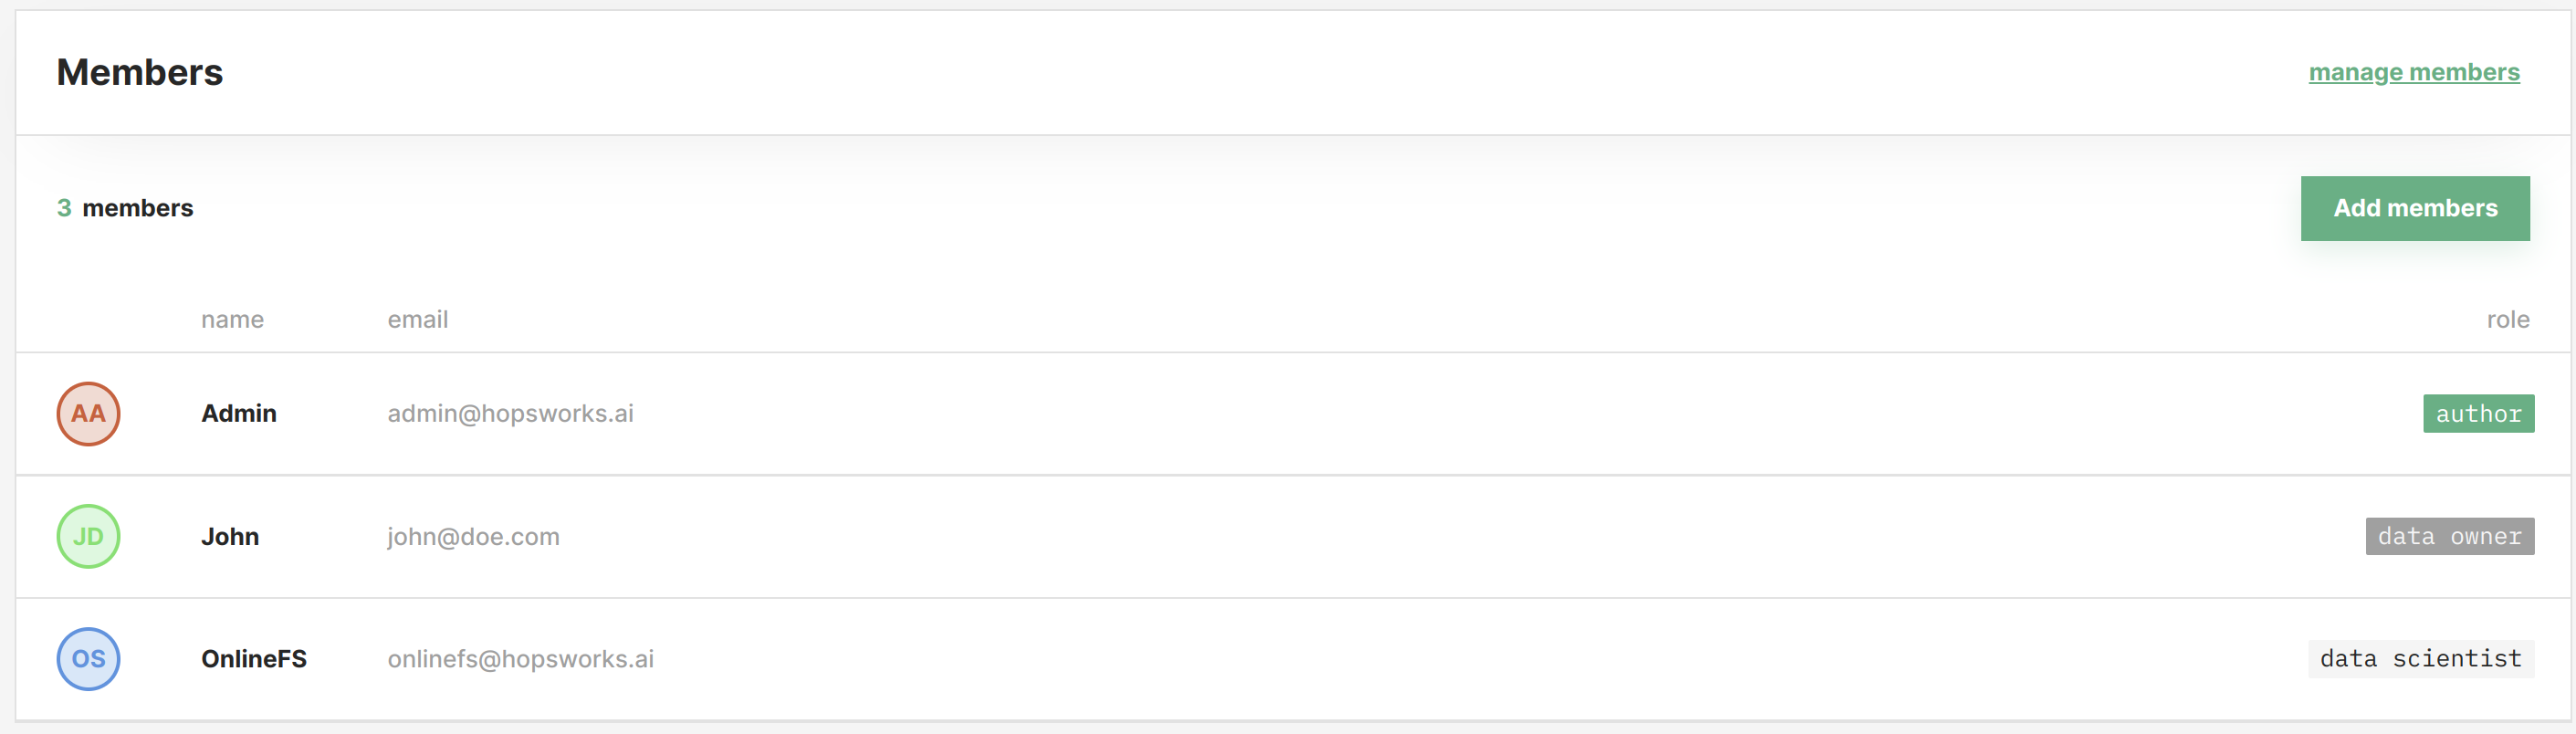
Step 3: Member invited#
The invited user will now appear in the list of members and will have access to the project.
Conclusion#
In this guide, you learned how to add a new member and the types of roles this member can be a part of.