How To Configure Scaling For A Deployment#
Introduction#
This guide explains how to set up autoscaling for model deployments using either the web UI or the Python API.
Autoscaling enables the deployment to use resources more efficiently, by growing and shrinking the allocated resources according to its actual, real-time usage.
How a deployment scales depends on the mode it runs in. See Deployment mode, Scale metrics and Scaling parameters for details on the available scaling options in each mode.
Web UI#
Step 1: Create new deployment#
If you have at least one model already trained and saved in the Model Registry, navigate to the deployments page by clicking on the Deployments tab on the navigation menu on the left.
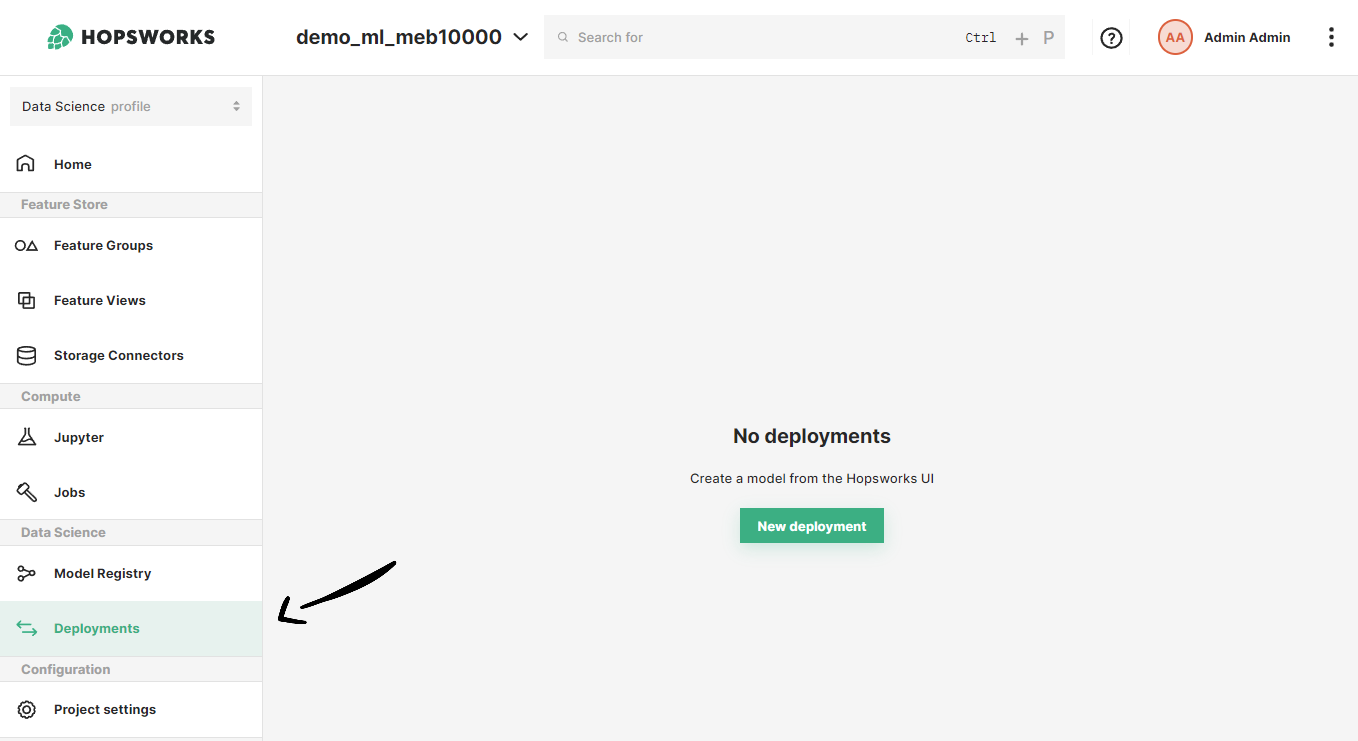
Once in the deployments page, you can create a new deployment by either clicking on New deployment (if there are no existing deployments) or on Create new deployment it the top-right corner. Both options will open the deployment creation form.
Step 2: Go to advanced options#
A simplified creation form will appear including the most common deployment fields from all available configurations. Autoscaling is part of the advanced options of a deployment. To navigate to the advanced creation form, click on Advanced options.
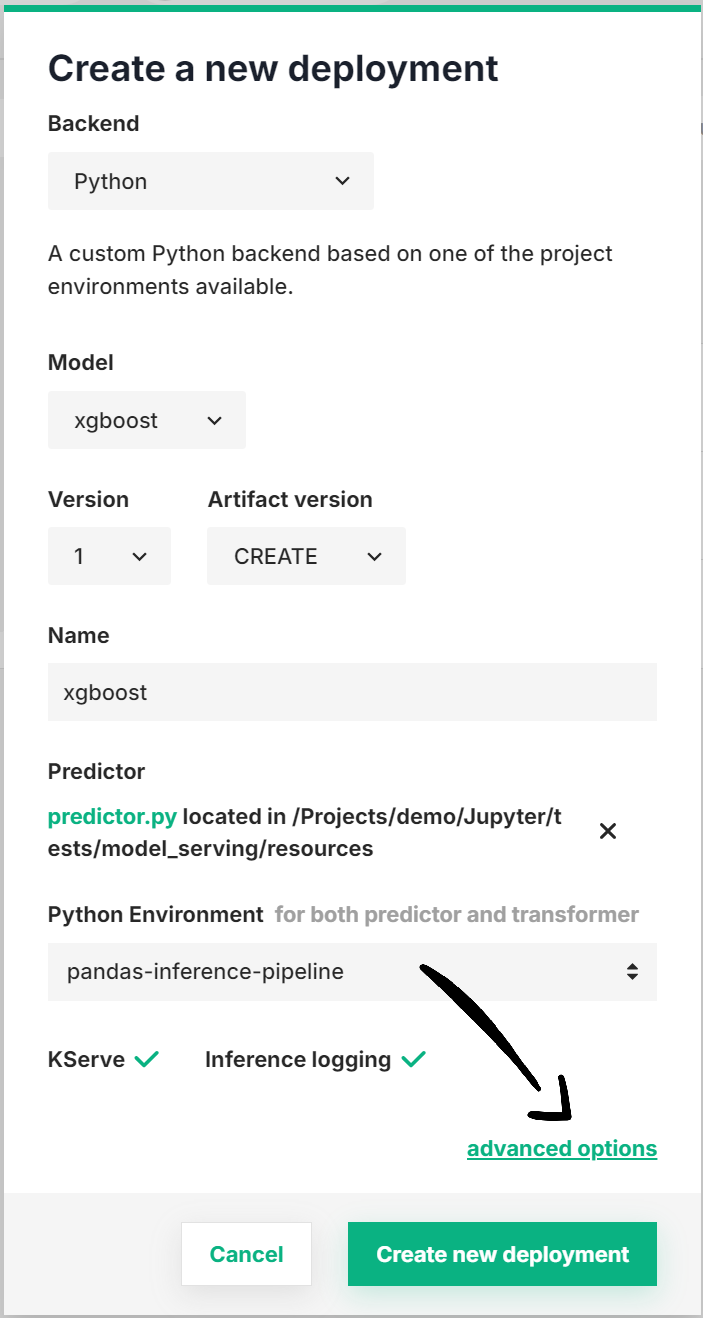
Step 3: Configure autoscaling#
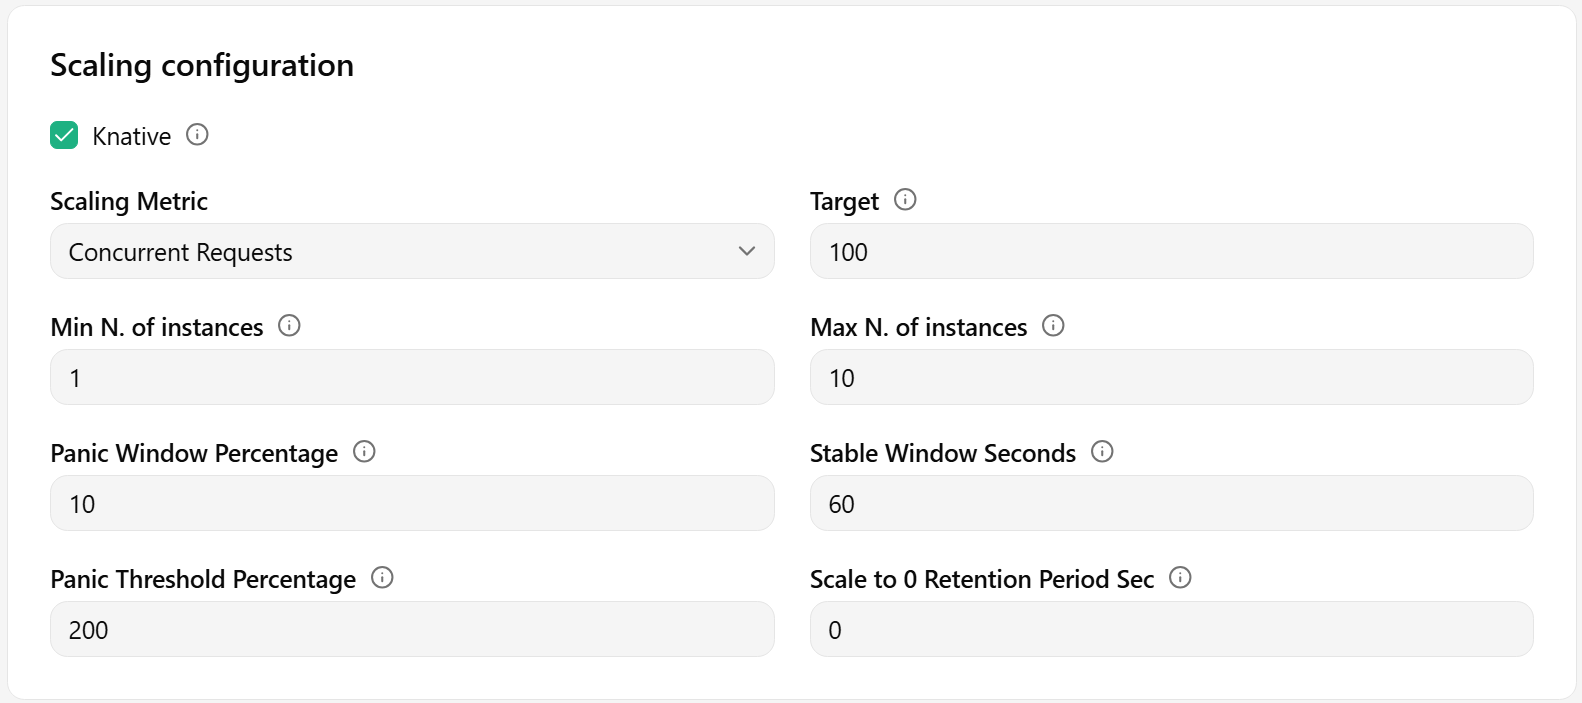
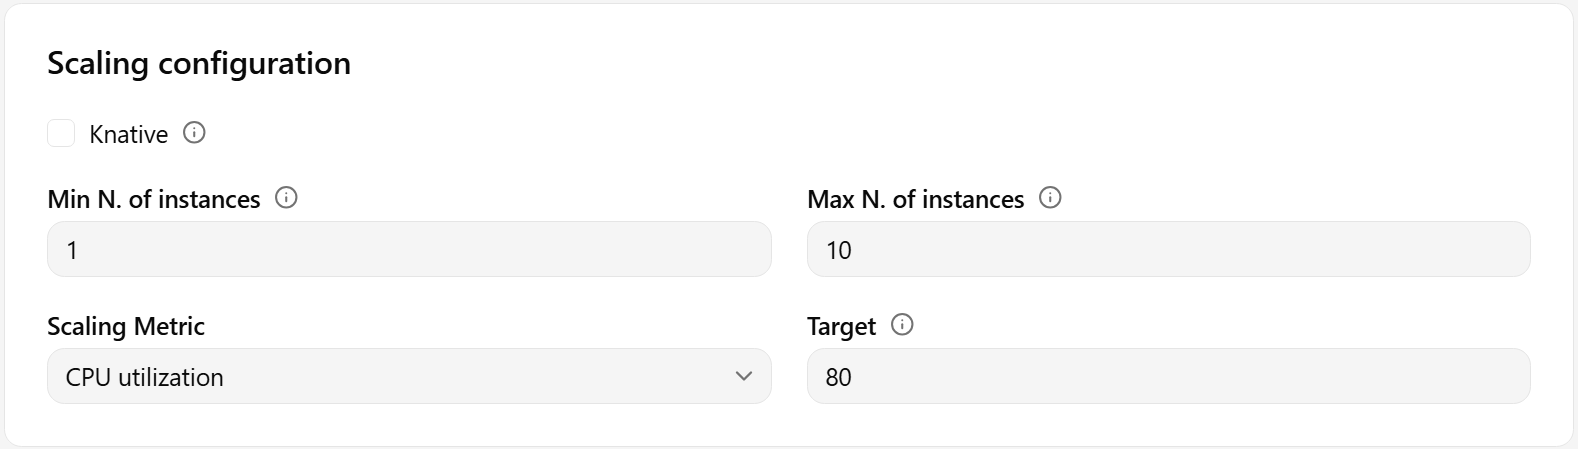
In the Autoscaling section of the advanced form, you can configure the scaling parameters for the predictor and/or the transformer (if available). The Knative checkbox at the top of the section selects the deployment mode and decides which of the fields below are shown. With it checked, you can set the scale metric, target value, minimum and maximum instances, as well as the panic and stable window parameters. With it cleared, the deployment runs in Standard mode and you can set the minimum and maximum instances plus a CPU or memory scale metric and its target. The checkbox is disabled while the deployment is running, because the mode of a running deployment cannot be changed.
Once you are done with the changes, click on Create new deployment at the bottom of the page to create the deployment for your model.
Code#
Step 1: Connect to Hopsworks#
import hopsworks


project = hopsworks.login()

# get Hopsworks Model Registry handle
mr = project.get_model_registry()

# get Hopsworks Model Serving handle
ms = project.get_model_serving()
Step 2: Define the predictor scaling configuration#
You can use the PredictorScalingConfig class to configure the scaling options according to your preferences. Default values for scaling metrics and parameters are listed in the Scale metrics and Scaling parameters sections above. Make sure the metric and parameters you set are valid for the deployment mode you deploy in.
Step 3 (Optional): Define the transformer scaling configuration#
If a transformer script is also provided, you can use the TransformerScalingConfig class to configure the scaling options according to your preferences. Default values for scaling metrics and parameters are listed in the Scale metrics and Scaling parameters sections above.
Step 4: Create a deployment with the scaling configuration#
my_model = mr.get_model("my_model", version=1)

# optional
my_transformer = ms.create_transformer(
    script_file="Resources/my_transformer.py",
    scaling_configuration=transformer_scaling,
)

my_deployment = my_model.deploy(
    scaling_configuration=predictor_scaling,
    # optional:
    transformer=my_transformer,
)
my_model = mr.get_model("my_model", version=1)

# optional
my_transformer = ms.create_transformer(
    script_file="Resources/my_transformer.py",
    scaling_configuration=transformer_scaling,
)

my_deployment = my_model.deploy(
    scaling_configuration=predictor_scaling,
    knative_mode=False,
    # optional:
    transformer=my_transformer,
)
Match the scaling configuration to the mode
The knative_mode argument selects the deployment mode of the deployment. Leaving it unset deploys in Knative mode for every model server except vLLM, so a Standard scaling configuration needs knative_mode=False passed explicitly. A scaling configuration that uses fields the chosen mode does not support is rejected, so set both together.
API reference
Deployment mode#
Every deployment runs on KServe in one of two modes. In Knative mode, the deployment is backed by a Knative service that scales on request traffic and can scale to zero. In Standard mode, the deployment is backed by a plain Kubernetes Deployment that always keeps at least one instance running and scales on CPU or memory utilization. Inference requests reach both modes through the same Istio endpoint, so the mode does not change how you send predictions to a deployment.
Knative and Standard mode
| Mode | Backed by | Scale-to-zero | Autoscaler |
|---|---|---|---|
| Knative | Knative service | Yes | Knative Pod Autoscaler (KPA) |
| Standard | Kubernetes Deployment | No | Kubernetes HPA |
LLM deployments default to Standard mode, and deployments on every other model server default to Knative mode. LLMs load large model files and start slowly, so scaling them to zero costs a long cold start on the next request, and their throughput is bounded by GPU memory rather than by the number of concurrent requests.
The two modes are backed by different Kubernetes resources, so the mode of a deployment cannot be changed while it is running. Stop the deployment, change the mode, and start it again. Switching the mode clears the scaling settings that do not carry over and re-derives the defaults of the new mode.
Python SDK
From the Python SDK, the mode is selected with the knative_mode keyword argument: True for Knative mode, False for Standard mode. Leaving it unset uses the default for the model server when creating a deployment, and keeps the stored mode when updating one. See Model.deploy() in the API reference.
Scale metrics#
The metric a deployment can scale on depends on its deployment mode, because the two modes are driven by different autoscalers. Setting a metric that the mode does not support is rejected.
| Scale Metric | Mode | Default Target | Description |
|---|---|---|---|
| RPS | Knative | 200 | Requests per second per replica |
| CONCURRENCY | Knative | 100 | Concurrent requests per replica |
| CPU | Standard | 80 | CPU utilization percentage |
| MEMORY | Standard | 80 | Memory utilization percentage |
Knative deployments default to CONCURRENCY. See Knative autoscaling metrics for more details on the Knative metrics.
Standard deployments default to CPU, and scale between the minimum and maximum instances. Setting the minimum and maximum instances to the same value runs a fixed number of replicas instead, with no autoscaler and no scale metric. LLM deployments default to a fixed replica count, because every extra replica needs a GPU and GPU-bound pods scale poorly on CPU or memory utilization.
Scaling parameters#
The following parameters can be used to fine-tune the autoscaling behavior. See scale bounds, autoscaling concepts and scale-to-zero in the Knative documentation for more details.
| Parameter | Mode | Default | Range | Description |
|---|---|---|---|---|
minInstances | Both | n/a | ≥ 0 | Minimum replicas (0 enables scale-to-zero, Knative mode only) |
maxInstances | Both | n/a | ≥ 1 | Maximum replicas (cannot be less than min) |
panicWindowPercentage | Knative | 10.0 | 1–100 | Panic window as percentage of stable window |
stableWindowSeconds | Knative | 60 | 6–3600 | Stable window duration in seconds |
panicThresholdPercentage | Knative | 200.0 | > 0 | Traffic threshold to trigger panic mode |
scaleToZeroRetentionSeconds | Knative | 0 | ≥ 0 | Time to retain pods before scaling to zero |
The panic, stable window and scale-to-zero retention parameters are Knative Pod Autoscaler settings with no equivalent in a Kubernetes HPA, so a Standard deployment rejects them. A Standard deployment also requires at least one instance.
Cluster-level constraints
Administrators can set cluster-wide limits on the maximum and minimum number of instances. When the minimum is set to 0, scale-to-zero is enforced for all Knative deployments.