AWS IAM Role Chaining#
Introduction#
When running Hopsworks in the cloud you have several options to give the Hopsworks user access to AWS resources. The simplest is to setup the EC2 instances running Hopsworks with an instance profile giving access to the resources. But, this will make these resources accessible by all the Hopsworks users. To manage access to the resource on a project base you need to use Role chaining.
In this document we will see how to configure AWS and Hopsworks to use Role chaining in your Hopsworks projects.
Prerequisites#
Before you begin this guide you'll need the following:
- A Hopsworks cluster running on EC2.
- Administrator account on a Hopsworks cluster.
Step 1: Create an instance profile role#
To use role chaining the head node need to be able to impersonate the roles you want to be linked to your project. For this you need to create an instance profile with assume role permissions and attach it to your head node. For more details about the creation of instance profile see the aws documentation. If running in managed.hopsworks.ai you can also refer to our getting started guide.
Note
To ensure that the Hopsworks users can't use the head node instance profile and impersonate the roles by their own means, you need to ensure that they can't execute code on the head node. This means having all jobs running on worker nodes and using EKS to run jupyter nodebooks.
{
    "Version": "2012-10-17",
    "Statement": [
        {
            "Sid": "AssumeDataRoles",
            "Effect": "Allow",
            "Action": "sts:AssumeRole",
            "Resource": [
                "arn:aws:iam::123456789011:role/test-role",
                "arn:aws:iam::xxxxxxxxxxxx:role/s3-role",
                "arn:aws:iam::xxxxxxxxxxxx:role/dev-s3-role",
                "arn:aws:iam::xxxxxxxxxxxx:role/redshift"
            ]
        }
    ]
}
Step 2: Create the resource roles#
For the instance profile to be able to impersonate the roles you need to configure the roles themselves to allow it. This is dome by adding the instance profile to the role's Trust relationships.
{
    "Version": "2012-10-17",
    "Statement": [
        {
        "Effect": "Allow",
        "Principal": {
            "AWS": "arn:aws:iam::xxxxxxxxxxxx:role/instance-profile"
        },
        "Action": "sts:AssumeRole"
        }
    ]
}
Step 3: Create mappings#
Now that the head node can assume the roles we need to configure Hopsworks to deletegate access to the roles on a project base.
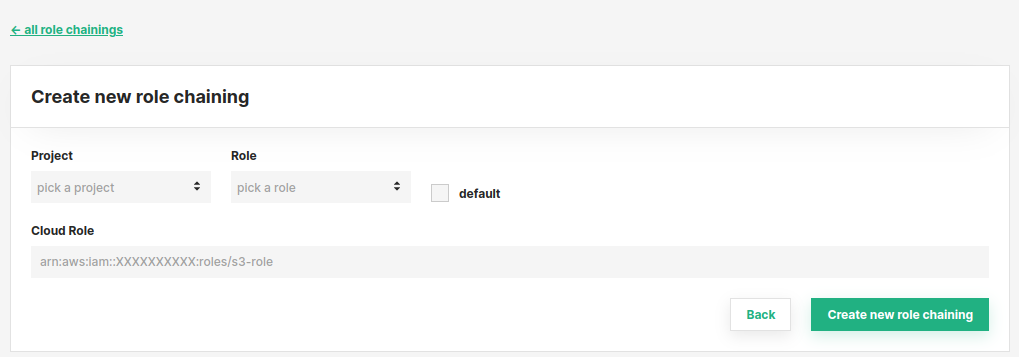
In Hopsworks, click on your name in the top right corner of the navigation bar and choose Cluster Settings from the dropdown menu. In the Cluster Settings' IAM Role Chaining tab you can configure the mappings between projects and IAM roles.

Add mappings by clicking on New role chaining. Enter the project name. Select the type of user that can assume the role. Enter the role ARN. And click on Create new role chaining

Project member can now create connectors using temporary credentials to assume the role you configured. More detail about using temporary credentials can be found here.
Project member can see the list of role they can assume by going the Project Settings -> Assuming IAM Roles page.
Conclusion#
In this guide you learned how to configure and map AWS IAM roles to project roles in Hopsworks.