Orchestrate Jobs using Apache Airflow#
Introduction#
Hopsworks jobs can be orchestrated using Apache Airflow. You can define a Airflow DAG (Directed Acyclic Graph) containing the dependencies between Hopsworks jobs. You can then schedule the DAG to be executed at a specific schedule using a cron expression.
Airflow DAGs are defined as Python files. Within the Python file, different operators can be used to trigger different actions. Hopsworks provides an operator to execute jobs on Hopsworks and a sensor to wait for a specific job to finish.
Use Apache Airflow in Hopsworks#
Hopsworks deployments include a deployment of Apache Airflow. You can access it from the Hopsworks UI by clicking on the Airflow button on the left menu.
Airflow is configured to enforce Role Based Access Control (RBAC) to the Airflow DAGs. Admin users on Hopsworks have access to all the DAGs in the deployment. Regular users can access all the DAGs of the projects they are a member of.
Access Control
Airflow does not have any knowledge of the Hopsworks project you are currently working on. As such, when opening the Airflow UI, you will see all the DAGs all of the projects you are a member of.
Hopsworks DAG Builder#
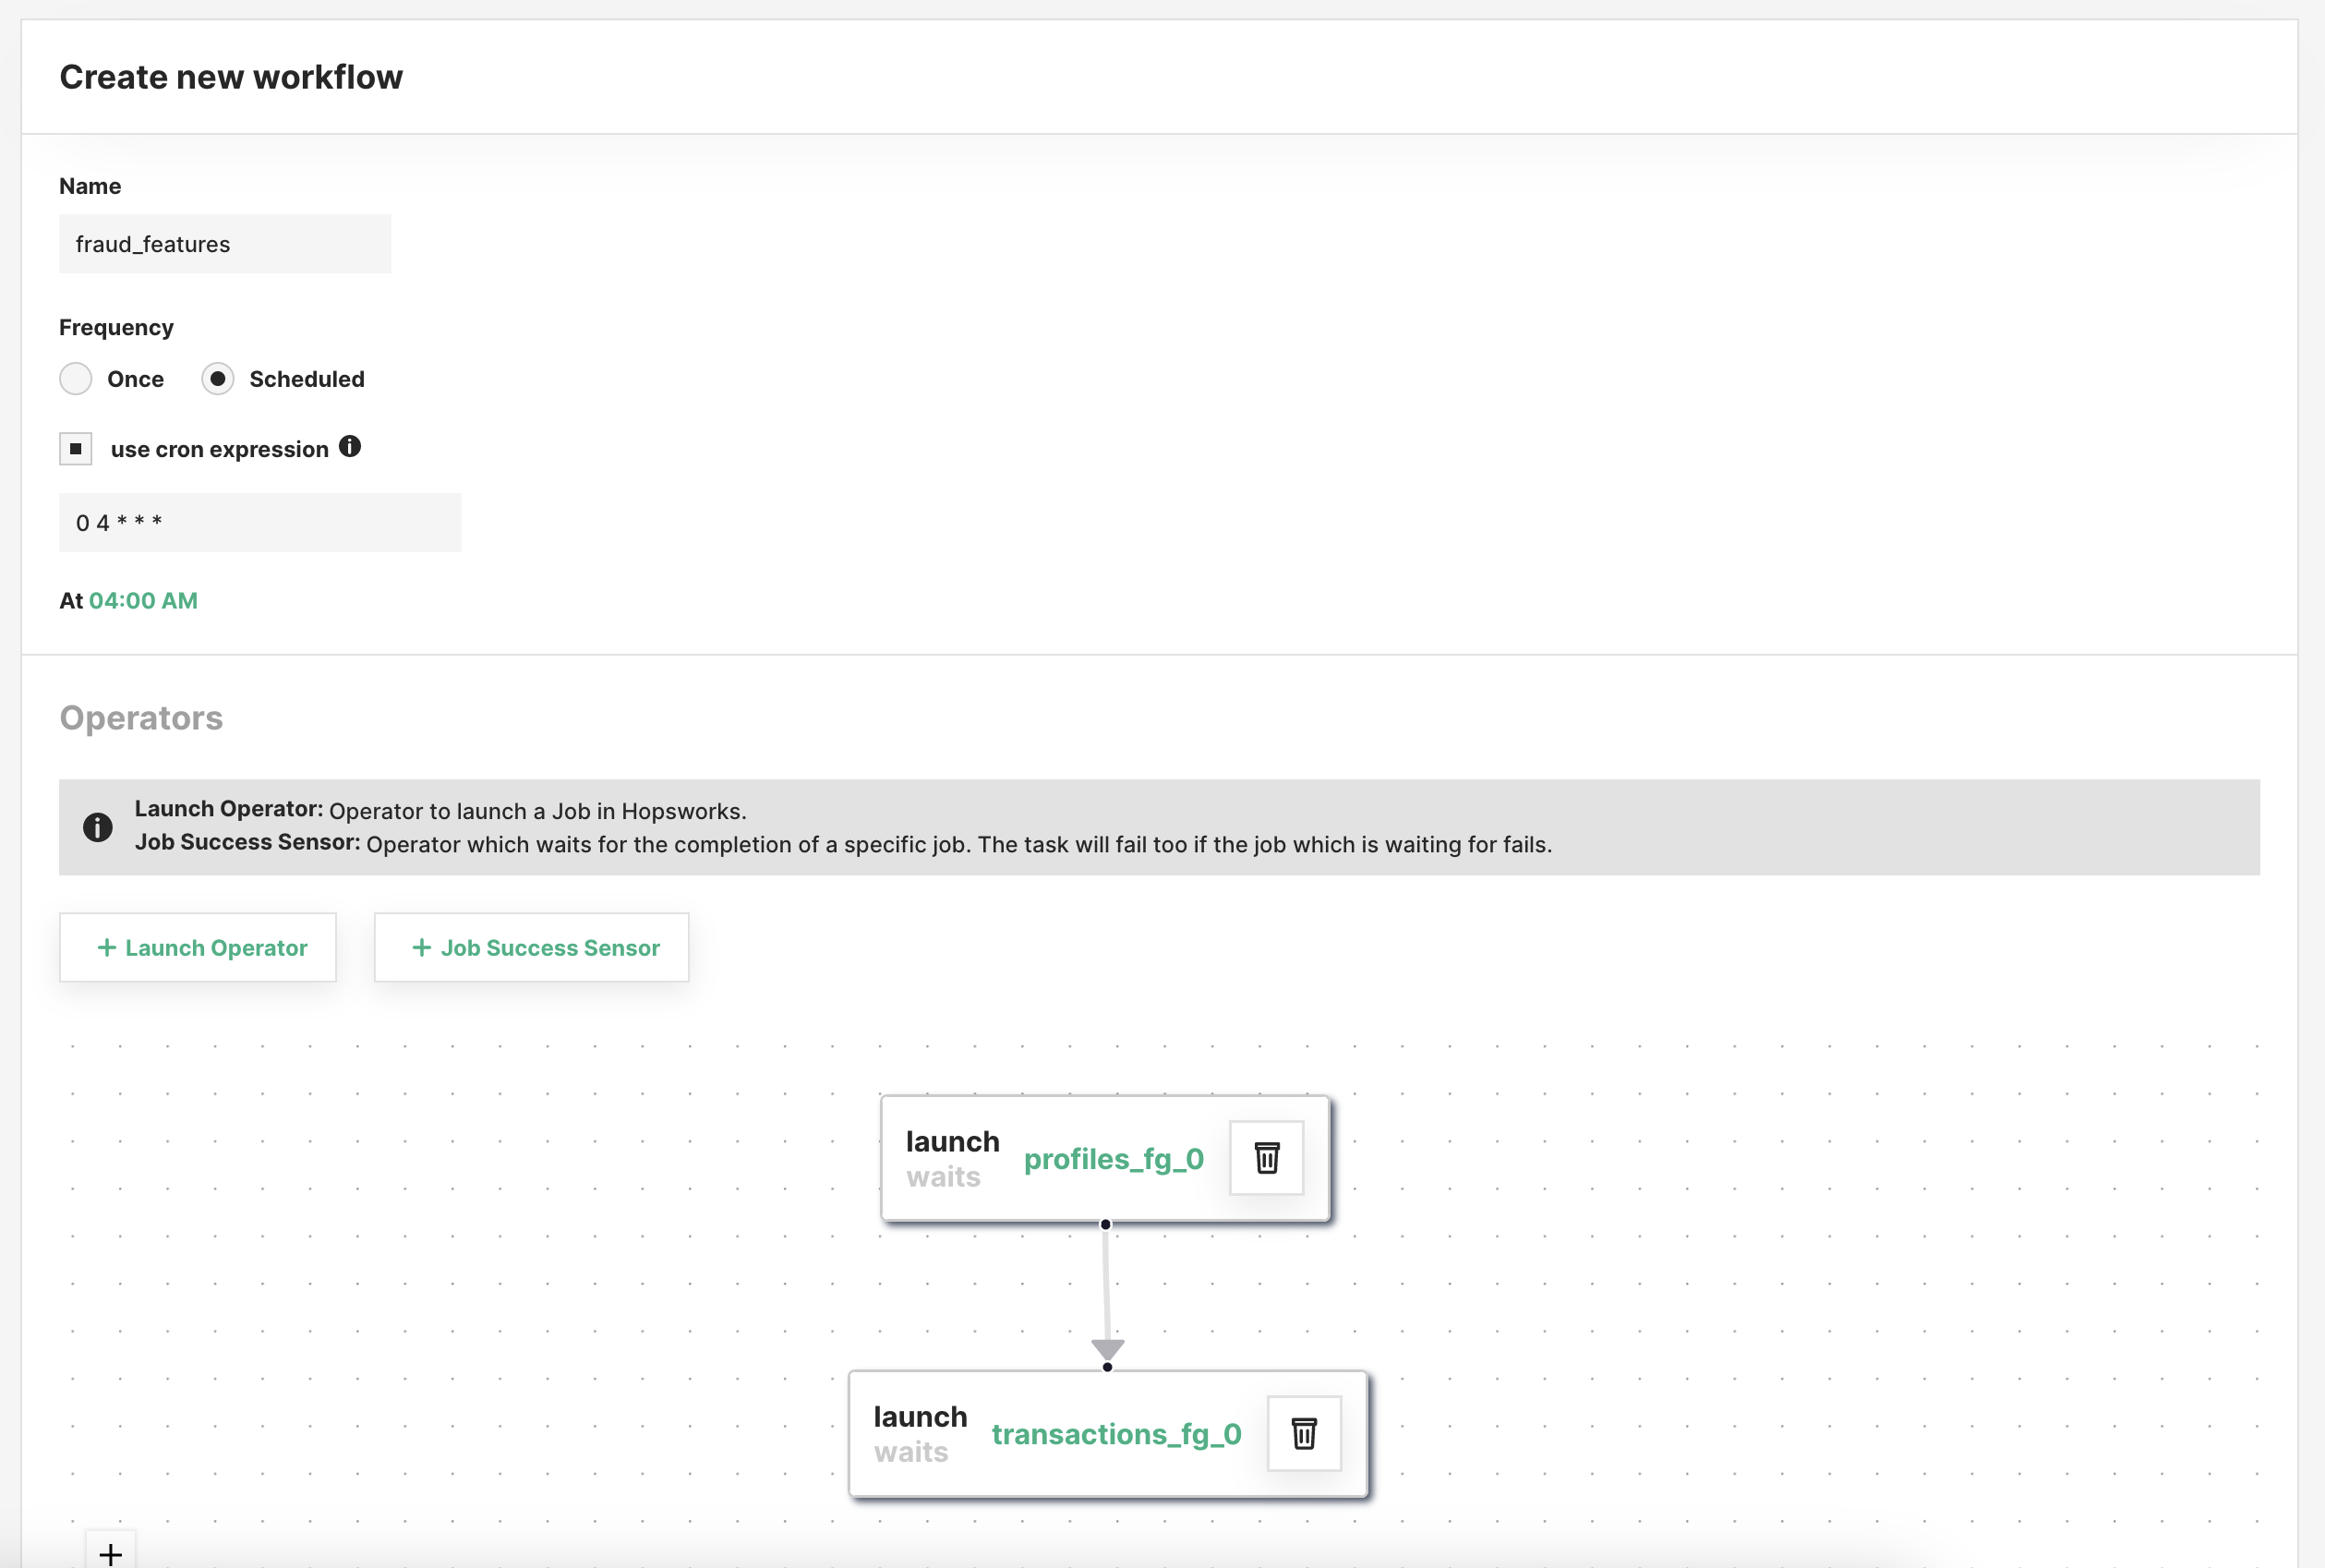
You can create a new Airflow DAG to orchestrate jobs using the Hopsworks DAG builder tool. Click on New Workflow to create a new Airflow DAG. You should provide a name for the DAG as well as a schedule interval. You can define the schedule using the dropdown menus or by providing a cron expression.
You can add to the DAG Hopsworks operators and sensors:
-
Operator: The operator is used to trigger a job execution. When configuring the operator you select the job you want to execute and you can optionally provide execution arguments. You can decide whether or not the operator should wait for the execution to be completed. If you select the wait option, the operator will block and Airflow will not execute any parallel task. If you select the wait option the Airflow task fails if the job fails. If you want to execute tasks in parallel, you should not select the wait option but instead use the sensor. When configuring the operator, you can can also provide which other Airflow tasks it depends on. If you add a dependency, the task will be executed only after the upstream tasks have been executed successfully.
-
Sensor: The sensor can be used to wait for executions to be completed. Similarly to the wait option of the operator, the sensor blocks until the job execution is completed. The sensor can be used to launch several jobs in parallel and wait for their execution to be completed. Please note that the sensor is defined at the job level rather than the execution level. The sensor will wait for the most recent execution to be completed and it will fail the Airflow task if the execution was not successful.
You can then create the DAG and Hopsworks will generate the Python file.
Write your own DAG#
If you prefer to code the DAGs or you want to edit a DAG built with the builder tool, you can do so. The Airflow DAGs are stored in the Airflow dataset which you can access using the file browser in the project settings.
When writing the code for the DAG you can invoke the operator as follows:
HopsworksLaunchOperator(
    dag=dag,
    task_id="profiles_fg_0",
    project_name="airflow_doc",
    job_name="profiles_fg",
    job_arguments="",
    wait_for_completion=True,
)
You should provide the name of the Airflow task (task_id) and the Hopsworks job information (project_name, job_name, job_arguments). You can set the wait_for_completion flag to True if you want the operator to block and wait for the job execution to be finished.
Similarly, you can invoke the sensor as shown below. You should provide the name of the Airflow task (task_id) and the Hopsworks job information (project_name, job_name)
HopsworksJobSuccessSensor(
    dag=dag,
    task_id="wait_for_profiles_fg",
    project_name="airflow_doc",
    job_name="profiles_fg",
)
When writing the DAG file, you should also add the access_control parameter to the DAG configuration. The access_control parameter specifies which projects have access to the DAG and which actions the project members can perform on it. If you do not specify the access_control option, project members will not be able to see the DAG in the Airflow UI.
Admin access
The access_control configuration does not apply to Hopsworks admin users which have full access to all the DAGs even if they are not member of the project.
    dag = DAG(
        dag_id="example_dag",
        default_args=args,
        access_control={
            "project_name": {"can_dag_read", "can_dag_edit"},
        },
        schedule_interval="0 4 * * *",
    )
Project Name
You should replace the project_name in the snippet above with the name of your own project
Manage Airflow DAGs using Git#
You can leverage the Git integration to track your Airflow DAGs in a git repository. Airflow will only consider the DAG files which are stored in the Airflow Dataset in Hopsworks. After cloning the git repository in Hopsworks, you can automate the process of copying the DAG file in the Airflow Dataset using DatasetApi.copy of the Hopsworks API.