How To Schedule a Job#
Introduction#
Hopsworks clusters can run jobs on a schedule, allowing you to automate the execution. Whether you need to backfill your feature groups on a nightly basis or run a model training pipeline every week, the Hopsworks scheduler will help you automate these tasks. Each job can be configured to have a single schedule. For more advanced use cases, Hopsworks integrates with any DAG manager and directly with the open-source Apache Airflow; see our Airflow Guide.
Schedules can be defined using the drop-down menus in the UI or a Quartz cron expression.
Schedule frequency
The Hopsworks scheduler runs every minute. As such, the scheduling frequency should be of at least 1 minute.
Parallel executions
By default, at most one execution of a job runs at a time. If a fire time is reached while a previous execution is still running, the scheduler waits for the previous run to finish before starting the new one. You can raise this cap with max_active_runs (see Scheduling fields).
Logical time and data intervals#
When the scheduler fires a job, it attaches a data window to the execution, expressed through three environment variables:
HOPS_START_TIME— start of the data window. Two modes:- Last execution time (default —
start_time_offset_seconds = null) — the previous cron fire. Adapts to the schedule's cadence, so the window is always "everything since the previous run". - Before last execution (hh:mm) —
previous_fire − (hh*3600 + mm*60)seconds. Stored as a positive integer; the backend subtracts. HOPS_END_TIME— end of the data window. AlwaysHOPS_START_TIME + cron intervalso consecutive scheduled runs tile the timeline with no gaps between them.end_time_offset_secondsis kept on the DTO for backward compatibility but is ignored.HOPS_LOGICAL_DATE— the scheduler's stable identifier for this interval (Airflow-style start of interval = previous cron fire). Used for dedup and retries.
With the defaults on an hourly schedule firing at 10:00, the window is [09:00, 10:00) — the last hour of data. The same defaults on a daily schedule firing at 00:00 give [yesterday 00:00, today 00:00) — the last day. Change the modes (see below) to shape a different window.
These three values are injected into the job container as environment variables on every scheduled execution. In your program, read them like any other env var:
import os
from datetime import datetime


start = datetime.fromisoformat(os.environ["HOPS_START_TIME"])
end = datetime.fromisoformat(os.environ["HOPS_END_TIME"])
print(f"Processing rows in [{start}, {end})")
import os

from pyspark.sql import SparkSession
from pyspark.sql import functions as F


spark = SparkSession.builder.getOrCreate()

start = os.environ["HOPS_START_TIME"]
end = os.environ["HOPS_END_TIME"]

df = spark.read.table("events").where(
    (F.col("event_ts") >= F.lit(start)) & (F.col("event_ts") < F.lit(end))
)
Why intervals and not just "now"?#
A scheduled run represents a time slice of data to process, not the wall-clock moment the container happened to start. Decoupling the two matters:
- If the scheduler is down for six hours and an hourly job resumes, each catch-up run still sees the interval it was supposed to cover — not six copies of "now".
- Backfills work naturally: replaying an interval produces the same output as the original run.
- Downstream consumers can rely on the interval end being monotonic even when upstream is delayed.
Legacy -start_time argument#
For backwards compatibility the scheduler also appends -start_time <logical date> to the job arguments (or -p start_time <logical date> for Papermill notebooks). New code should prefer the HOPS_* environment variables — they're present on every job type and don't require parsing CLI args.
UI#
Scheduling a job#
You can define a schedule for a job during the creation of the job itself or after the job has been created, from the job overview UI.
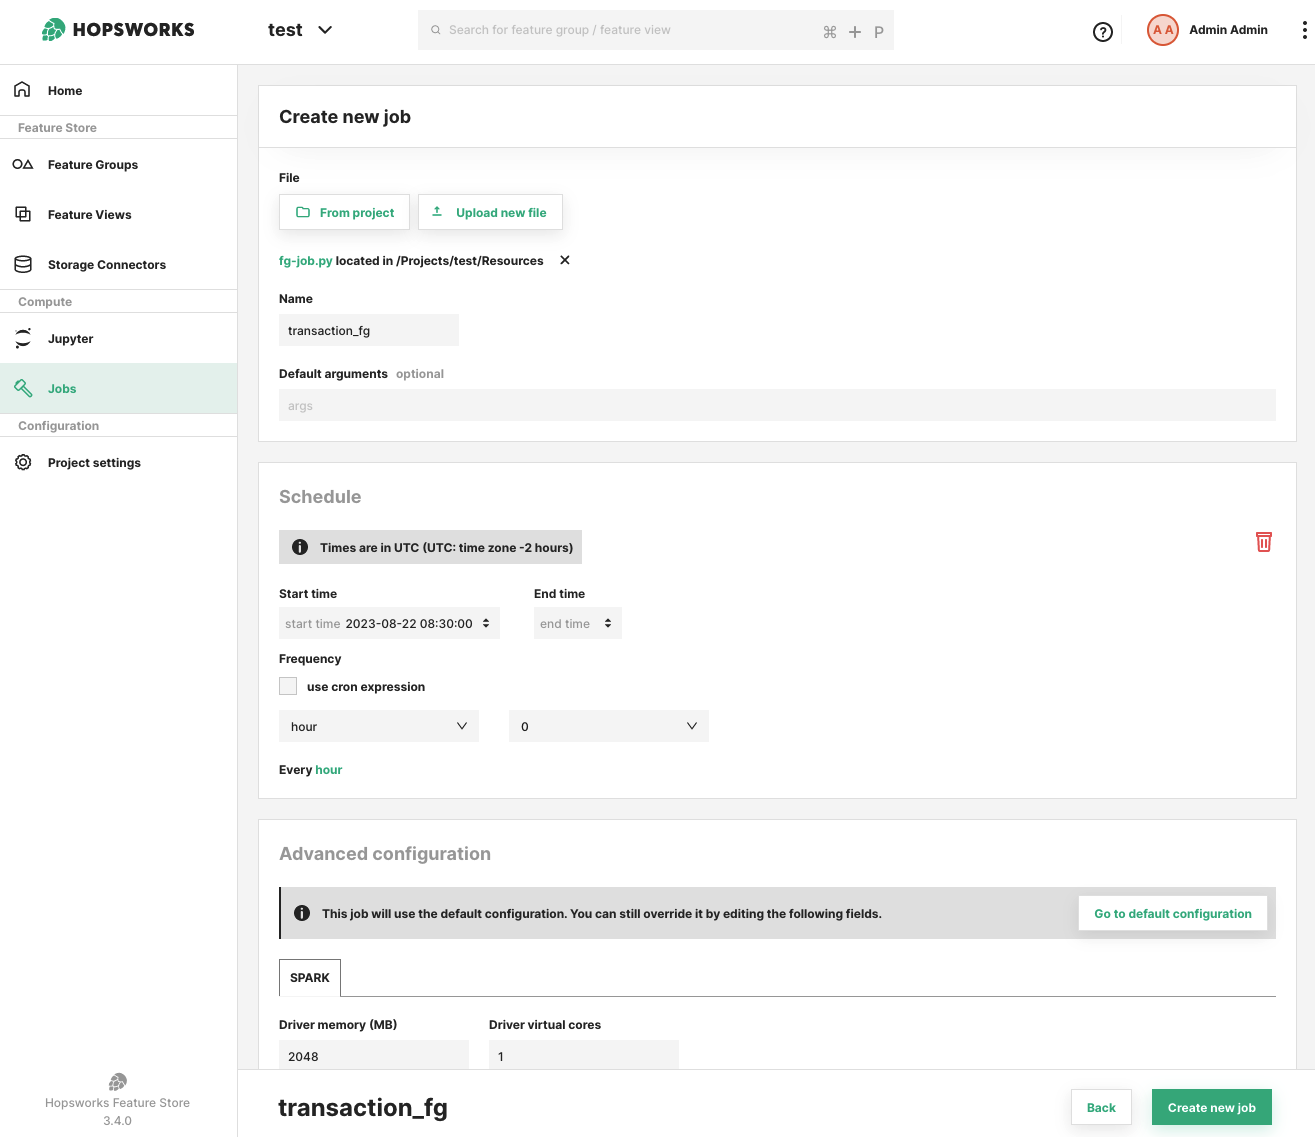
The add schedule prompt requires you to select a frequency either through the drop-down menus or by using a cron expression. You can also provide a start time to specify when the schedule should take effect. The start time can be in the past. You can optionally provide an end time, in which case the scheduler stops firing after that point.
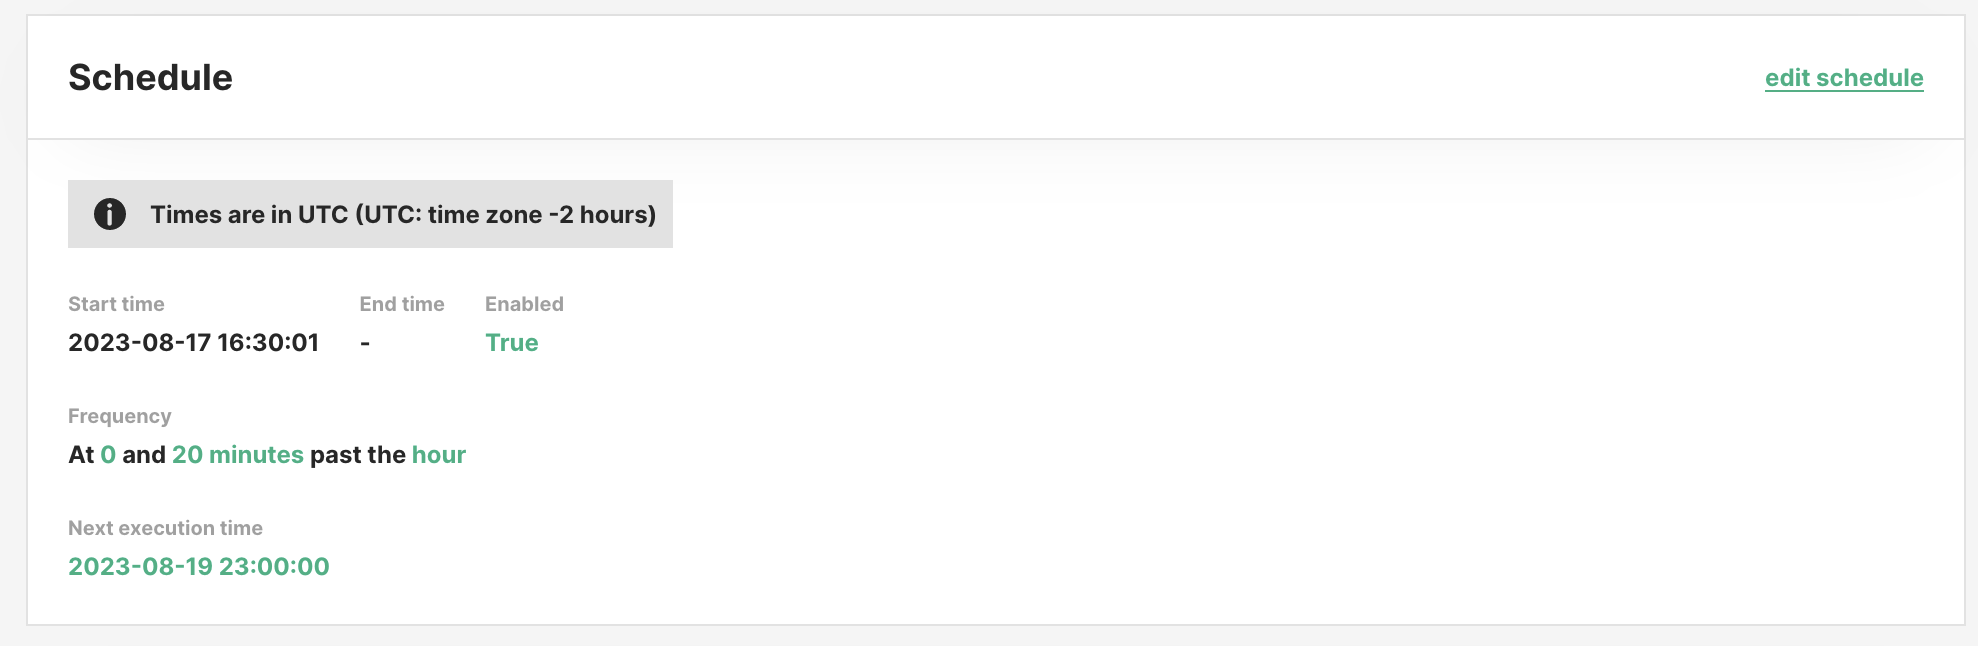
In the job overview you can see the current scheduling configuration, whether it is enabled, and when the next execution is planned for.
All times are in UTC.
Scheduling fields#
The Schedule form exposes these fields for controlling the data window, concurrency and catch-up behaviour:
| Field | Default | Description |
|---|---|---|
max_active_runs | 1 | Upper bound on concurrent executions for this job. |
start_time_offset_seconds | null (last execution time) | null → HOPS_START_TIME = previous cron fire. Positive integer → HOPS_START_TIME = previous fire − seconds (shifts the window earlier). Must be ≥ 0. |
end_time_offset_seconds | legacy; ignored | Kept on the DTO for backward compatibility. The backend always sets HOPS_END_TIME = HOPS_START_TIME + cron interval — consecutive runs tile the timeline with no gaps. |
catchup | false | If true, on recovery after a scheduler outage the runs for every missed interval are created. If false, only the most recent missed interval is created. |
skip_to_date | unset | When catchup=true, missed intervals strictly before this date are skipped during reconciliation. |
max_catchup_runs | unset | When catchup=true, caps how many missed intervals are replayed, keeping the most recent. |
Example — "process the previous 25 hours, not the previous hour"#
Defaults give you the natural cron interval ([previous fire, current fire)). To process a 25-hour trailing window every hour (e.g. to include a little overlap for late-arriving data), shift start 24 hours earlier — the end stays at the current fire because it's start + cron interval = start + 1 h:
start_time_offset_seconds = 25 * 3600   # HOPS_START_TIME = previous fire − 25 h
# end_time_offset_seconds is ignored; HOPS_END_TIME = HOPS_START_TIME + 1 h
At 11:00 UTC on an hourly schedule the container sees HOPS_START_TIME = 09:00 (previous day) and HOPS_END_TIME = 10:00 (previous day).
Example — catchup=false after a 6-hour outage#
With an hourly schedule and catchup=false, if the scheduler is unreachable from 00:00 to 06:00, on recovery the scheduler creates one execution — the 06:00 interval — not six. This matches Airflow's catchup_by_default=False semantics.
Example — bounded replay#
With catchup=true, max_catchup_runs=24 and a 1-week outage on an hourly schedule, only the most recent 24 missed intervals are replayed; older ones are dropped.
Disable / enable a schedule#
You can pause a schedule to prevent further executions. When re-enabled, the next fire uses the current time as the starting point (pause is not the same as an outage — paused time is not considered "missed").
Use skip_to_date (advanced) if you want a paused-and-re-enabled schedule with catchup=true to skip over the pause window.
Delete a schedule#
You can remove the schedule for a job using the UI and by clicking on the trash icon on the schedule section of the job overview. If you re-schedule a job after having deleted the previous schedule, even with the same options, previous scheduled executions are not considered.
Python API#
from datetime import UTC, datetime

import hopsworks


project = hopsworks.login()
job = project.get_job_api().get_job("my_feature_pipeline")

# Defaults (None, None): HOPS_START_TIME = previous cron fire (last execution time),
# HOPS_END_TIME = cron fire time. Adapts to any cron — hourly gives the last hour,
# daily gives the last day, etc.
job.schedule(
    cron_expression="0 0 * ? * * *",
    start_time=datetime(2026, 1, 1, tzinfo=UTC),
)

# Shift the window 1 hour earlier so each hourly run sees the previous-to-previous
# hour. HOPS_END_TIME is always HOPS_START_TIME + cron interval (1 h here), so the
# window remains 1 hour wide — only the anchor moves.
job.schedule(
    cron_expression="0 0 * ? * * *",
    start_time_offset_seconds=3600,  # previous fire − 1 h
    catchup=True,
    max_active_runs=2,
    max_catchup_runs=24,
)

# Inspect
schedule = job.job_schedule
print(schedule.cron_expression, schedule.catchup, schedule.max_active_runs)
print(schedule.next_execution_date_time)

# Remove
job.unschedule()
See also Batch feature pipelines for one-shot backfill runs and the Job.run(start_time=..., end_time=...) API.
Differences from Apache Airflow#
Hopsworks follows the same data-interval model as Airflow: logical_date is the start of the data interval, data_interval_end is the cron fire time, runs are created at or after the interval end, and catchup controls whether missed intervals are replayed. However, a few behaviours differ — if you are coming from Airflow, these are the ones worth knowing.
First-run interval starts at start_date, not the next cron boundary#
If a schedule has start_date = 10:05 and an hourly cron firing on :00, Airflow aligns start_date forward to 11:00 and the first run has data_interval = [11:00, 12:00). Hopsworks clamps the previous fire to start_date, so the first run fires at 11:00 with data_interval = [10:05, 11:00) — a short first interval starting at start_date itself.
If that offset would break the first run's computation (for example, a job that expects full hourly windows), set start_date to a cron-aligned time.
Manual runs don't automatically get a data interval#
Airflow always fills a data interval for manually triggered DagRuns via infer_manual_data_interval. Hopsworks sets HOPS_LOGICAL_DATE / HOPS_START_TIME / HOPS_END_TIME on a manual run only if you explicitly pass them — via the UI's Run with time window dialog, the Python job.run(start_time=..., end_time=...) kwargs, or the JSON execution endpoint. A plain "Run" with no time window leaves the env vars unset.
This keeps the contract honest: a manual one-off either processes a specific window (opt in) or processes "whatever your code defines, independent of any window". It does mean job code shouldn't assume HOPS_START_TIME is always present — check for the var and fall back as appropriate.
Per-tick draining vs. one-per-loop#
Airflow's scheduler creates at most one DagRun per DAG per loop iteration, to keep many DAGs progressing in parallel. The Hopsworks scheduler will drain up to 20 past intervals for one schedule in a single timer tick (each tick is ~1 minute), then move on. In practice this means a schedule with a large backlog catches up in batches of 20 per minute rather than one per minute, while not blocking other schedules for more than one tick.
You typically don't observe this unless catchup=true after a long outage: expect the backlog to drain at ~20 intervals/minute per schedule, not one.
No DST fold-hour handling#
Airflow treats cron schedules as timezone-aware and has explicit logic for the DST "fold hour" when clocks go back. Hopsworks evaluates schedules in UTC. If you need non-UTC semantics, express your cron in UTC — there is no equivalent of Airflow's timezone-aware timetable for DST. For almost all users this is a non-issue.
Reconciliation on schedule create / update, not just outage#
In Airflow, catchup=true kicks in only when the scheduler detects past intervals at runtime. Hopsworks also replays missed intervals at creation time — if you create a new schedule with catchup=true and a start_date in the past, past intervals run immediately rather than being implicitly skipped by the first-fire advancement. The same happens if you flip catchup from false to true, or re-enable a paused catchup=true schedule.
This matches what most users expect ("turn on catchup ⇒ see the backfill"), but is a deliberate divergence — Airflow's equivalent behaviour is "the next DagRun after now is the earliest missed one, and subsequent loops fill in the rest over time".
Leader election via Payara, not advisory locks#
Airflow coordinates multiple schedulers with PostgreSQL advisory locks (pg_try_advisory_xact_lock). Hopsworks uses Payara's cluster primary election: the scheduler timer only fires on the primary node. Reconciliation happens on the first primary-owned tick after startup. Correctness is backed at the application layer — executeWithCron seeds startingActive = countActiveByJob(...) once per tick and tracks an additive firedThisTick counter, which is monotonic and independent of RonDB COUNT read-after-write lag. This replaces an earlier (job_id, logical_date) unique index that was too strict — it blocked legitimate retry / manual-rerun / re-backfill flows that share a logical_date.