Jupyter notebooks#
Developing with Jupyter notebooks is provided as a service in Hopsworks as part of the compute section of a project which you can access from the main project menu. The image below shows the Jupyter service page in Hopsworks.
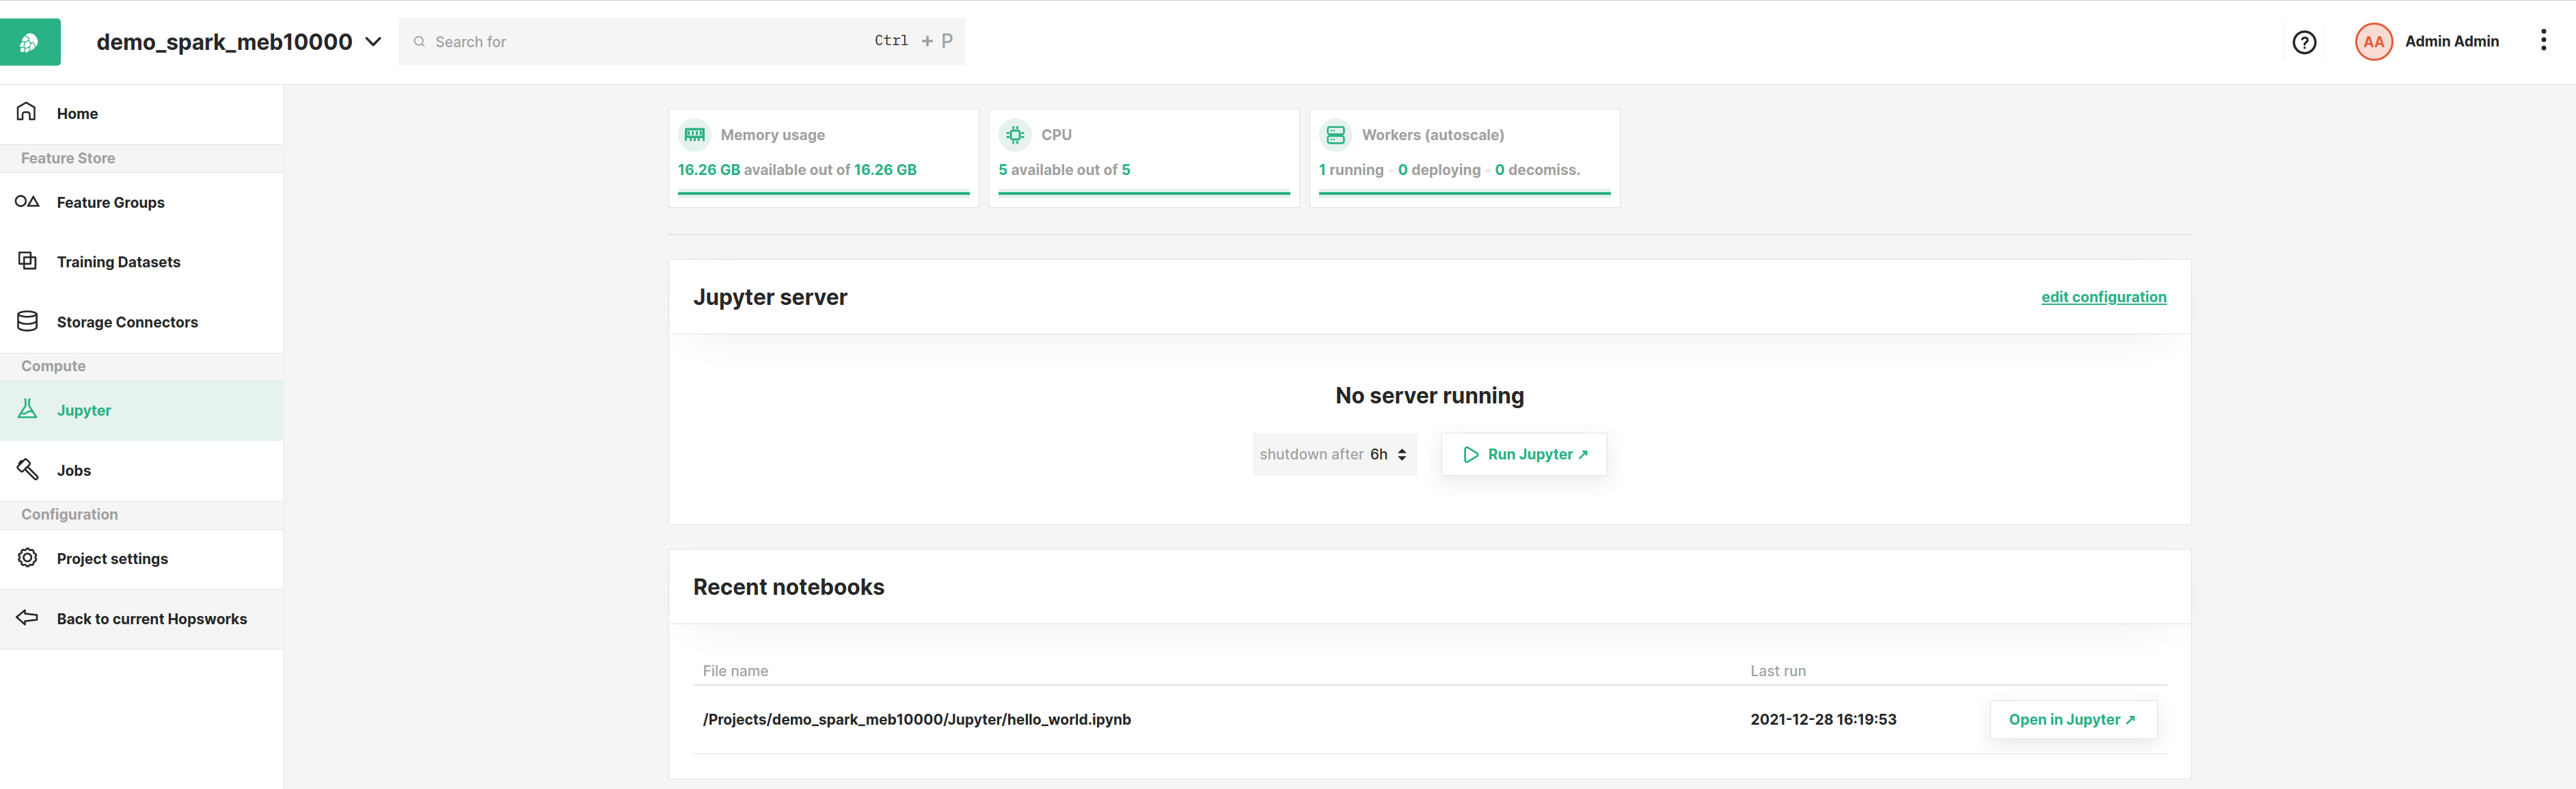
From this page, you can configure various options and settings to start Jupyter with as described in the sections below.
Configuration and start#
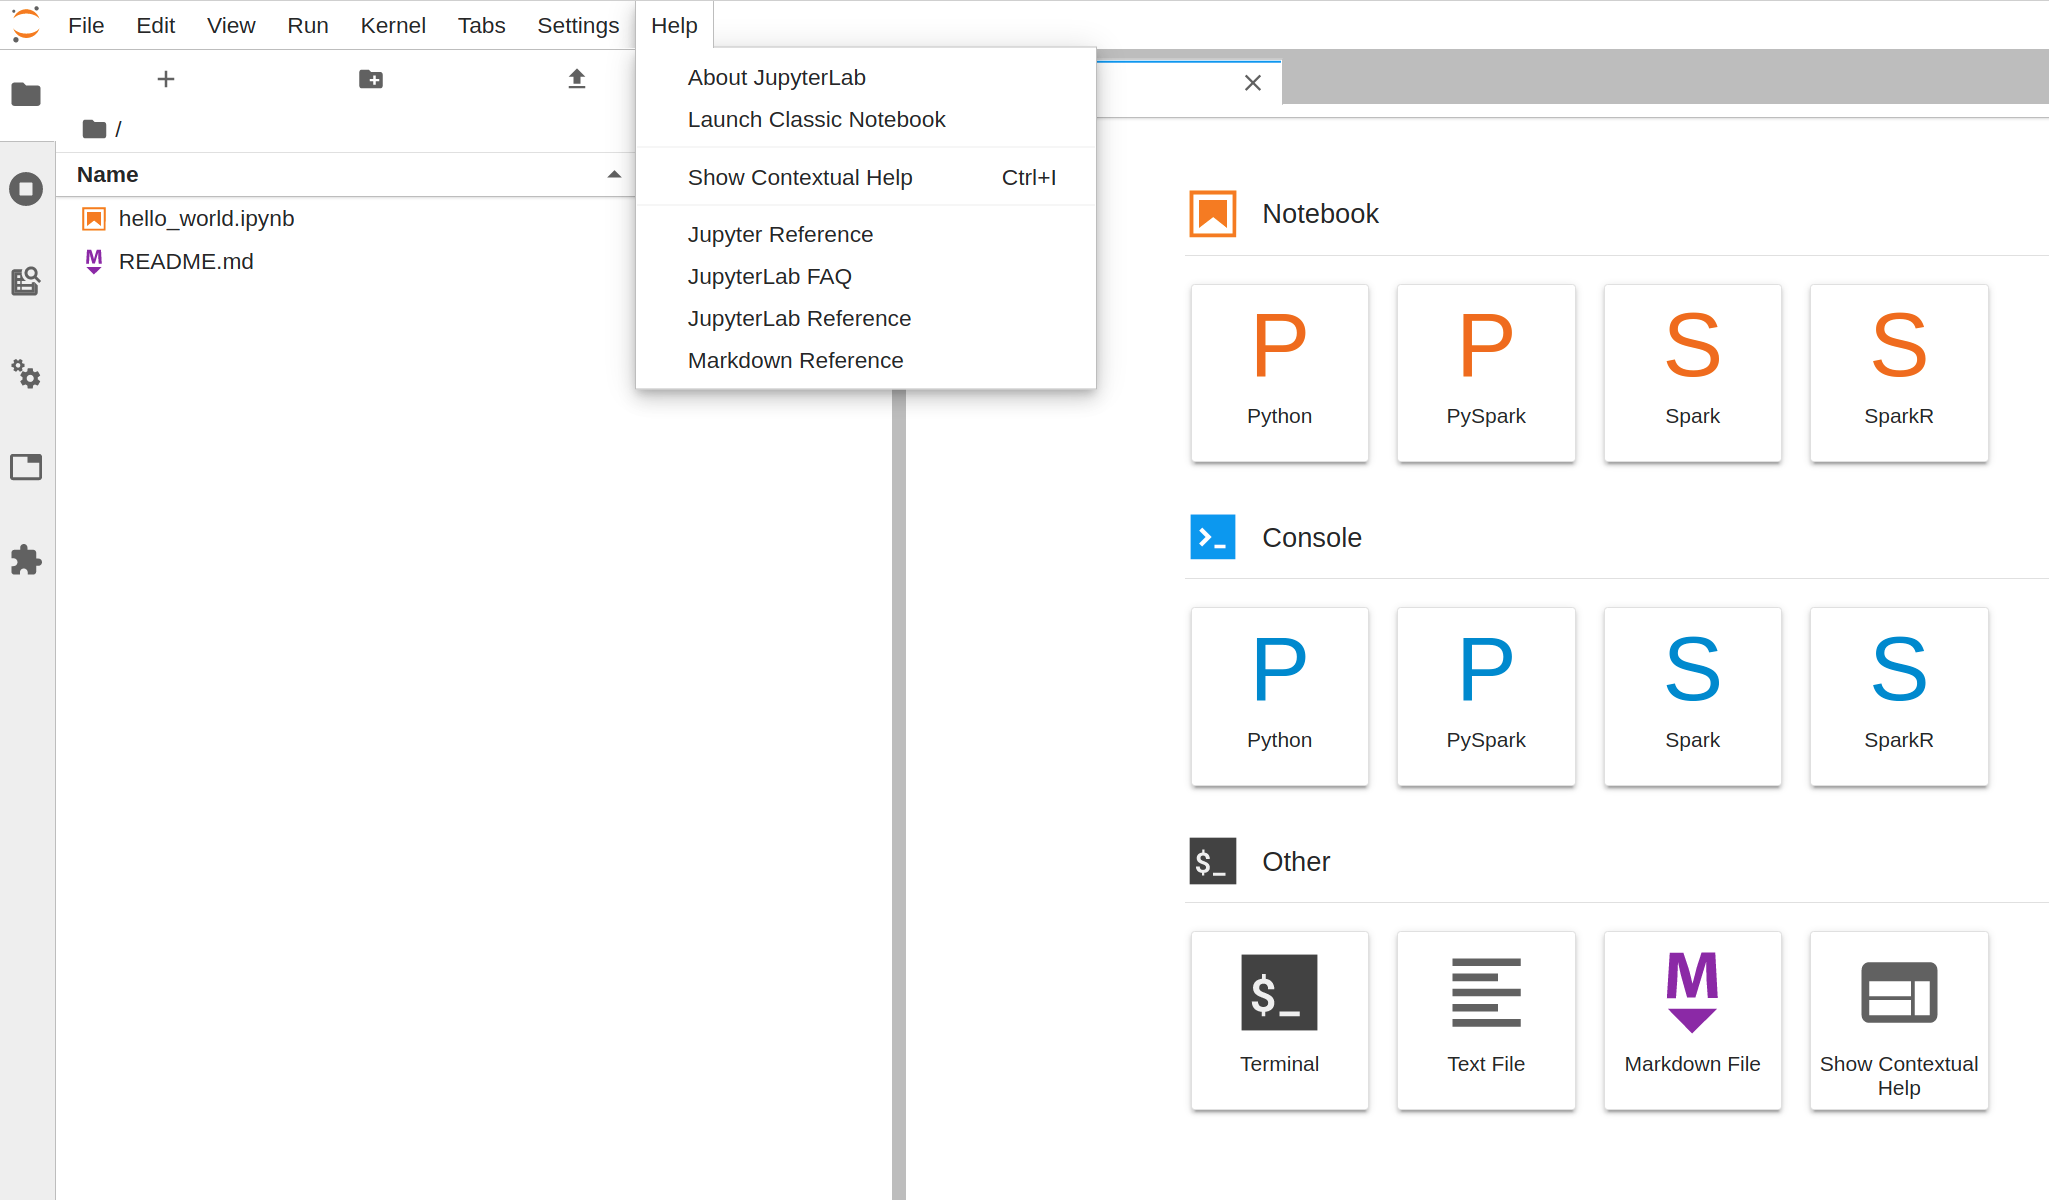
Hopsworks supports both JupyterLab and classic Jupyter as Jupyter development frameworks. Clicking Run Jupyter ,
will start JupyterLab by default. You can then open classic Jupyter from within JupyterLab by navigating to Help - Launch Classic Notebook.
Hopsworks will attempt to open JupyterLab in a new browser tab. You can also click the Open Jupyter button to
open Jupyter in a new tab if your browser is blocking this operation by default.
Jupyter server is using the same configuration options as the Jobs service to run notebooks. Currently, the Spark/PySpark
and Python configuration options are supported. For more information on how to set these options, see the Jobs section
and for more information on how to work with Spark and Jupyter in Hopsworks see the Jupyter + Spark on Hopsworks below.
If you would like to switch between configurations, you will have to shut down the running Jupyter server first.
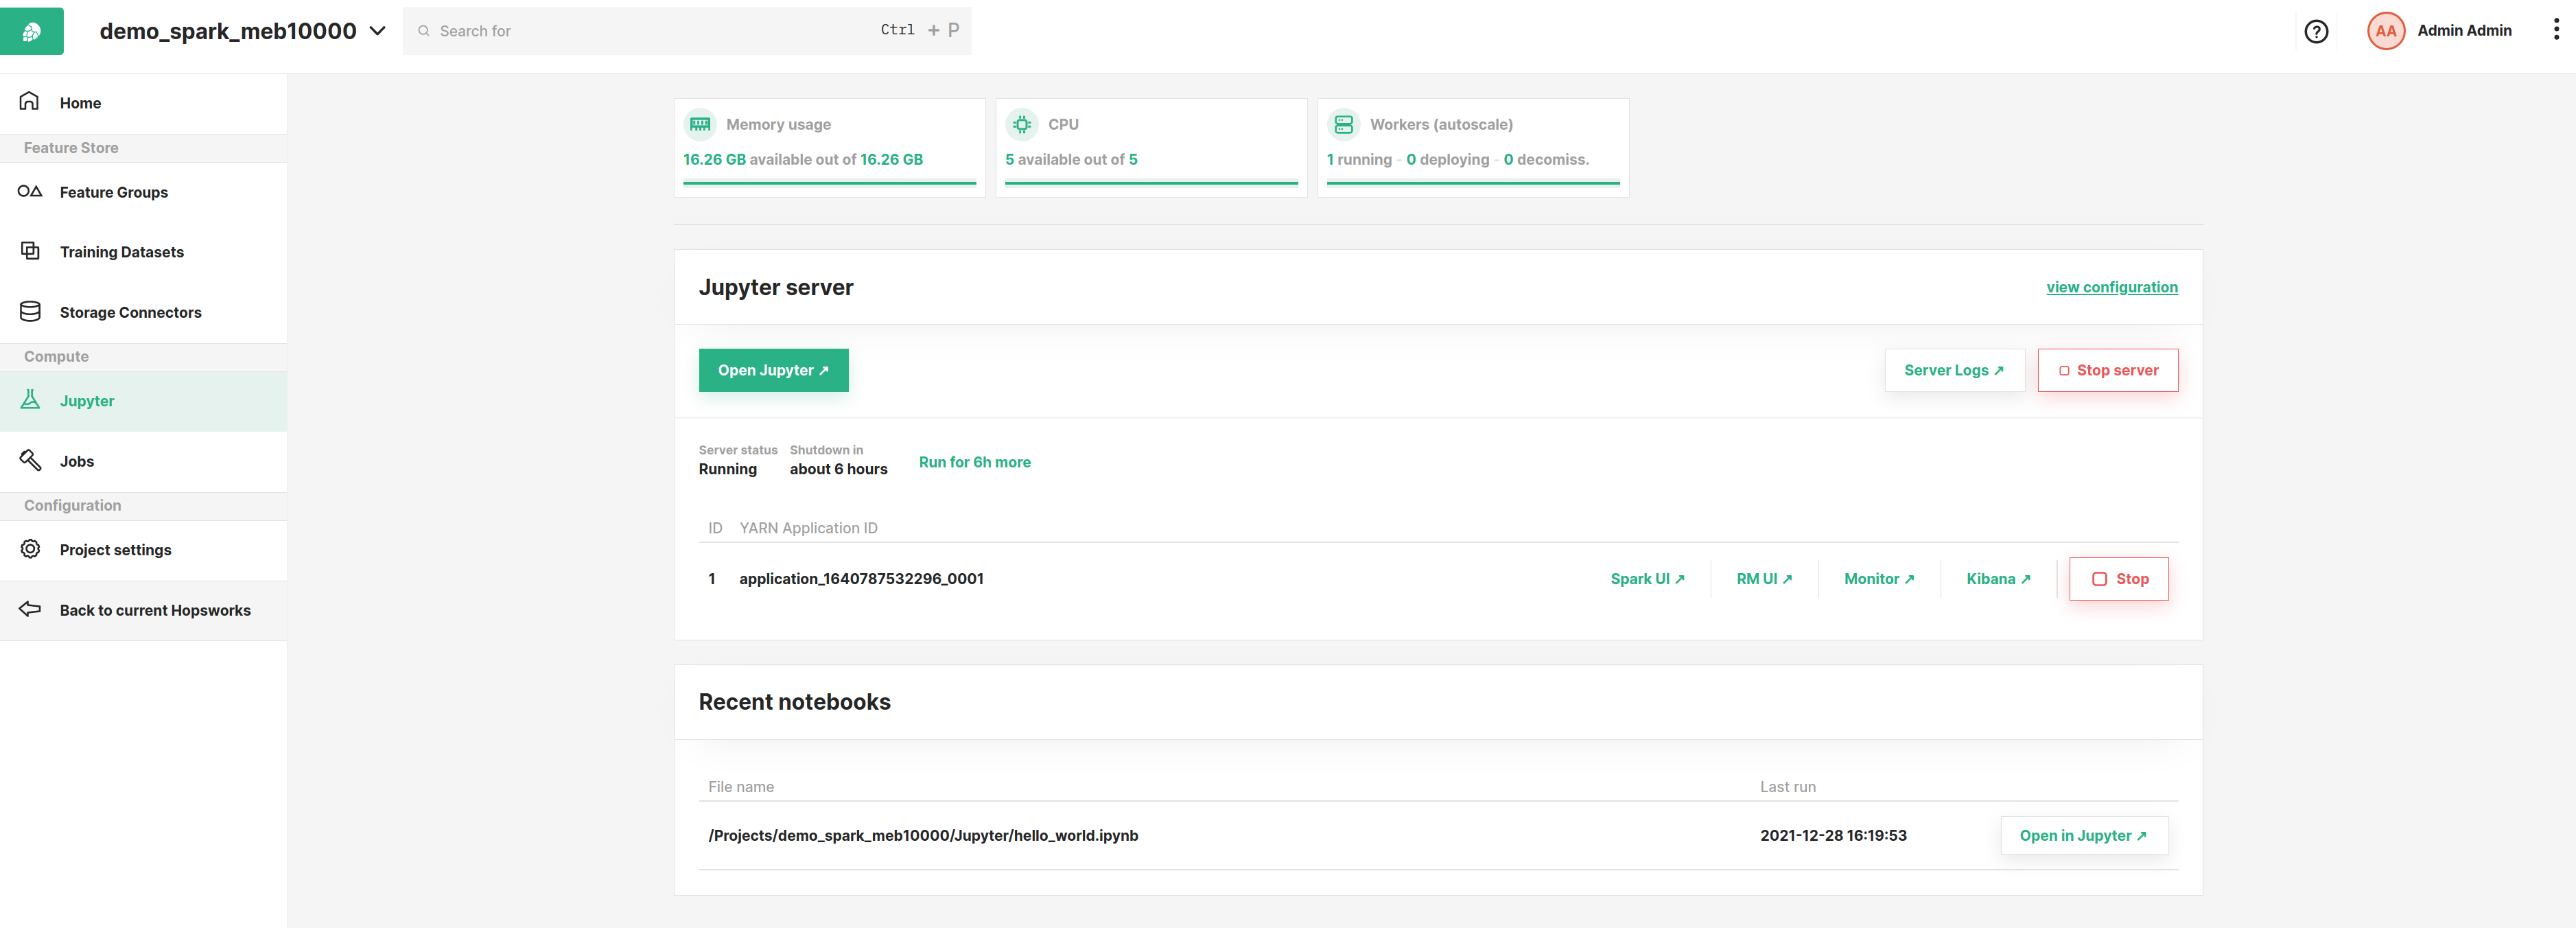
After starting a Spark/PySpark notebook, you can view monitoring and logging information as shown in the image below.
For Spark/PySpark notebooks, this information is identical to the information provided when running Spark/PySpark jobs
from the Jobs dashboard (see Jobs section for details).
You can start multiple notebooks from the same Jupyter server, however keep in mind that for each notebook new compute resources will be allocated based on the configuration options Jupyter was started with.
Recent notebooks#
When you run a notebook, its Jupyter configuration is stored and attached to the notebook.
You can use this configuration later to start the Jupyter notebook directly from the Jupyter dashboard by clicking
Open in Jupyter under the Recent notebooks section of the dashboard. For example, in the image above you can see a
notebook called hello_world.ipynb which you can start directly. Hopsworks will use the Jupyter server configuration the
notebook ran with last time.
Logs#
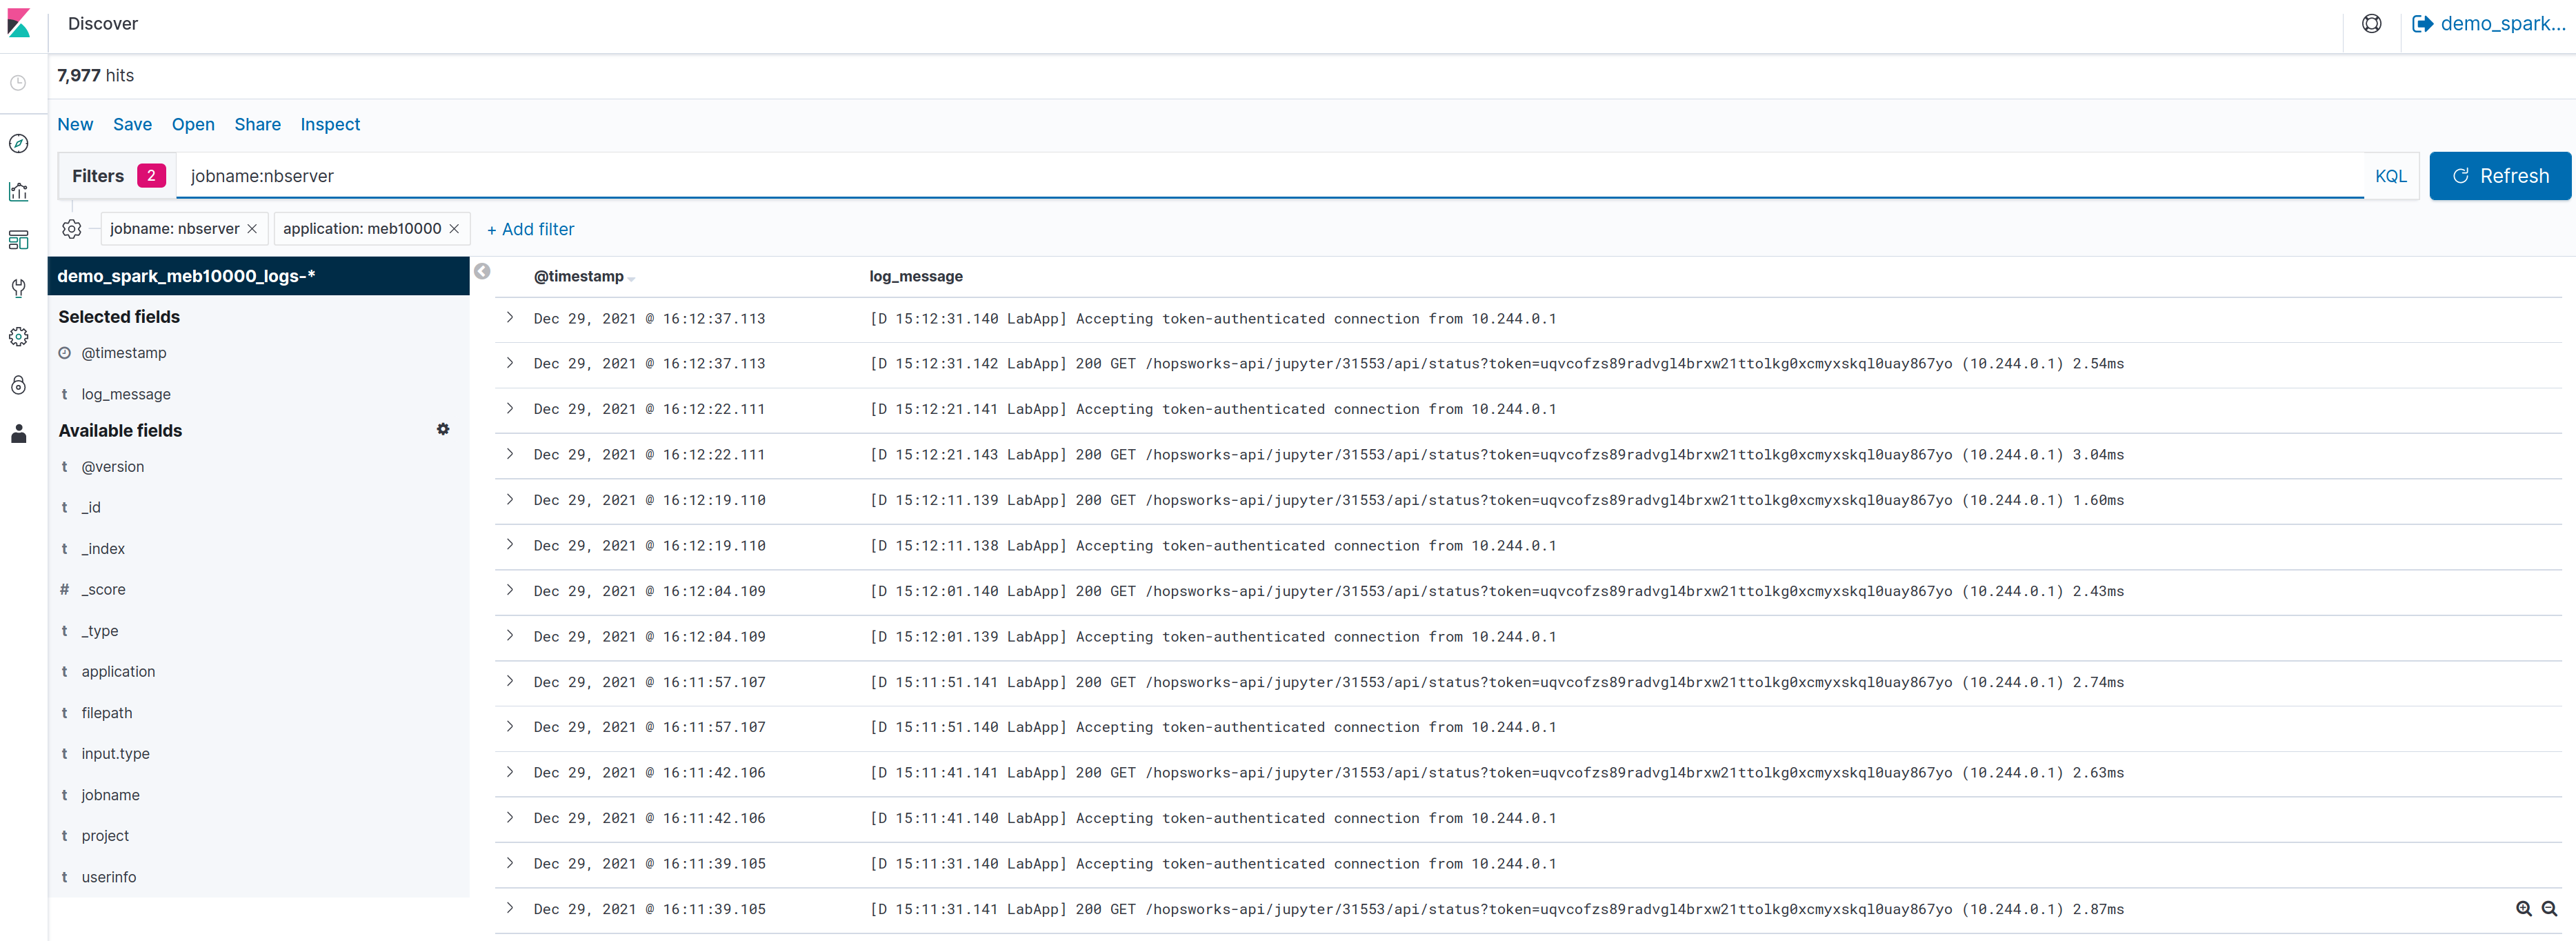
It can be useful to look at the Jupyter server logs in case of errors as they can provide more details compared to the
error notification that is shown in the Jupyter dashboard. For example if Jupyter cannot start, simply click the
Server Logs button next to the Start or Stop button in the Jupyter dashboard.
This will open a new tab (make sure your browser does not block the new tab!) with the Jupyter logs as shown in the figure below.
Auto-shutdown#
Jupyter server is configured to automatically shut down after 6 hours. This functionality enables you to avoid excessive use of compute resources. You can modify the shut down limit by adding 6-hour chunks to the shutdown time. The dashboard also shows you how much time is currently left before the Jupyter server shuts down.
Debug Jupyter installation#
Jupyter is installed in the Python environment of your project. This means that if a dependency of Jupyter is removed,
or an incorrect version is installed it may not work properly. If the Python environment ends up in a state with
conflicting libraries installed then an alert will be shown in the Python libraries page under the Project settings menu.
Jupyter + Spark on Hopsworks#
As a user, you will just interact with the Jupyter notebooks, but below you can find a detailed explanation of the technology behind the scenes.
When using Jupyter on Hopsworks, a library called sparkmagic_ is used to interact with the Hopsworks cluster.
When you create a Jupyter notebook on Hopsworks, you first select a kernel. A kernel is simply a program that
executes the code that you have in the Jupyter cells, you can think of it as a REPL-backend to your jupyter notebook that acts as a frontend.
Sparkmagic works with a remote REST server for Spark, called livy, running inside the Hopsworks cluster. Livy is an interface that Jupyter-on-Hopsworks uses to interact with the cluster. When you run Jupyter cells using the pyspark kernel, the kernel will automatically send commands to livy in the background for executing the commands on the cluster. Thus, the work that happens in the background when you run a Jupyter cell is as follows:
- The code in the cell will first go to the kernel.
- Next, the kernel sends the code as an HTTP REST request to Livy.
- When receiving the REST request, Livy executes the code on the Spark driver in the cluster.
- If the code is regular python/scala/R code, it will run inside a python/scala/R interpreter on the Spark driver.
- If the code includes a spark command, using the spark session, a spark job will be launched on the cluster from the Spark driver.
- When the python/scala/R or spark execution is finished, the results are sent back from Livy to the pyspark kernel/sparkmagic.
- Finally, the pyspark kernel displays the result in the Jupyter notebook.
The three Jupyter kernels we support on Hopsworks are:
- Spark, a kernel for executing scala code and interacting with the cluster through spark-scala
- PySpark, a kernel for executing python code and interacting with the cluster through pyspark
- SparkR, a kernel for executing R code and interacting with the cluster through spark-R
By default, all files and folders created by Spark are group writable (i.e umask=007). If you want to change this
default umask you can add additional spark property spark.hadoop.fs.permissions.umask-mode=<umask> in
the Properties textbox of the Jupyter server configuration, before starting the jupyter server.
In the rest of this tutorial we will focus on the pyspark kernel.
PySpark notebooks#
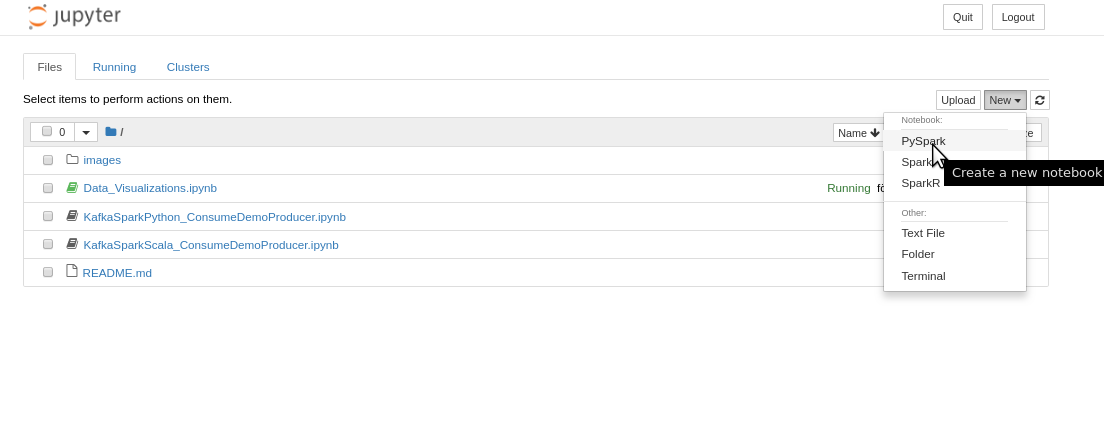
After you have started the Jupyter notebook server, you can create a PySpark notebook from JupyterLab:
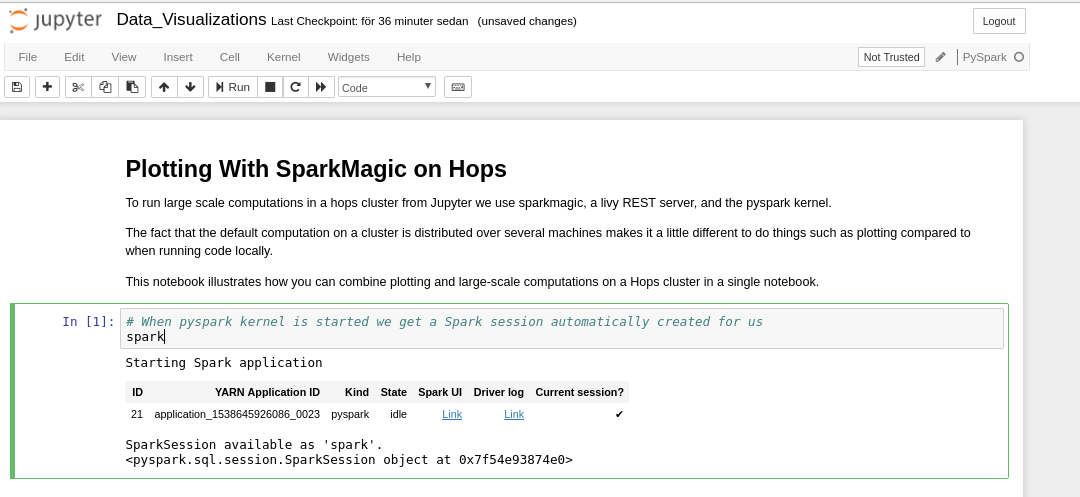
When you execute the first cell in a PySpark notebook, the Spark session is automatically created, referring to the Hopsworks cluster.
The notebook will look just like any Python notebook, with the difference that the python interpreter is actually running on a Spark driver in the cluster. You can execute regular Python code:

Since you are executing on the Spark driver, you can also run applications on spark executors in the cluster, the Spark session is available as the variable spark in the notebook:

When you execute a cell in Jupyter that starts a Spark job, you can go back to the Hopsworks Jupyter service dashboard where you can access the Spark web UI and other monitoring and logging tools.
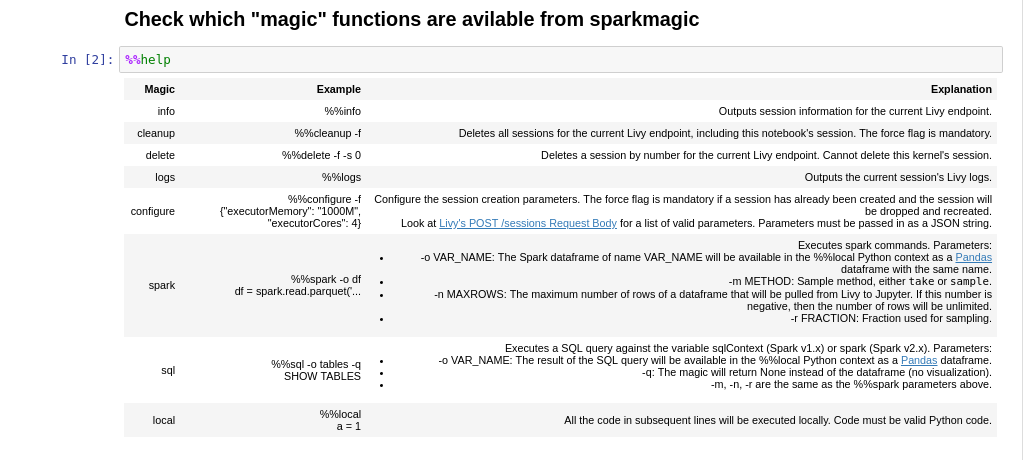
In addition to having access to a regular Python interpreter as well as the spark cluster, you also have access to
magic commands provided by sparkmagic. You can view a list of all commands by executing a cell with %%help:
Plotting with PySpark Kernel#
So far throughout this tutorial, the Jupyter notebook have behaved more or less identical to how it does if you start the notebook server locally on your machine using a Python kernel, without access to a Hopsworks cluster. However, there is one main difference from a user-standpoint when using PySpark notebooks instead of regular Python notebooks, this is related to plotting.
Since the code in a PySpark notebook is executed remotely, in the Spark cluster, regular Python plotting will not work.
What you can do however, is to use sparkmagic to download your remote spark dataframe as a local pandas dataframe and
plot it using matplotlib, seaborn, or sparkmagic's built-in visualization.
To achieve this we use the magics: %%sql, %%spark, and %%local. The steps to do plotting using a PySpark notebook
are illustrated below. Using this approach, you can have large scale cluster computation and plotting in the same notebook.
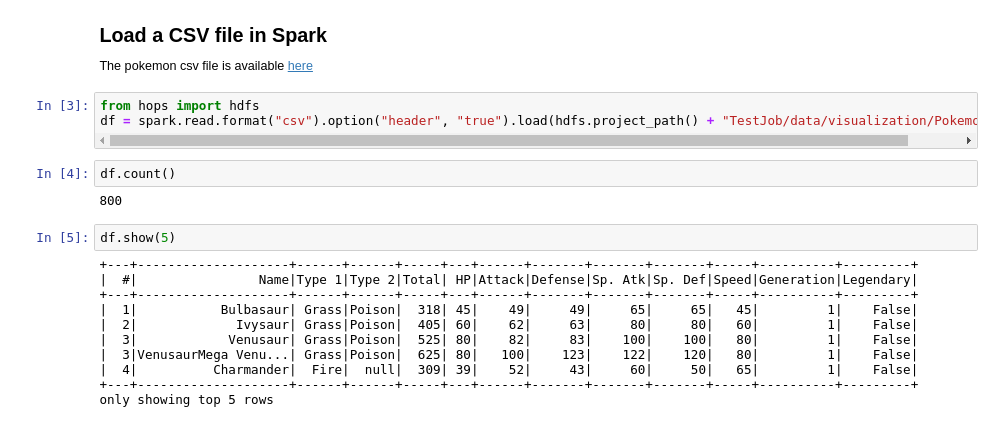
Step 1 : Create a remote Spark Dataframe:
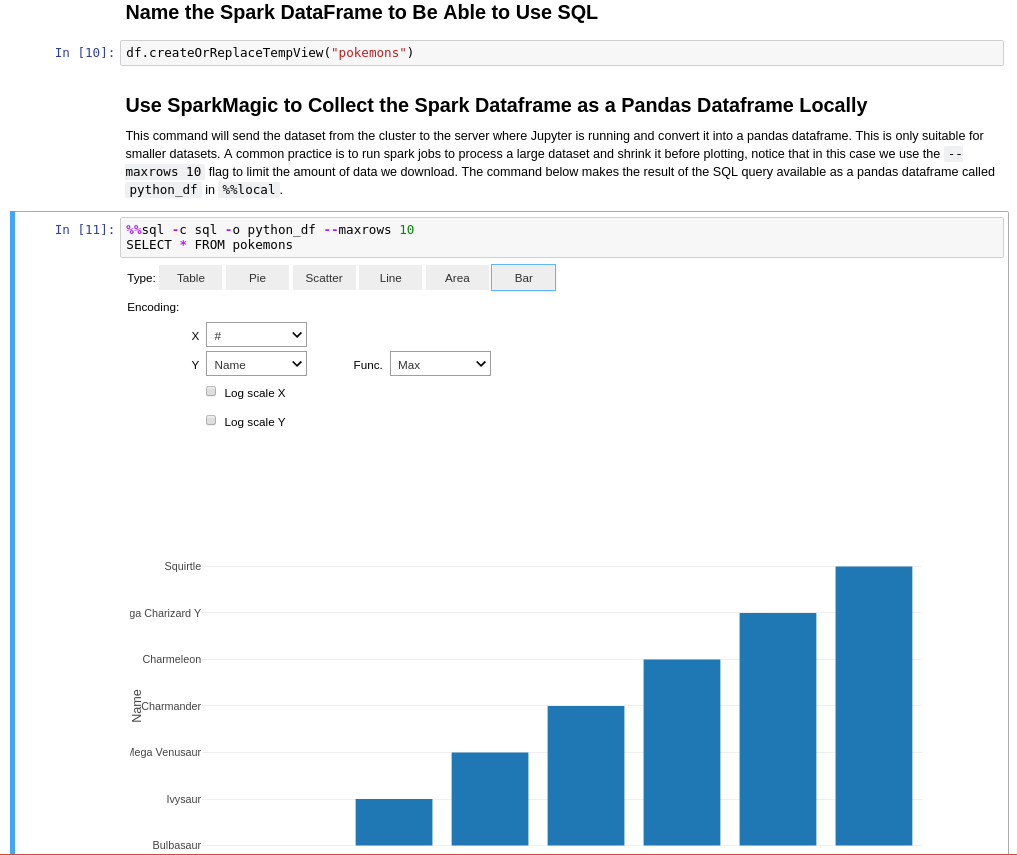
Step 2 : Download the Spark Dataframe to a local Pandas Dataframe using %%sql or %%spark: Note: you should not try to download large spark dataframes for plotting. When you plot a dataframe, the entire dataframe must fit into memory, so add the flag –maxrows x to limit the dataframe size when you download it to the local Jupyter server for plotting.
Using %%sql:
Using %%spark:
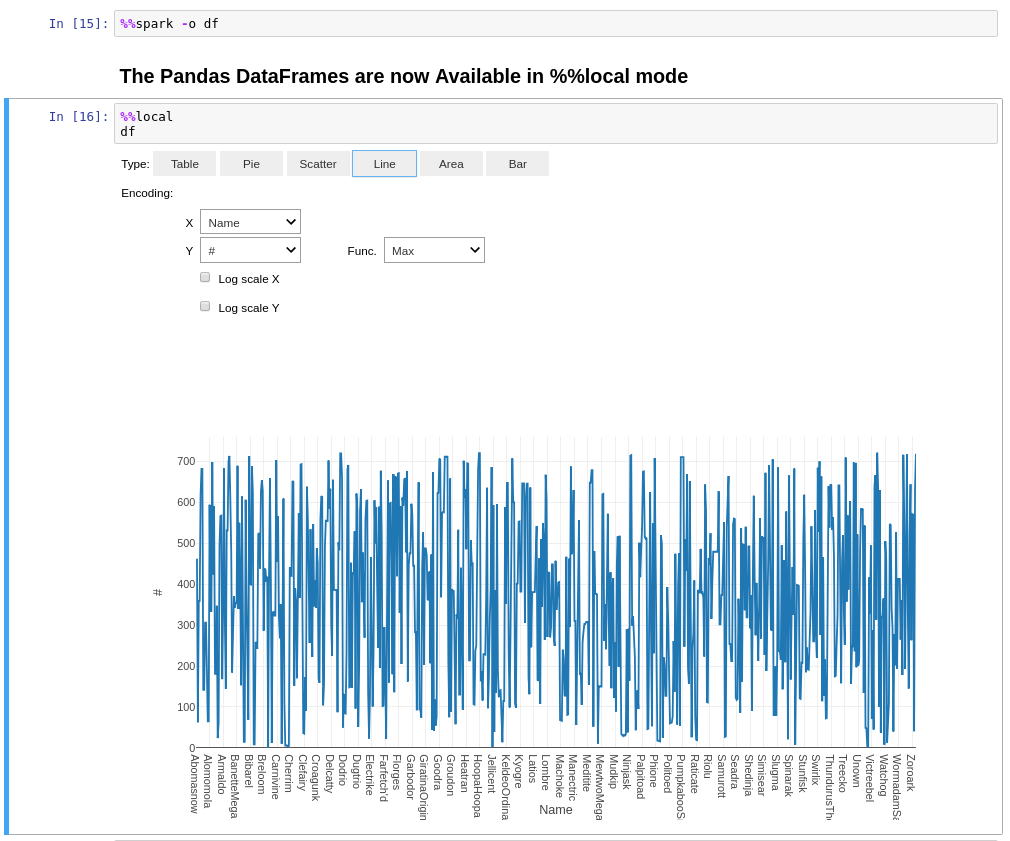
Step 3 : Plot the pandas dataframe using Python plotting libraries:
When you download a dataframe from Spark to Pandas with sparkmagic, it gives you a default visualization of the data
using autovizwidget, as you saw in the screenshots above. However, sometimes you want custom plots, using matplotlib or seaborn.
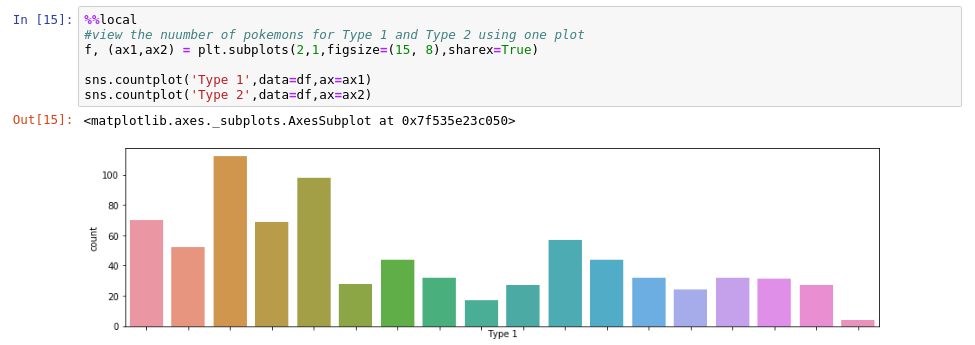
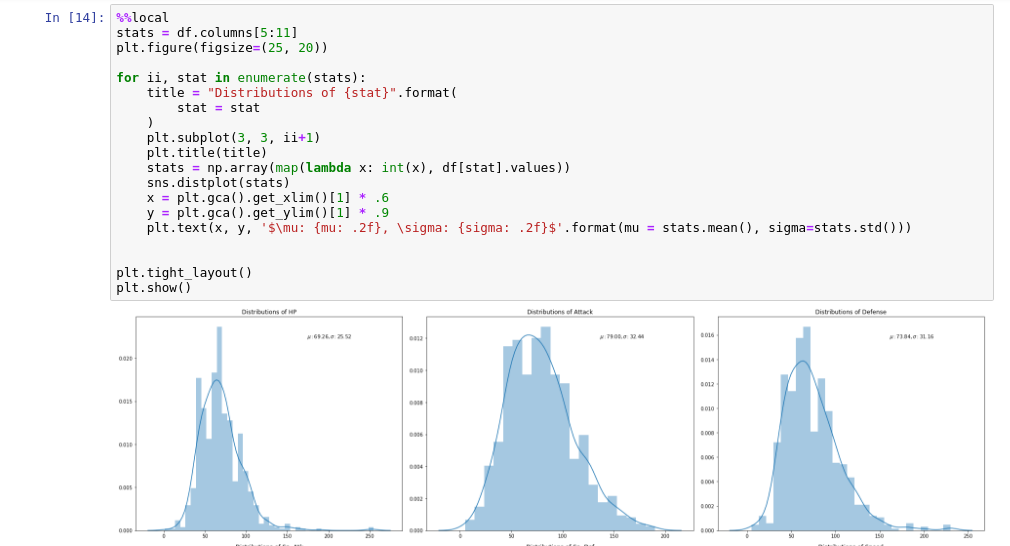
To do this, use the sparkmagic %%local to access the local pandas dataframe and then you can plot as usual.

Want to Learn More?#
We provide a large number of example notebooks available at examples.hopsworks.ai with the notebook files themselves being hosted at the Hopsworks examples GitHub repository. Go to Hopsworks and try them out!