Integration with Amazon EKS and Amazon ECR#
This guide shows how to create a cluster in Hopsworks.ai with integrated support for Amazon Elastic Kubernetes Service (EKS) and Amazon Elastic Container Registry (ECR). So that Hopsworks can launch Python jobs, Jupyter servers, and ML model servings on top of Amazon EKS.
Warning
In the current version, we don't support sharing EKS clusters between Hopsworks clusters. That is, an EKS cluster can be only used by one Hopsworks cluster.
Step 1: Create an EKS cluster on AWS#
If you have an existing EKS cluster, skip this step and go directly to Step 2.
Amazon provides two getting started guides using AWS management console or eksctl to help you create an EKS cluster.
The easiest way is to use the eksctl command.
Step 1.1: Installing eksctl, aws, and kubectl#
Follow the prerequisites section in getting started with eksctl to install aws, eksctl, and kubectl.
Step 1.2: Create an EKS cluster using eksctl#
You can create a sample EKS cluster with the name my-eks-cluster using Kubernetes version 1.17 with 2 managed nodes in the us-east-2 region by running the following command. For more details on the eksctl usage, check the eksctl documentation.
eksctl create cluster --name my-eks-cluster --version 1.17 --region us-east-2 --nodegroup-name my-nodes --nodes 2 --managed
Output:
[ℹ]  eksctl version 0.26.0
[ℹ]  using region us-east-2
[ℹ]  setting availability zones to [us-east-2b us-east-2a us-east-2c]
[ℹ]  subnets for us-east-2b - public:192.168.0.0/19 private:192.168.96.0/19
[ℹ]  subnets for us-east-2a - public:192.168.32.0/19 private:192.168.128.0/19
[ℹ]  subnets for us-east-2c - public:192.168.64.0/19 private:192.168.160.0/19
[ℹ]  using Kubernetes version 1.17
[ℹ]  creating EKS cluster "my-eks-cluster" in "us-east-2" region with managed nodes
[ℹ]  will create 2 separate CloudFormation stacks for cluster itself and the initial managed nodegroup
[ℹ]  if you encounter any issues, check CloudFormation console or try 'eksctl utils describe-stacks --region=us-east-2 --cluster=my-eks-cluster'
[ℹ]  CloudWatch logging will not be enabled for cluster "my-eks-cluster" in "us-east-2"
[ℹ]  you can enable it with 'eksctl utils update-cluster-logging --region=us-east-2 --cluster=my-eks-cluster'
[ℹ]  Kubernetes API endpoint access will use default of {publicAccess=true, privateAccess=false} for cluster "my-eks-cluster" in "us-east-2"
[ℹ]  2 sequential tasks: { create cluster control plane "my-eks-cluster", 2 sequential sub-tasks: { no tasks, create managed nodegroup "my-nodes" } }
[ℹ]  building cluster stack "eksctl-my-eks-cluster-cluster"
[ℹ]  deploying stack "eksctl-my-eks-cluster-cluster"
[ℹ]  building managed nodegroup stack "eksctl-my-eks-cluster-nodegroup-my-nodes"
[ℹ]  deploying stack "eksctl-my-eks-cluster-nodegroup-my-nodes"
[ℹ]  waiting for the control plane availability...
[✔]  saved kubeconfig as "/Users/maism/.kube/config"
[ℹ]  no tasks
[✔]  all EKS cluster resources for "my-eks-cluster" have been created
[ℹ]  nodegroup "my-nodes" has 2 node(s)
[ℹ]  node "ip-192-168-21-142.us-east-2.compute.internal" is ready
[ℹ]  node "ip-192-168-62-117.us-east-2.compute.internal" is ready
[ℹ]  waiting for at least 2 node(s) to become ready in "my-nodes"
[ℹ]  nodegroup "my-nodes" has 2 node(s)
[ℹ]  node "ip-192-168-21-142.us-east-2.compute.internal" is ready
[ℹ]  node "ip-192-168-62-117.us-east-2.compute.internal" is ready
[ℹ]  kubectl command should work with "/Users/maism/.kube/config", try 'kubectl get nodes'
[✔]  EKS cluster "my-eks-cluster" in "us-east-2" region is ready
Once the cluster is created, eksctl will write the cluster credentials for the newly created cluster to your local kubeconfig file (~/.kube/config). To test the cluster credentials, you can run the following command to get the list of nodes in the cluster.
kubectl get nodes
Output:
NAME                                           STATUS   ROLES    AGE     VERSION
ip-192-168-21-142.us-east-2.compute.internal   Ready    <none>   2m35s   v1.17.9-eks-4c6976
ip-192-168-62-117.us-east-2.compute.internal   Ready    <none>   2m34s   v1.17.9-eks-4c6976
Step 2: Create an instance profile role on AWS#
You need to add permission to the instance profile you use for instances deployed by Hopsworks.ai to give them access to EKS and ECR. Go to the IAM service in the AWS management console, click Roles, search for your role, and click on it. Click on Add inline policy. Go to the JSON tab and replace the existing JSON permissions with the JSON permissions below..
{
    "Version": "2012-10-17",
    "Statement": [
        {
            "Sid": "AllowPullMainImages",
            "Effect": "Allow",
            "Action": [
                "ecr:GetDownloadUrlForLayer",
                "ecr:BatchGetImage"
            ],
            "Resource": [
                "arn:aws:ecr:*:*:repository/filebeat",
                "arn:aws:ecr:*:*:repository/base"
            ]
        },
        {
            "Sid": "AllowCreateRespositry",
            "Effect": "Allow",
            "Action": "ecr:CreateRepository",
            "Resource": "*"
        },
        {
            "Sid": "AllowPushandPullImages",
            "Effect": "Allow",
            "Action": [
                "ecr:GetDownloadUrlForLayer",
                "ecr:BatchGetImage",
                "ecr:CompleteLayerUpload",
                "ecr:UploadLayerPart",
                "ecr:InitiateLayerUpload",
                "ecr:DeleteRepository",
                "ecr:BatchCheckLayerAvailability",
                "ecr:PutImage",
                "ecr:ListImages",
                "ecr:BatchDeleteImage",
                "ecr:GetLifecyclePolicy",
                "ecr:PutLifecyclePolicy"
            ],
            "Resource": [
                "arn:aws:ecr:*:*:repository/*/filebeat",
                "arn:aws:ecr:*:*:repository/*/base"
            ]
        },
        {
            "Sid": "AllowGetAuthToken",
            "Effect": "Allow",
            "Action": "ecr:GetAuthorizationToken",
            "Resource": "*"
        },
        {
            "Sid": "AllowDescirbeEKS",
            "Effect": "Allow",
            "Action": "eks:DescribeCluster",
            "Resource": "arn:aws:eks:*:*:cluster/*"
        }
    ]
}
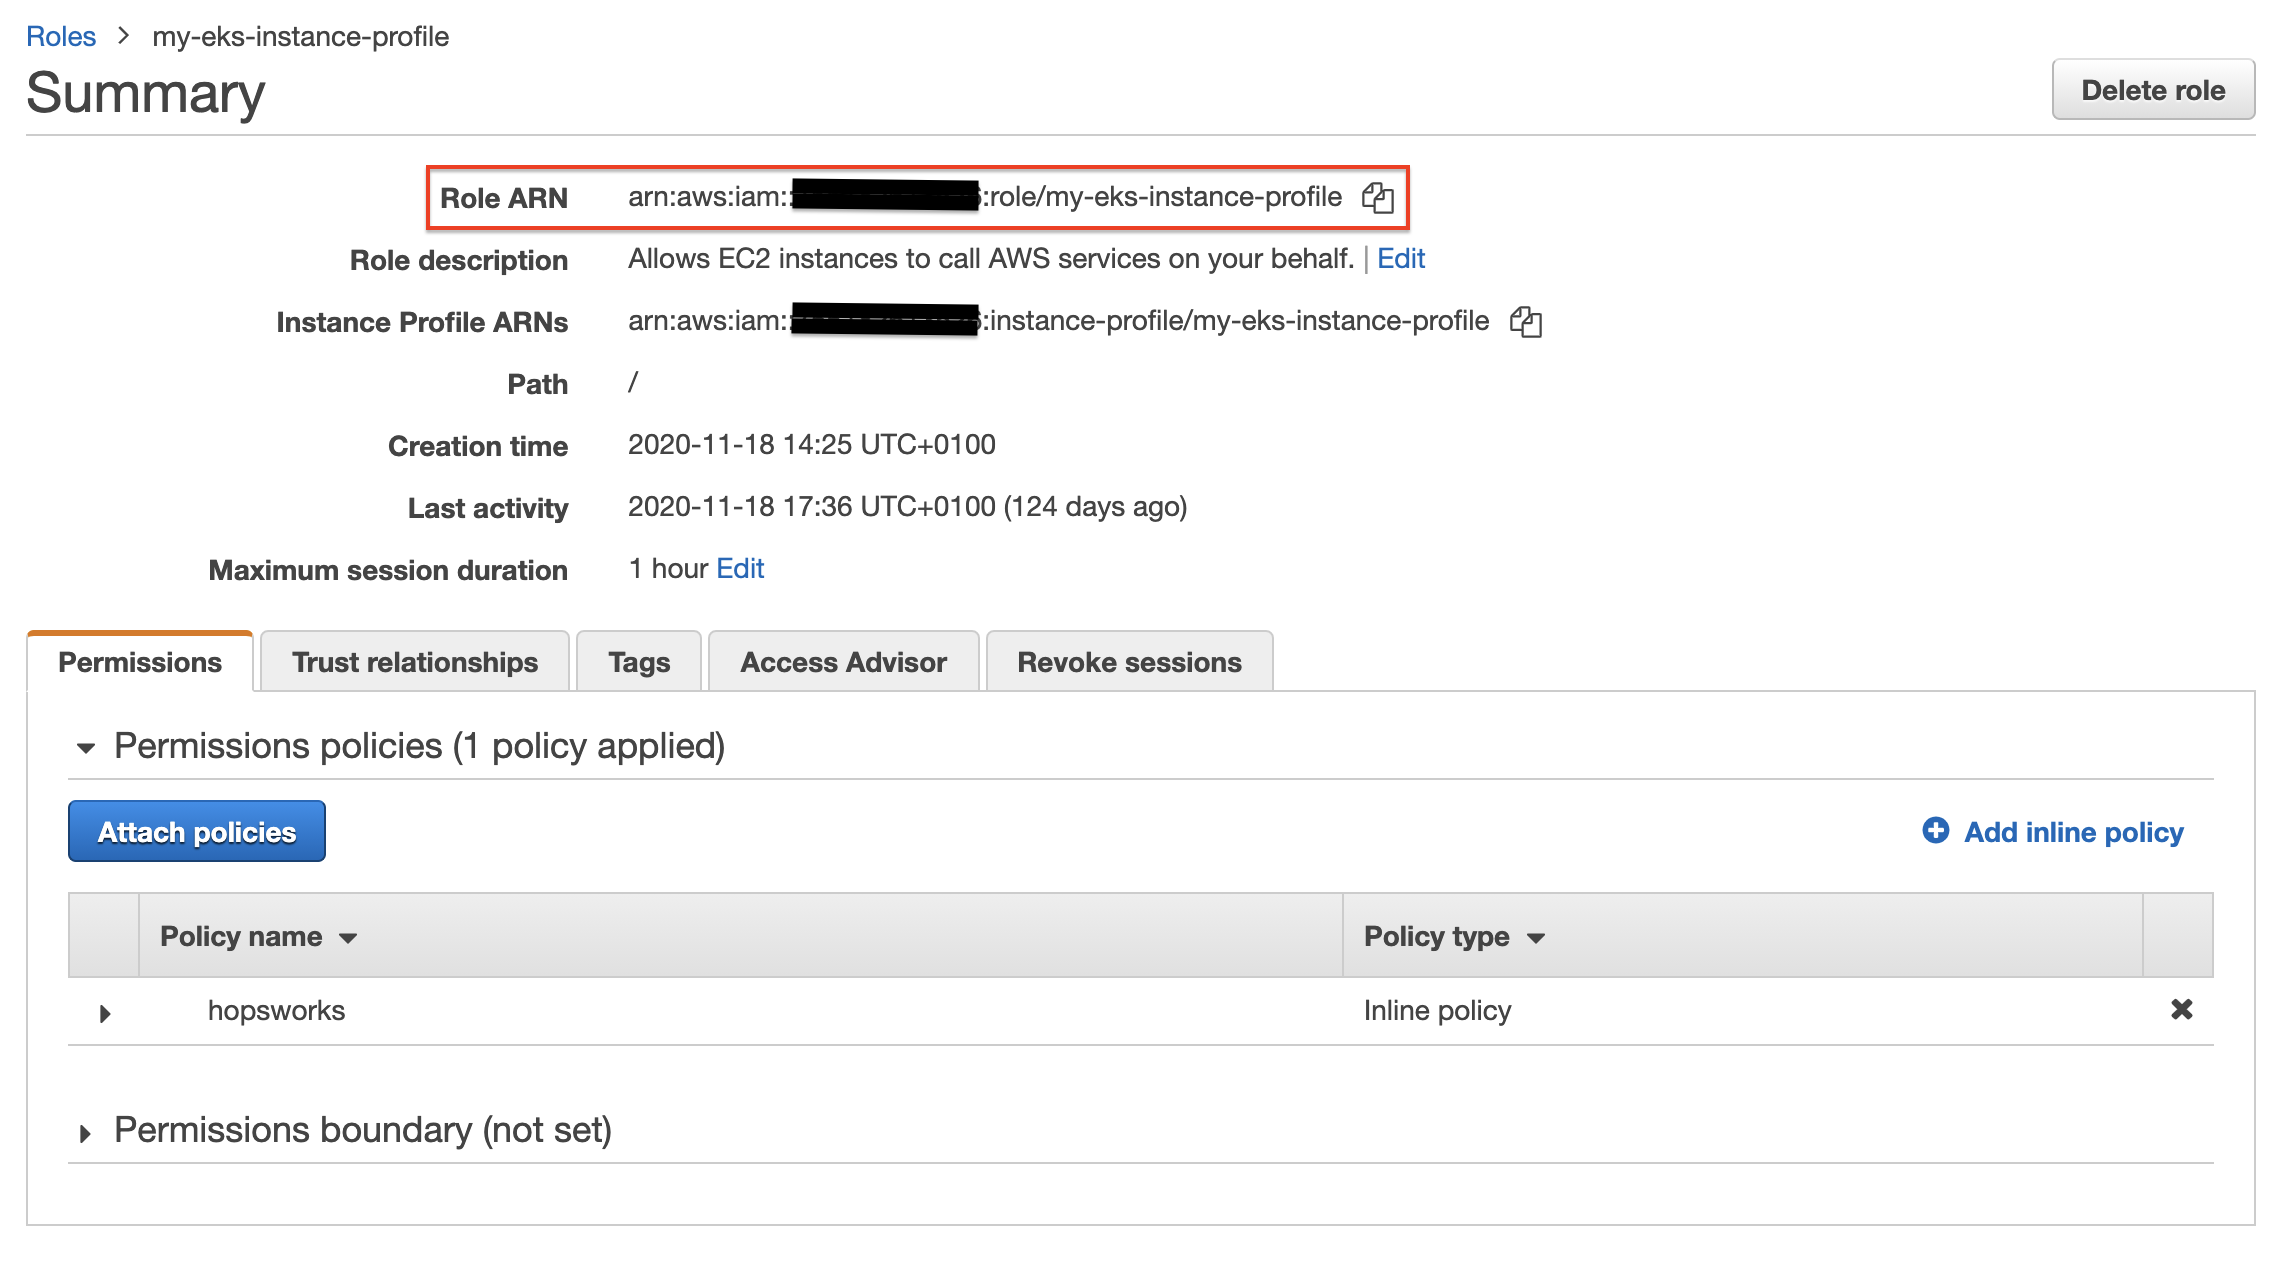
Click on Review policy. Give a name to your policy and click on Create policy.
Copy the Role ARN of your profile (not to be confused with the Instance Profile ARNs two lines bellow).
Step 3: Allow your role to use your EKS cluster#
You need to configure your EKS cluster to accept connections from the role you created above. This is done by using the following kubectl command. For more details, check Managing users or IAM roles for your cluster.
Note
The kubectl edit command uses the vi editor by default, however, you can override this behavior by setting KUBE_EDITOR to your preferred editor.
KUBE_EDITOR="vi" kubectl edit configmap aws-auth -n kube-system
Output:
# Please edit the object below. Lines beginning with a '#' will be ignored,
# and an empty file will abort the edit. If an error occurs while saving this file will be
# reopened with the relevant failures.
#
apiVersion: v1
data:
mapRoles: |
    - groups:
        - system:bootstrappers
        - system:nodes
        rolearn: arn:aws:iam::xxxxxxxxxxxx:role/eksctl-my-eks-cluster-nodegroup-m-NodeInstanceRole-FQ7L0HQI4NCC
        username: system:node:{{EC2PrivateDNSName}}
kind: ConfigMap
metadata:
creationTimestamp: "2020-08-24T07:42:31Z"
name: aws-auth
namespace: kube-system
resourceVersion: "770"
selfLink: /api/v1/namespaces/kube-system/configmaps/aws-auth
uid: c794b2d8-9f10-443d-9072-c65d0f2eb552
Follow the example below (lines 13-16) to add your role to mapRoles and assign the system:masters group to your role. Make sure to replace 'YOUR ROLE RoleARN' with the Role ARN you copied in the previous step before saving.
Warning
Make sure to keep the same formatting as in the example below. The configuration format is sensitive to indentation and copy-pasting does not always keep the correct indentation.
# Please edit the object below. Lines beginning with a '#' will be ignored,
# and an empty file will abort the edit. If an error occurs while saving this file will be
# reopened with the relevant failures.
#
apiVersion: v1
data:
  mapRoles: |
    - groups:
      - system:bootstrappers
      - system:nodes
      rolearn: arn:aws:iam::xxxxxxxxxxxx:role/eksctl-my-eks-cluster-nodegroup-m-NodeInstanceRole-FQ7L0HQI4NCC
      username: system:node:{{EC2PrivateDNSName}}
    - groups:
      - system:masters
      rolearn: <YOUR ROLE RoleARN>
      username: hopsworks
kind: ConfigMap
metadata:
creationTimestamp: "2020-08-24T07:42:31Z"
name: aws-auth
namespace: kube-system
resourceVersion: "770"
selfLink: /api/v1/namespaces/kube-system/configmaps/aws-auth
uid: c794b2d8-9f10-443d-9072-c65d0f2eb552
Once you are done with editing the configmap, save it and exit the editor. The output should be:
configmap/aws-auth edited
Step 4: Setup network connectivity#
For Hopsworks to be able to start containers in the EKS cluster and for these containers to be able to use Hopsworks we need to establish network connectivity between Hopsworks and EKS. For this, we have two solutions. The first option (A) is to run Hopsworks and EKS in the same virtual network and security group. The second option (B) is to pair the EKS and Hopsworks virtual networks. If you choose this option, make sure to create the peering before starting the Hopsworks cluster as it connects to EKS at startup.
Option A: run Hopsworks and EKS in the same virtual network.#
Running EKS and Hopsworks in the same security group is the simplest of the two solutions when it comes to setting up the system. All you need to do is to open the ports needed by Hopsworks in the security group created by the EKS cluster. Then you can just select this security group during the Hopsworks cluster creation. We will now see how to open the ports for HTTP (80) and HTTPS (443) to allow Hopsworks to run with all its functionalities.
Note
It is possible not to open ports 80 and 443 at the cost of some features. See Limiting permissions for more details.
First, you need to get the name of the security group of your EKS cluster by using the following eksctl command. Notice that you need to replace my-eks-cluster with the name of your cluster.
eksctl utils describe-stacks --region=us-east-2 --cluster=my-eks-cluster | grep 'OutputKey: "ClusterSecurityGroupId"' -a1
Check the output for OutputValue, which will be the id of your EKS security group.
ExportName: "eksctl-my-eks-cluster-cluster::ClusterSecurityGroupId",
OutputKey: "ClusterSecurityGroupId",
OutputValue: "YOUR_EKS_SECURITY_GROUP_ID"
Go to the Security Groups section of EC2 in the AWS management console and search for your security group using the id obtained above. Note the VPC ID, you will need it when creating the hopsworks cluster. Then, click on it then go to the Inbound rules tab and click on Edit inbound rules. You should now see the following screen.
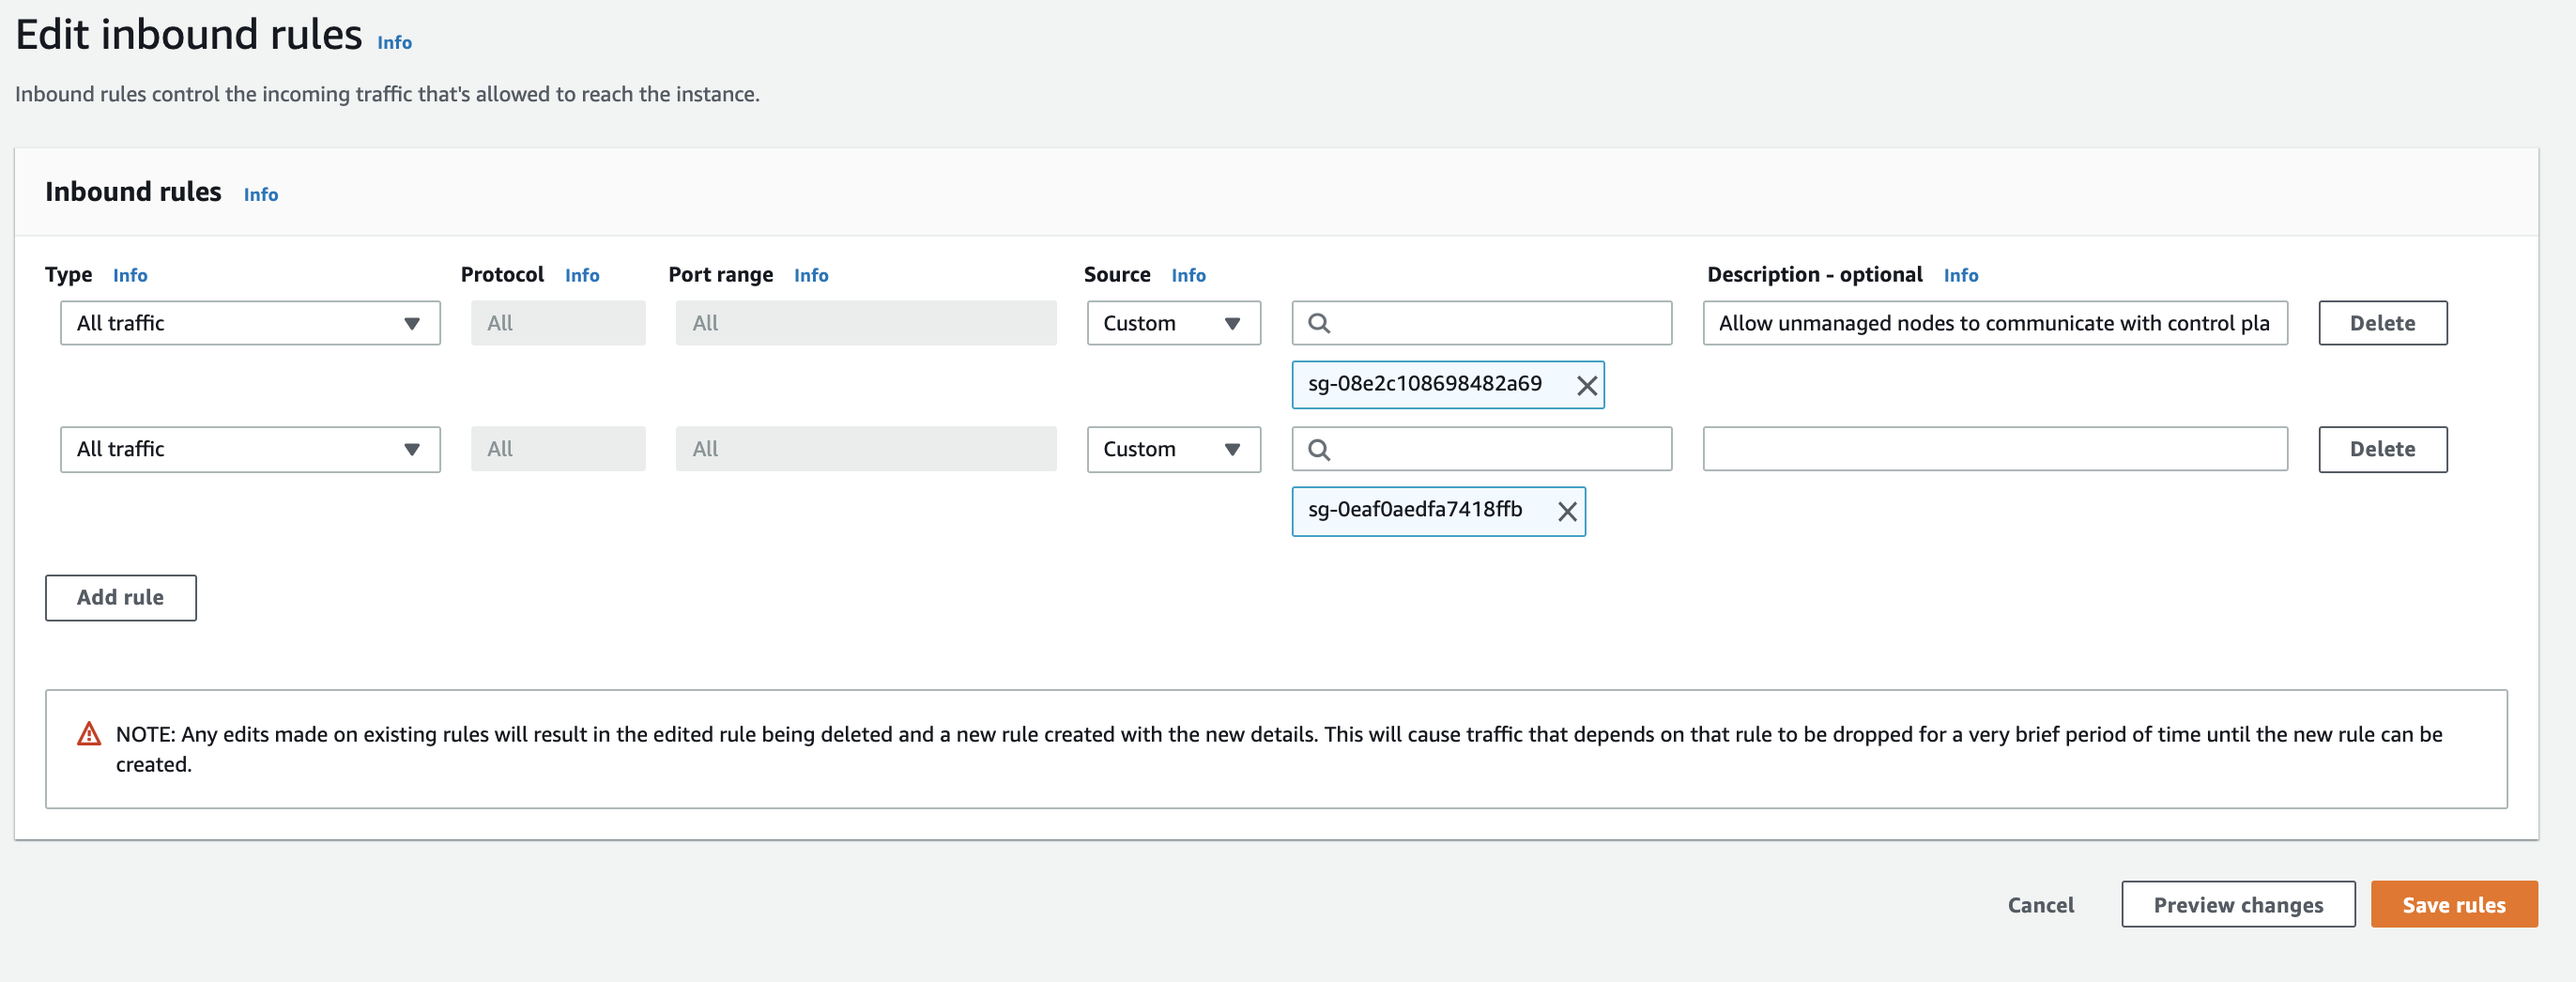
Add two rules for HTTP and HTTPS as follows:
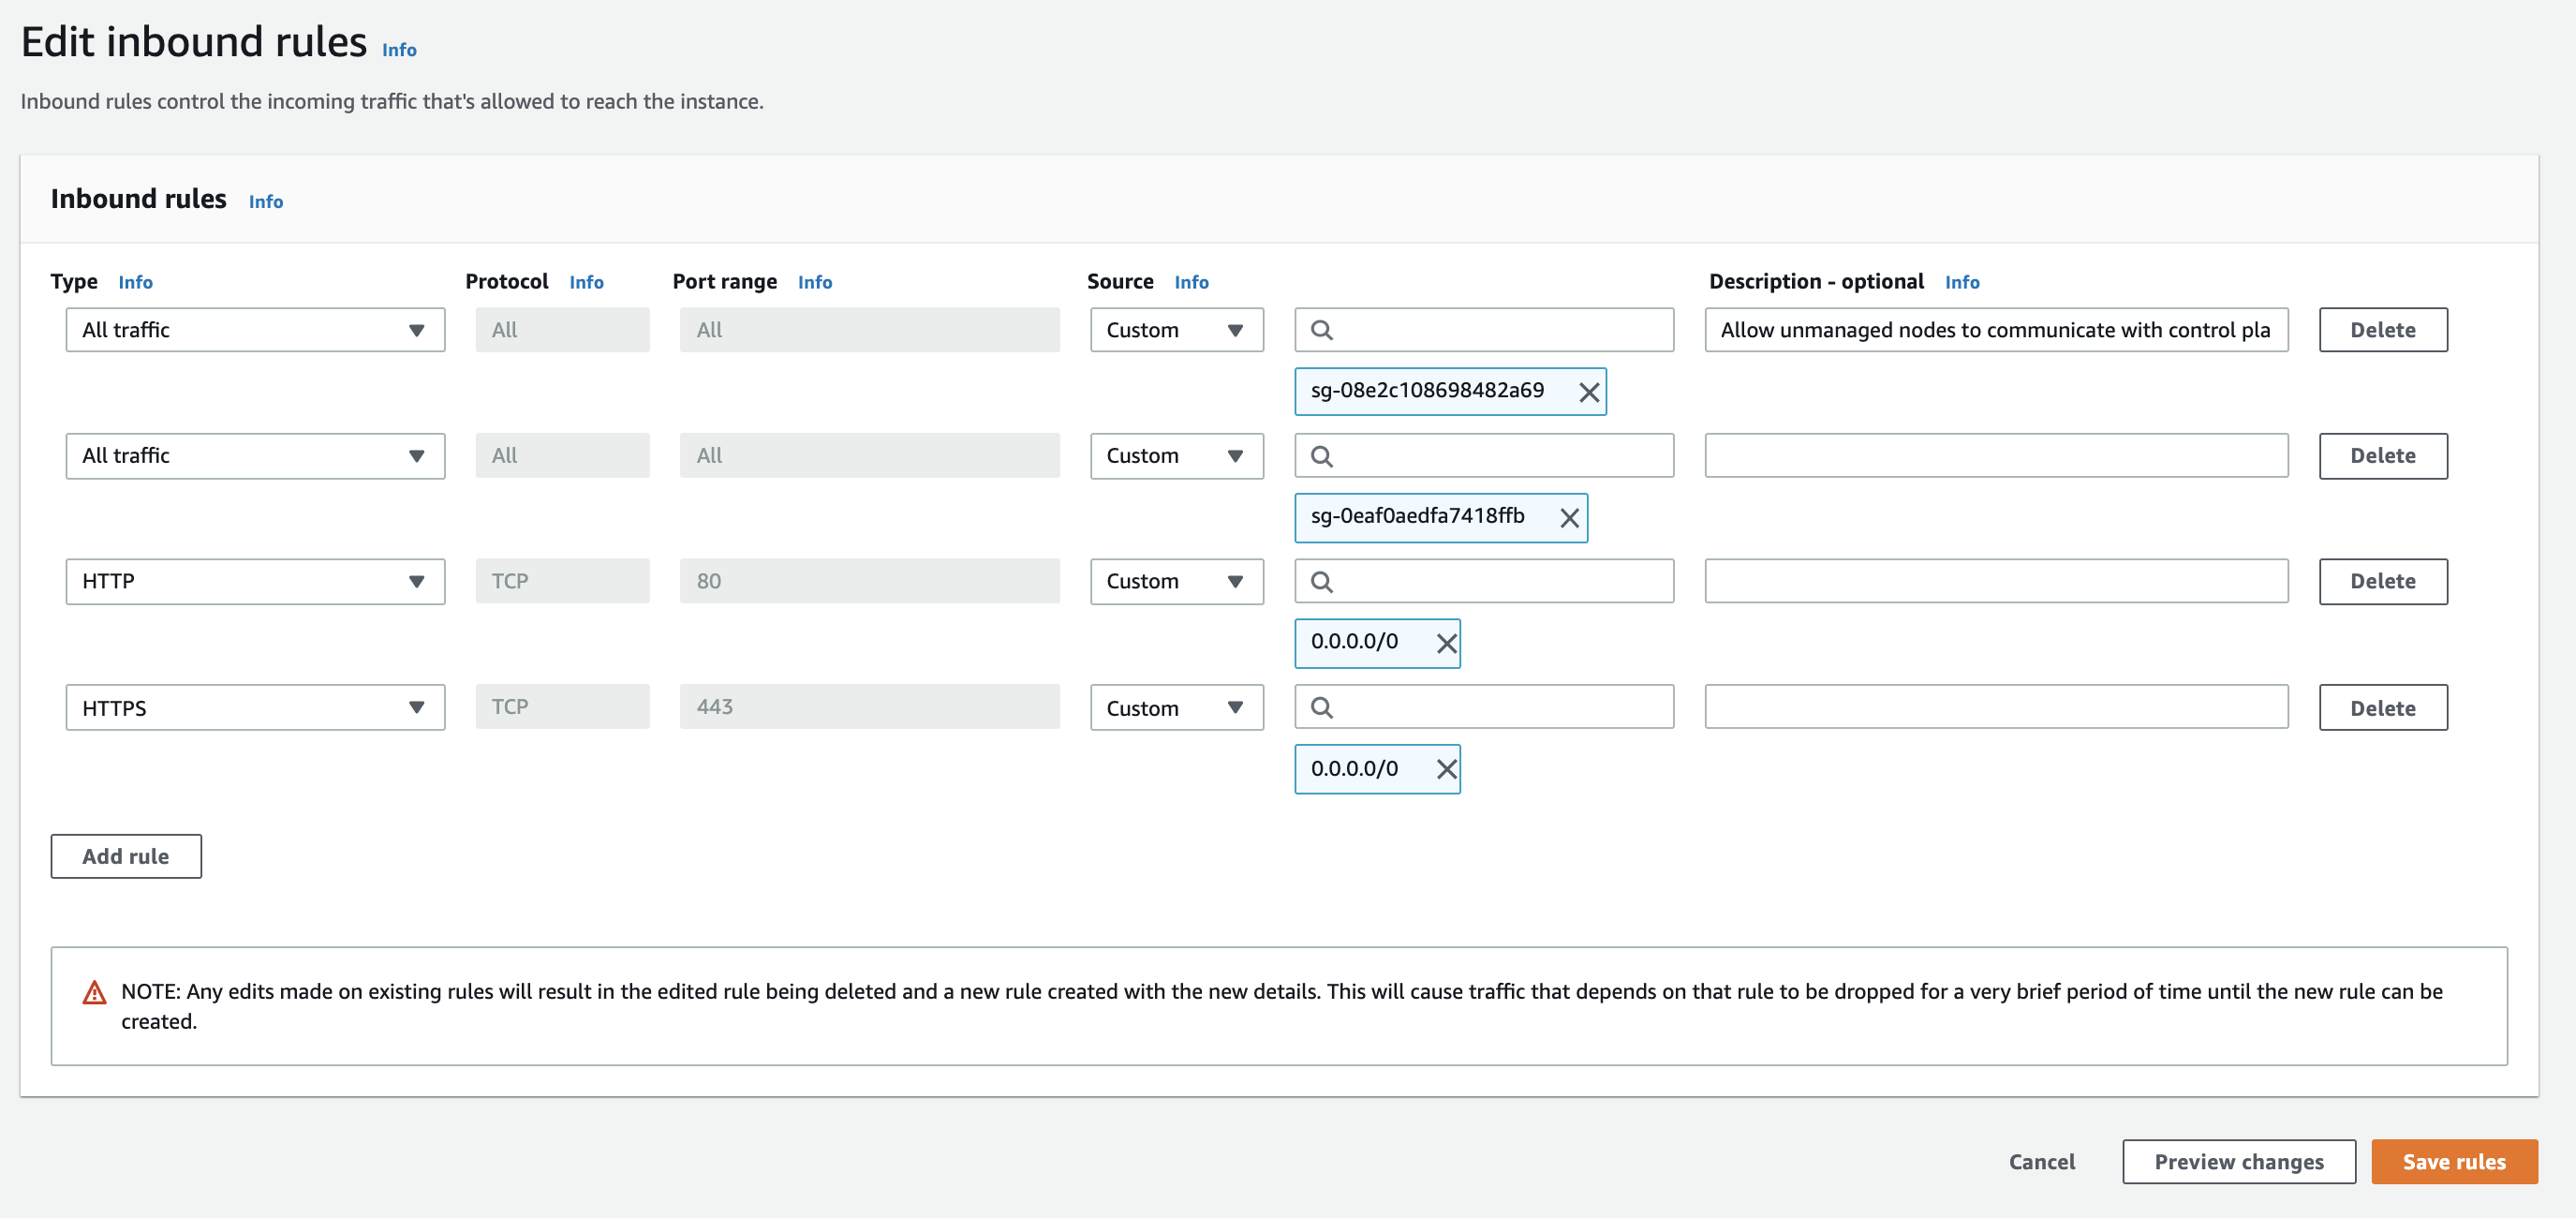
Click Save rules to save the updated rules to the security group.
Option B: create a pairing between Hopsworks and EKS#
To establish virtual peering between the Kubernetes cluster and Hopsworks, you need to select or create a virtual network for Hopsworks. You can create the virtual network by following the AWS documentation steps to create the virtual private network. Make sure to configure your subnet to use an address space that does not overlap with the address space in the Kubernetes network.
You then need to select or create a security group for the Hopsworks VPC. You can create the security group by following the steps in the AWS documentation. Remember to open the port for HTTP (80) and HTTPS (443) to allow Hopsworks to run with all its functionalities.
Note
It is possible not to open ports 80 and 443 at the cost of some features. See Limiting permissions for more details.
Once the Hopsworks VPC and security group are created you need to create a peering between the Hopsworks VPC and the EKS VPC. For this follow the AWS documentation here.
Finally, you need to edit the security groups for the EKS cluster and for Hopsworks to allow full communication between both VPC. This can be done following the instruction in the AWS documentation.
You can get the name of the security group of your EKS cluster by using the following eksctl command. Notice that you need to replace my-eks-cluster with the name of your cluster.
eksctl utils describe-stacks --region=us-east-2 --cluster=my-eks-cluster | grep 'OutputKey: "ClusterSecurityGroupId"' -a1
Check the output for OutputValue, which will be the id of your EKS security group.
ExportName: "eksctl-my-eks-cluster-cluster::ClusterSecurityGroupId",
OutputKey: "ClusterSecurityGroupId",
OutputValue: "YOUR_EKS_SECURITY_GROUP_ID"
Step 5: Allow Hopsworks.ai to delete ECR repositories on your behalf#
For hopsworks.ai to be able to clean up the ECR repo when terminating your hopsworks cluster, you need to add a new inline policy to the Cross-Account role or user connected to Hopsworks.ai, that you set up when connecting your AWS account to hopsworks.ai.
Navigate to AWS management console, then click on Roles or Users depending on which connection method you have used in Hopsworks.ai, and then search for your role or user name and click on it. Go to the Permissions tab, click on Add inline policy and go to the JSON tab. Replace the existing JSON permissions with the JSON permissions below. Click on Review policy, name it, and click Create policy.
{
    "Version": "2012-10-17",
    "Statement": [
        {
            "Sid": "AllowDeletingECRRepositories",
            "Effect": "Allow",
            "Action": [
                "ecr:DeleteRepository"
            ],
            "Resource": [
                "arn:aws:ecr:*:*:repository/*/filebeat",
                "arn:aws:ecr:*:*:repository/*/base"
            ]
        }
    ]
}
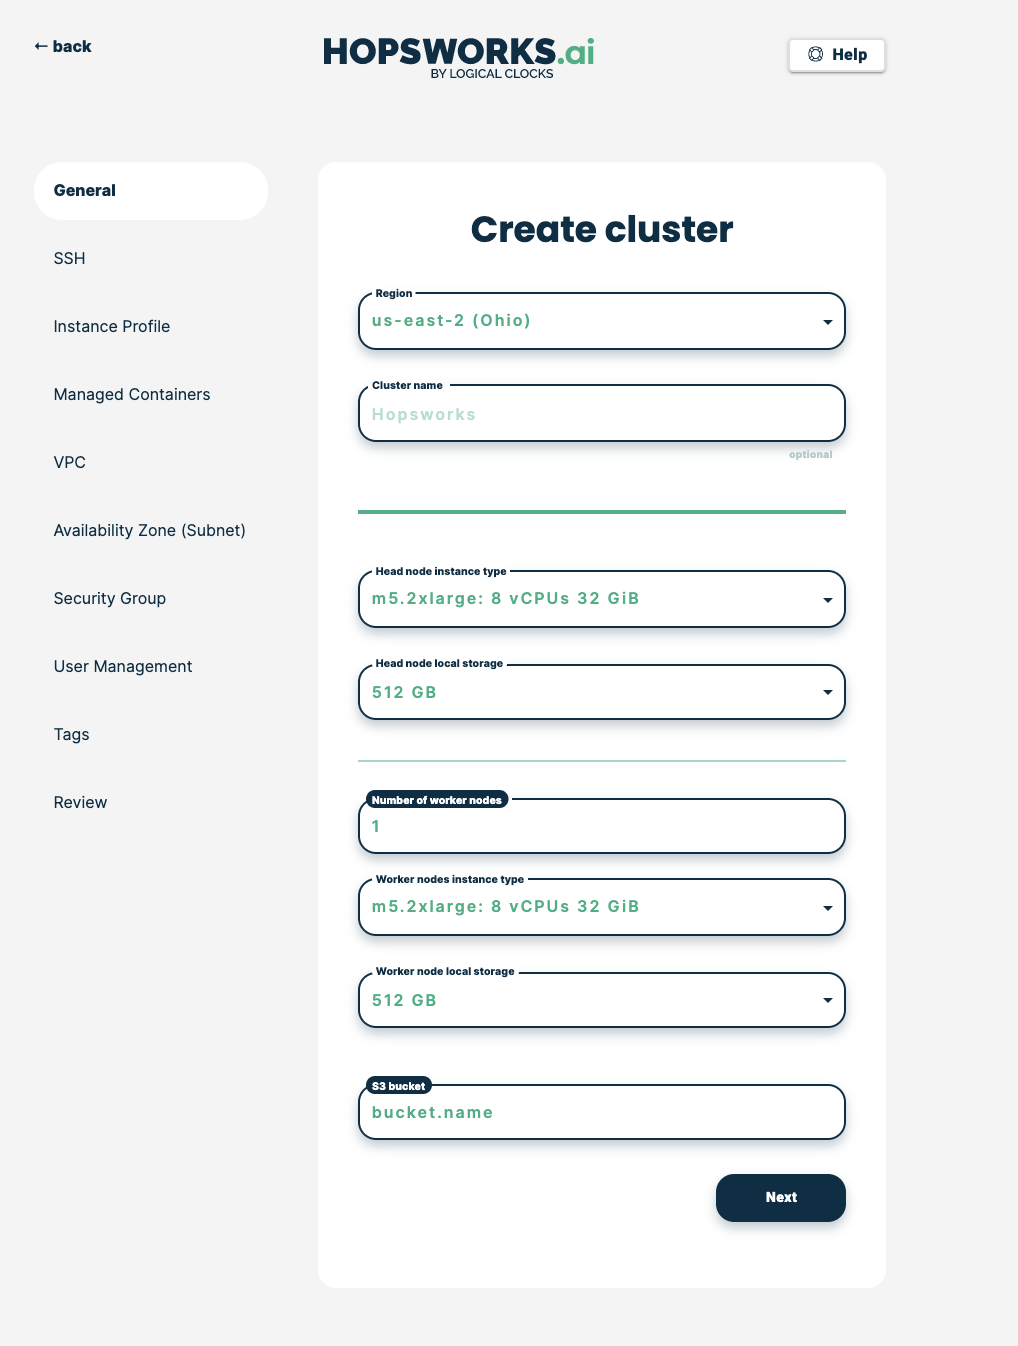
Step 6: Create a Hopsworks cluster with EKS and ECR support#
In Hopsworks.ai, select Create cluster. Choose the region of your EKS cluster and fill in the name of your S3 bucket, then click Next:
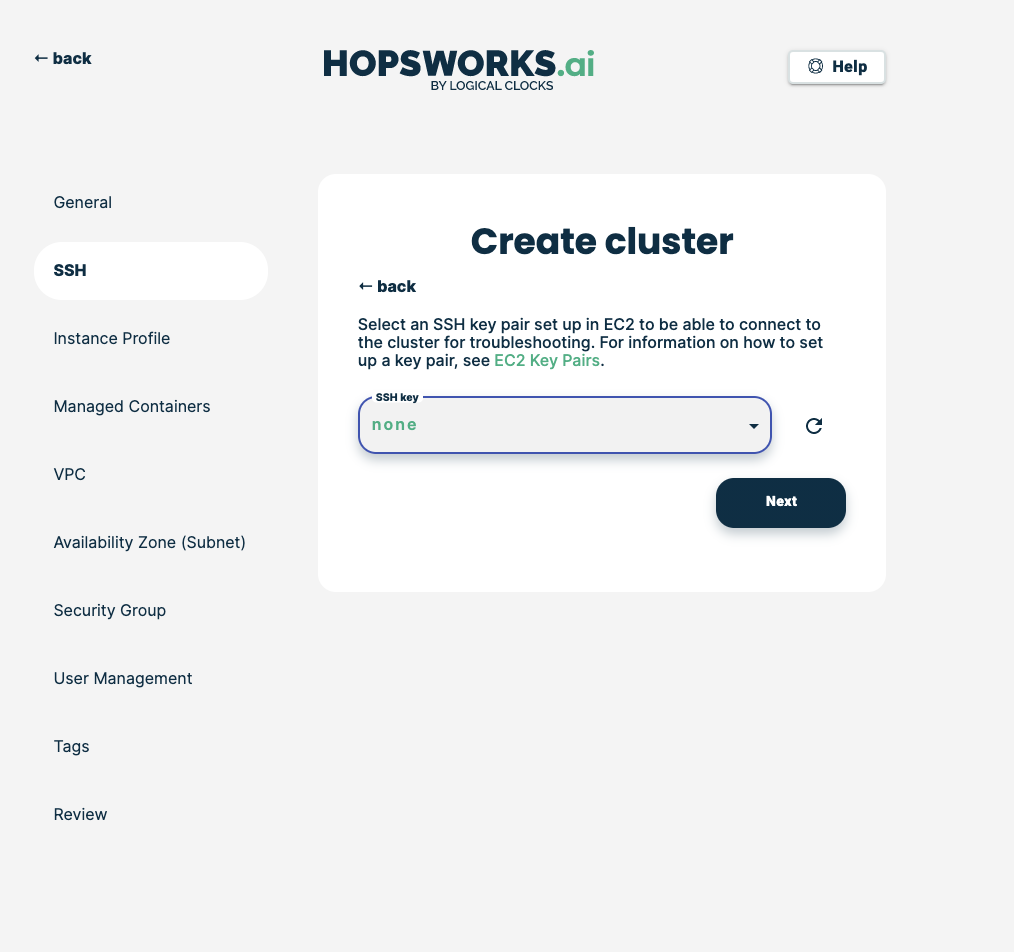
Choose your preferred SSH key to use with the cluster, then click Next:
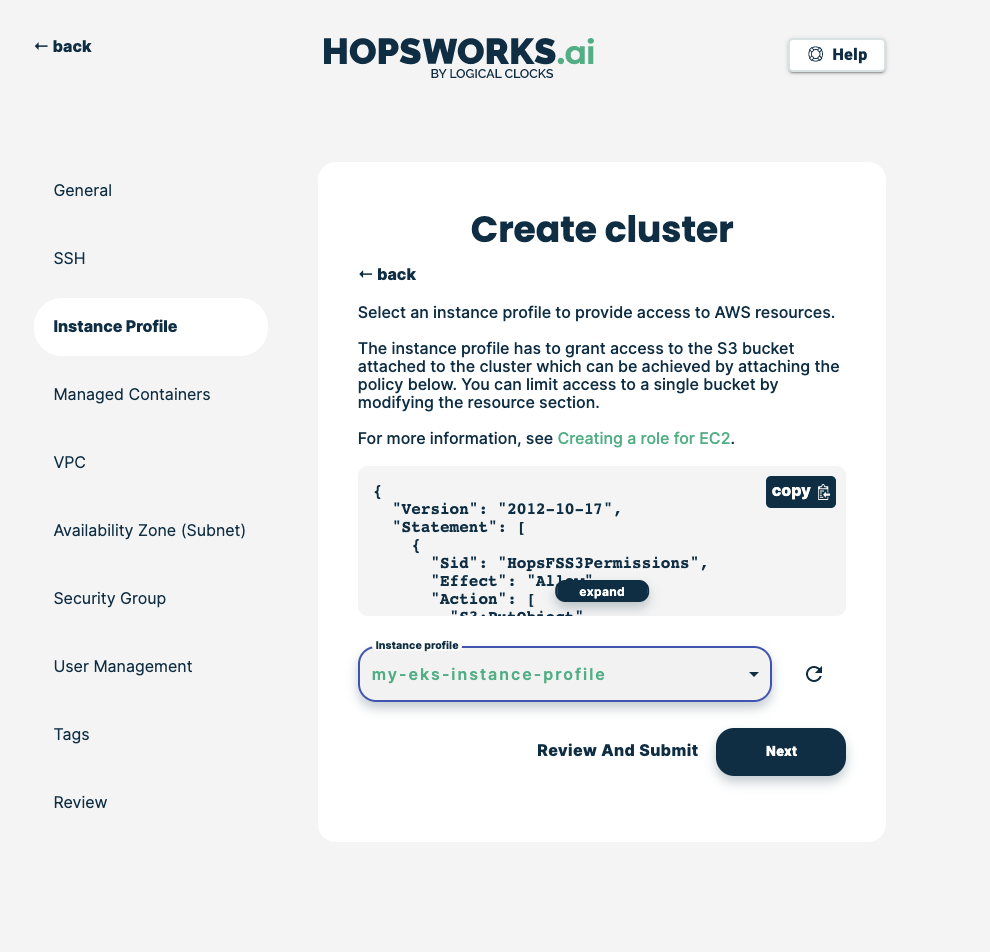
Choose the instance profile role that you have created in Step 2 (click on the refresh button if your instance profile is not in the list), then click Next:
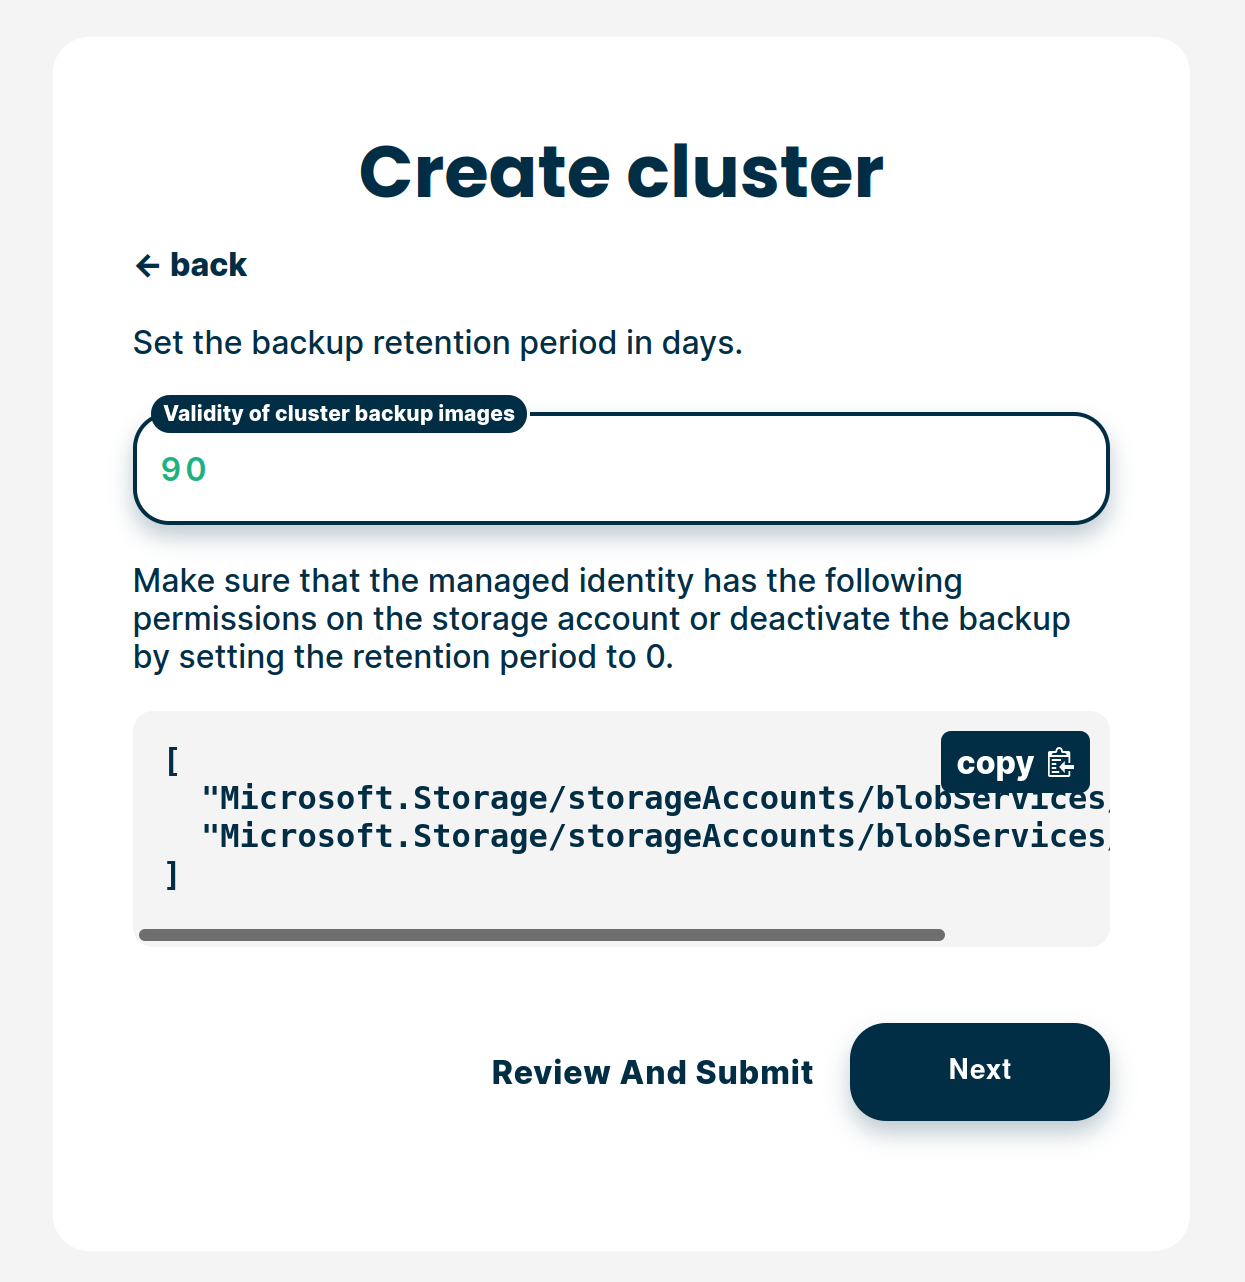
Choose the backup retention period and click Next:
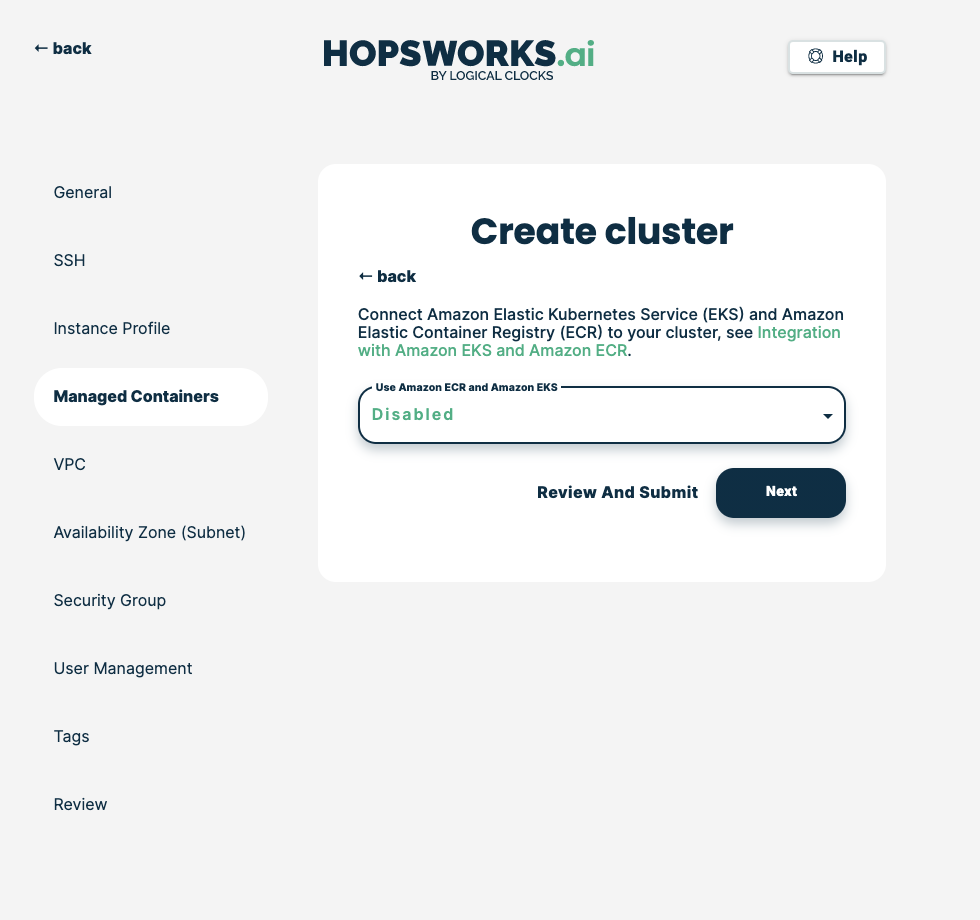
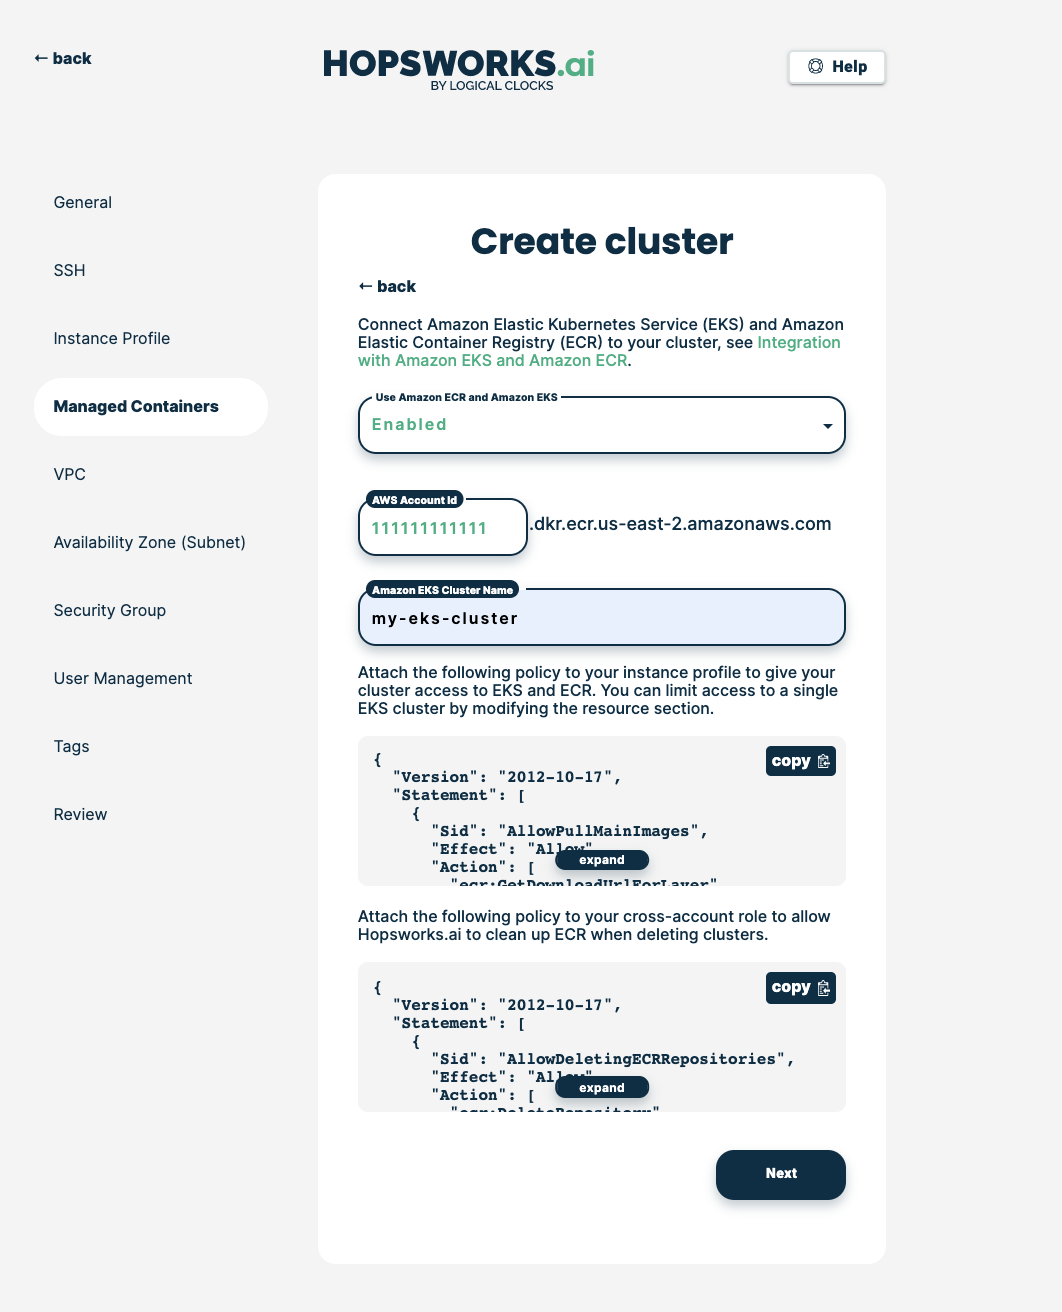
Choose Enabled to enable the use of Amazon EKS and ECR:
Add your EKS cluster name, then click Next:
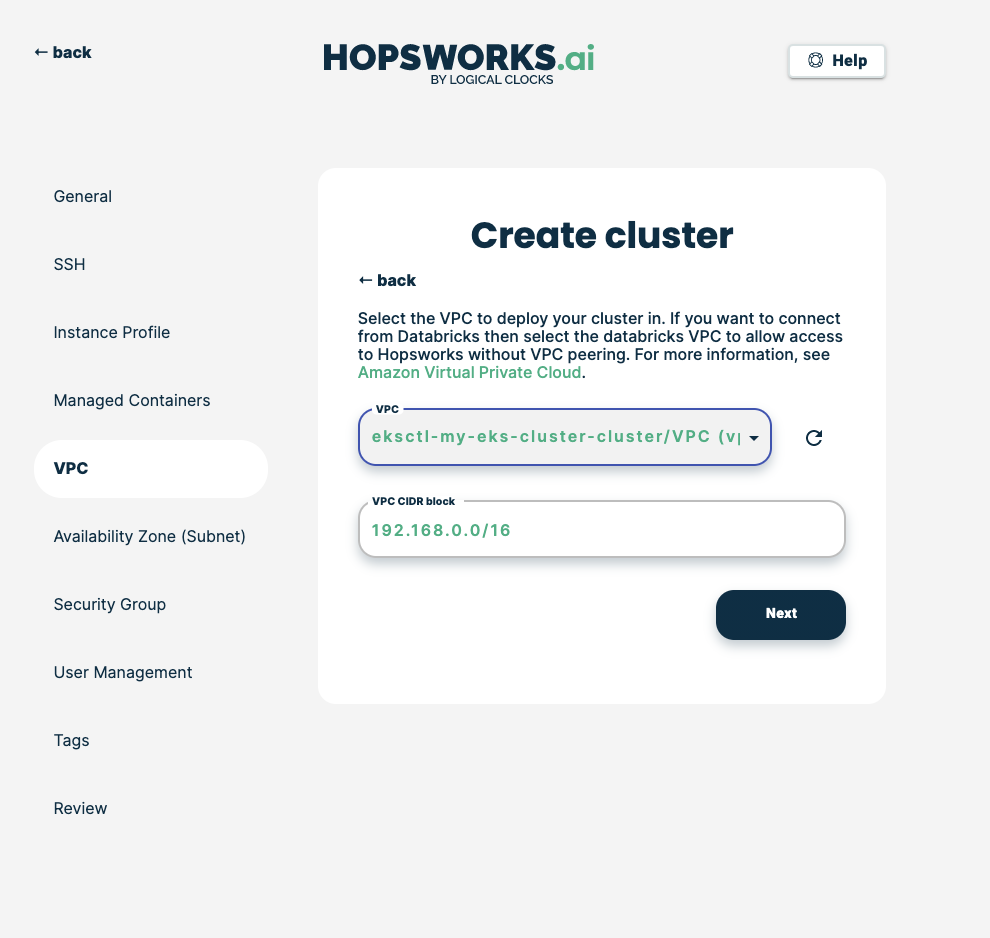
If you followed option A when setting up the network Choose the VPC of your EKS cluster. Its name should have the form eksctl-YOUR-CLUSTER-NAME-cluster (click on the refresh button if the VPC is not in the list).
If you followed option B choose the VPC you created during Step 4.
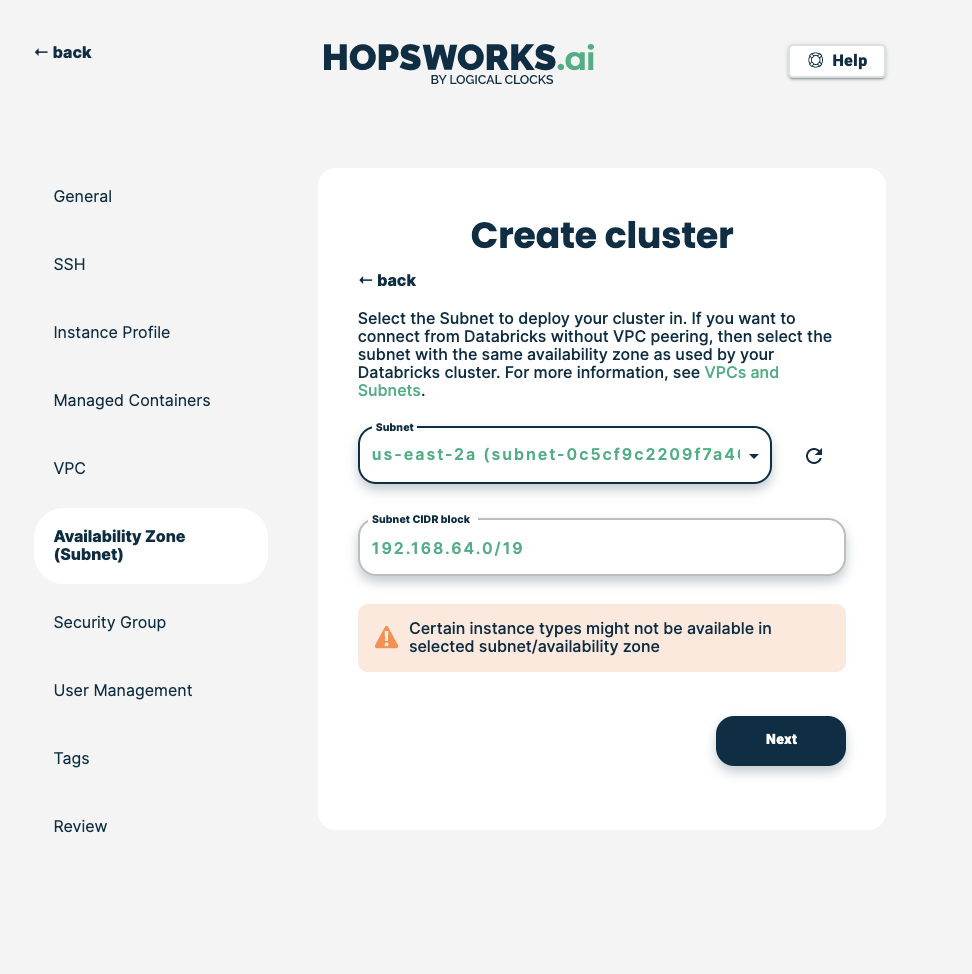
Choose any of the subnets in the VPC, then click Next.
Note
Avoid private subnets if you want to enjoy all the hopsworks features.
Choose the security group that you have updated/created in Step 4, then click Next:
Note
If you followed option A select the Security Group with the same id as in Step 4 and NOT the ones containing ControlPlaneSecurity or ClusterSharedNode in their name.

Click Review and submit, then Create. Once the cluster is created, Hopsworks will use EKS to launch Python jobs, Jupyter servers, and ML model servings.