Getting started with Hopsworks.ai (AWS)#
Hopsworks.ai is our managed platform for running Hopsworks and the Feature Store in the cloud. It integrates seamlessly with third-party platforms such as Databricks, SageMaker and KubeFlow. This guide shows how to set up Hopsworks.ai with your organization's AWS account.
Step 1: Connecting your AWS account#
Hopsworks.ai deploys Hopsworks clusters to your AWS account. To enable this you have to permit us to do so. This can be either achieved by using AWS cross-account roles or AWS access keys. We strongly recommend the usage of cross-account roles whenever possible due to security reasons.
Option 1: Using AWS Cross-Account Roles#
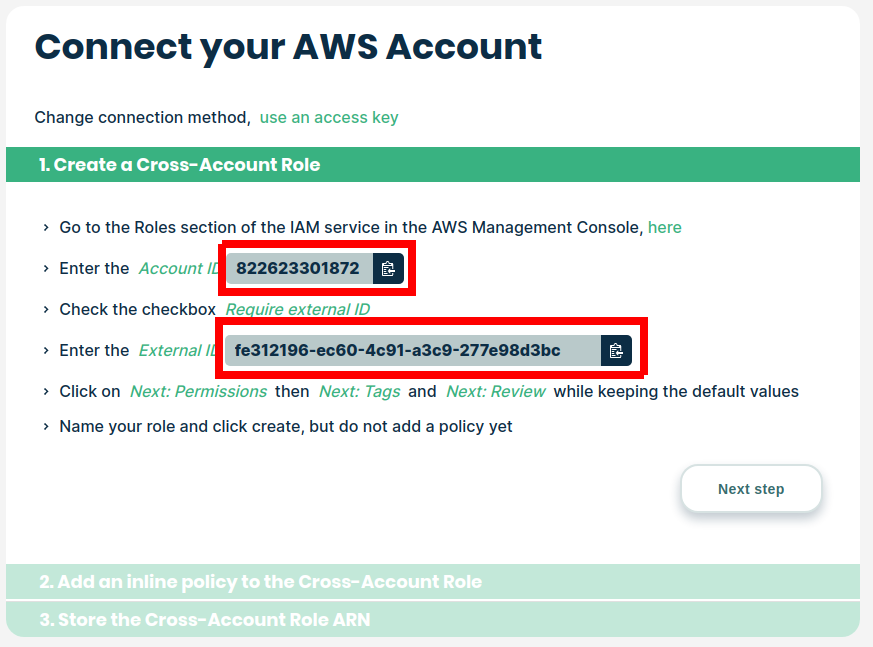
To create a cross-account role for Hopsworks.ai, you need our AWS account id and the external id we created for you. You can find this information on the first screen of the cross-account configuration flow. Take note of the account id and external id and go to the Roles section of the IAM service in the AWS Management Console and select Create role.
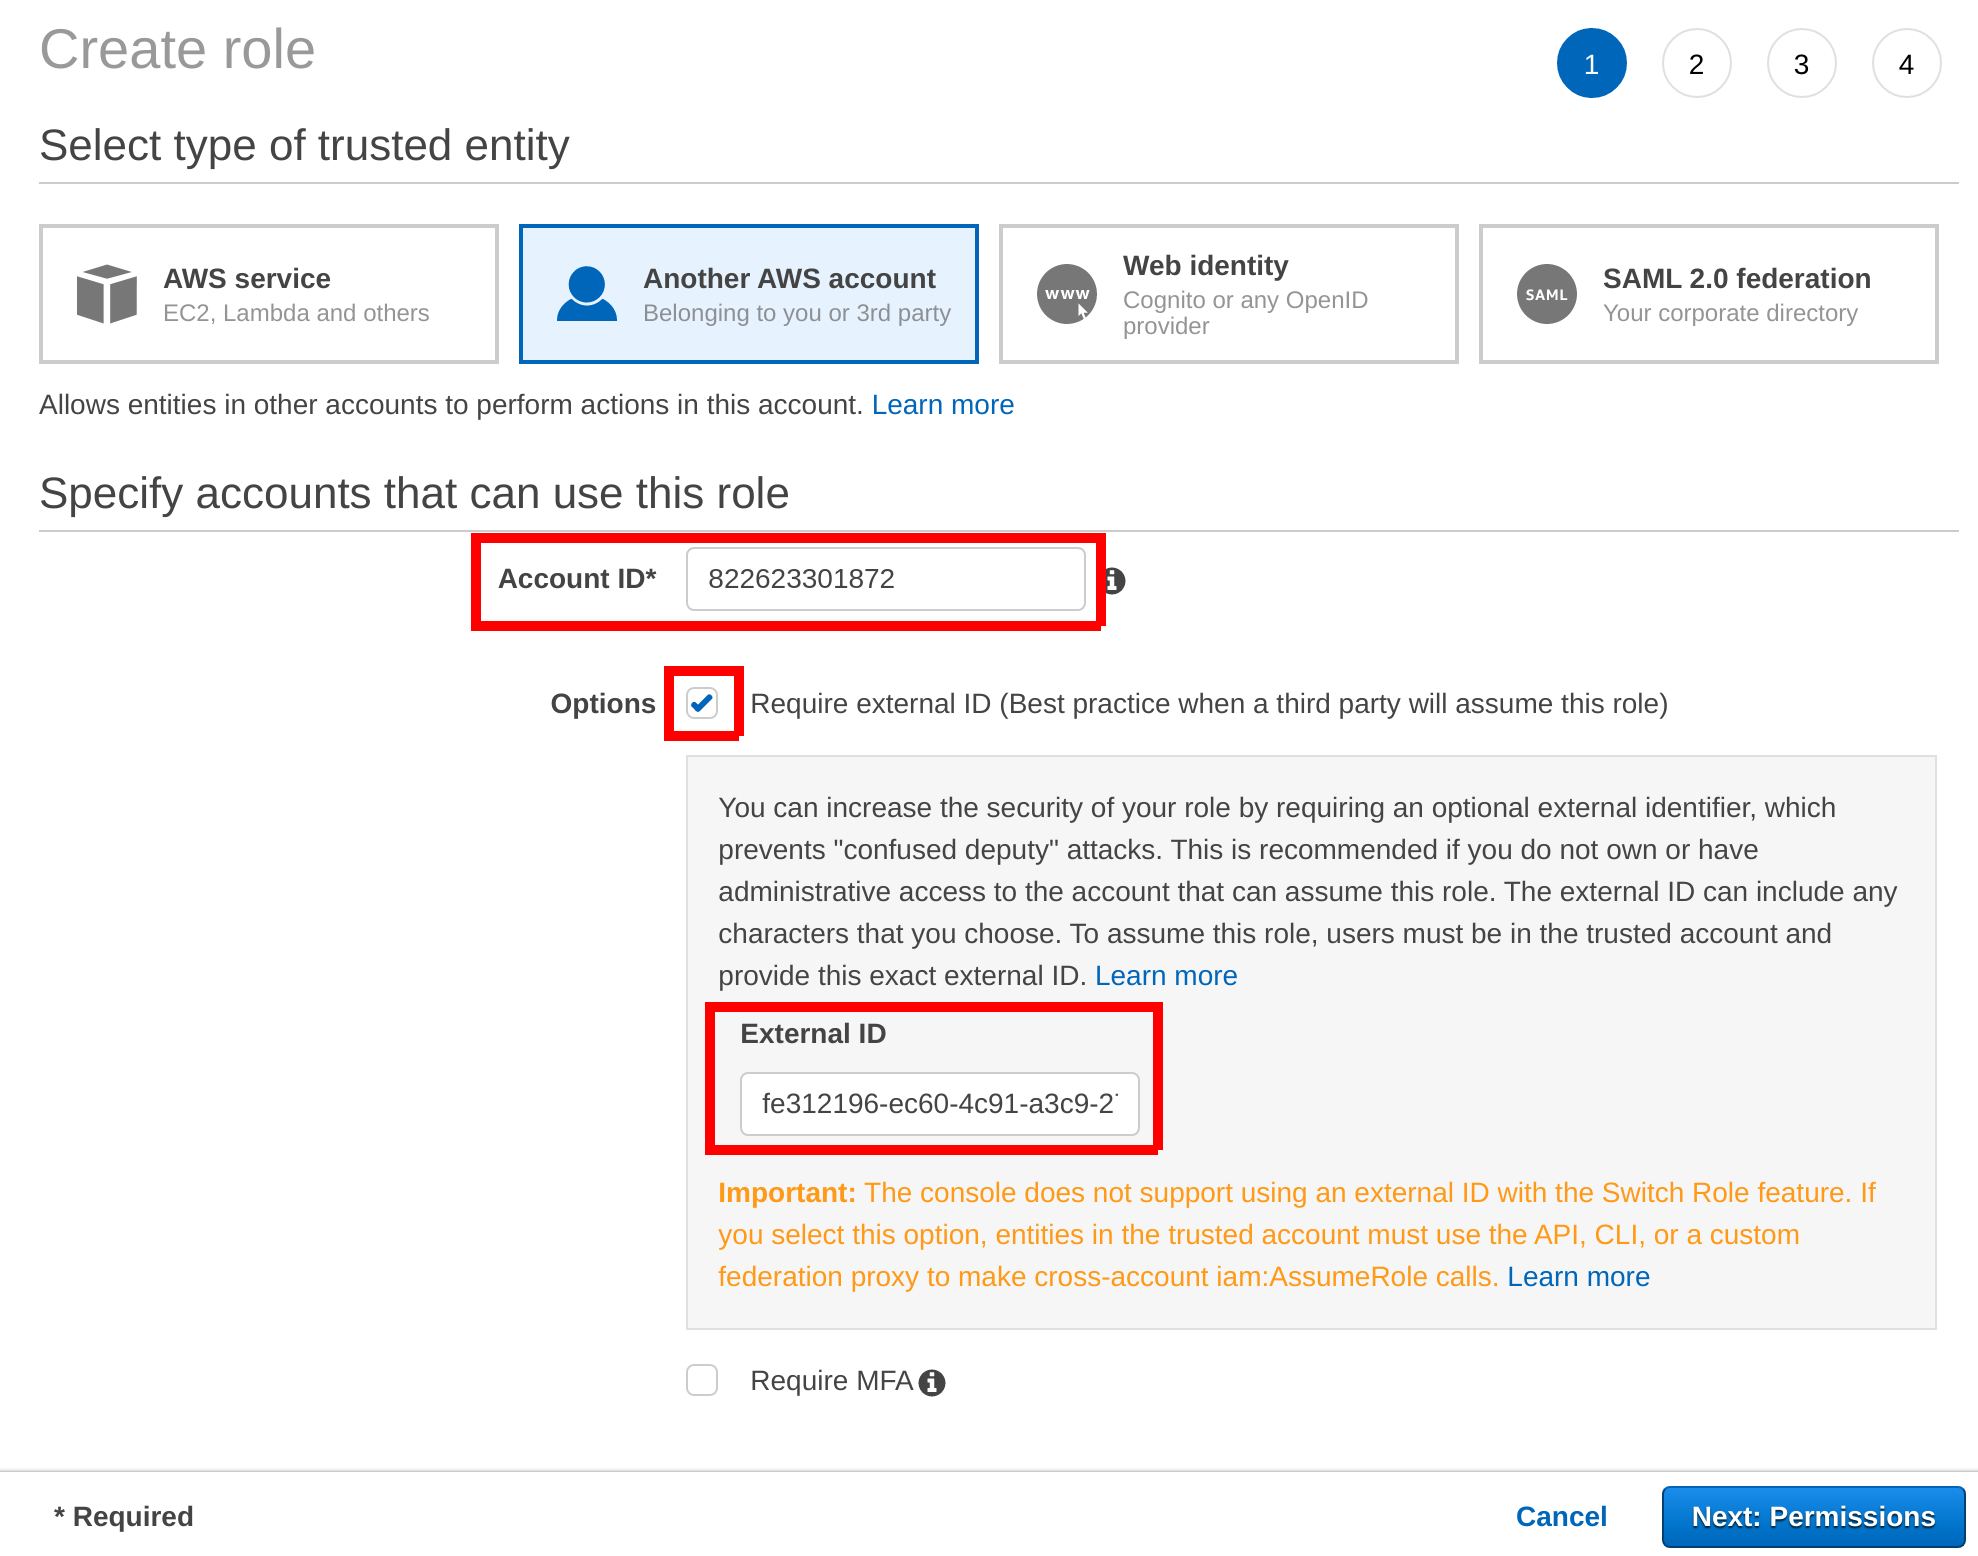
Select Another AWS account as trusted entity and fill in our AWS account id and the external id generated for you:
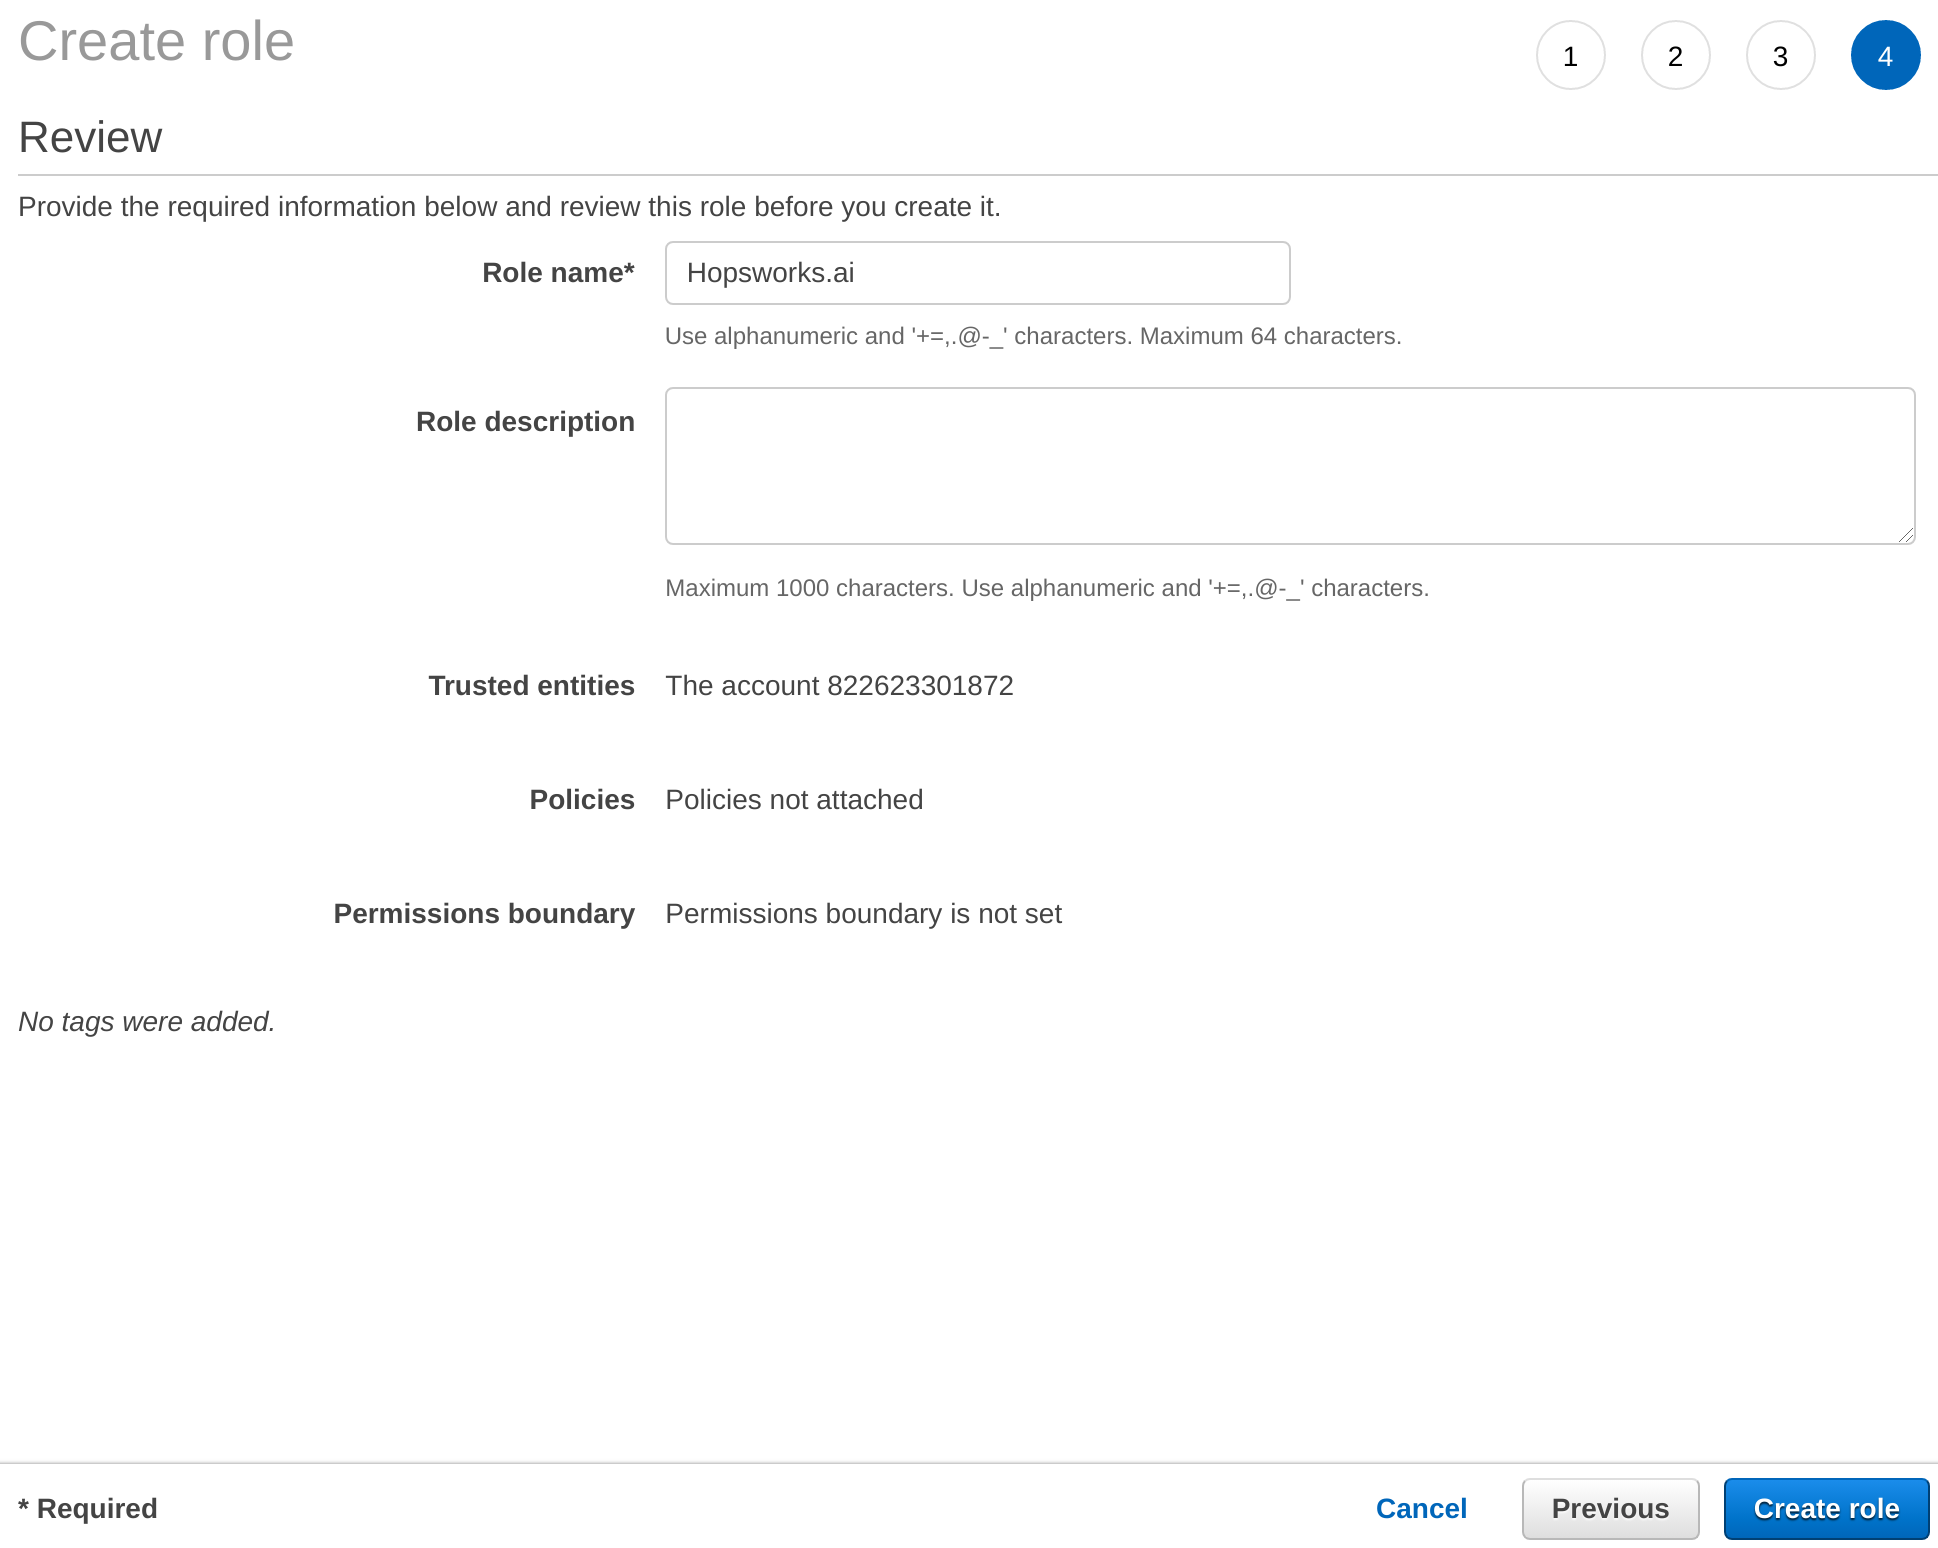
Go to the last step of the wizard, name the role and create it:
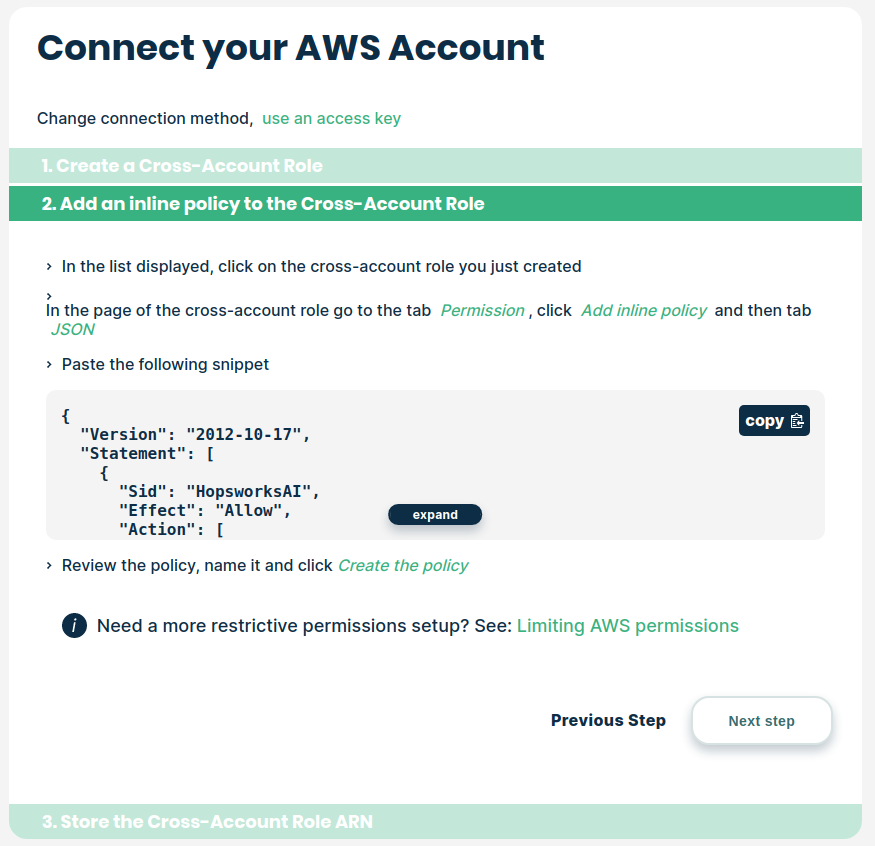
As a next step, you need to create an access policy to give Hopsworks.ai permissions to manage clusters in your organization's AWS account. By default, Hopsworks.ai is automating all steps required to launch a new Hopsworks cluster. If you want to limit the required AWS permissions, see restrictive-permissions.
Copy the permission JSON from the instructions:
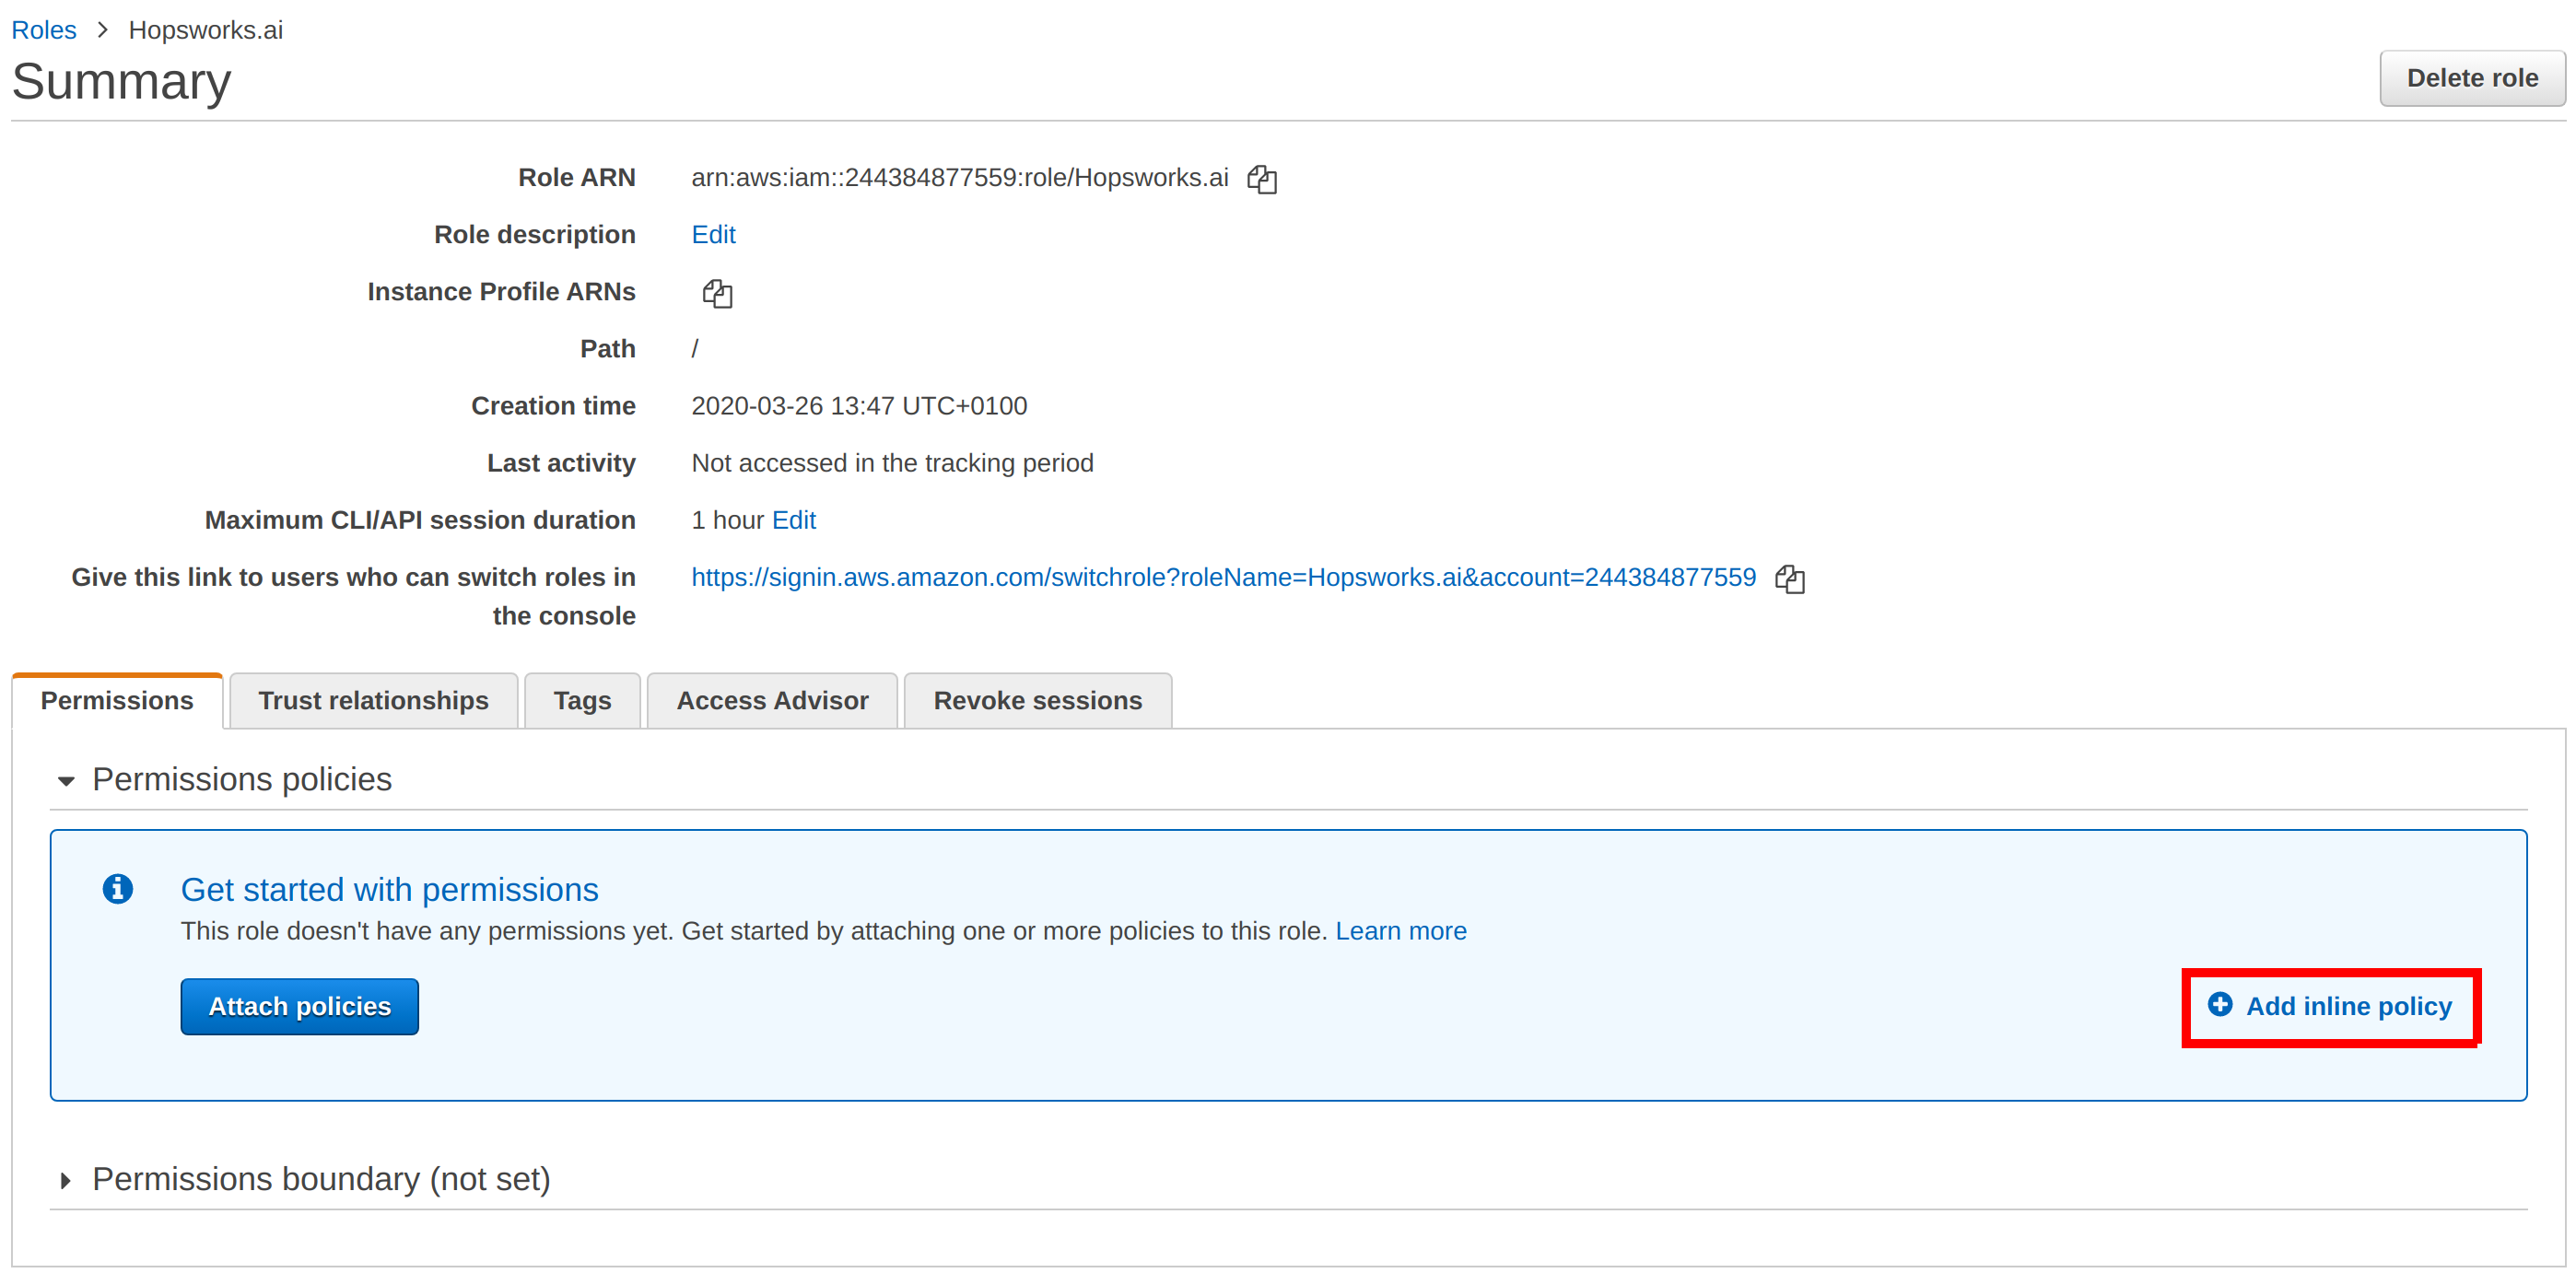
Identify your newly created cross-account role in the Roles section of the IAM service in the AWS Management Console and select Add inline policy:
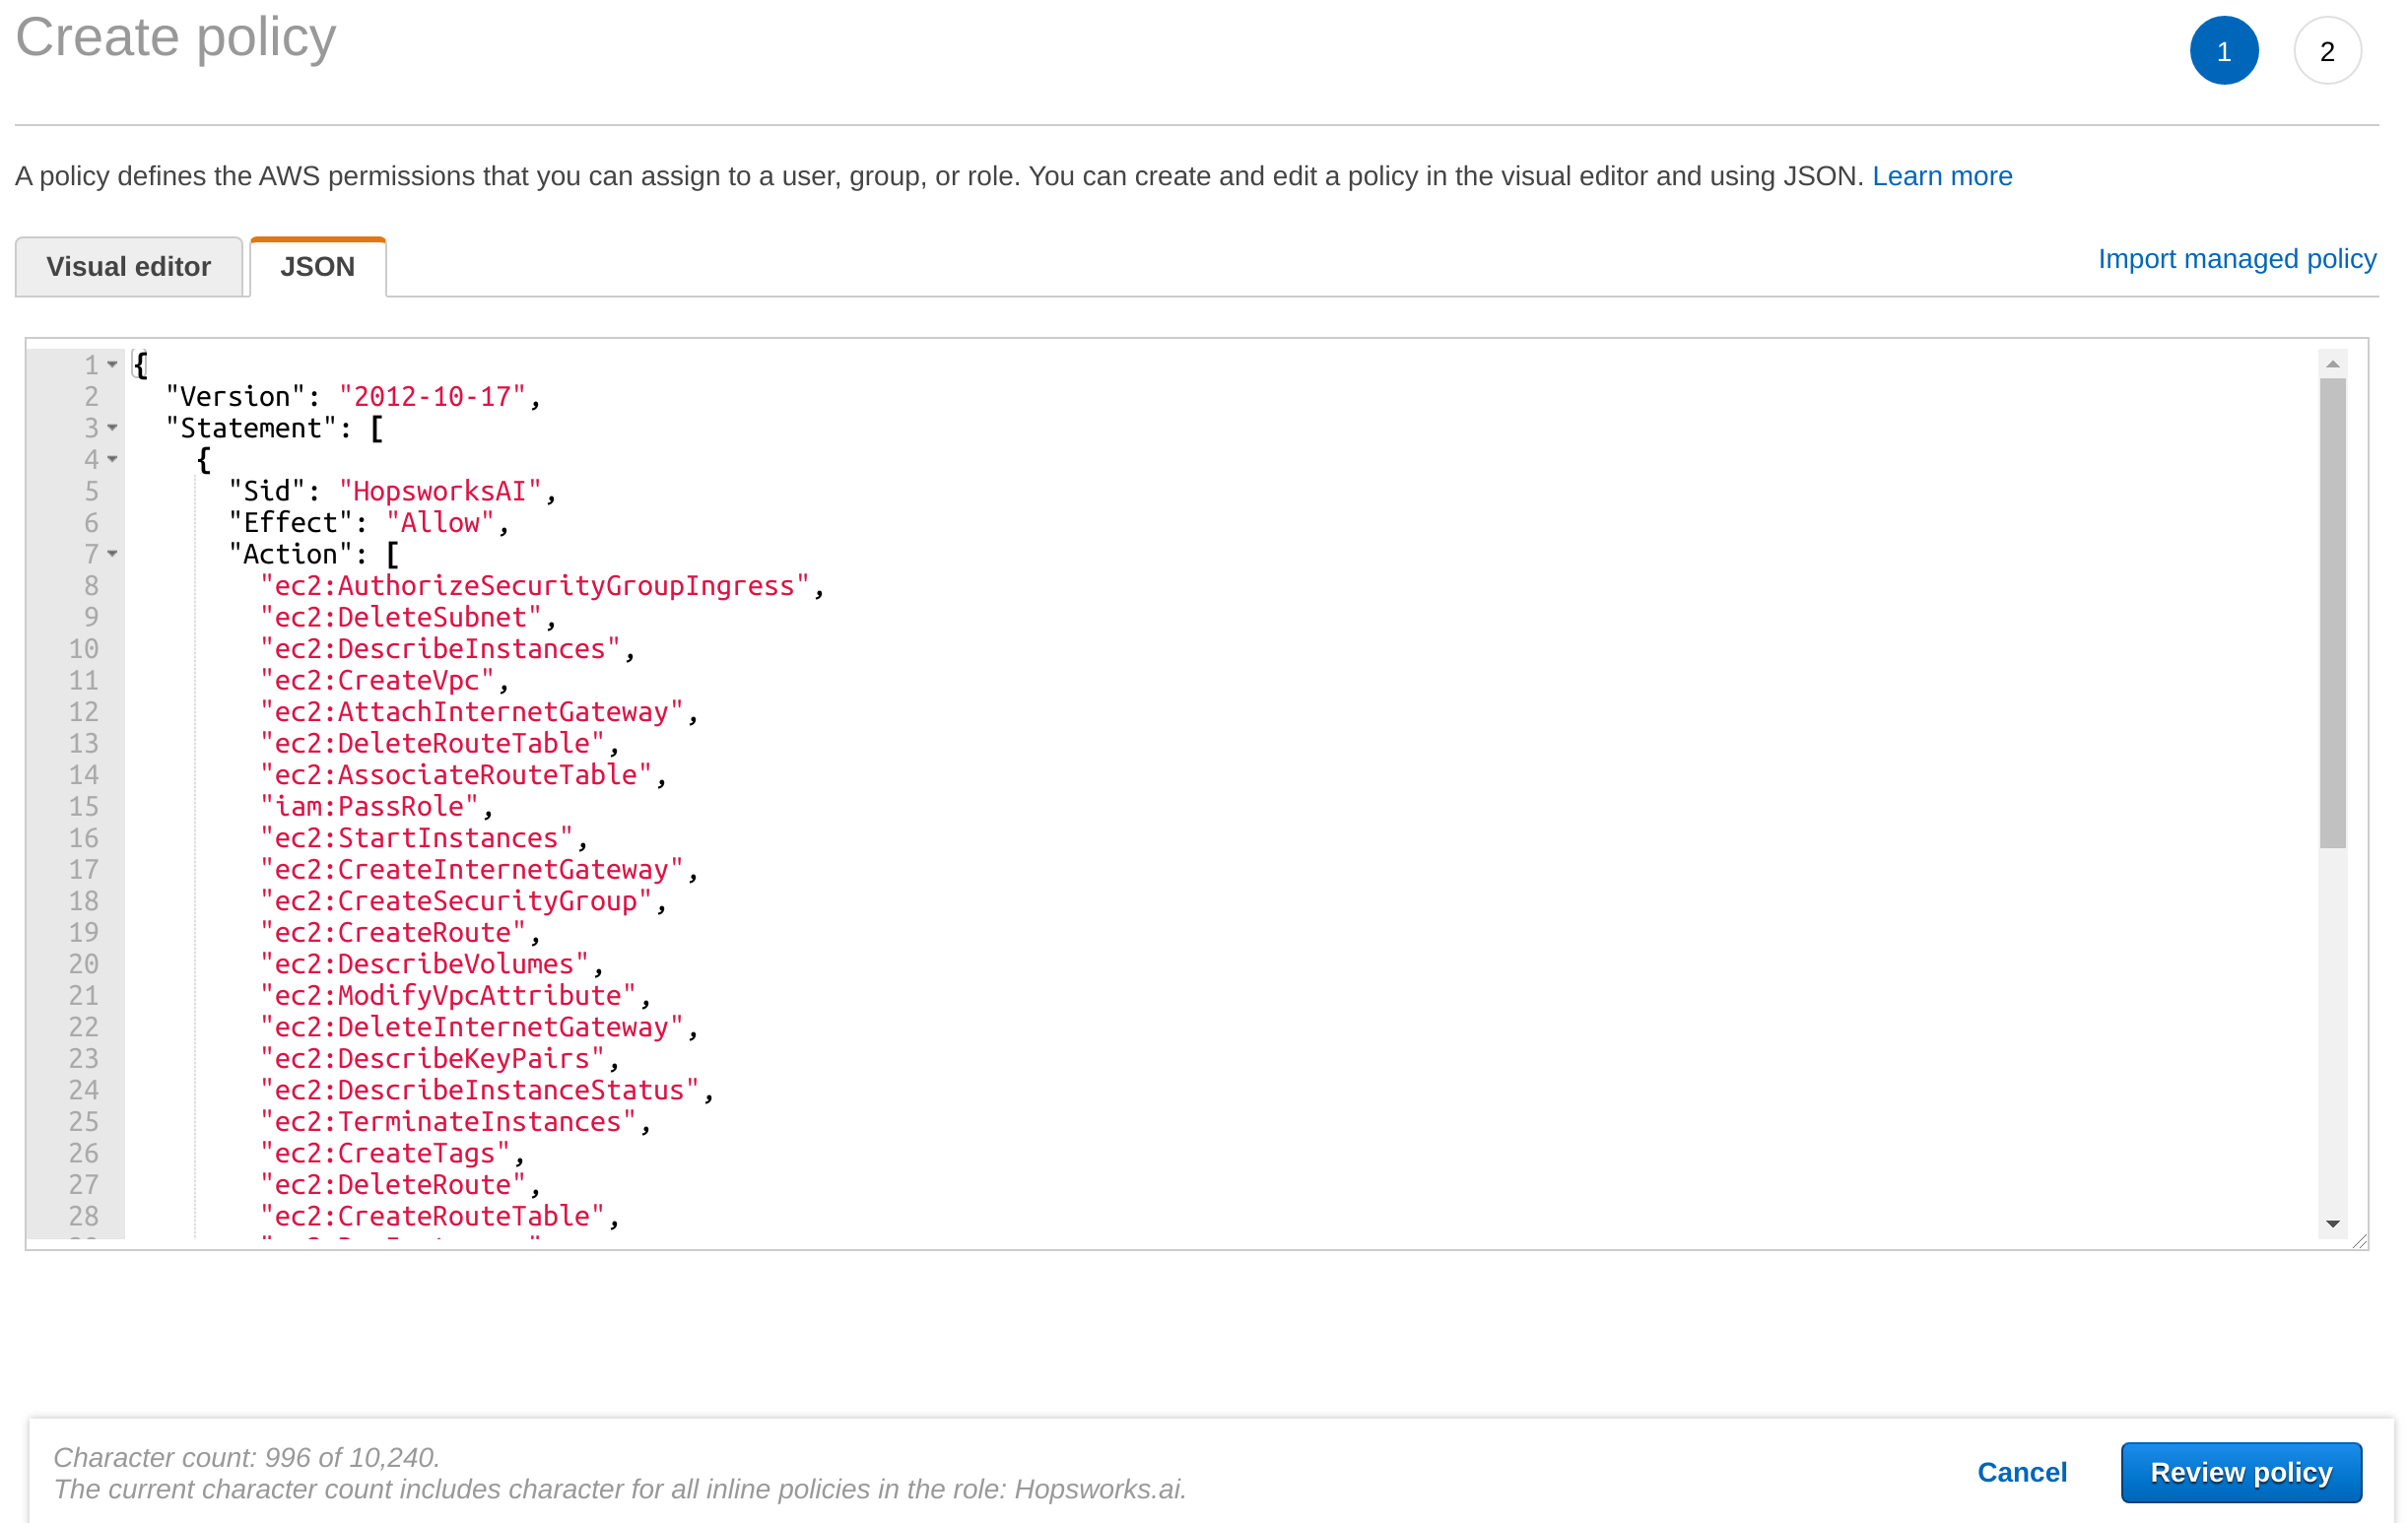
Replace the JSON policy with the JSON from our instructions and continue in the wizard:
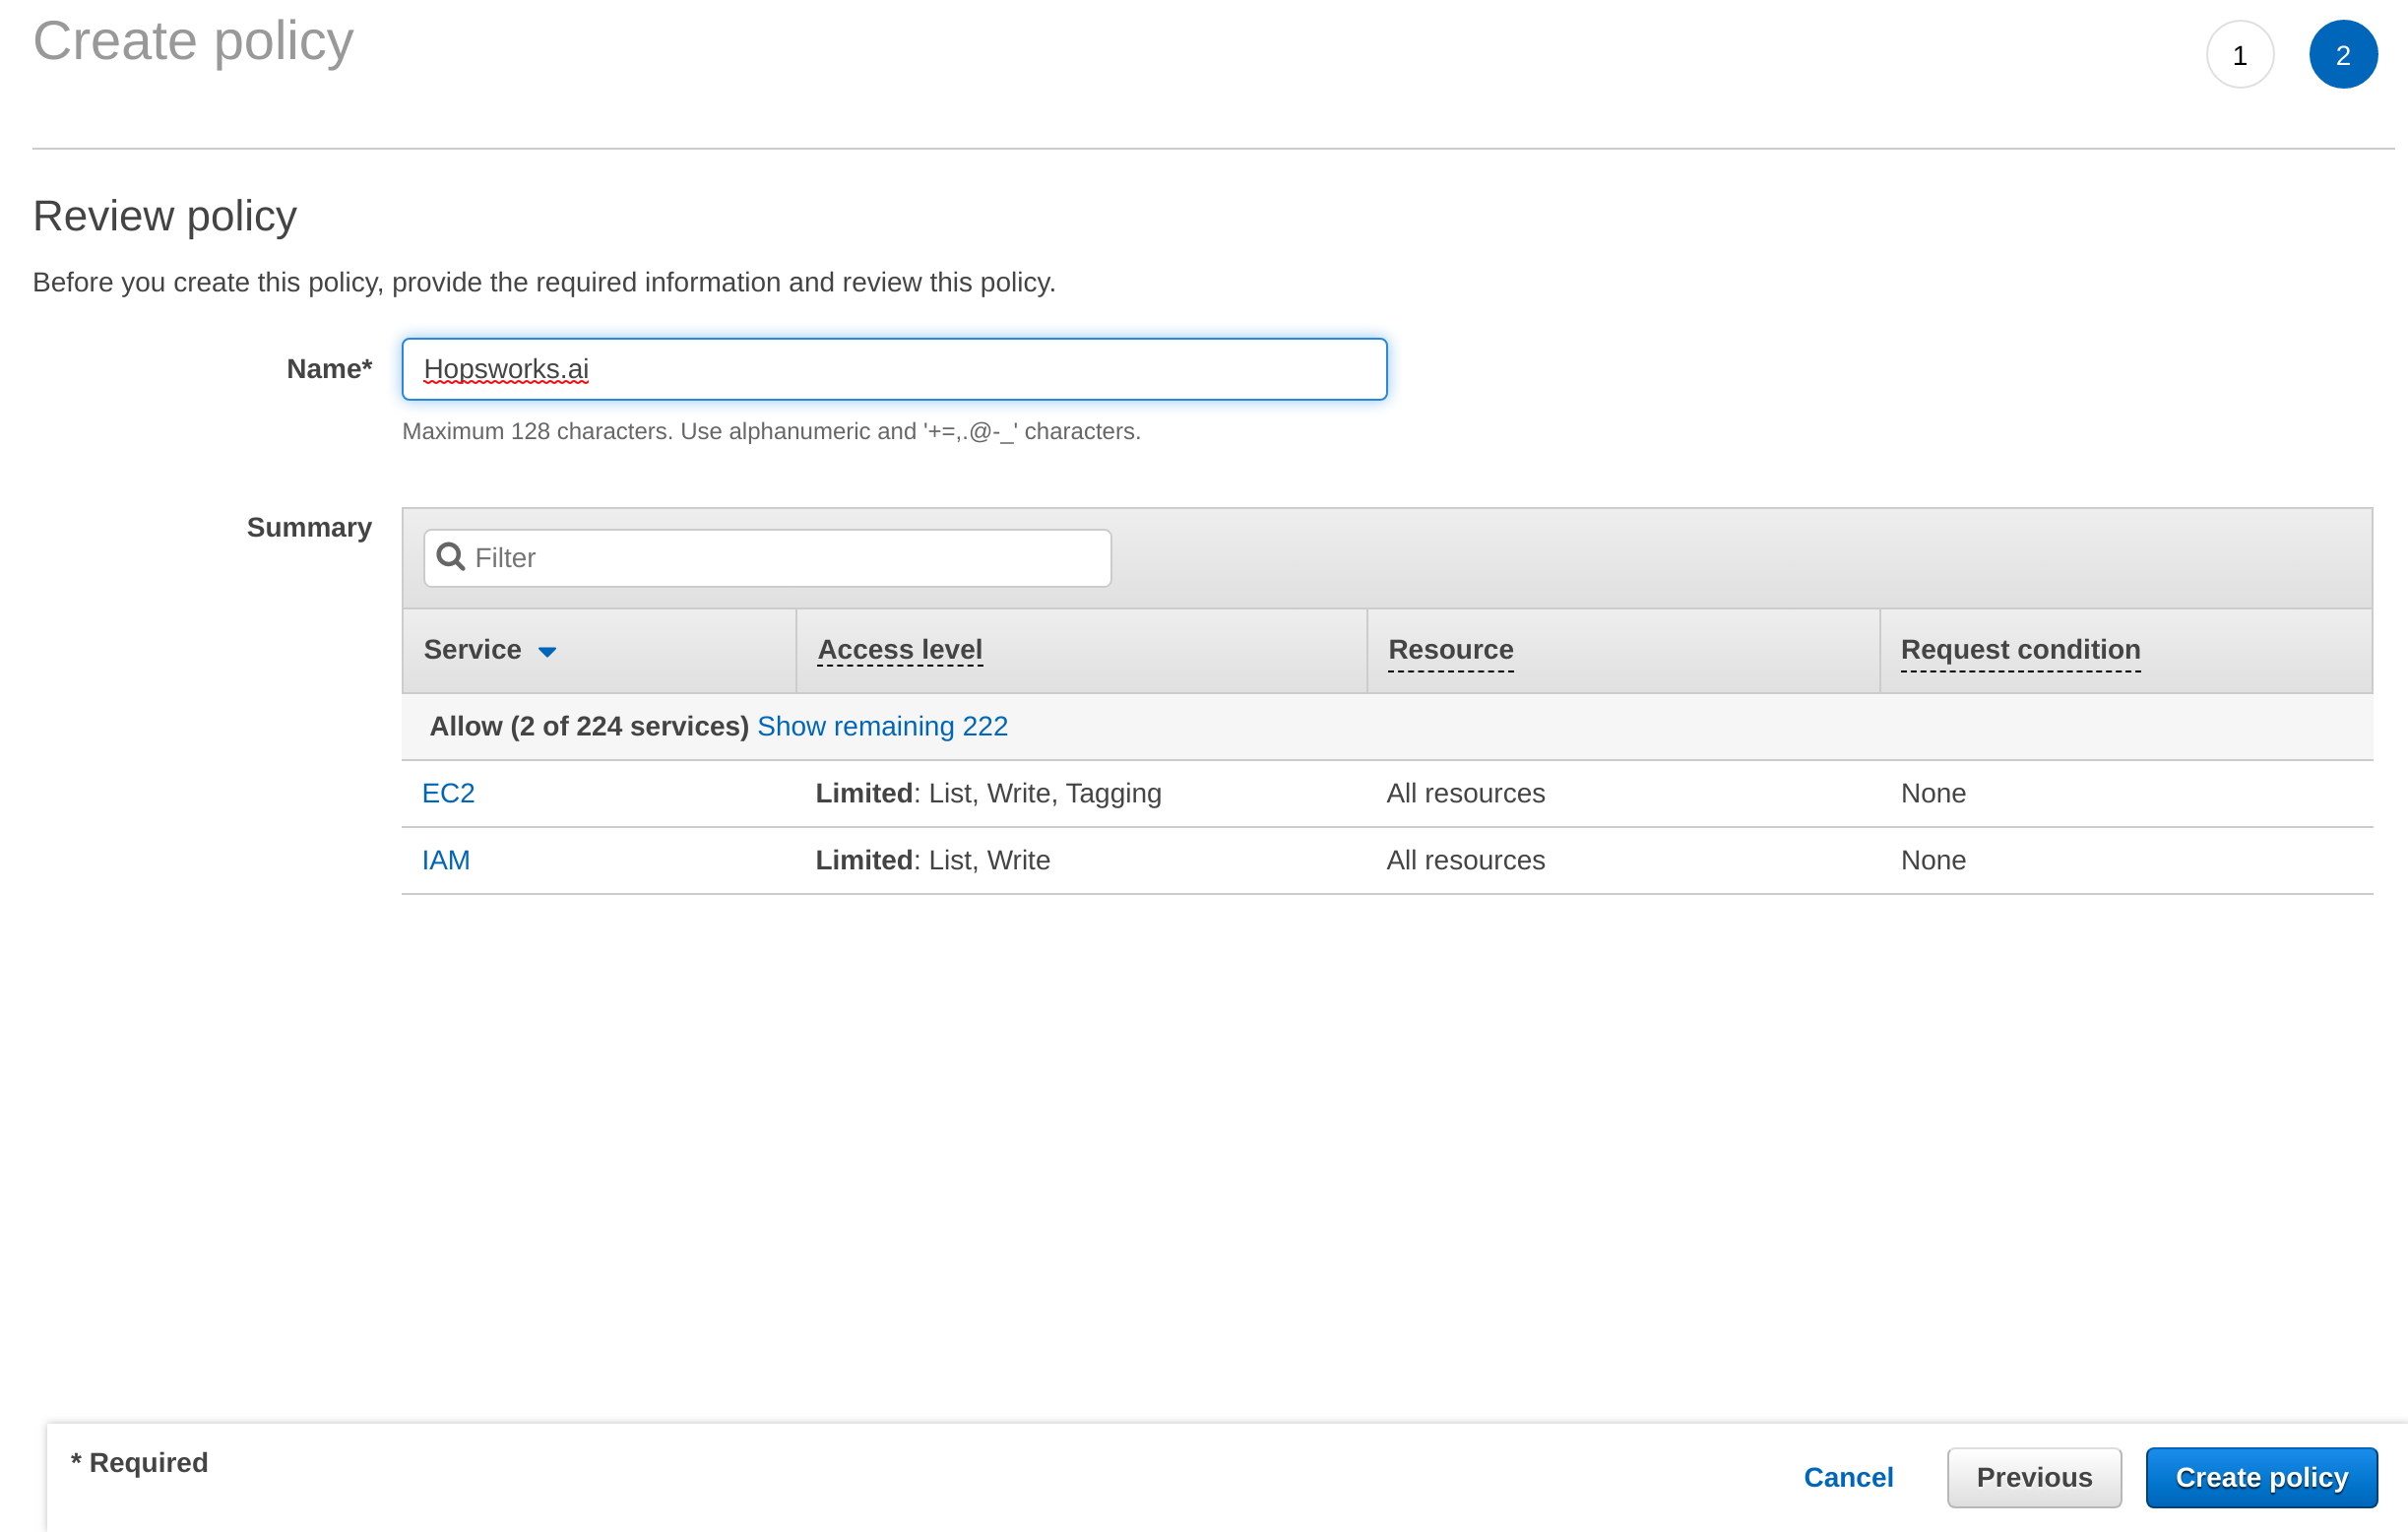
Name and create the policy:
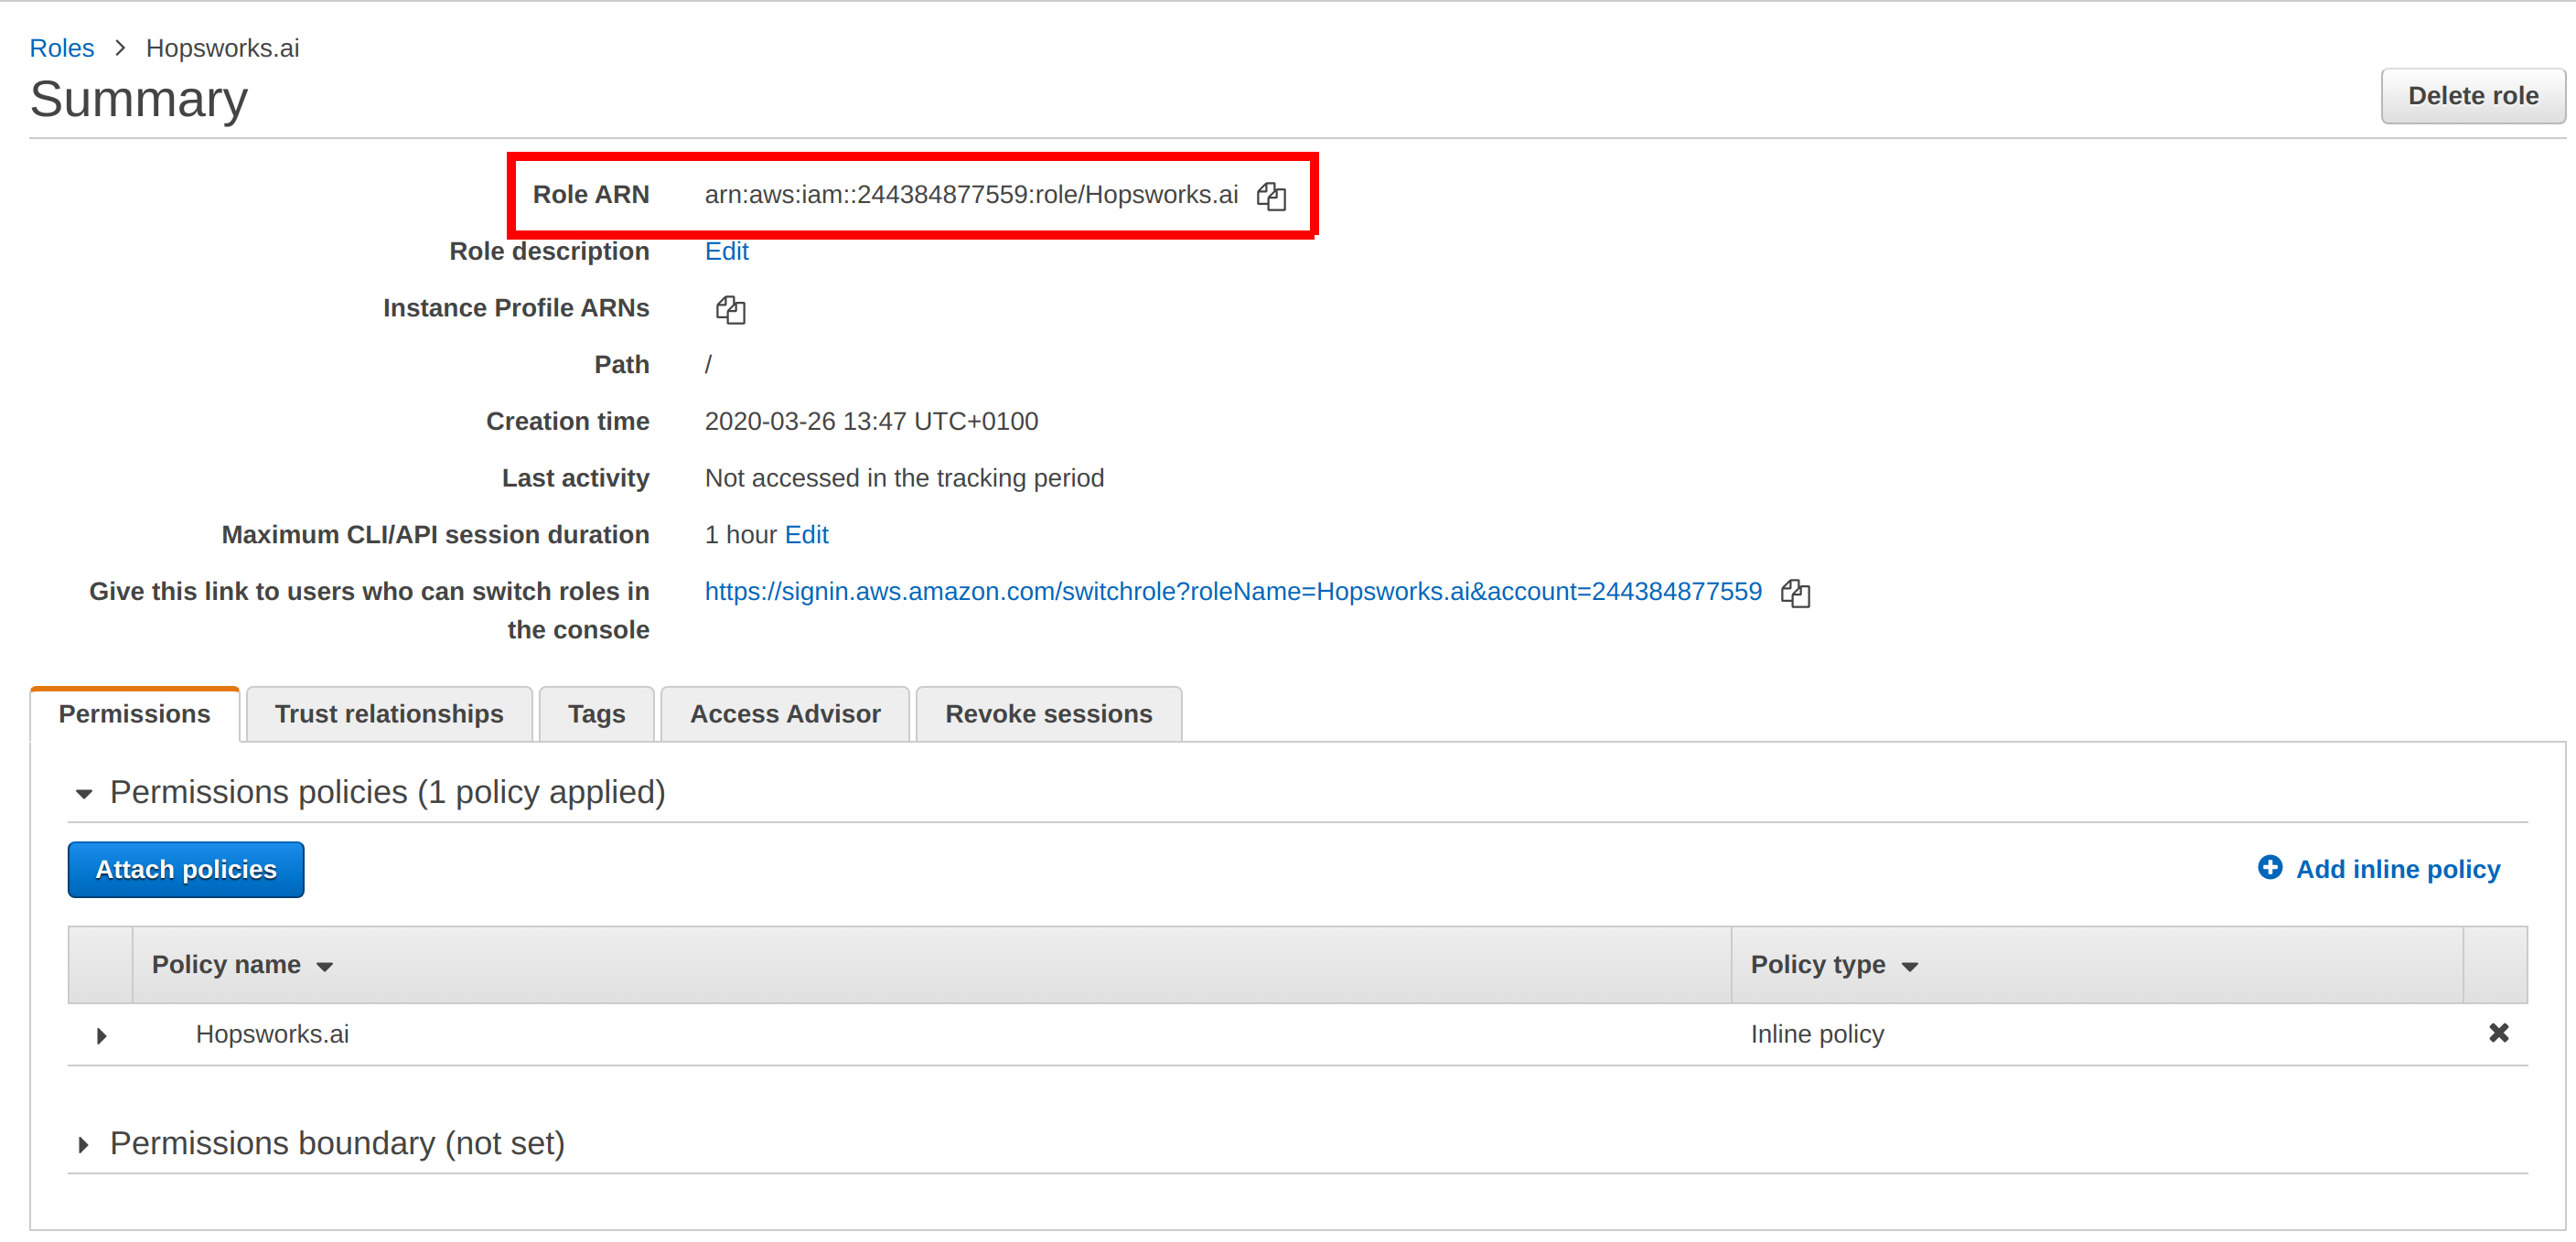
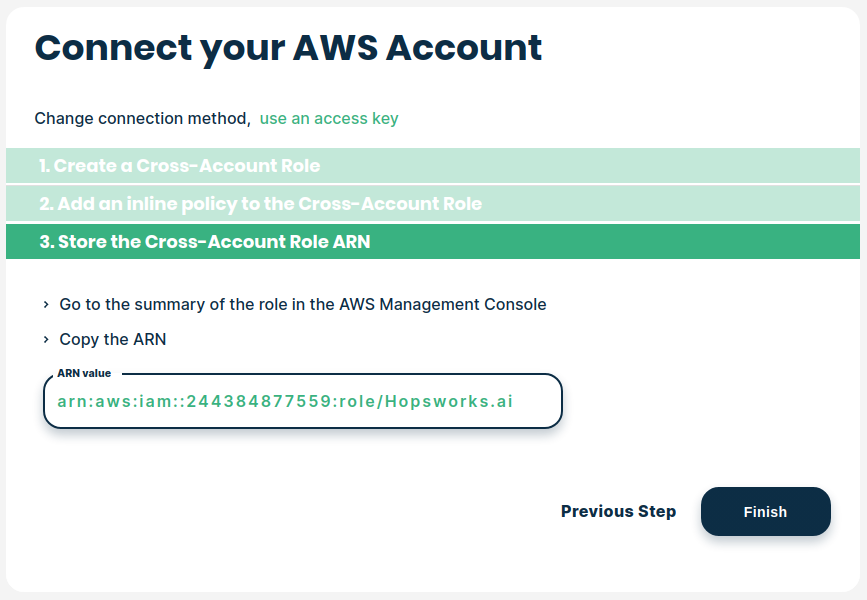
Copy the Role ARN from the summary of your cross-account role:
Paste the Role ARN into Hopsworks.ai and click on Finish:
Option 2: Using AWS Access Keys#
You can either create a new IAM user or use an existing IAM user to create access keys for Hopsworks.ai. If you want to create a new IAM user, see Creating an IAM User in Your AWS Account.
Warning
We recommend using Cross-Account Roles instead of Access Keys whenever possible, see Option 1: Using AWS Cross-Account Roles.
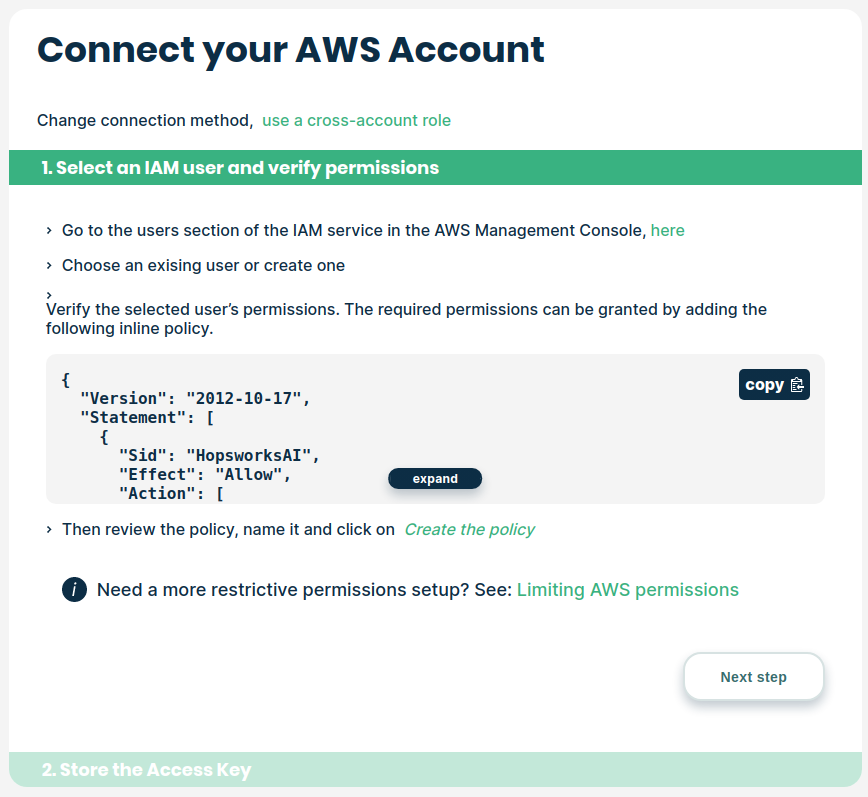
Hopsworks.ai requires a set of permissions to be able to launch clusters in your AWS account. The permissions can be granted by attaching an access policy to your IAM user. By default, Hopsworks.ai is automating all steps required to launch a new Hopsworks cluster. If you want to limit the required AWS permissions, see restrictive-permissions.
The required permissions are shown in the instructions. Copy them if you want to create a new access policy:
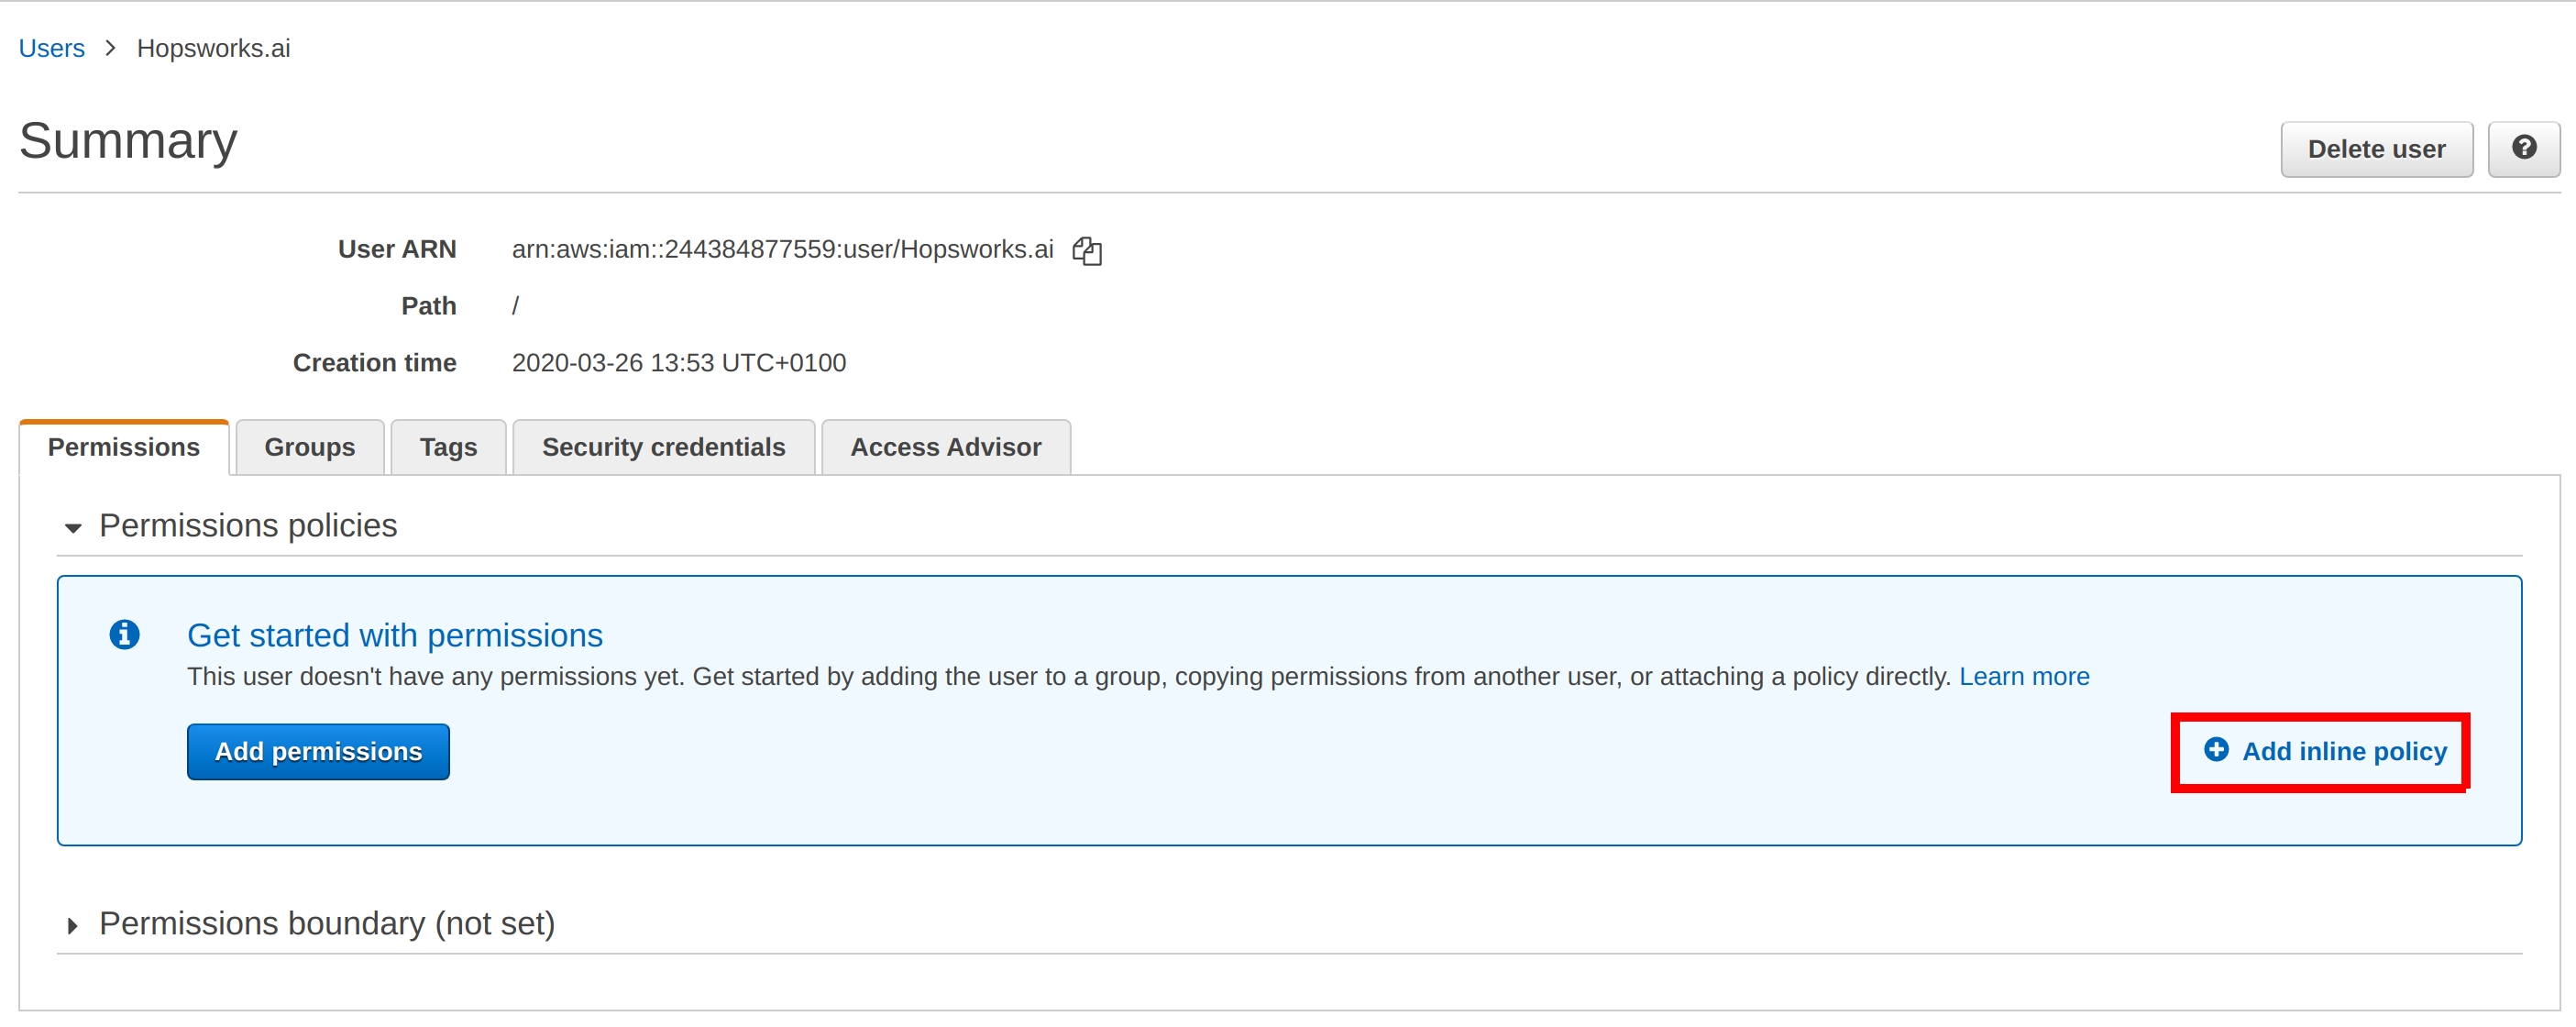
Add a new Inline policy to your AWS user:
Replace the JSON policy with the JSON from our instructions and continue in the wizard:
Name and create the policy:
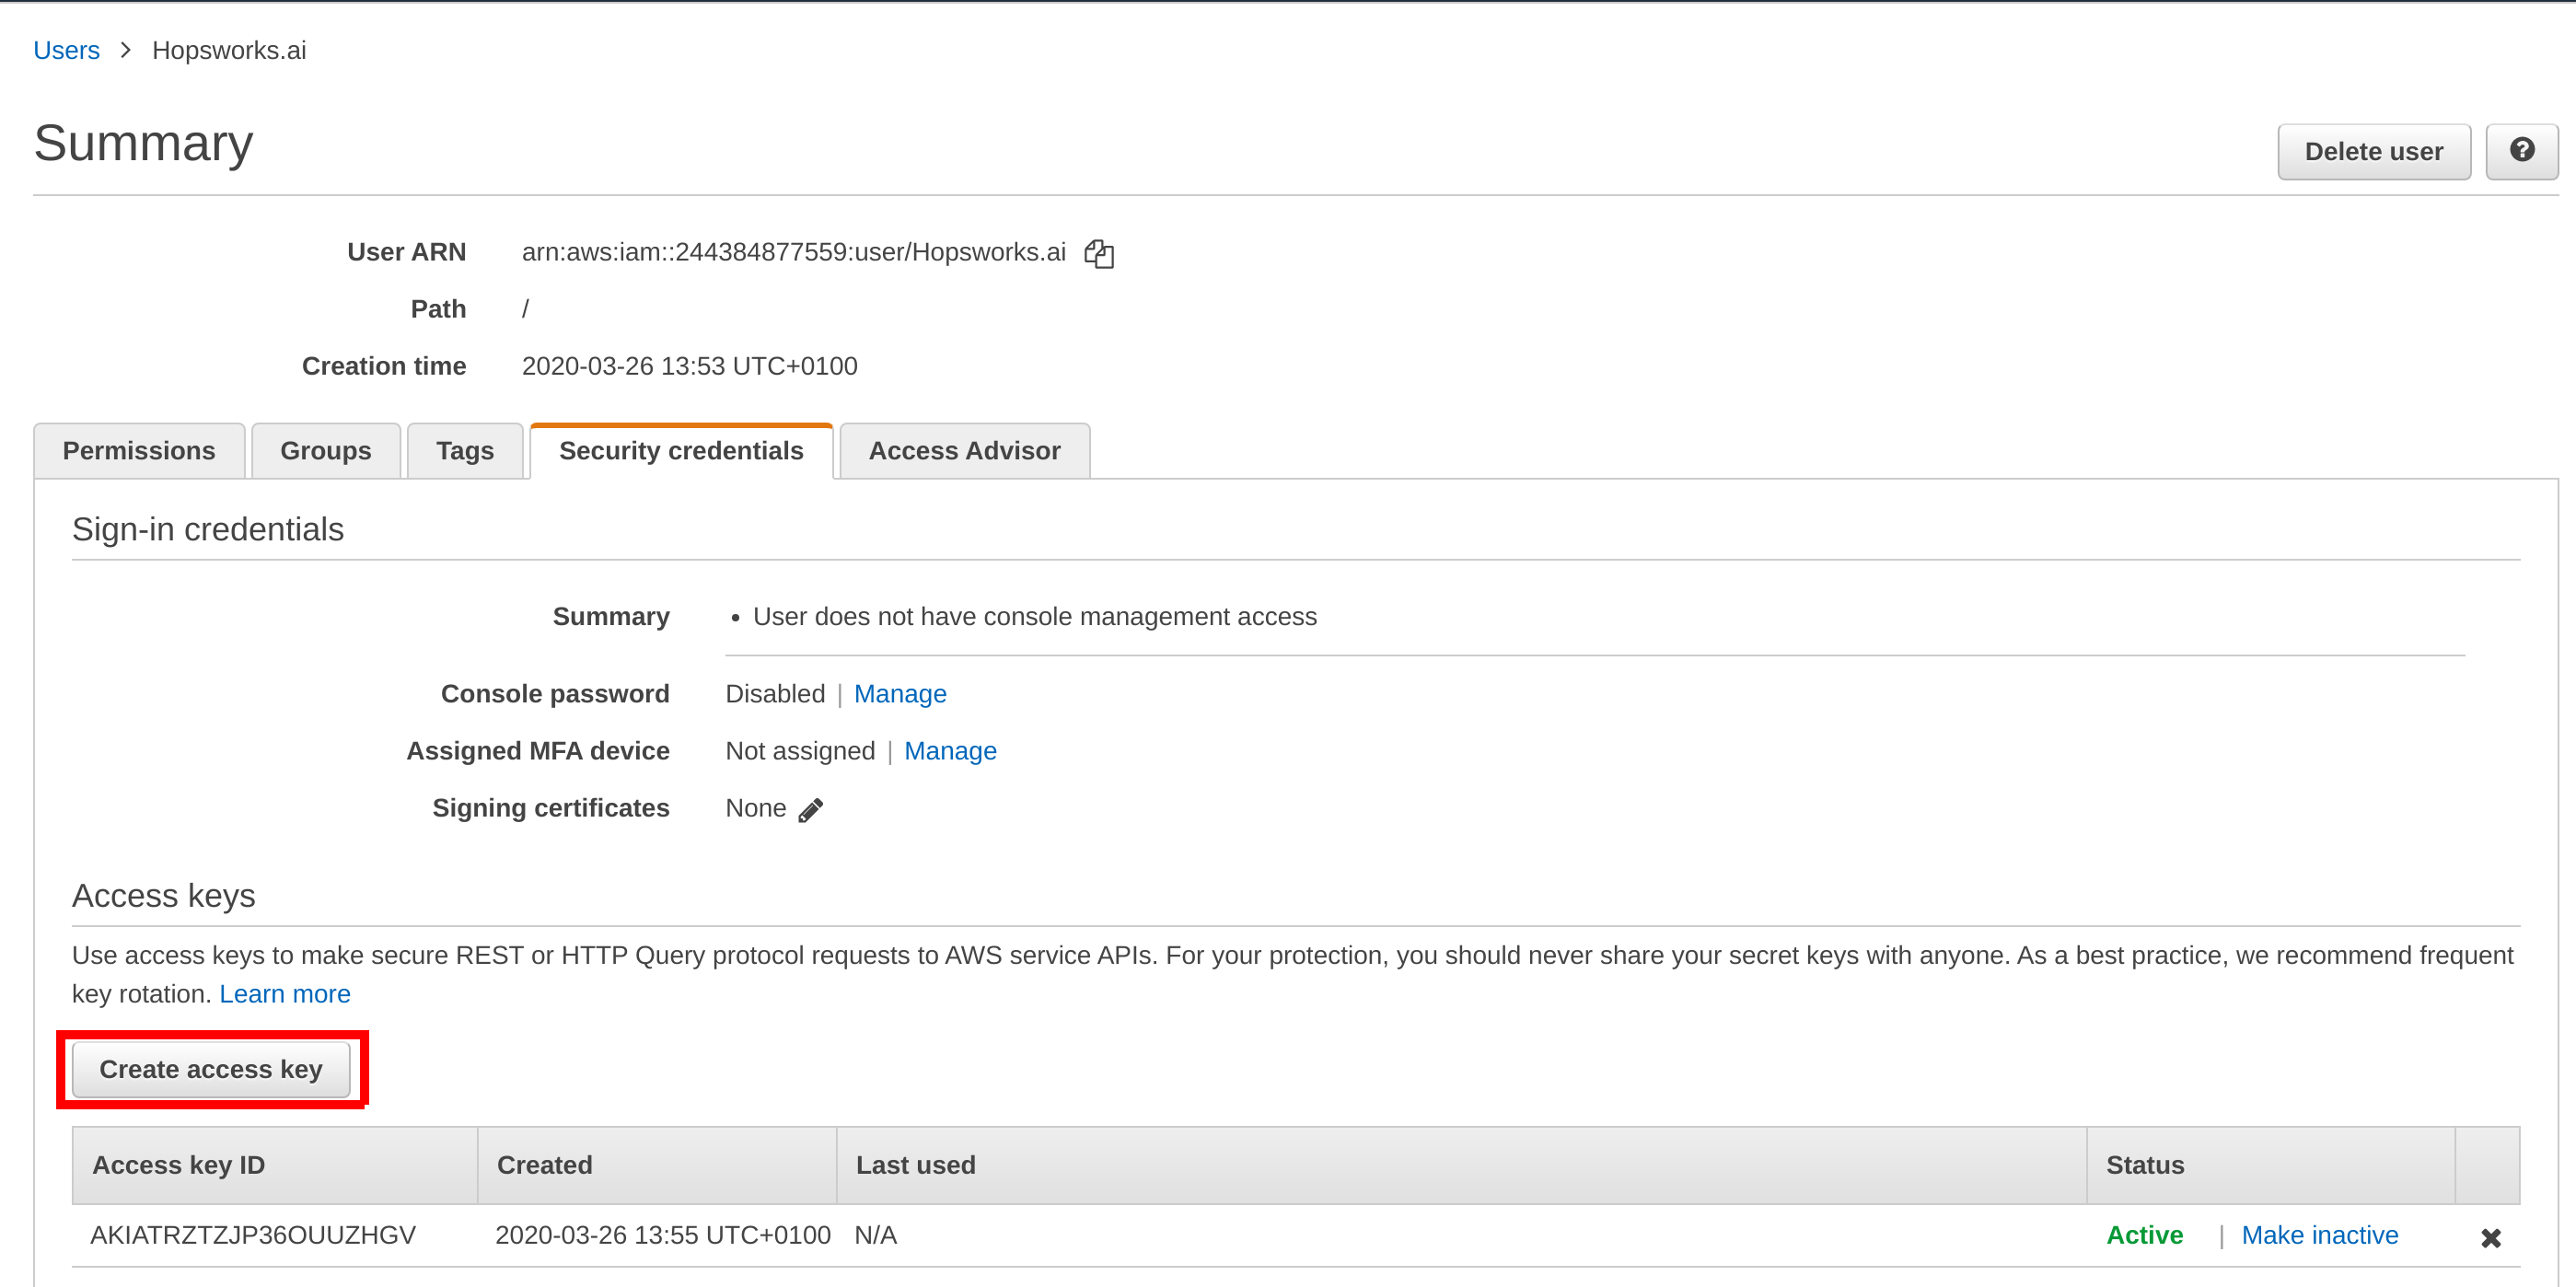
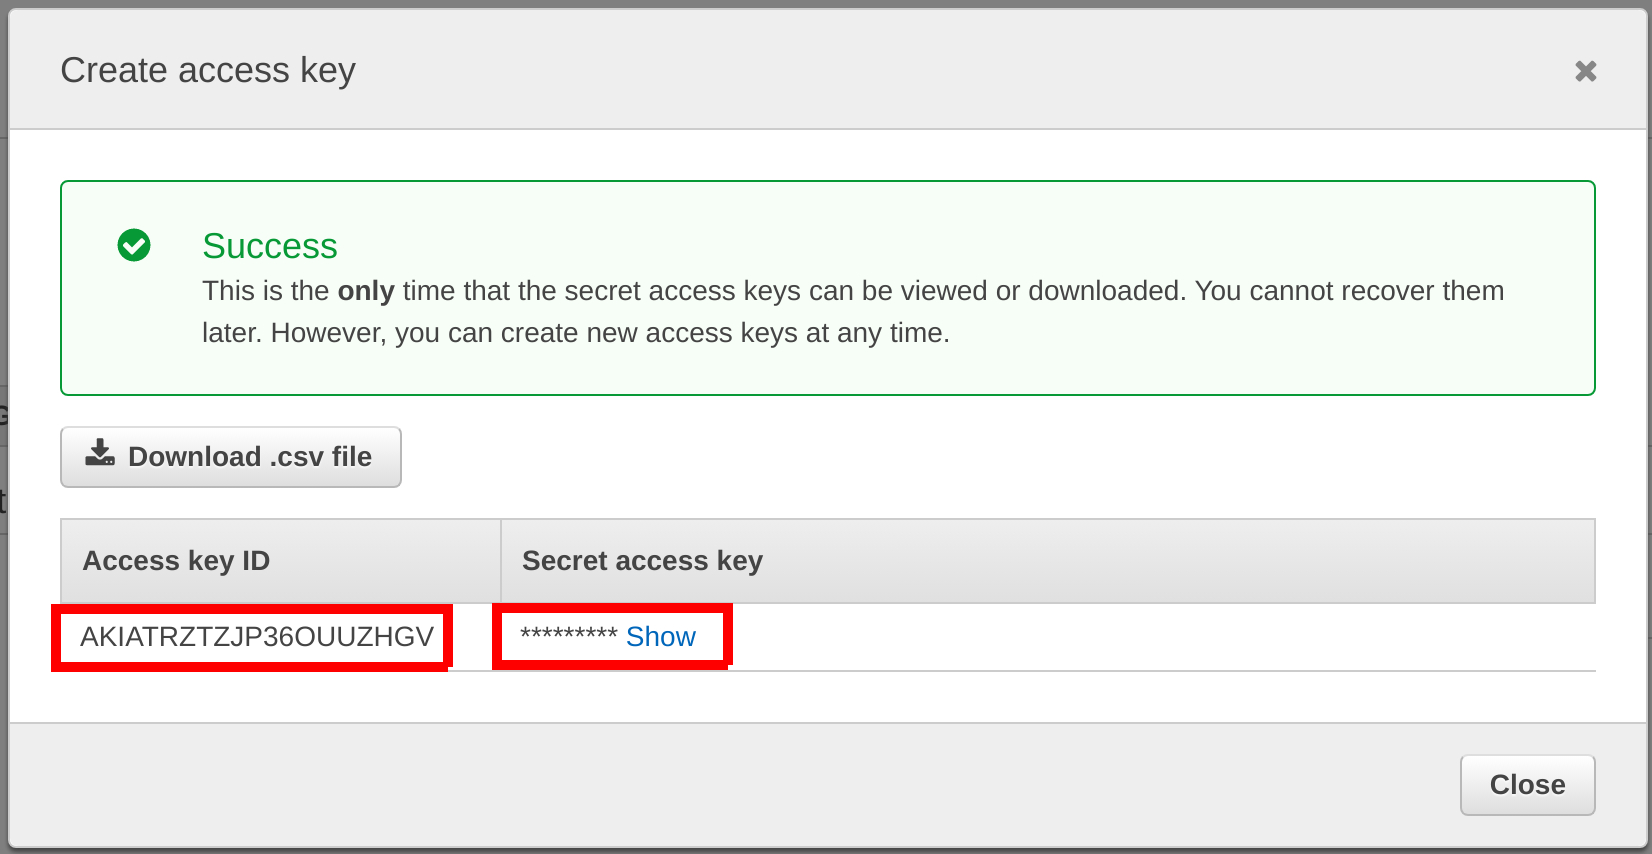
In the overview of your IAM user, select Create access key:
Copy the Access Key ID and the Secret Access Key:
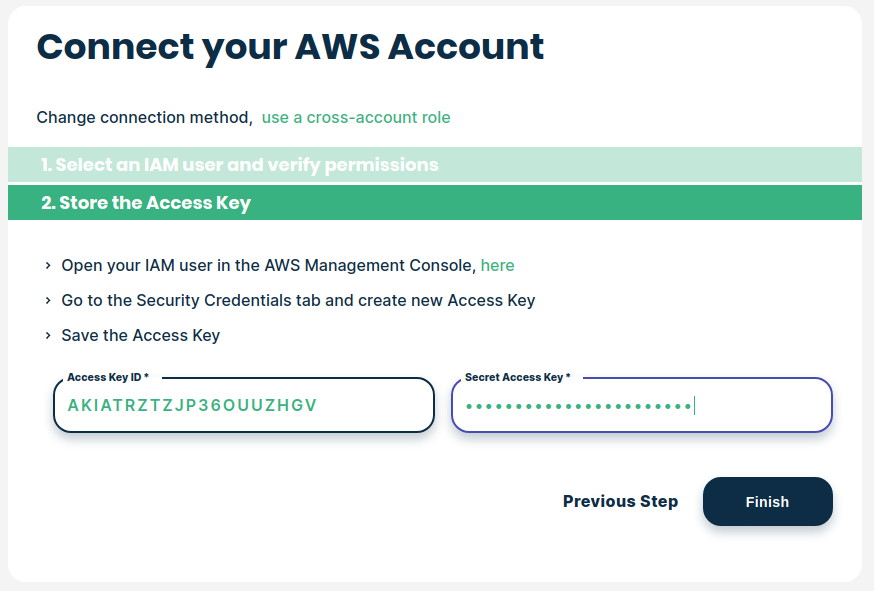
Paste the Access Key ID and the Secret Access Key into Hopsworks.ai and click on Finish:
Step 2: Creating Instance profile#
Note
If you prefer using terraform, you can skip this step and the remaining steps, and instead follow this guide.
Hopsworks cluster nodes need access to certain resources such as S3 bucket and CloudWatch.
Follow the instructions in this guide to create an IAM instance profile with access to your S3 bucket: Guide
When creating the policy, paste the following in the JSON tab.
Replace BUCKET_NAME with the appropriate S3 bucket name.
Note
Some of these permissions can be removed. Refer to this guide for more information.
{
  "Version": "2012-10-17",
  "Statement": [
    {
      "Sid": "hopsworksaiInstanceProfile",
      "Effect": "Allow",
      "Action": [
        "S3:PutObject",
        "S3:ListBucket",
        "S3:GetBucketLocation",
        "S3:GetObject",
        "S3:DeleteObject",
        "S3:AbortMultipartUpload",
        "S3:ListBucketMultipartUploads",
        "S3:PutLifecycleConfiguration",
        "S3:GetLifecycleConfiguration",
        "S3:PutBucketVersioning",
        "S3:GetBucketVersioning",
        "S3:ListBucketVersions",
        "S3:DeleteObjectVersion"
      ],
      "Resource": [
        "arn:aws:s3:::BUCKET_NAME/*",
        "arn:aws:s3:::BUCKET_NAME"
      ]
    },
    {
      "Effect": "Allow",
      "Action": [
        "cloudwatch:PutMetricData",
        "ec2:DescribeVolumes",
        "ec2:DescribeTags",
        "logs:PutLogEvents",
        "logs:DescribeLogStreams",
        "logs:DescribeLogGroups",
        "logs:CreateLogStream",
        "logs:CreateLogGroup"
      ],
      "Resource": "*"
    },
    {
      "Effect": "Allow",
      "Action": [
        "ssm:GetParameter"
      ],
      "Resource": "arn:aws:ssm:*:*:parameter/AmazonCloudWatch-*"
    },
    {
      "Sid": "UpgradePermissions",
      "Effect": "Allow",
      "Action": [
        "ec2:DescribeVolumes",
        "ec2:DetachVolume",
        "ec2:AttachVolume",
        "ec2:ModifyInstanceAttribute"
      ],
      "Resource": "*"
    }
  ]
}
Step 3: Creating storage#
The Hopsworks clusters deployed by hopsworks.ai store their data in an S3 bucket in your AWS account. To enable this you need to create an S3 bucket and an instance profile to give cluster nodes access to the bucket.
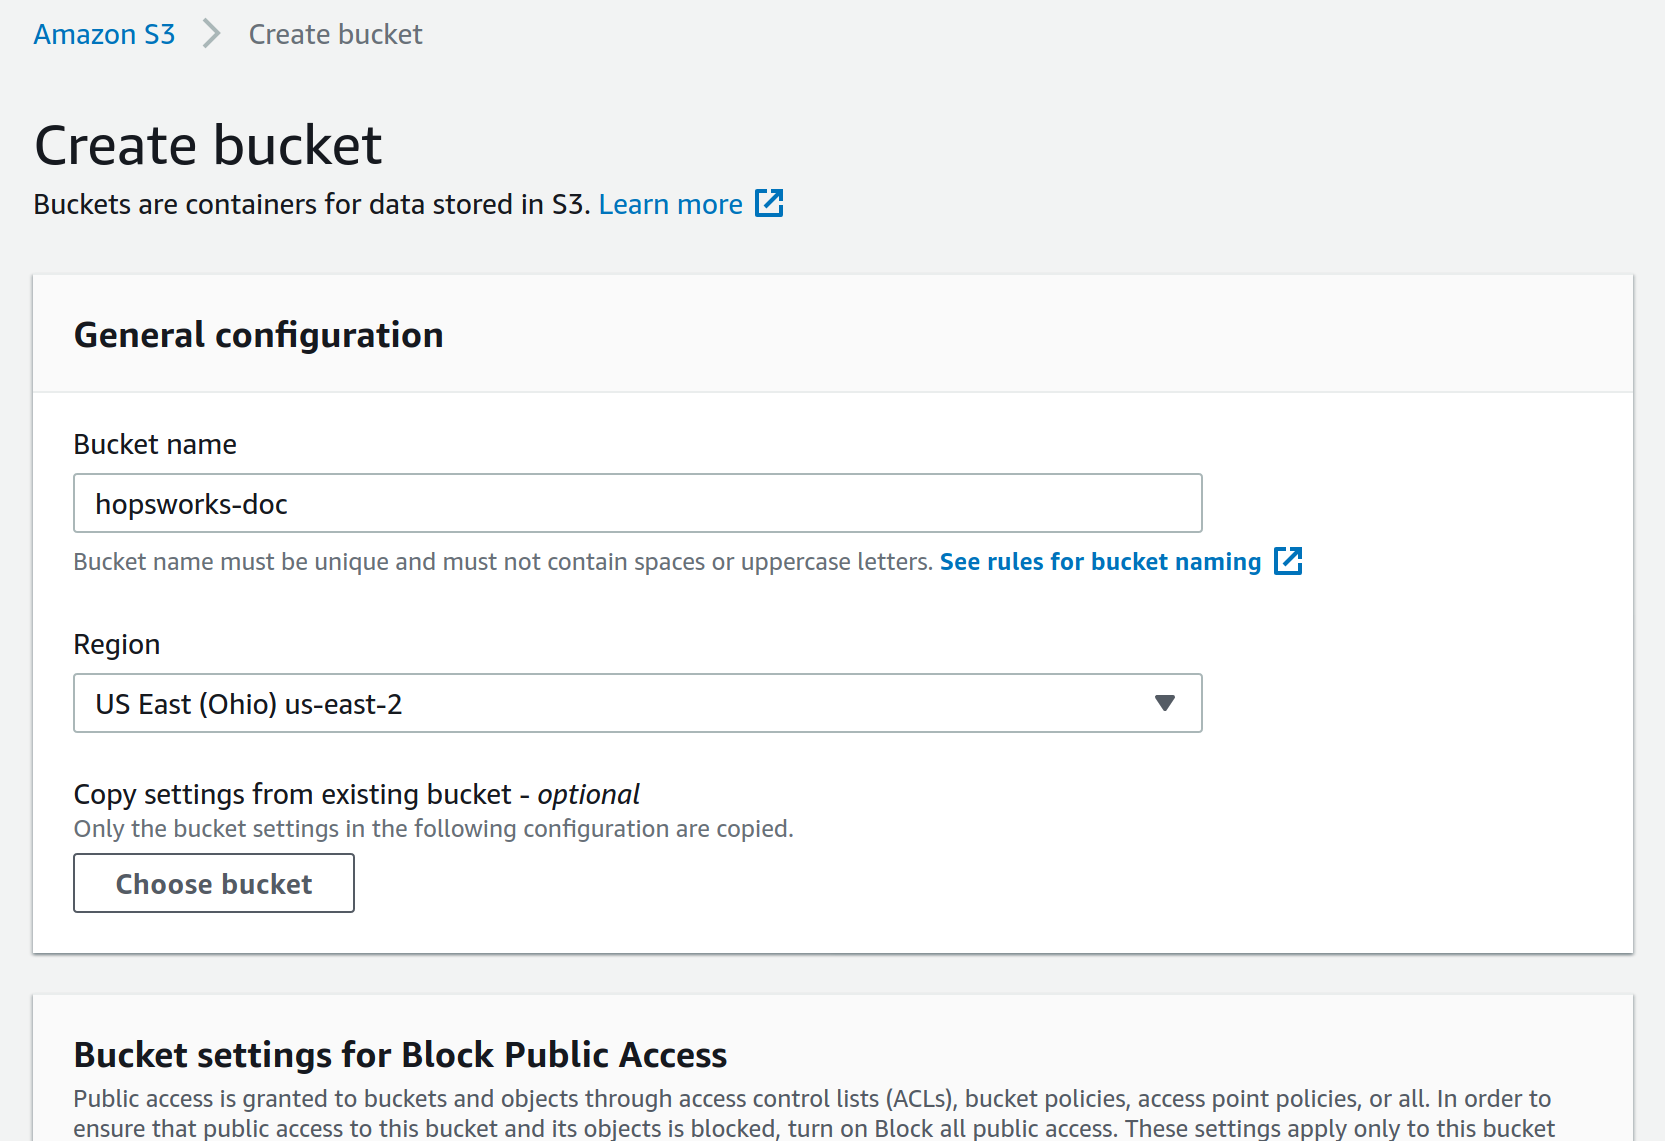
Proceed to the S3 Management Console and click on Create bucket:

Name your bucket and select the region where your Hopsworks cluster will run. Click on Create bucket at the bottom of the page.
Step 4: Create an SSH key#
When deploying clusters, Hopsworks.ai installs an ssh key on the cluster's instances so that you can access them if necessary. For this purpose, you need to add an ssh key to your AWS EC2 environment. This can be done in two ways: creating a new key pair or importing an existing key pair.
Step 4.1: Create a new key pair#
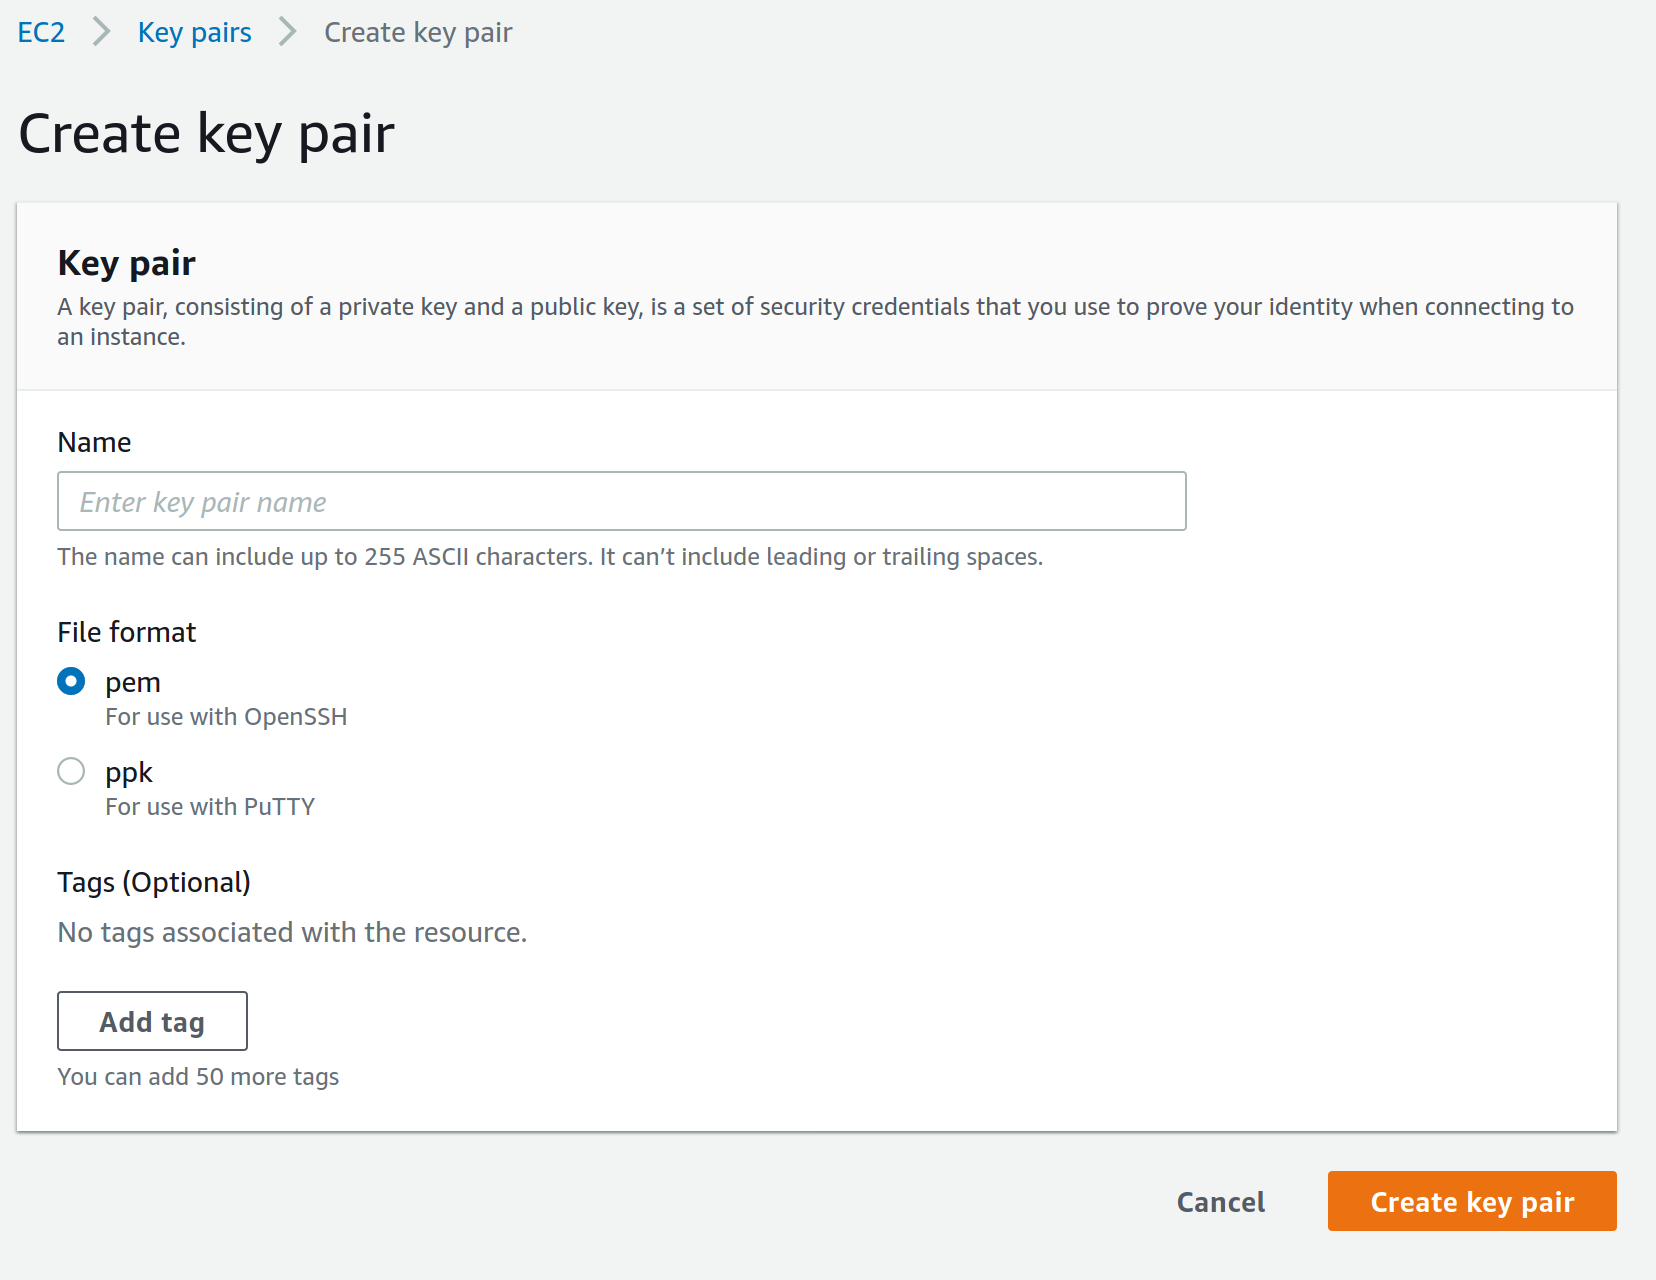
Proceed to Key pairs in the EC2 console and click on Create key pair

Name your key, select the file format you prefer and click on Create key pair.
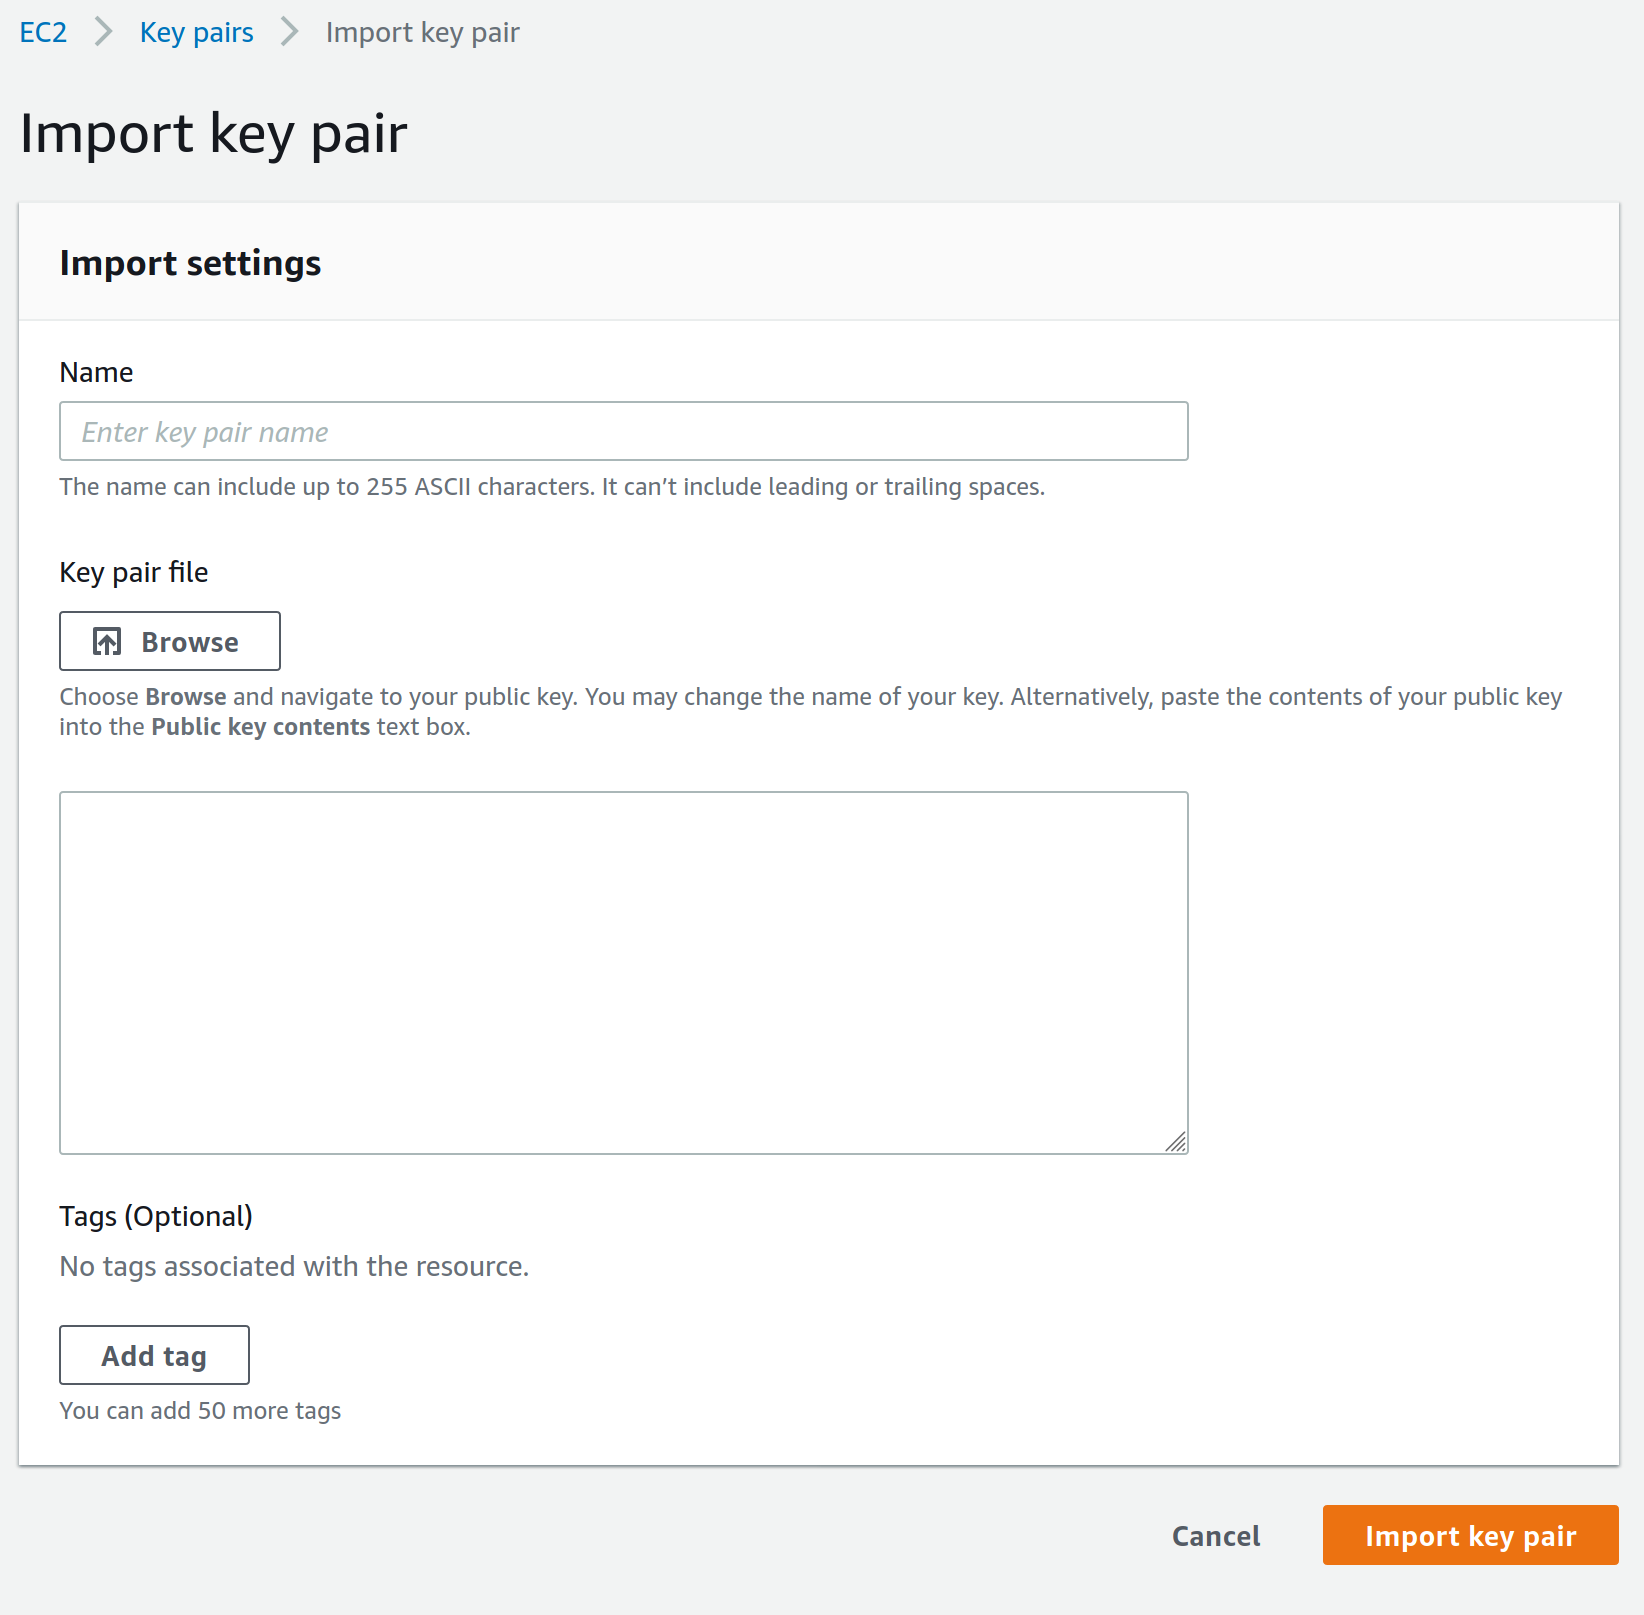
Step 4.2: Import a key pair#
Proceed to Key pairs in the EC2 console, click on Action and click on Import key pair

Name your key pair, upload your public key and click on Import key pair.
Step 5: Deploying a Hopsworks cluster#
In Hopsworks.ai, select Create cluster:

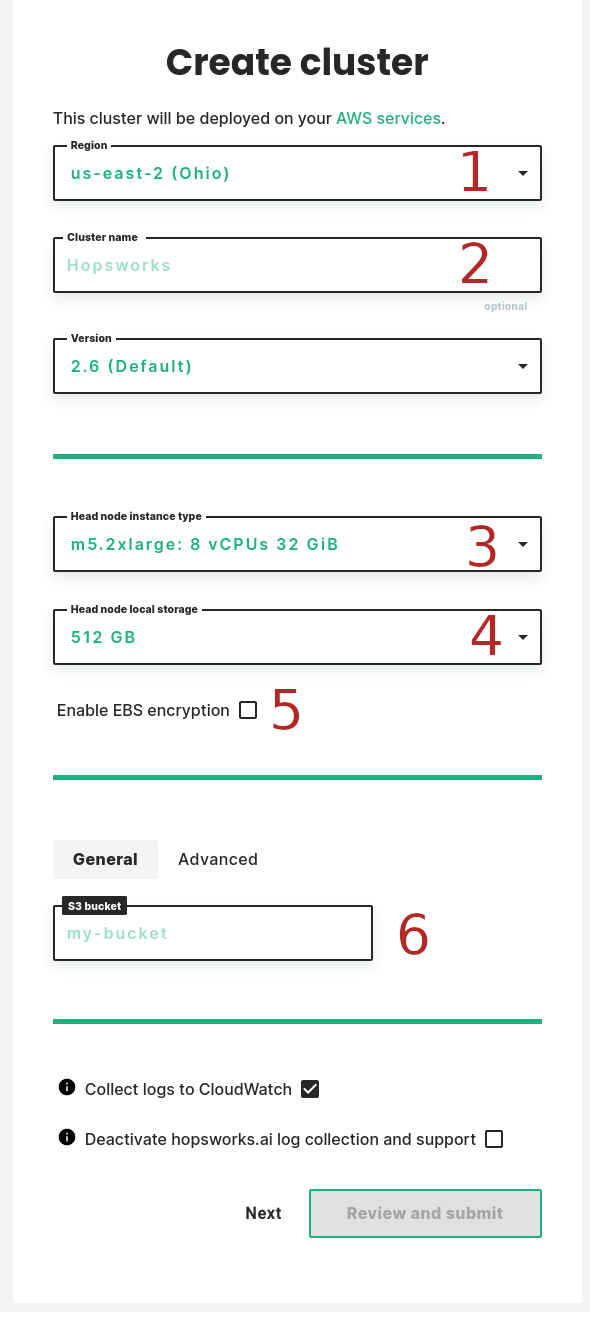
Select the Region in which you want your cluster to run (1), name your cluster (2).
Select the Instance type (3) and Local storage (4) size for the cluster Head node.
Enter the name of the S3 bucket (5) you created above in S3 bucket.
Note
The S3 bucket you are using must be empty.
Press Next:
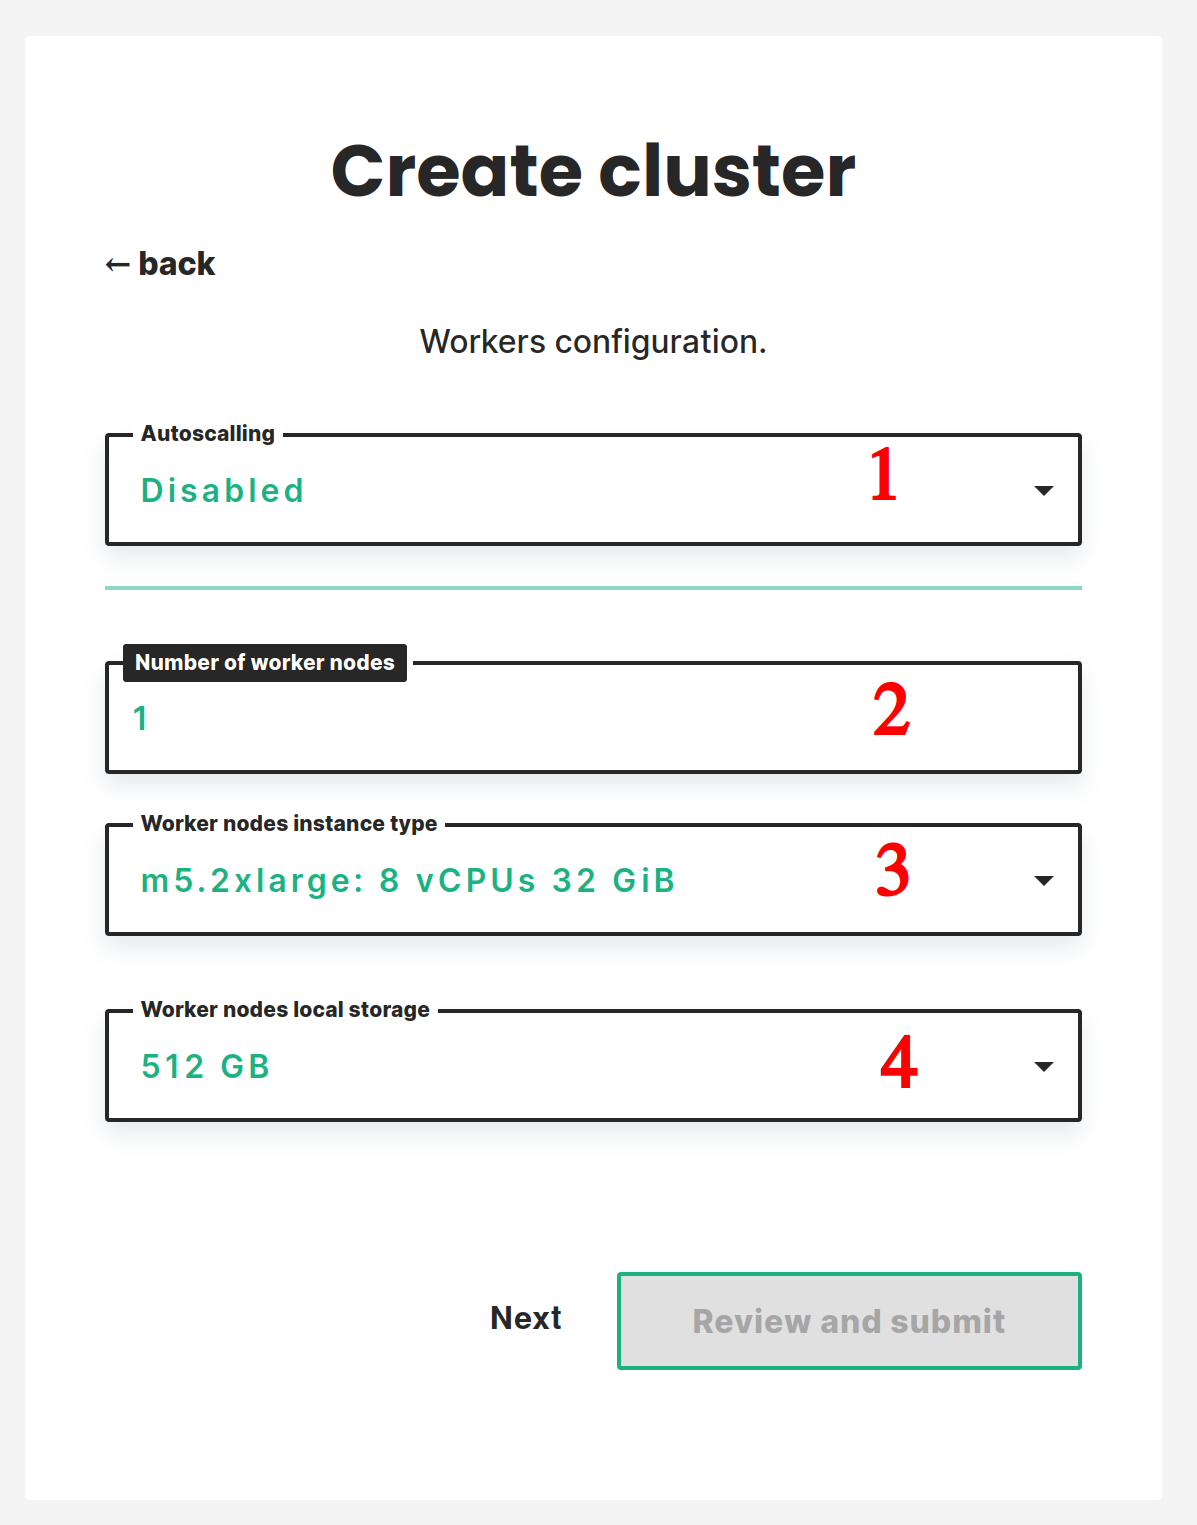
Select the number of workers you want to start the cluster with (2). Select the Instance type (3) and Local storage size (4) for the worker nodes.
Note
It is possible to add or remove workers or to enable autoscaling once the cluster is running.
Press Next:
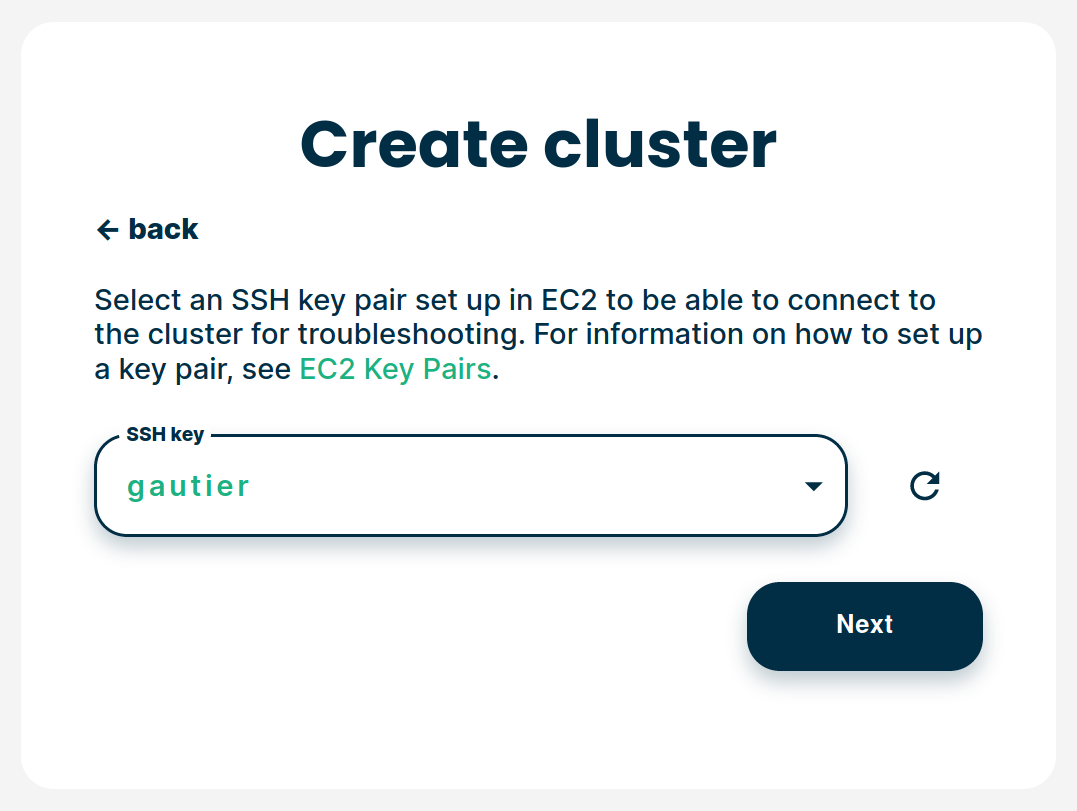
Select the SSH key that you want to use to access cluster instances:
Select the Instance Profile that you created above:
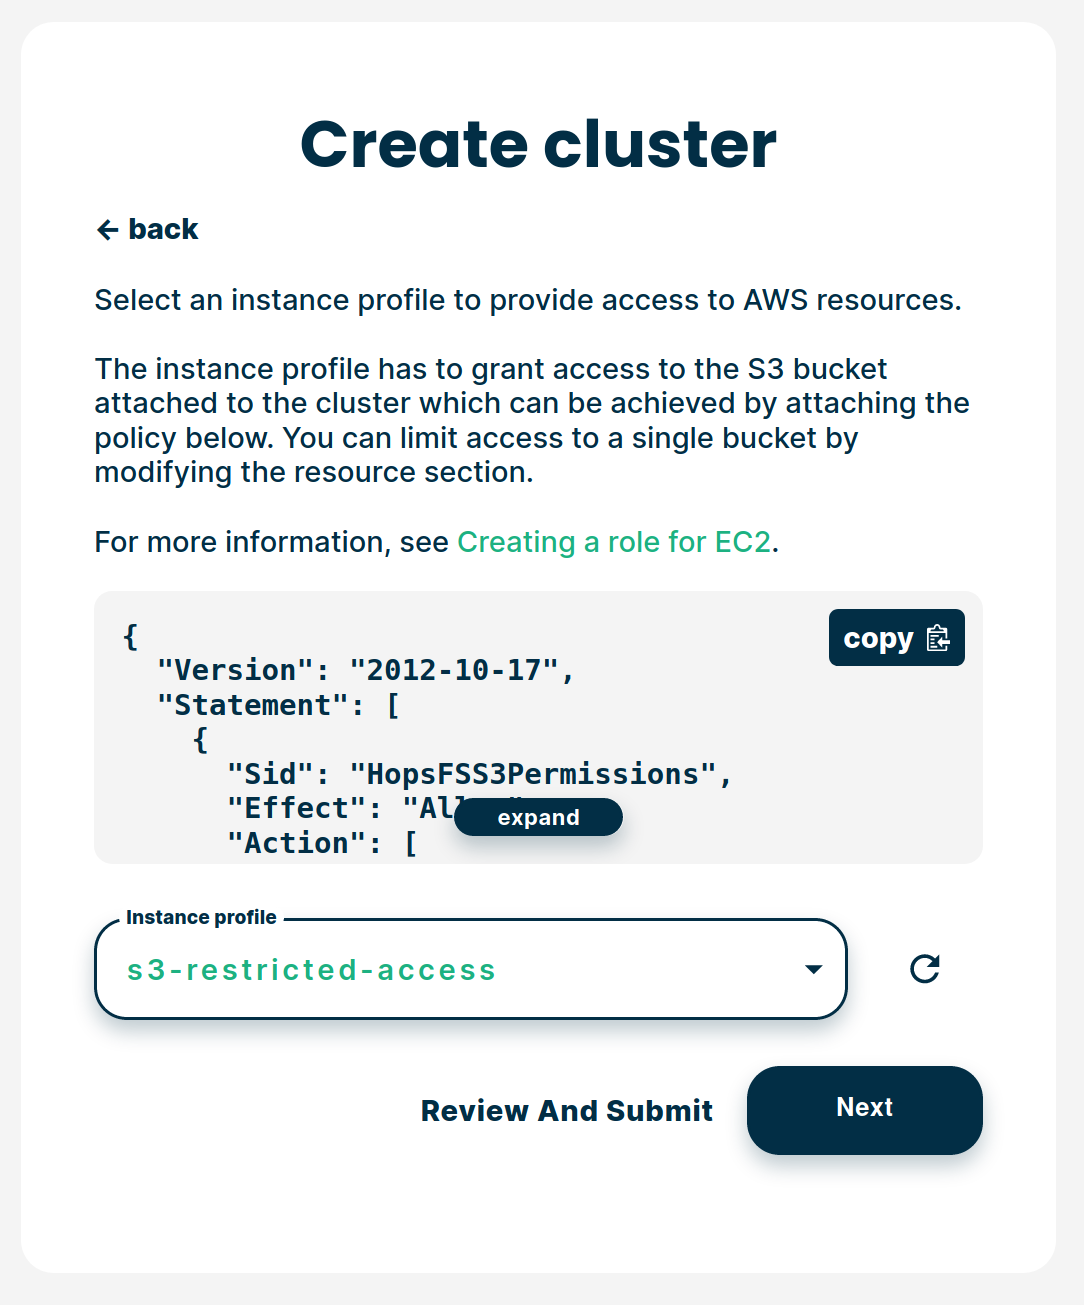
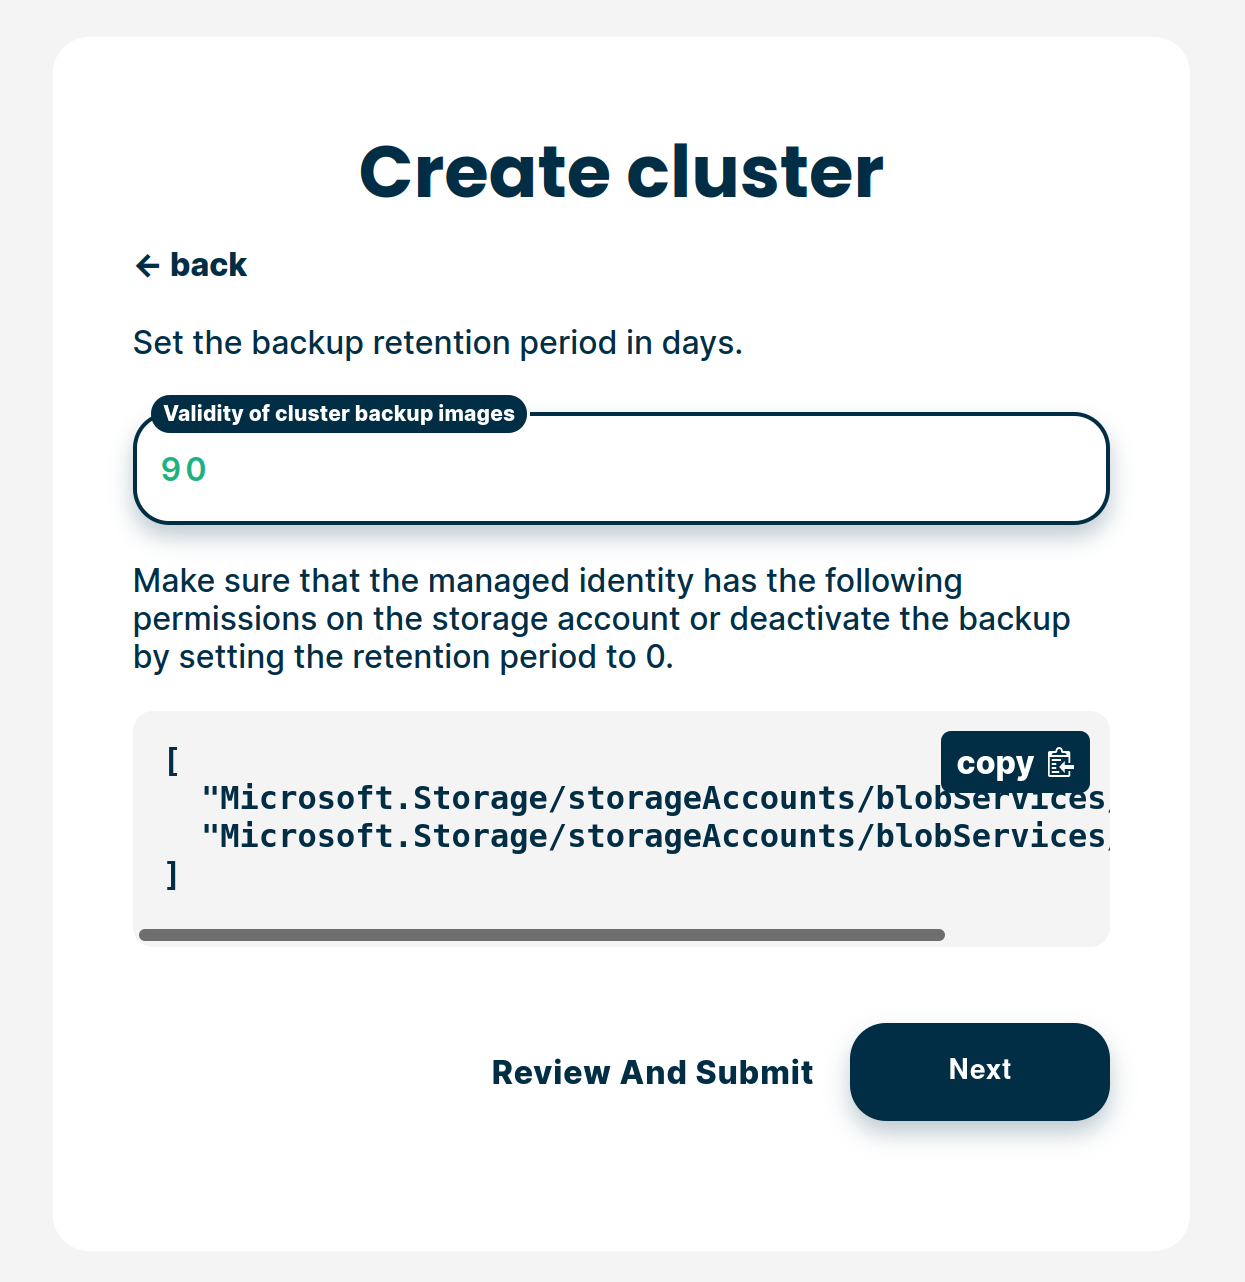
To backup the S3 bucket data when taking a cluster backup we need to set a retention policy for S3. You can deactivate the retention policy by setting this value to 0 but this will block you from taking any backup of your cluster. Choose the retention period in day and click on Review and submit:
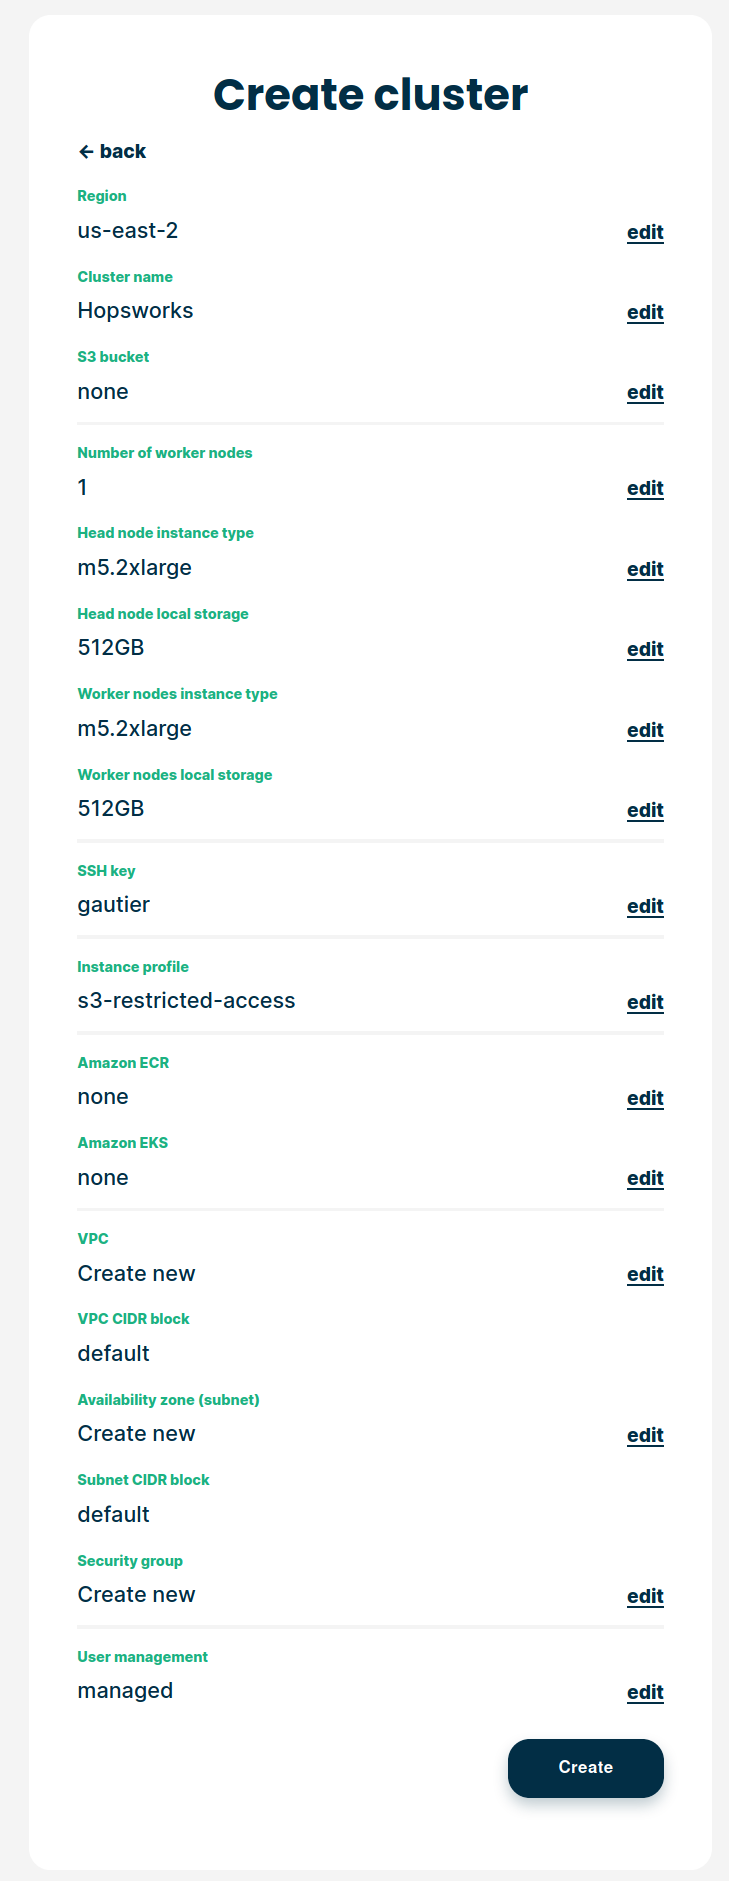
Review all information and select Create:
The cluster will start. This will take a few minutes:
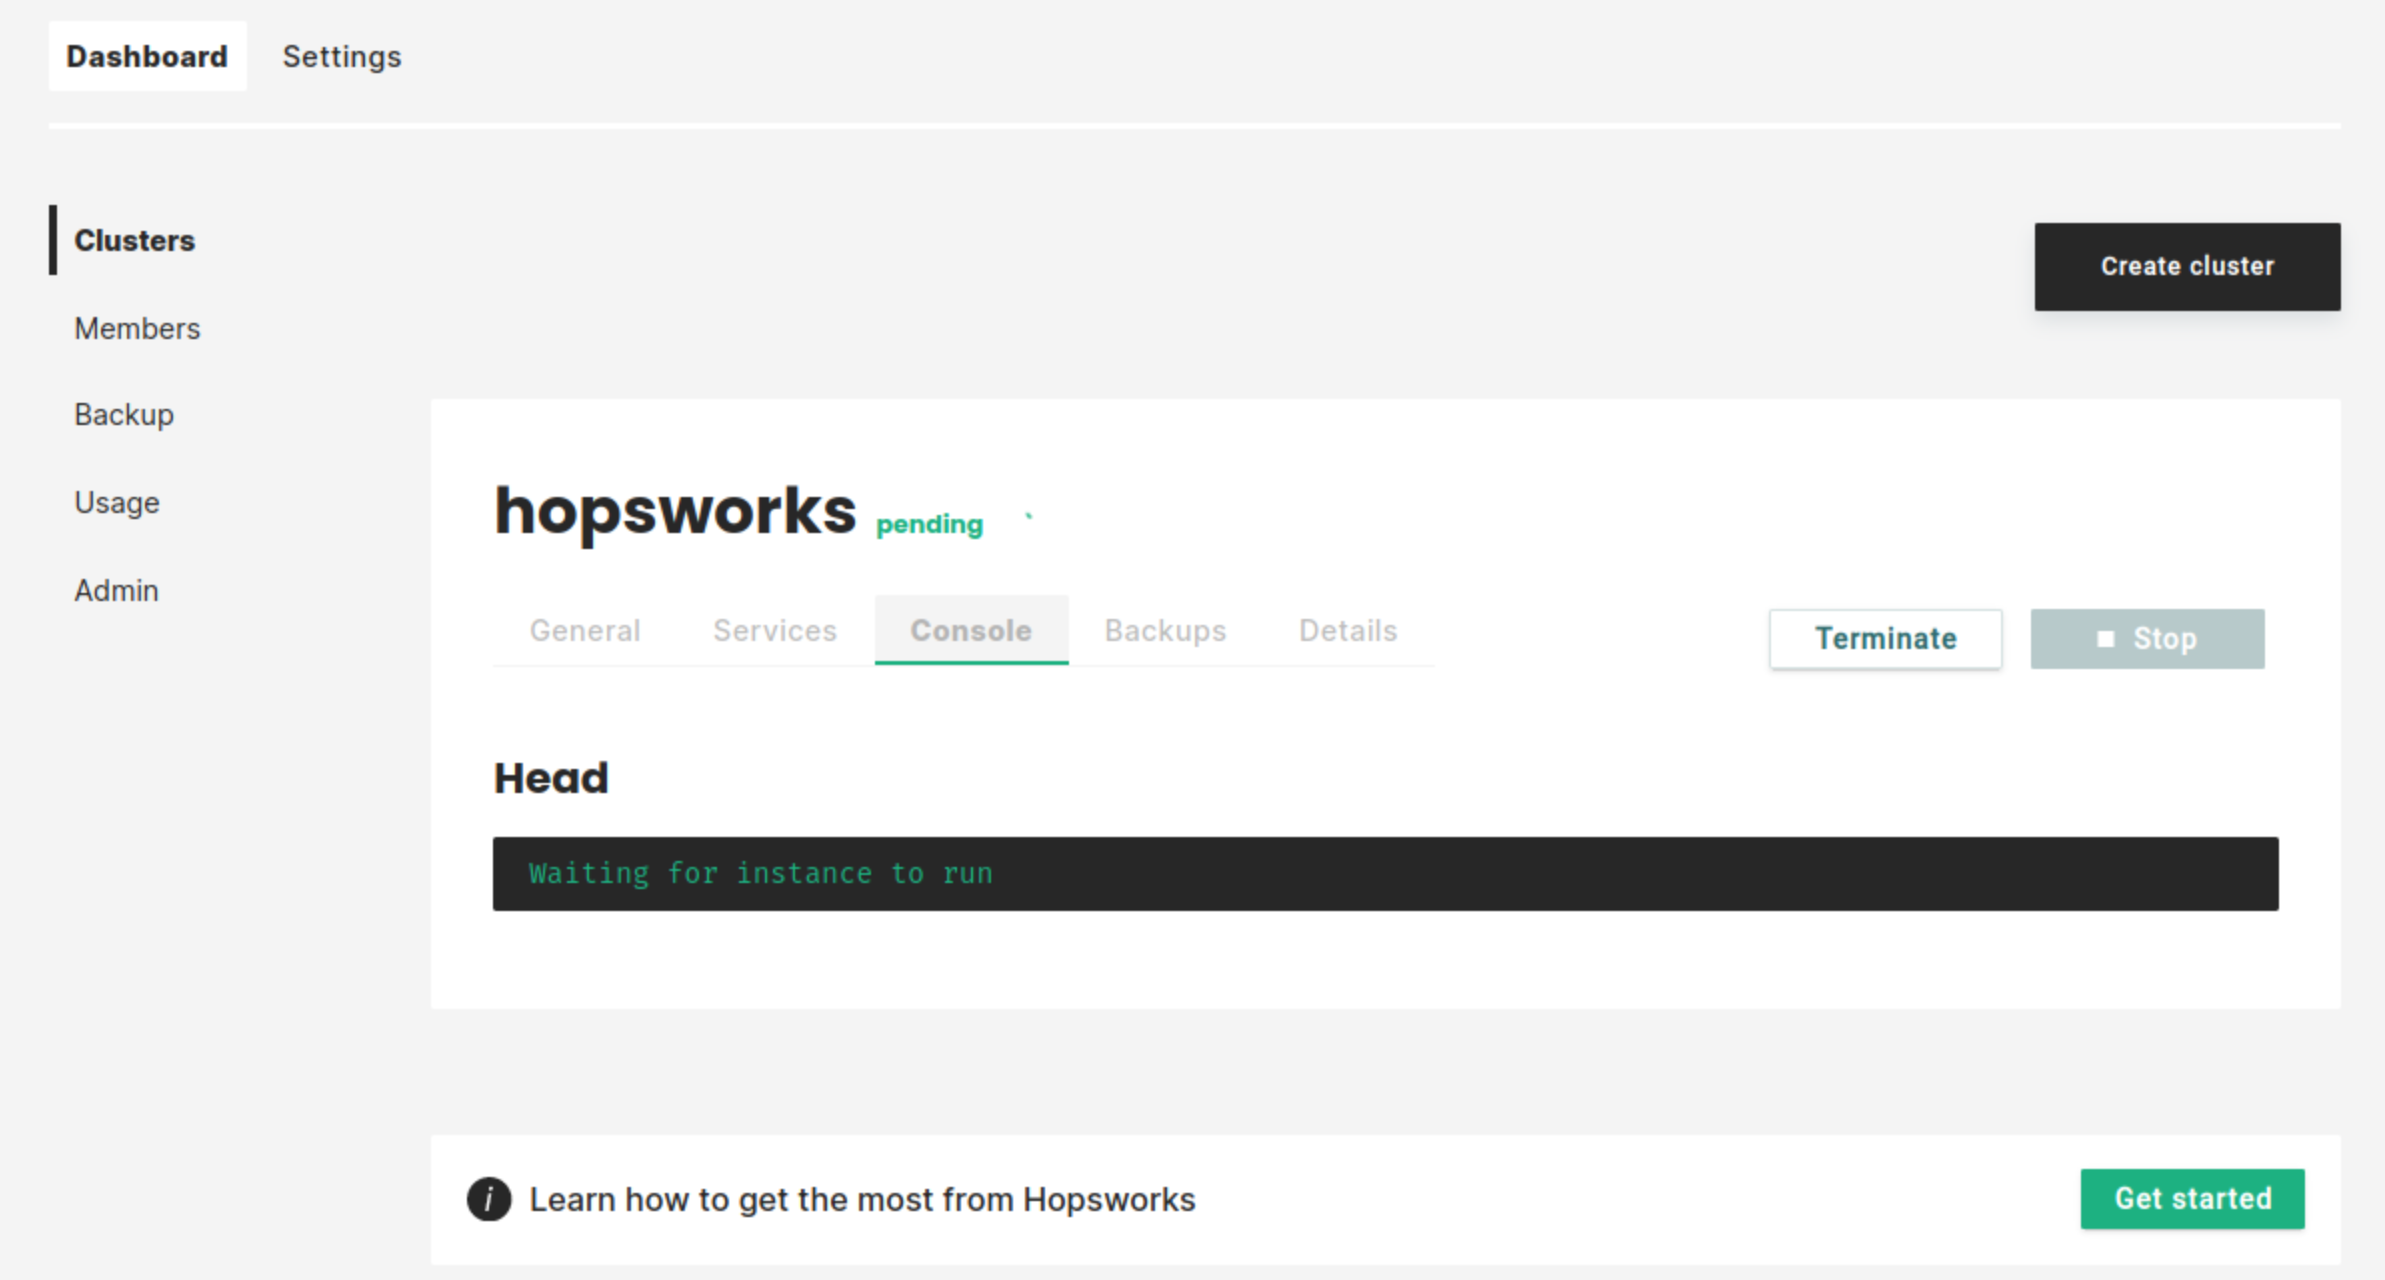
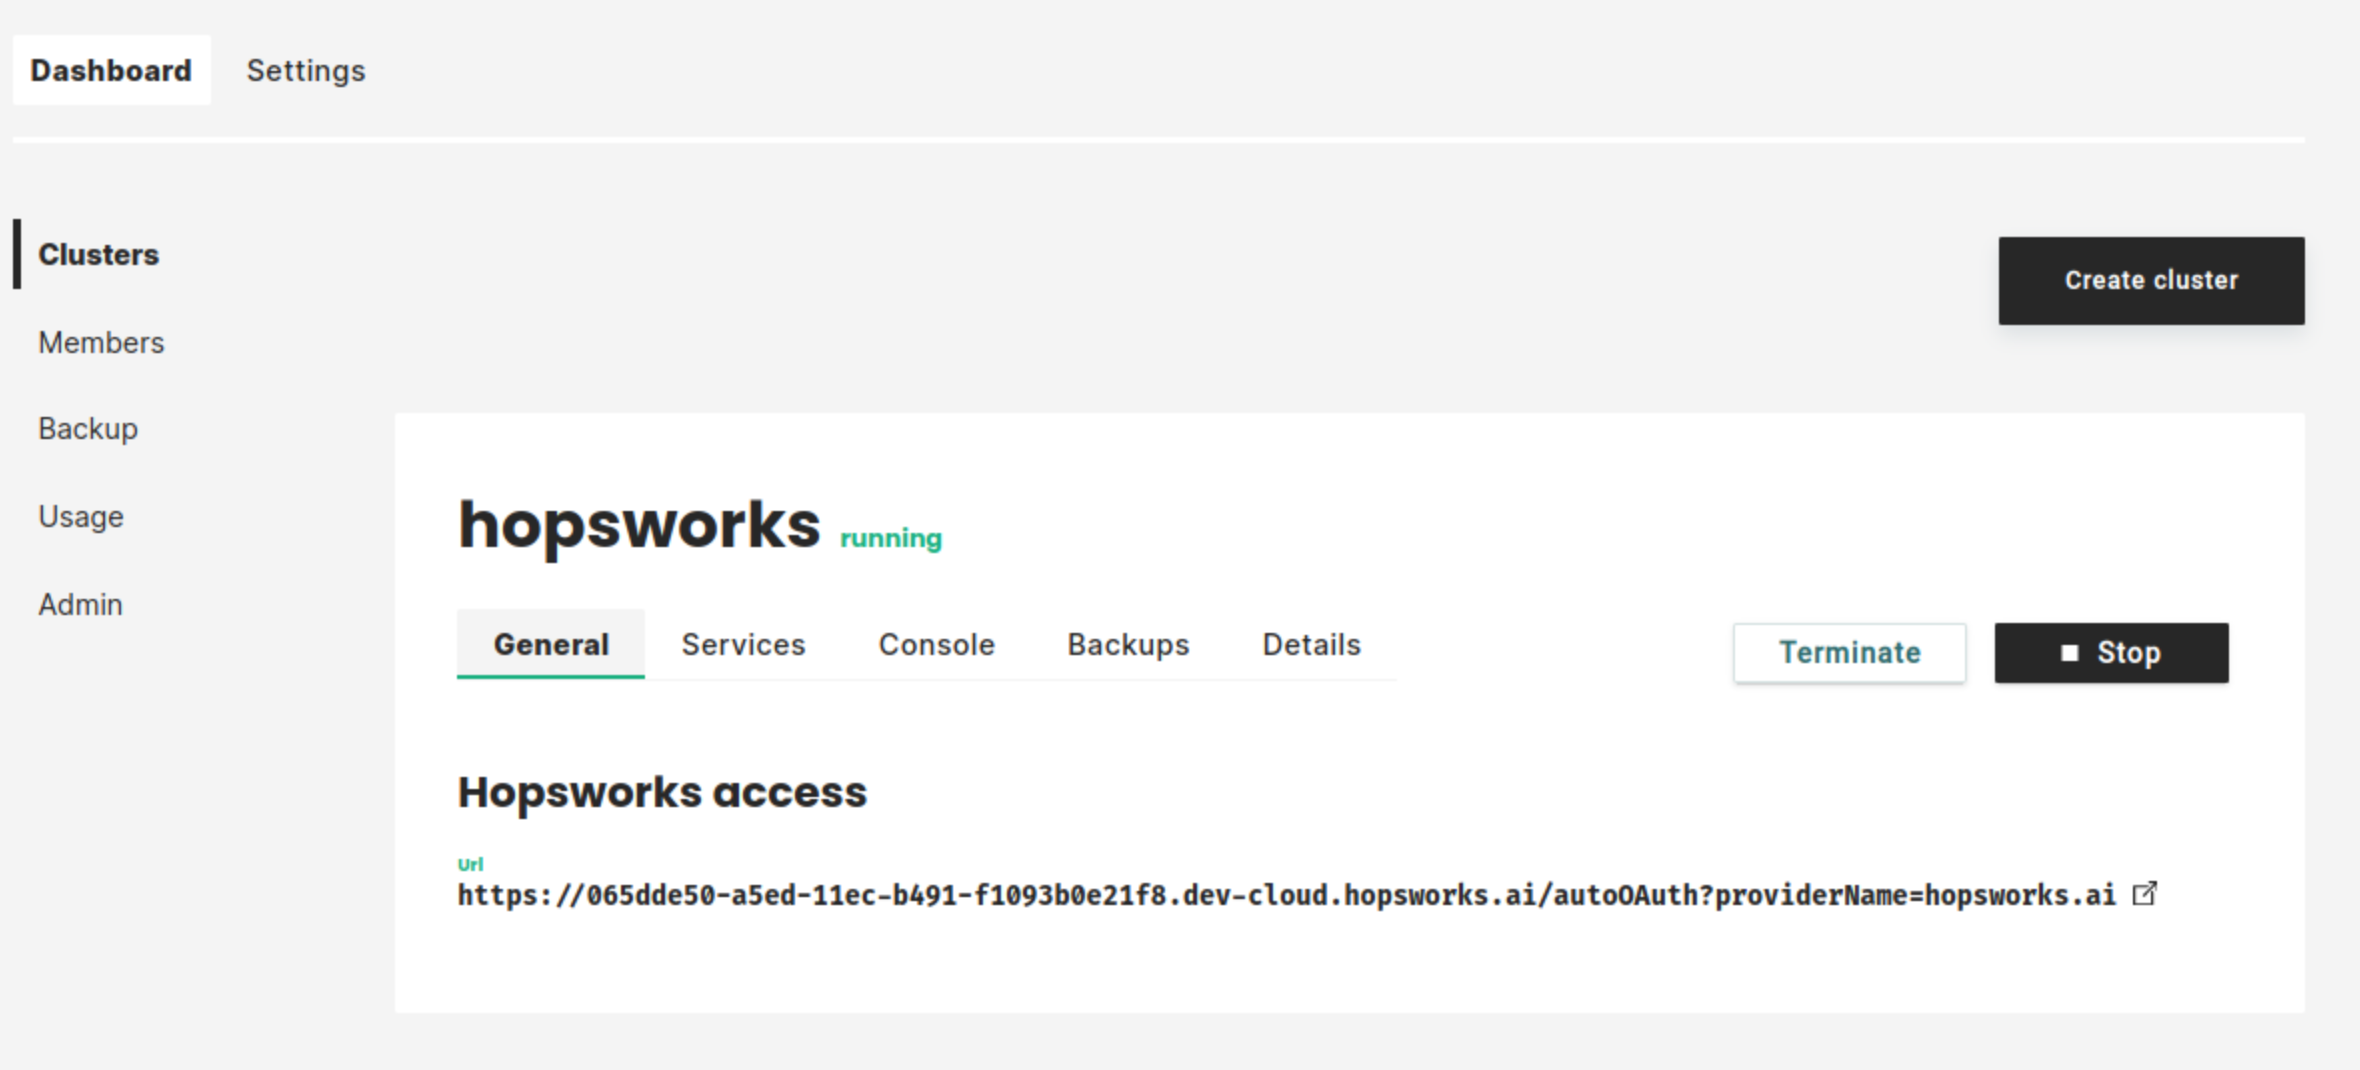
As soon as the cluster has started, you will be able to log in to your new Hopsworks cluster. You will also be able to stop, restart, or terminate the cluster.
Step 6: Next steps#
Check out our other guides for how to get started with Hopsworks and the Feature Store:
- Make Hopsworks services accessible from outside services
- Get started with the Hopsworks Feature Store
- Get started with Machine Learning on Hopsworks: HopsML
- Get started with Hopsworks: User Guide
- Code examples and notebooks: hops-examples