Integration with Azure AKS and ACR#
This guide shows how to create a cluster in hopsworks.ai with integrated support for Azure Kubernetes Service (AKS) and Azure Container Registry (ACR). This enables Hopsworks to launch Python jobs, Jupyter servers, and serve models on top of AKS.
Hopsworks AKS and ACR integration have four requirements:
- A virtual network with access to AKS pods and the AKS API servers
- One Azure container registry configured in your account
- One AKS cluster
- Permissions to the ACR and AKS attached to a user-managed identity
This guide provides an example setup with a private AKS cluster and public ACR.
Note
A public AKS cluster means the Kubernetes API server is accessible outside the virtual network it is deployed in. Similarly, a public ACR is accessible through the internet.
User assigned managed identity (managed identity)#
Note
A user assigned managed identity (managed identity) can be created at the subscription level or to a specific resource group in a subscription. The managed identity is attached to the virtual machines that run inside your subscription (or resource group). Hence, the permissions only apply to services that run within your subscription (or resource group).
The AKS and ACR integration requires some permissions to be attached to the managed identity used by the Hopsworks cluster.
If you have already created a user assigned managed identity for the storage continue to Add role assignment to the managed identity using this identity.
To set up the managed identity, go to the resource group where you will add the managed identity - this should be the same resource group you will deploy Hopsworks in. Click on the Add button. In the search dialog, enter "user assigned managed identity". Click on Create. Then give a name to the managed identity and make sure that it is in the Region where you will deploy your cluster. Click on Review + create, and click on Create.
Add role assignment to the managed identity#
Go to the managed identity created above. Click on Azure role assignments in the left column. Click on Add role assignment. For the Scope select Resource group or Subscription depending on your preference. Select the Role AcrPull and click on Save.
Repeat the same operation with the following roles:
- AcrPull
- AcrPush
- AcrDelete
- Azure Kubernetes Service Cluster User Role
Warning
You will also need to attach storage access permissions to the managed identity, see Creating and configuring a storage
Once finished the role assignments should look similar to the picture below.

Private AKS cluster and public ACR#
This guide will step through setting up a private AKS cluster and a public ACR.
Step 1: Create an AKS cluster#
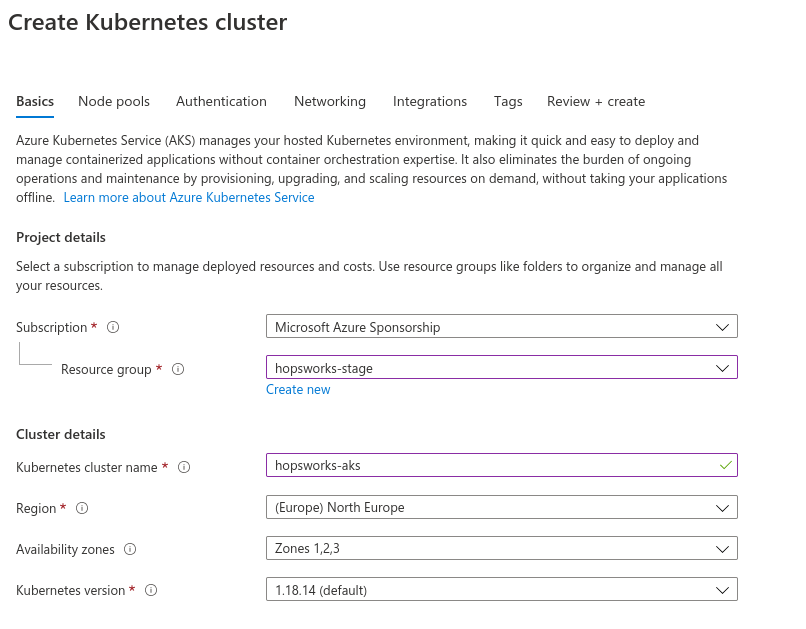
Go to Kubernetes services in the azure portal and click Add then Add Kubernetes cluster. Place the Kubernetes cluster in the same resource group and region as the Hopsworks cluster and choose a name for the Kubernetes cluster.
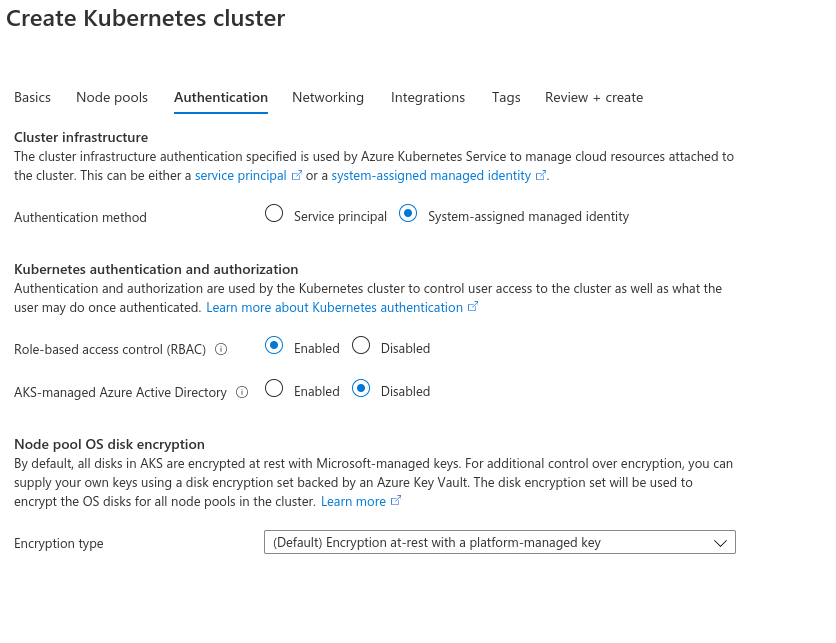
Next, click on the Authentication tab and verify the settings are as follow:
- Authentication method: System-assigned managed identity
- Role-based access control (RBAC): Enabled
- AKS-managed Azure Active Directory: Disabled
Note
Currently, AKS is only supported through managed identities. Contact the Logical Clocks sales team if you have a self-managed Kubernetes cluster.
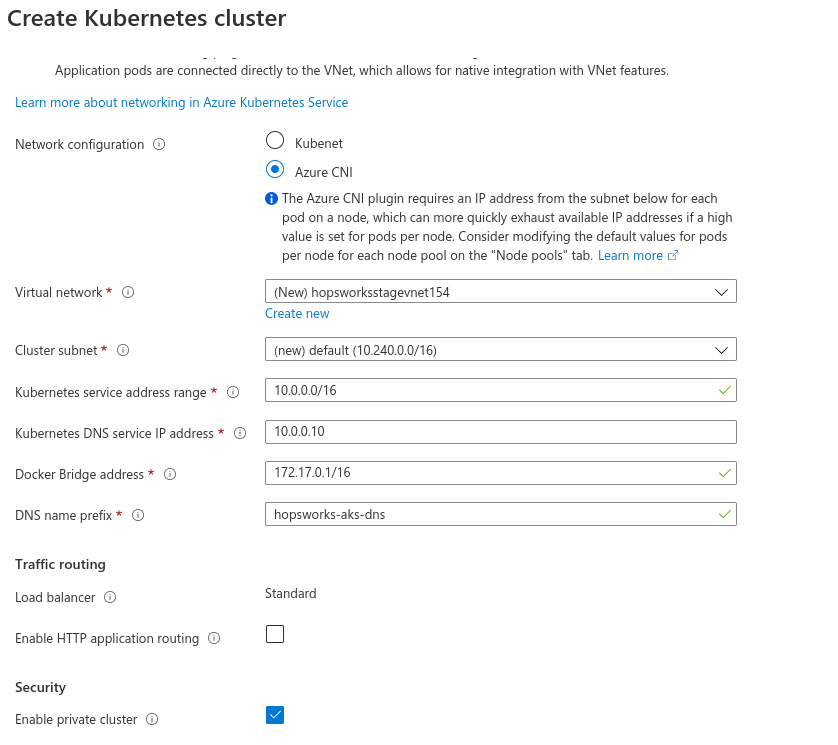
Next, go to the networking tab and check Azure CNI. The portal will automatically fill in the IP address ranges for the Kubernetes virtual network. Take note of the virtual network name that is created, in this example the virtual network name was hopsworksstagevnet154. Lastly, check the Enable private cluster option.
Next, go to the Integrations tab. Under container registry click Create new.
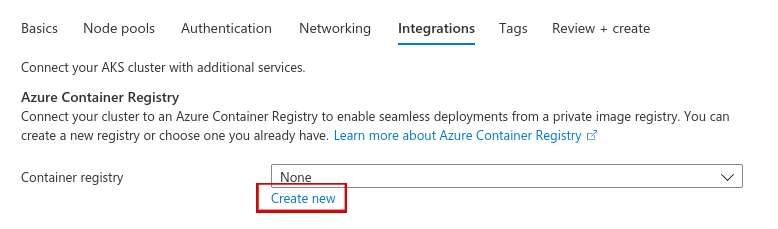
Choose a name for the registry and select premium for the SKU. Then press OK.
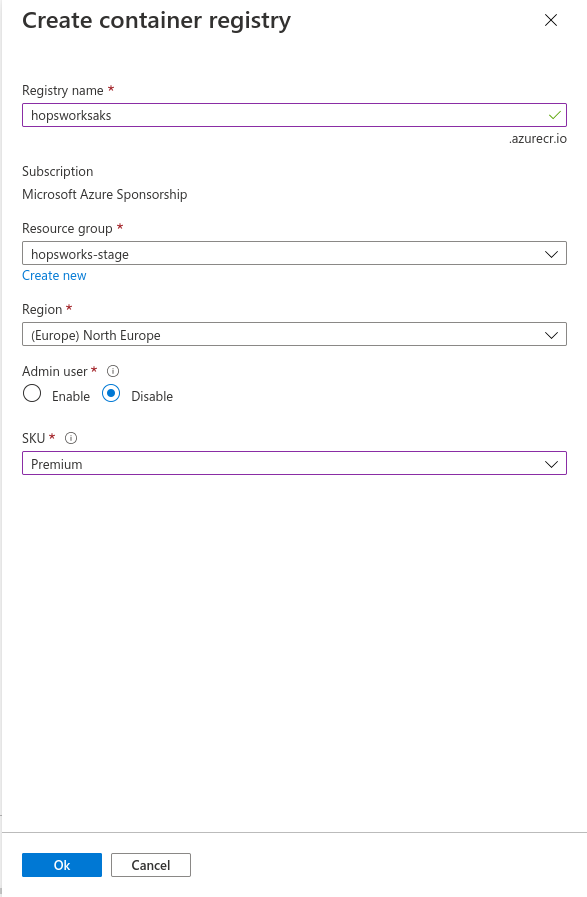
Next press Review + create, then click Create.
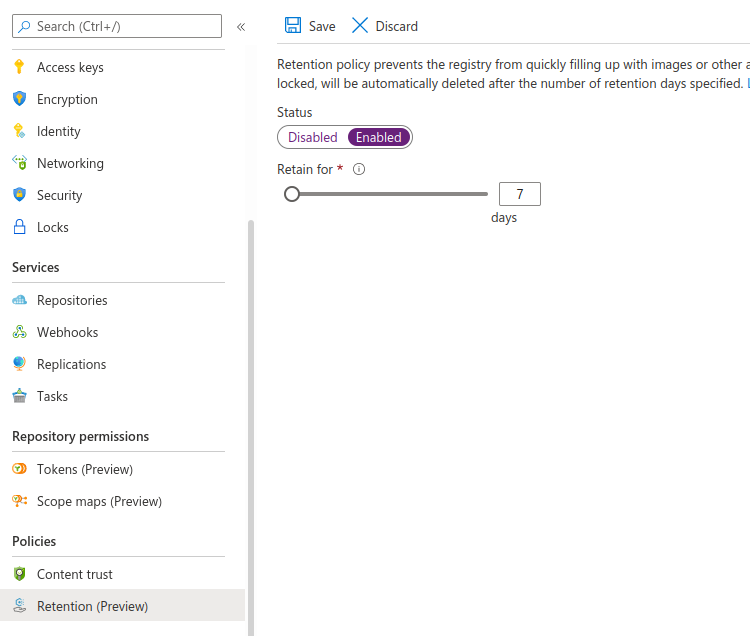
To prevent the registry from filling up with unnecessary images and artifacts you can enable a retention policy. A retention policy will automatically remove untagged manifests after a specified number of days. To enable a retention policy, go to the registry you created. Go to the Retention (preview) tab and set Status from disabled to enabled. Set the retention policy for 7 days as in the figure below, then press save.
Step 2: create a virtual network for the Hopsworks cluster#
Because the Kubernetes API service is private the Hopsworks cluster must be able to reach it over a private network. There are two options to integrate with a private AKS cluster. The first option (A) is to put the Hopsworks cluster in a pre-defined virtual network with a peering setup to the Kubernetes network. The second option (B) is to create a subnet inside the Kubernetes virtual network where the Hopsworks cluster will be placed.
Option A: Peering setup#
To establish virtual peering between the Kubernetes cluster and Hopsworks, you need to select or create a virtual network for Hopsworks. Go to virtual networks and press create. Choose a name for the new virtual network and select the same resource group you are planning to use for your Hopsworks cluster.
Next, go to the IP Addresses tab. Create an address space that does not overlap with the address space in the Kubernetes network. In the previous example, the automatically created Kubernetes network used the address space 10.0.0.0/8. Hence, the address space 172.18.0.0/16 can safely be used.
Next click Review + Create, then Create.
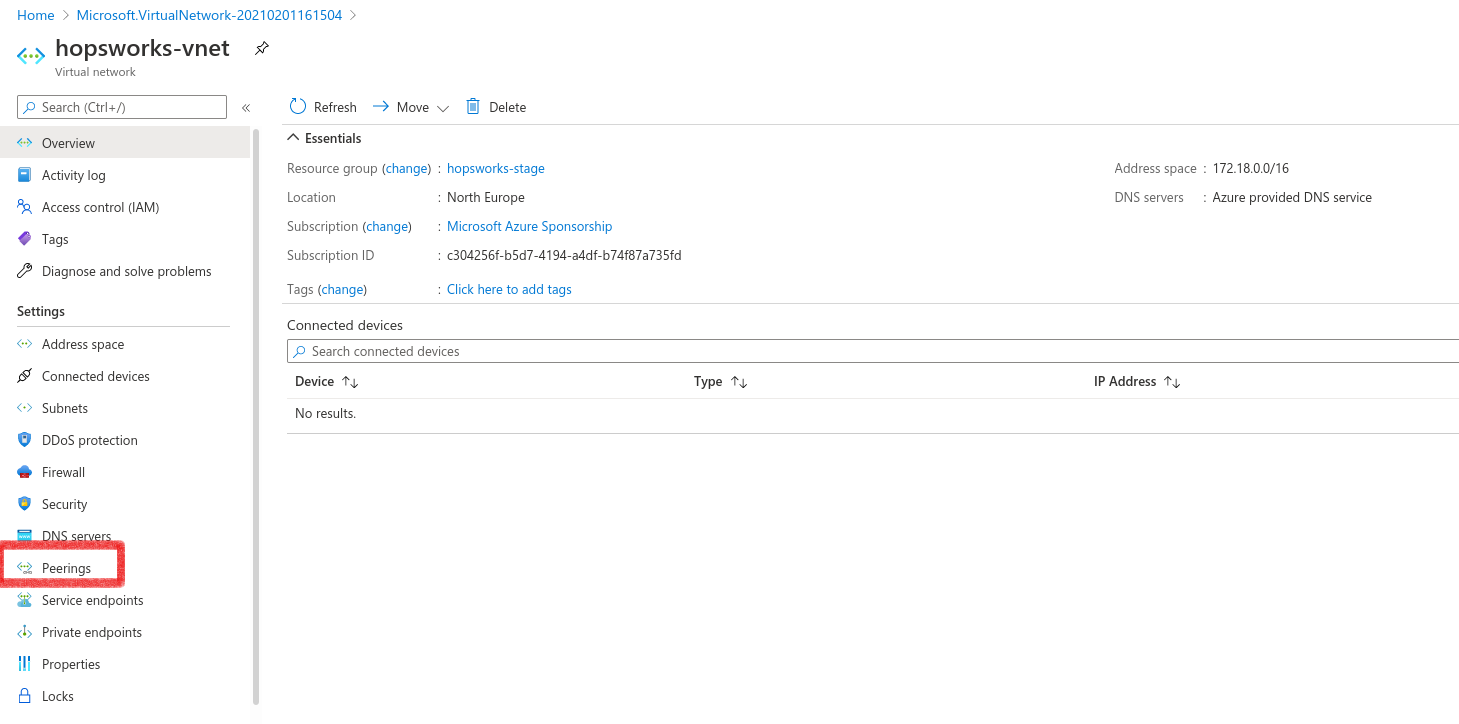
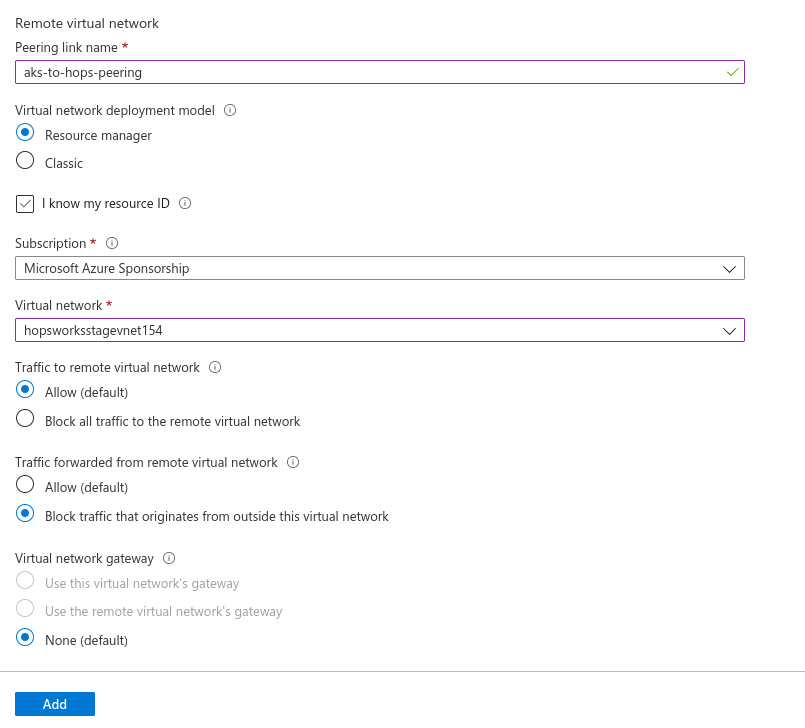
Next, go to the created virtual network and go to the Peerings tab. Then click Add.
Choose a name for the peering link. Check the Traffic to remote virtual network as Allow, and Traffic forwarded from remote virtual network to Block.
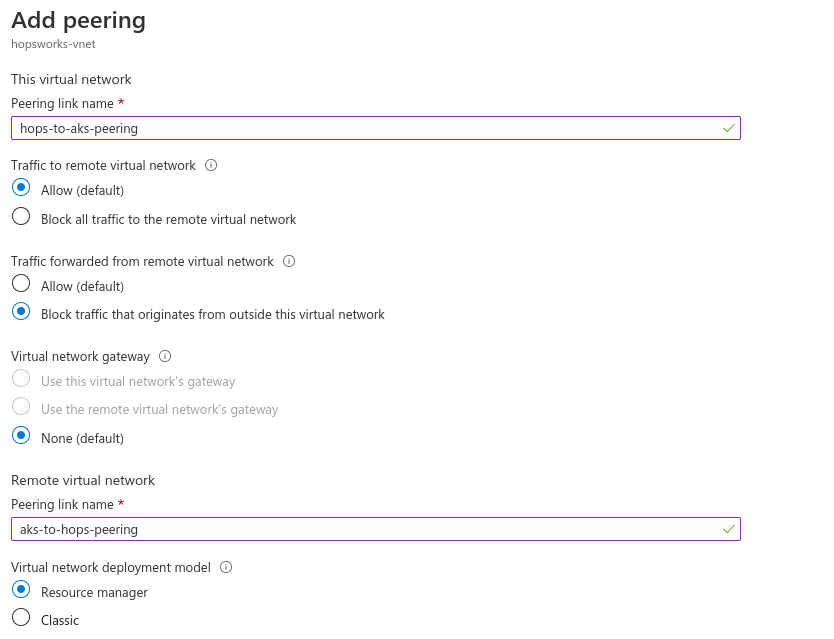
For the virtual network select the virtual network which was created by AKS, in our example this was hopsworksstagevnet154. Then press Add.
The last step is to set up a DNS private link to be able to use DNS resolution for the Kubernetes API servers. Go to resource groups in the Azure portal and find the resource group of the Kubernetes cluster. This will be in the form of MC_

In the left plane there is a tab called Virtual network links, click on the tab. Next press Add.

Choose a name for the private link and select the virtual network you will use for the Hopsworks cluster, then press OK.

The setup is now finalized and you can create the Hopsworks cluster.
Option B: Subnet in AKS network#
With this setup, the Hopsworks cluster will reside in the same virtual network as the AKS cluster. The difference is that a new subnet in the virtual network will be used for the Hopsworks cluster.
To set up the subnet, first, go to the virtual network that was created by AKS. In our example, this was hopsworksstagevnet154. Next, go to the subnets tab.
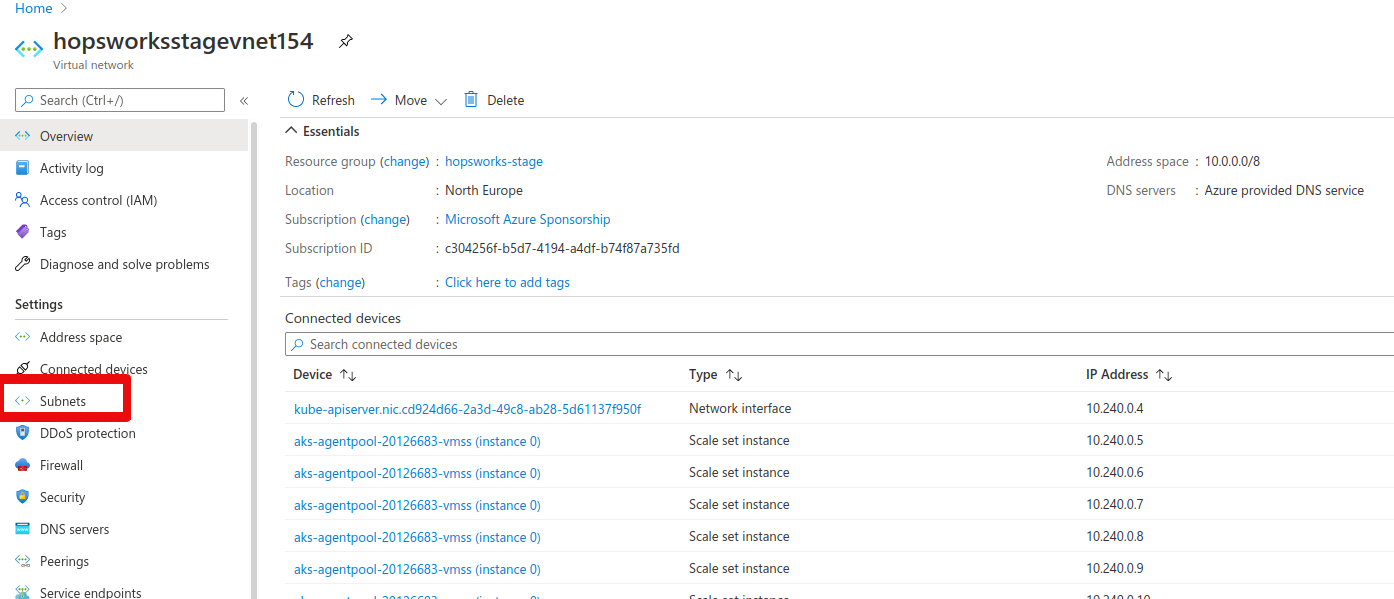
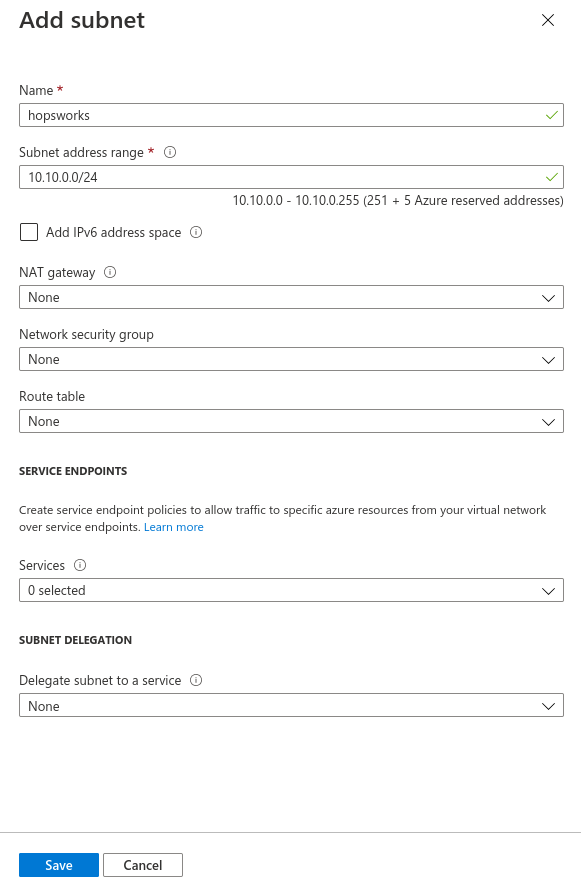
Press + Subnet. Choose a name for the subnet, for example, "hopsworks" and an IP range that does not overlap with the Kubernetes network. Then save.
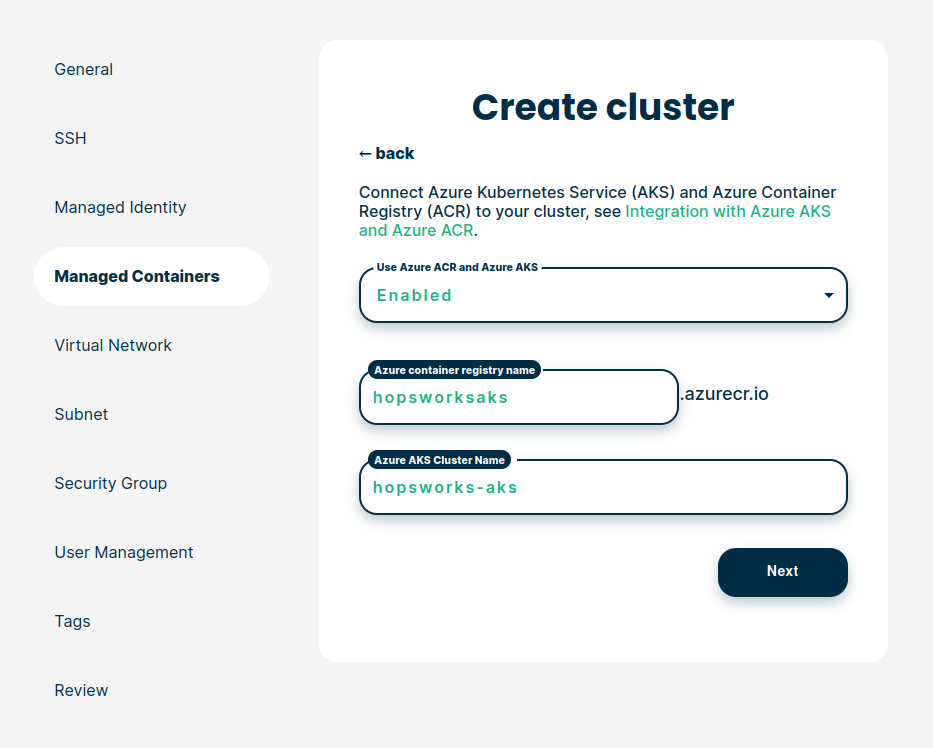
Create the Hopsworks cluster#
This step assumes you are creating your Hopsworks cluster using hopsworks.ai. The AKS configuration can be set under the Managed containers tab. Set Use Azure AKS and Azure ACR as enabled. Two new fields will pop up. Fill them with the name of the container registry and the AKS you created above. In the previous example, we created an ACR with the name hopsworksaks and an AKS cluster with the name hopsaks-cluster. Hence, the configuration should look similar to the picture below
In the virtual network tab, you have to select either the virtual network you created for the peering setup or the Kubernetes virtual network depending on which approach you choose. Under the subnet tab, you have to choose the default subnet if you choose the peering approach or the subnet you created if you choose to create a new subnet inside the AKS virtual network.