Hopsworks.ai Single Sign-On#
We will see here how to set up Single Sign-On for Hopsworks.ai. Once this is set up users from your organization will be able to directly sign in to Hopsworks.ai using your identity provider and without the need to manually create an account. They will then be able to manage the clusters of your organization and if you set up user management on your clusters an account will automatically be created for them in the clusters.
Note
See Hopsworks Single Sing-On if you do not want to give users the rights to manage your organization clusters but want to use your identity provider to manage access to your Hopsworks clusters.
Configure your identity provider.#
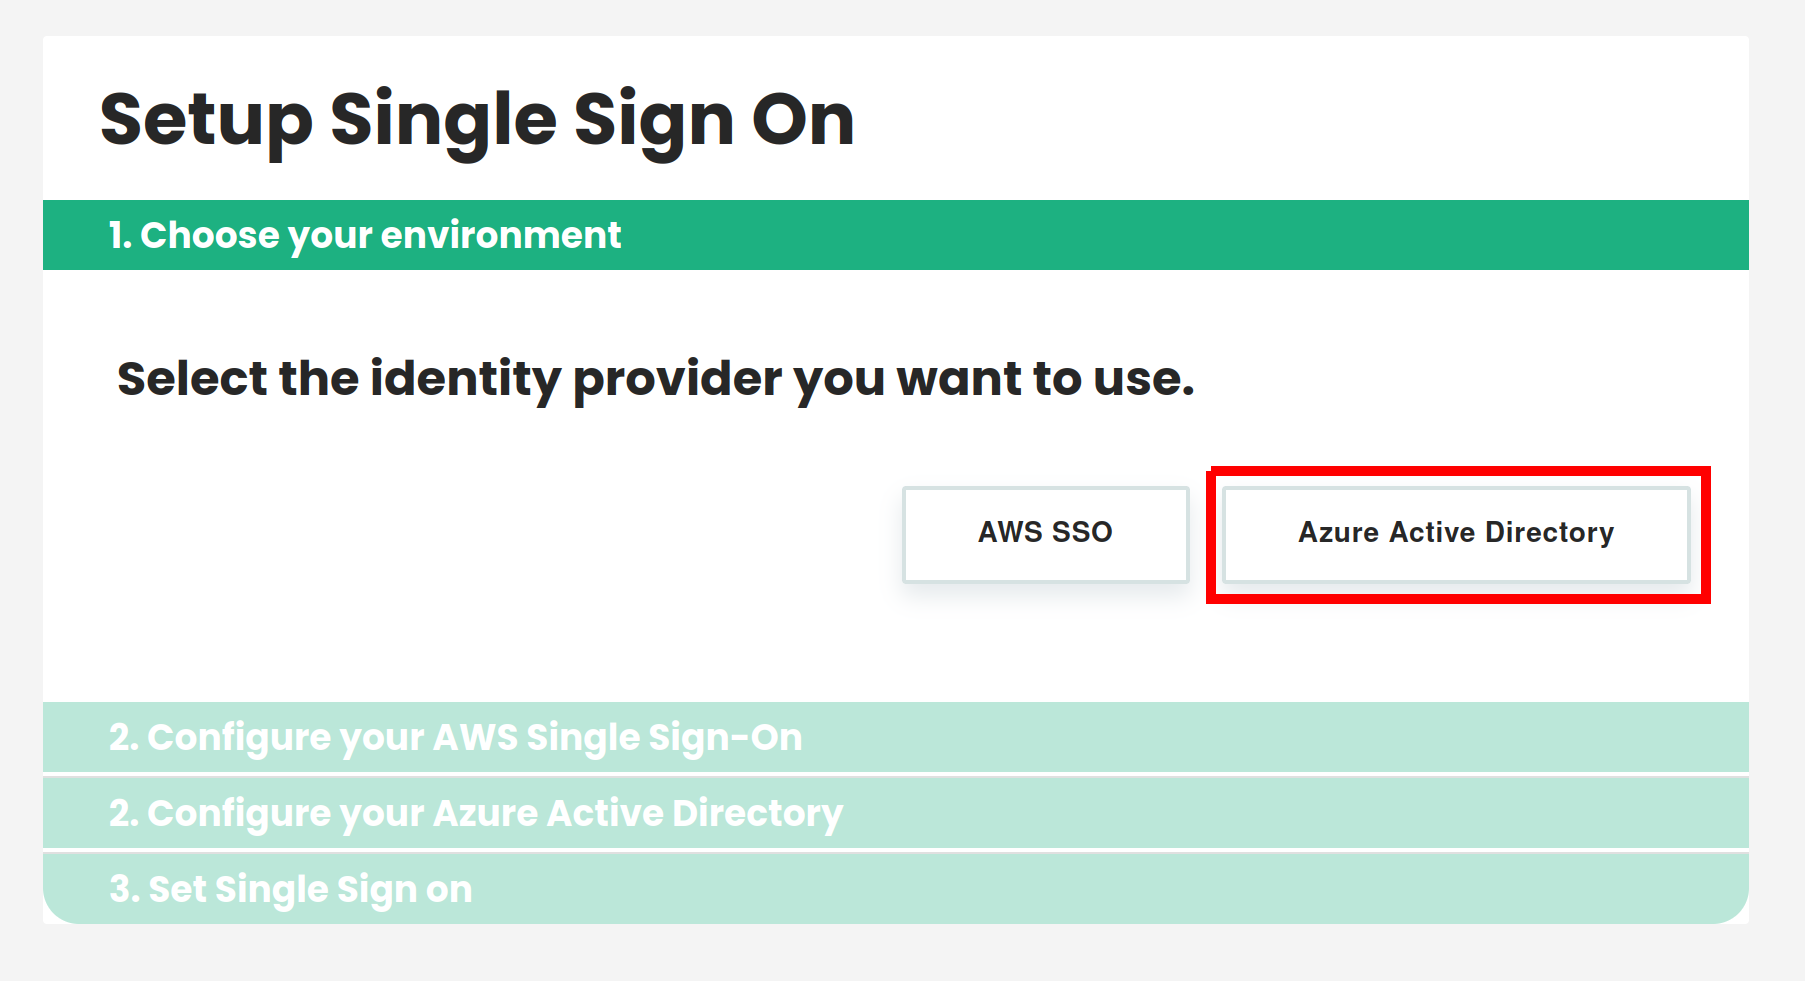
We will give here the examples of Azure Active Directory and AWS Single Sign-On but a similar setup can be done with any identity provider supporting SAML.
Azure Active Directory#
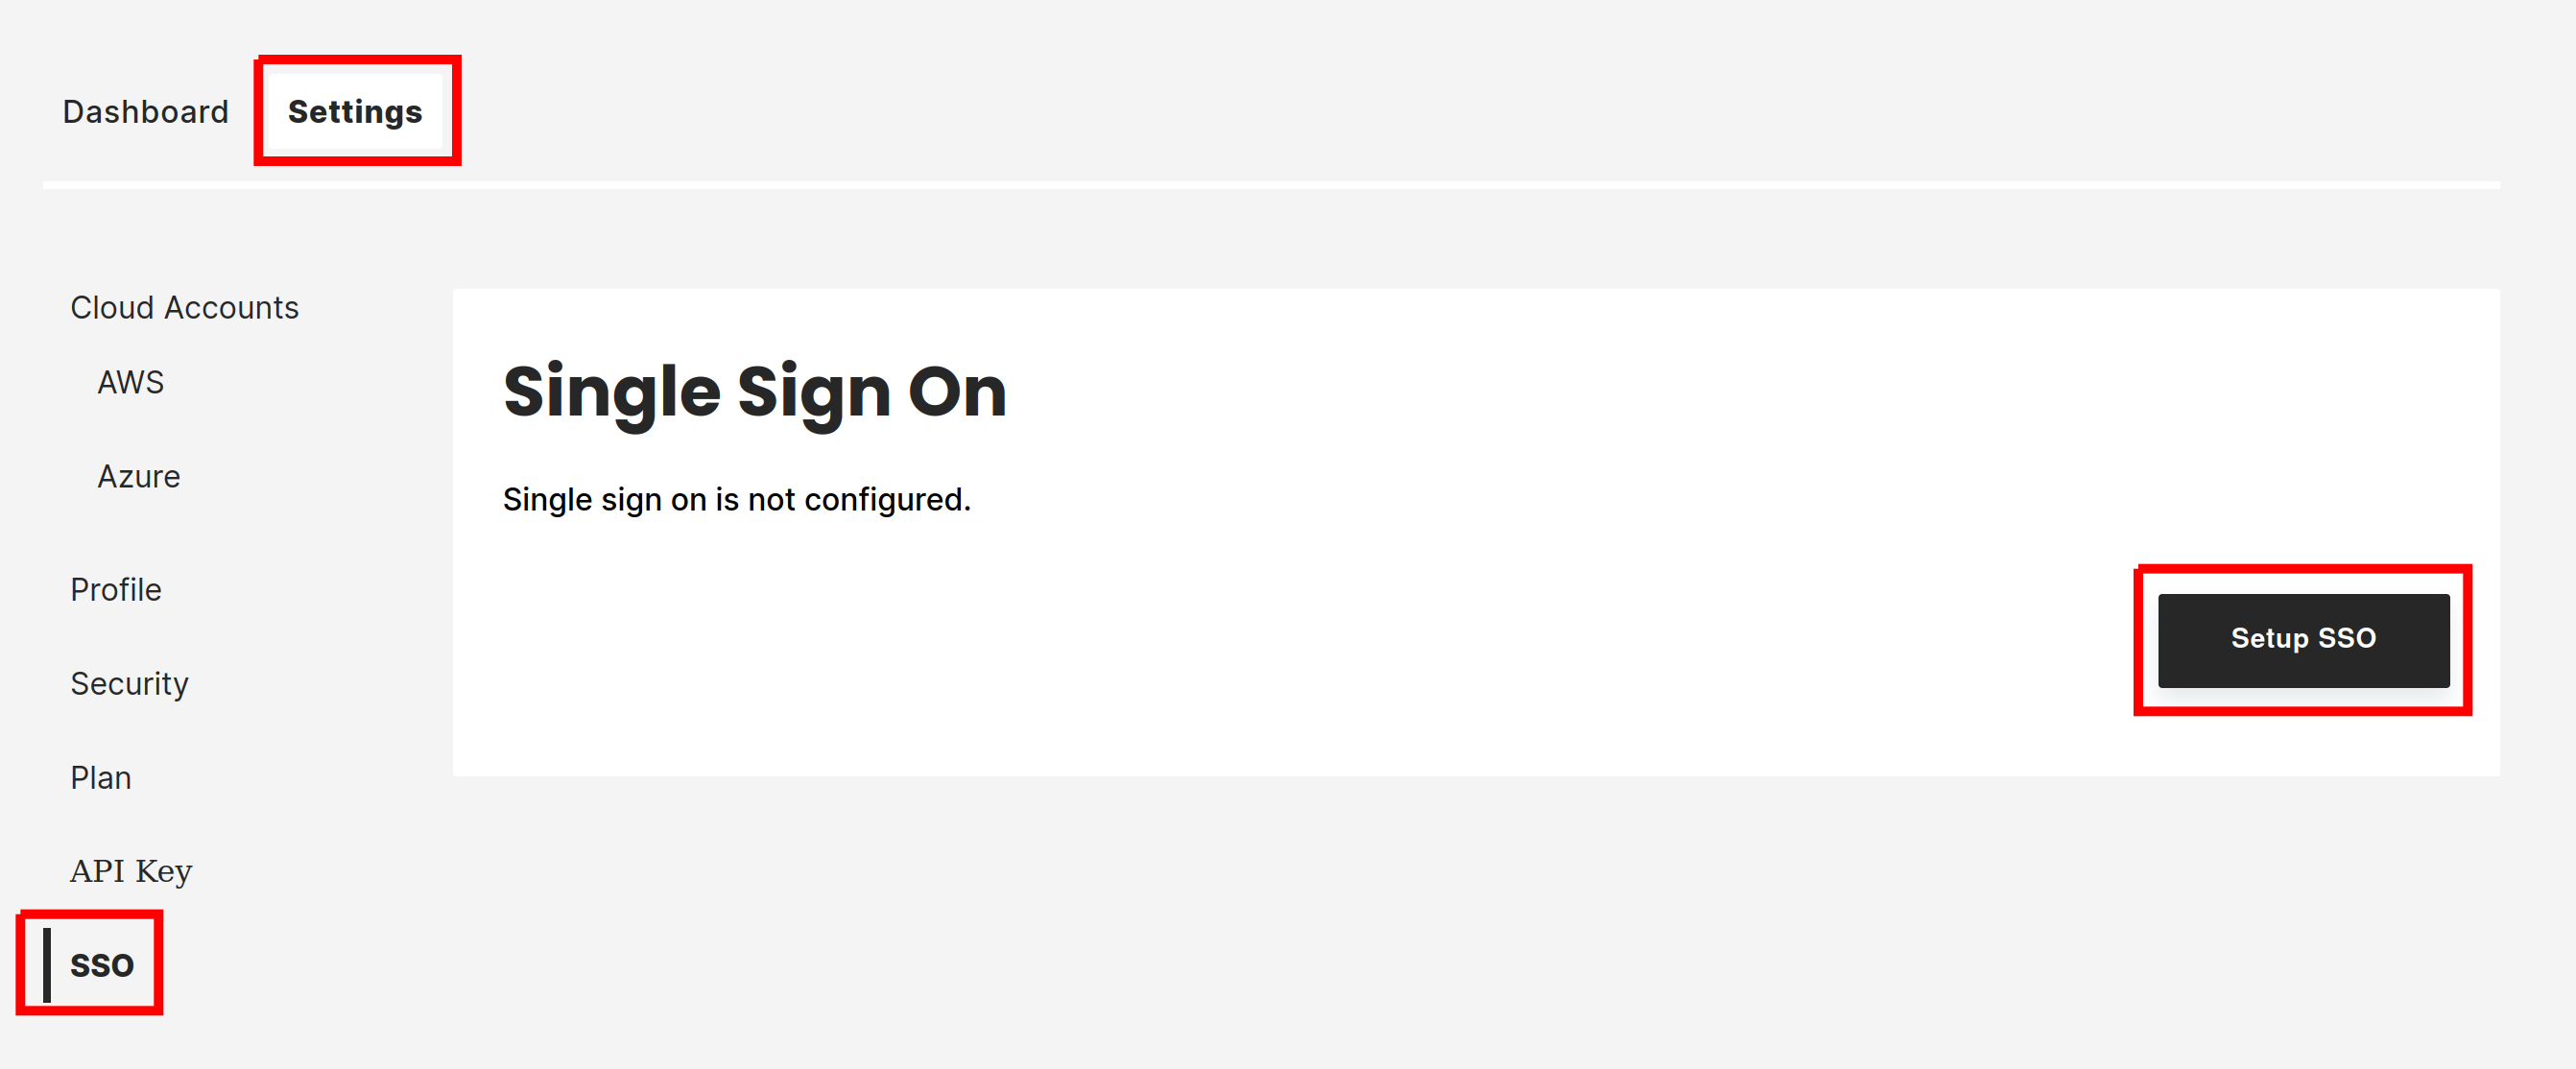
Go to your hopsworks.ai dashboard. Click on Settings. Click on SSO. Click on Setup SSO.
Click on Azure Active Directory. You will need the two copyable entries on this page in the following steps.
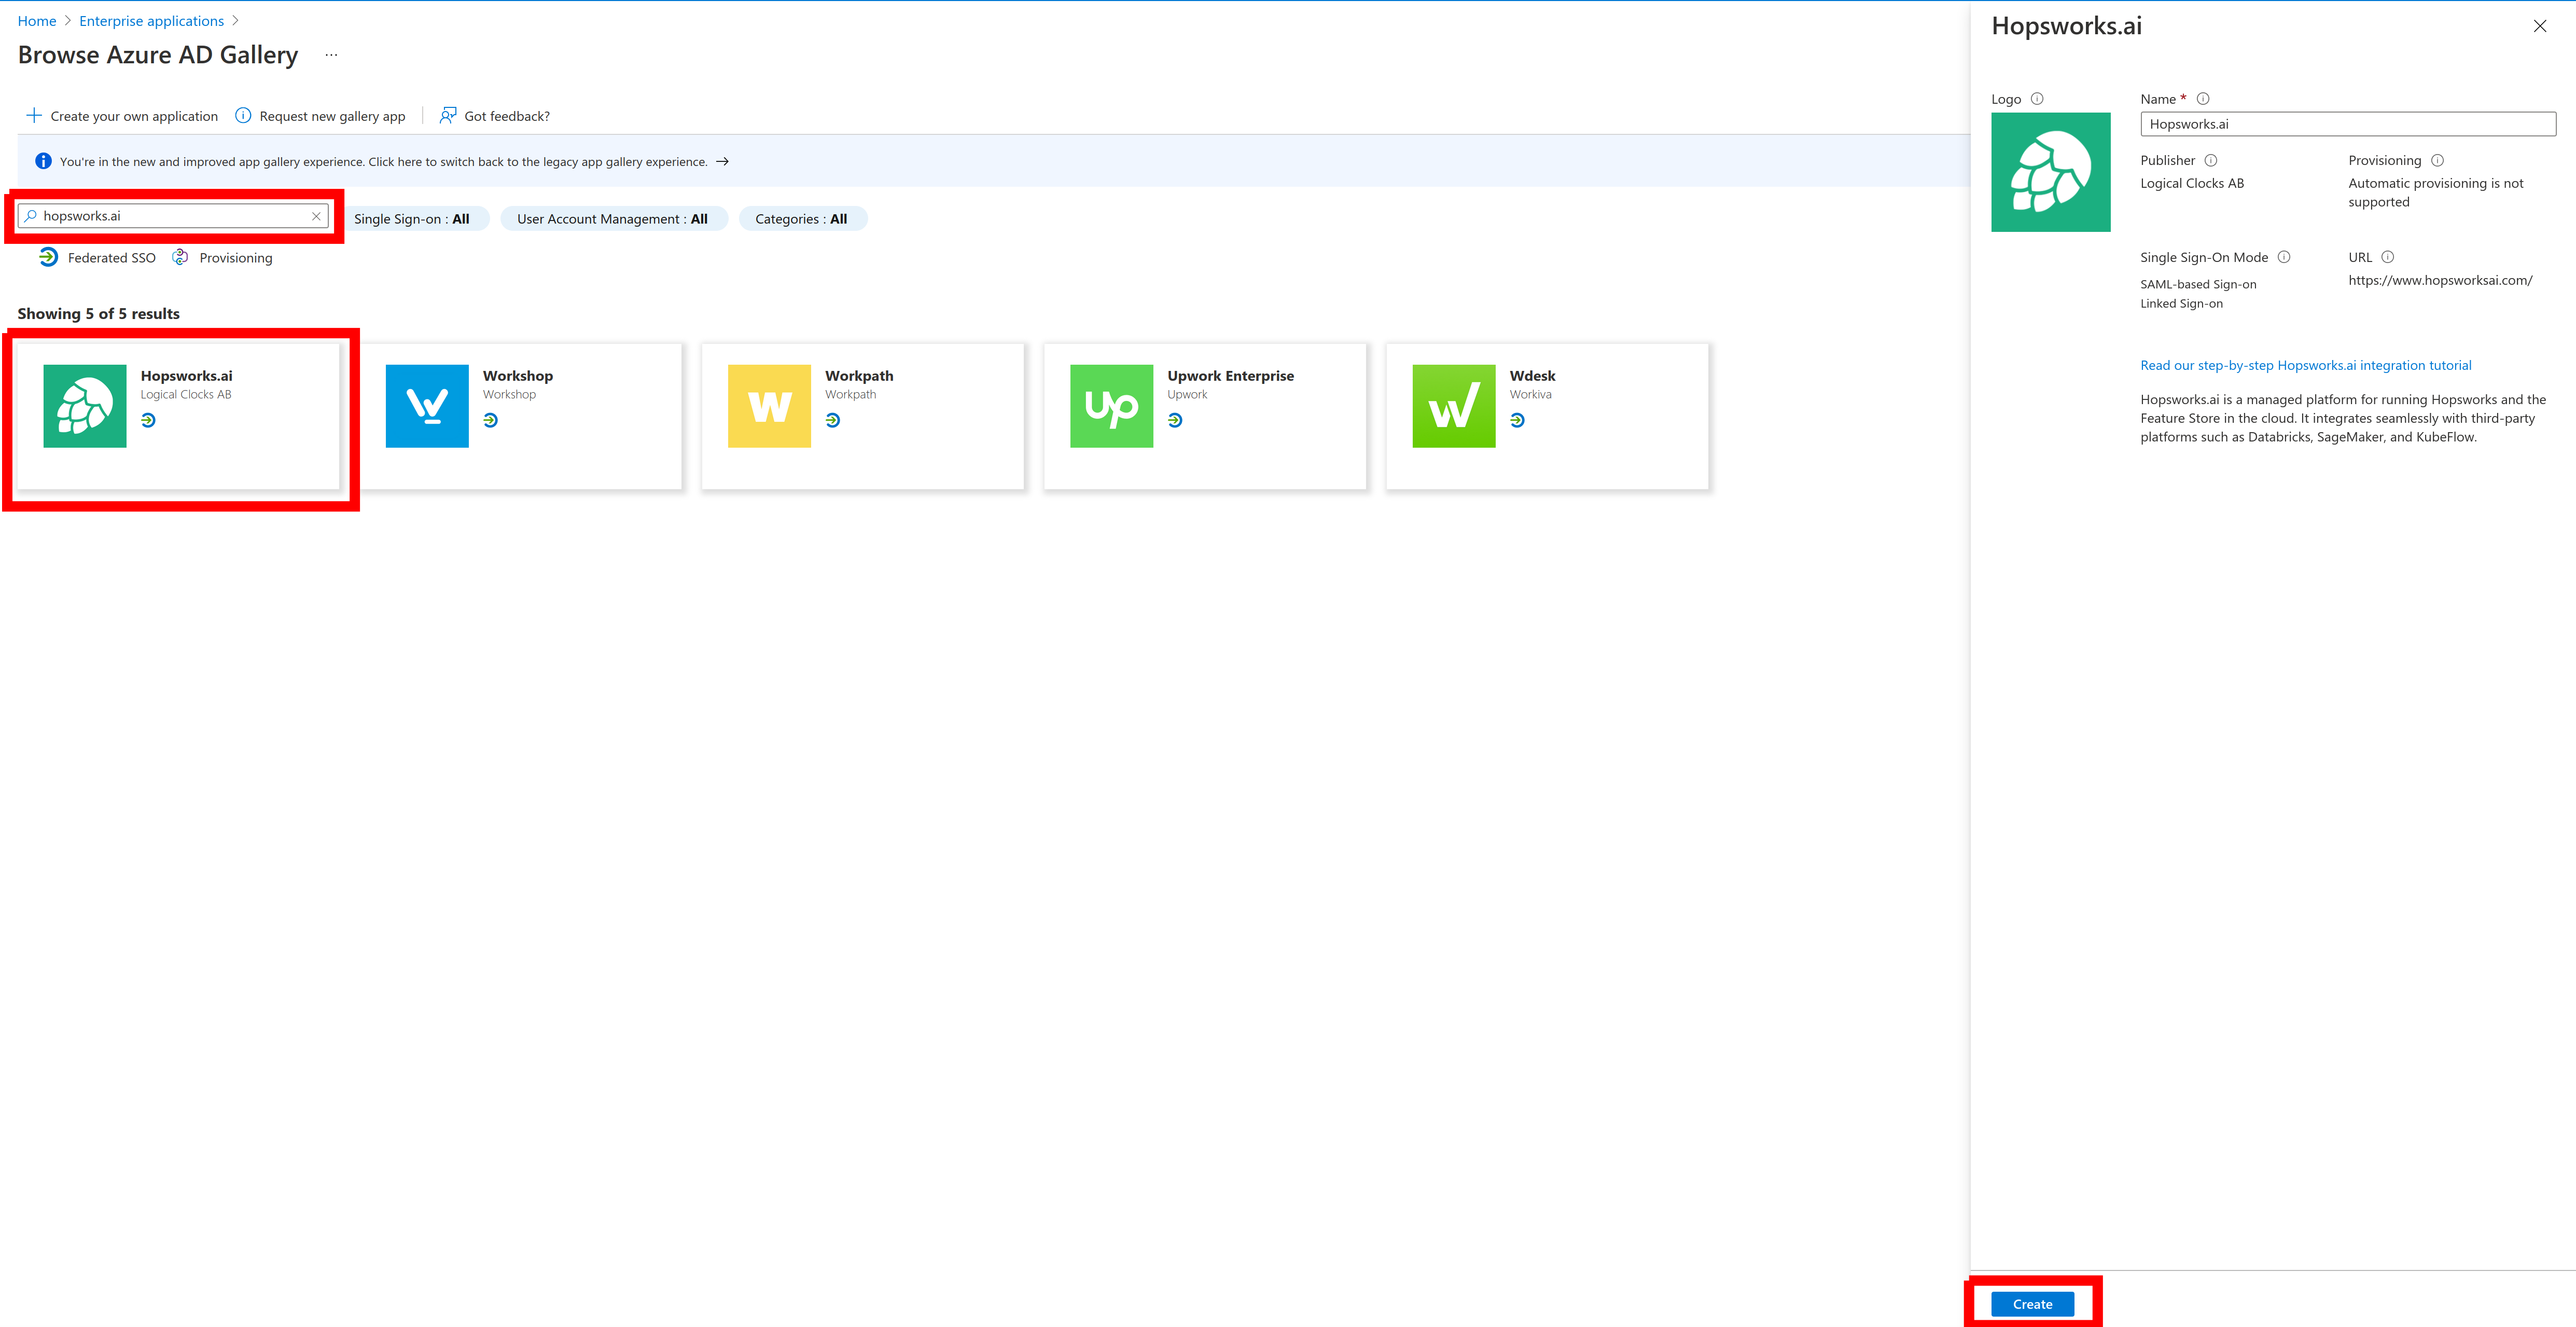
Go to the Azure Portal then proceed to the Active Directory and click on Enterprise applications. Click on New application.

Search for hopsworks.ai. Click on it then click on create.
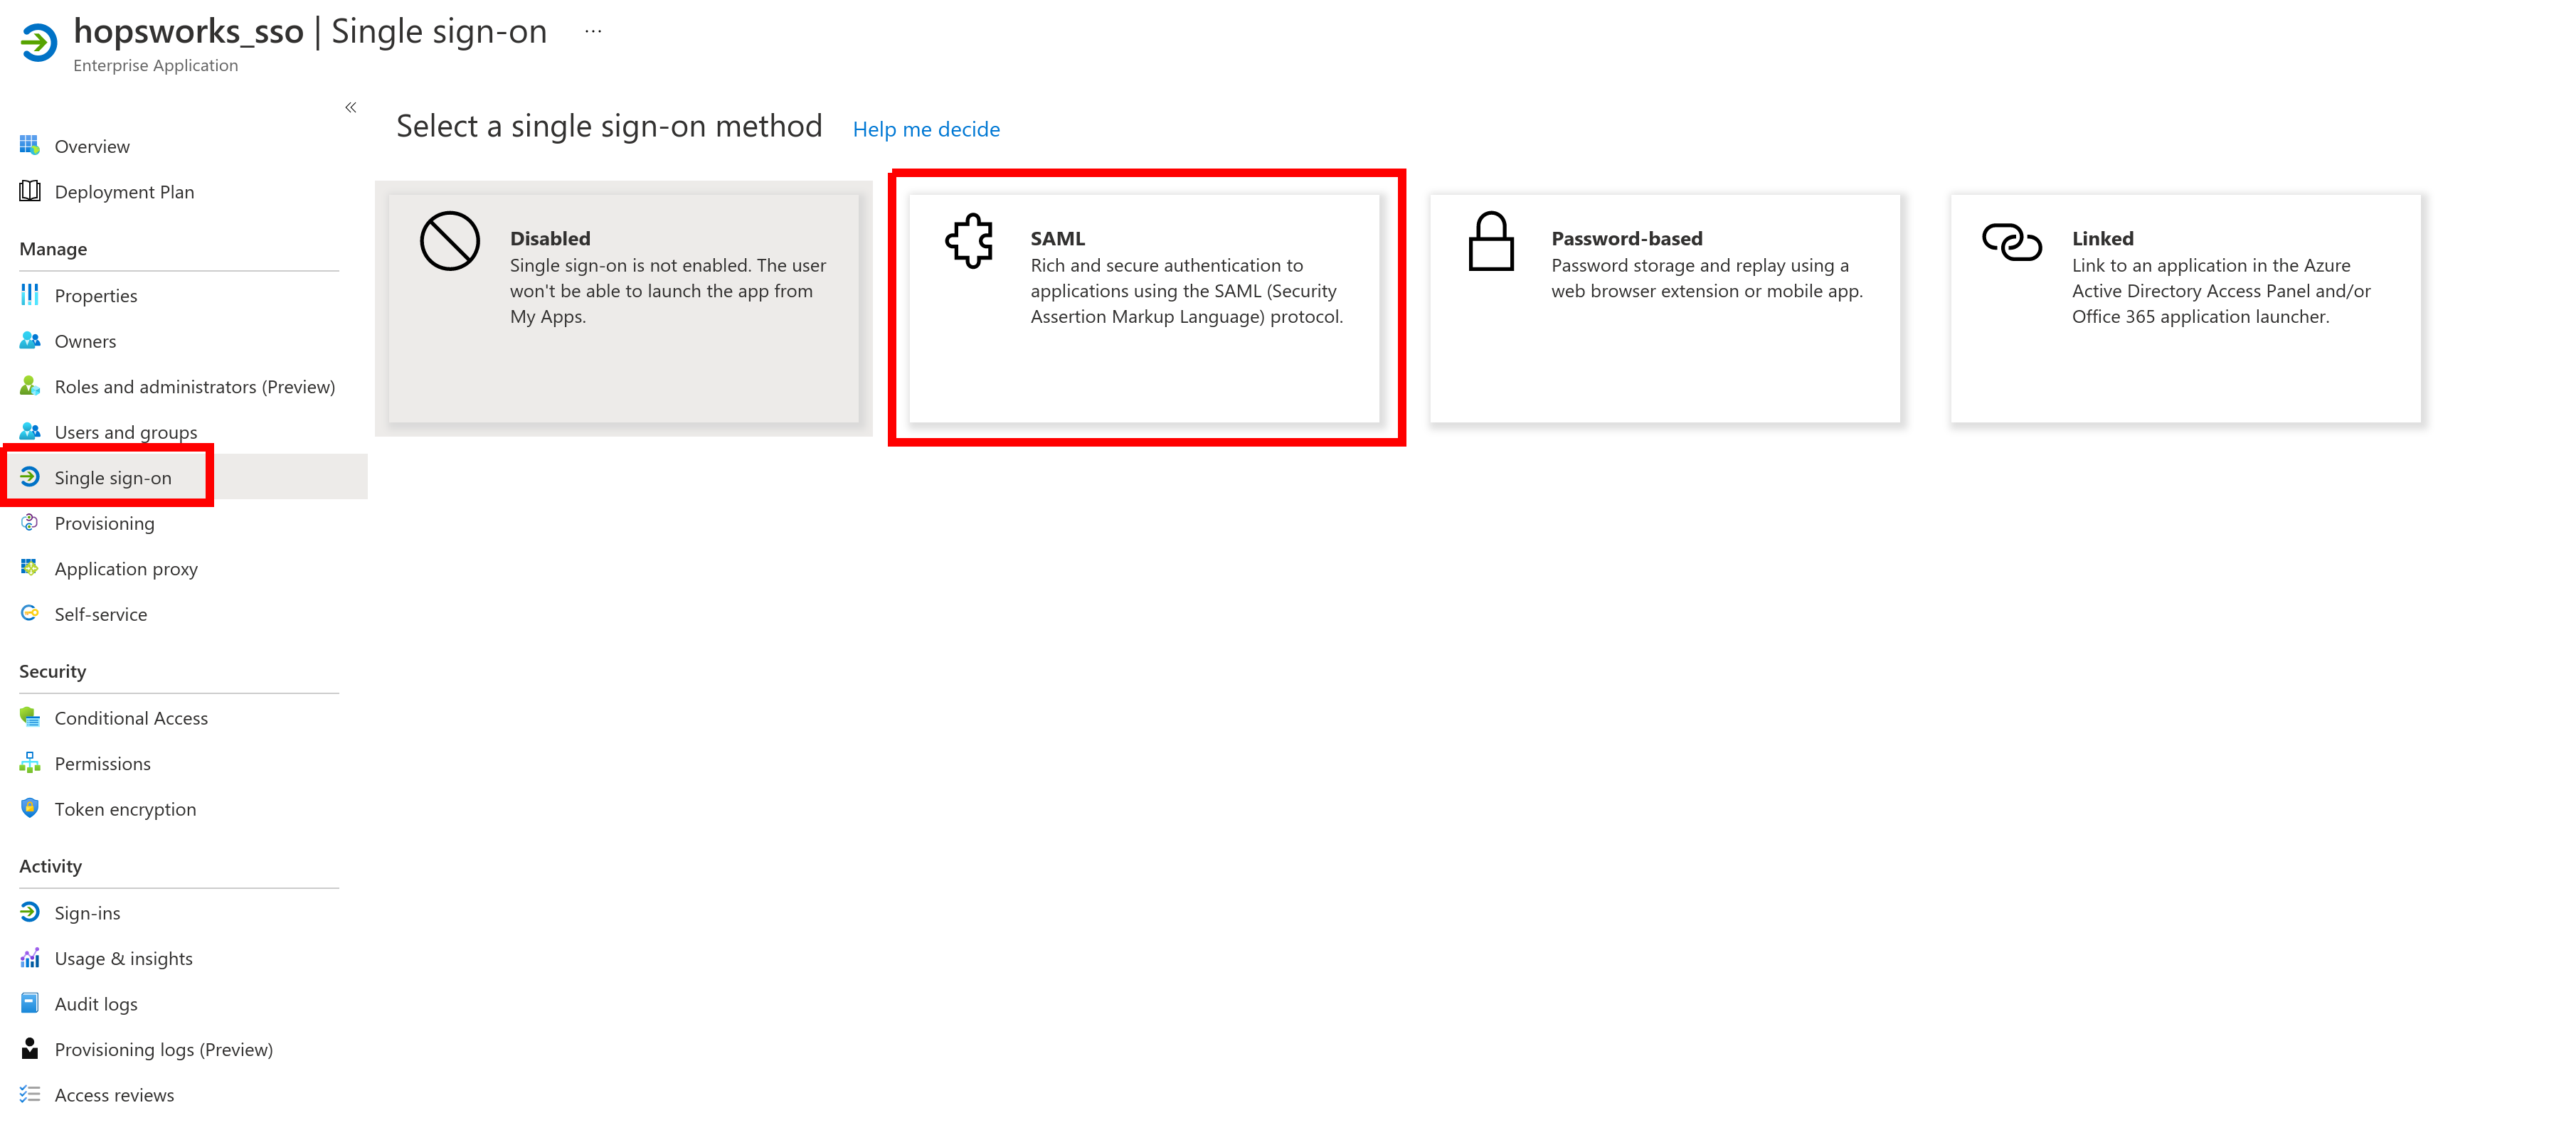
Click on Single sign-on. Then click on SAML.
Click on Edit in the Basic SAML Configuration section. Paste the Identifier (Entity ID) and Reply URL that you copied from the Hopsworks.ai setup page. Delete the wild card Identifier (Entity ID) that is already set.
For the Sign on URL copy the provided pattern (https://managed.hopsworks.ai/sso-open/
Click on Save.
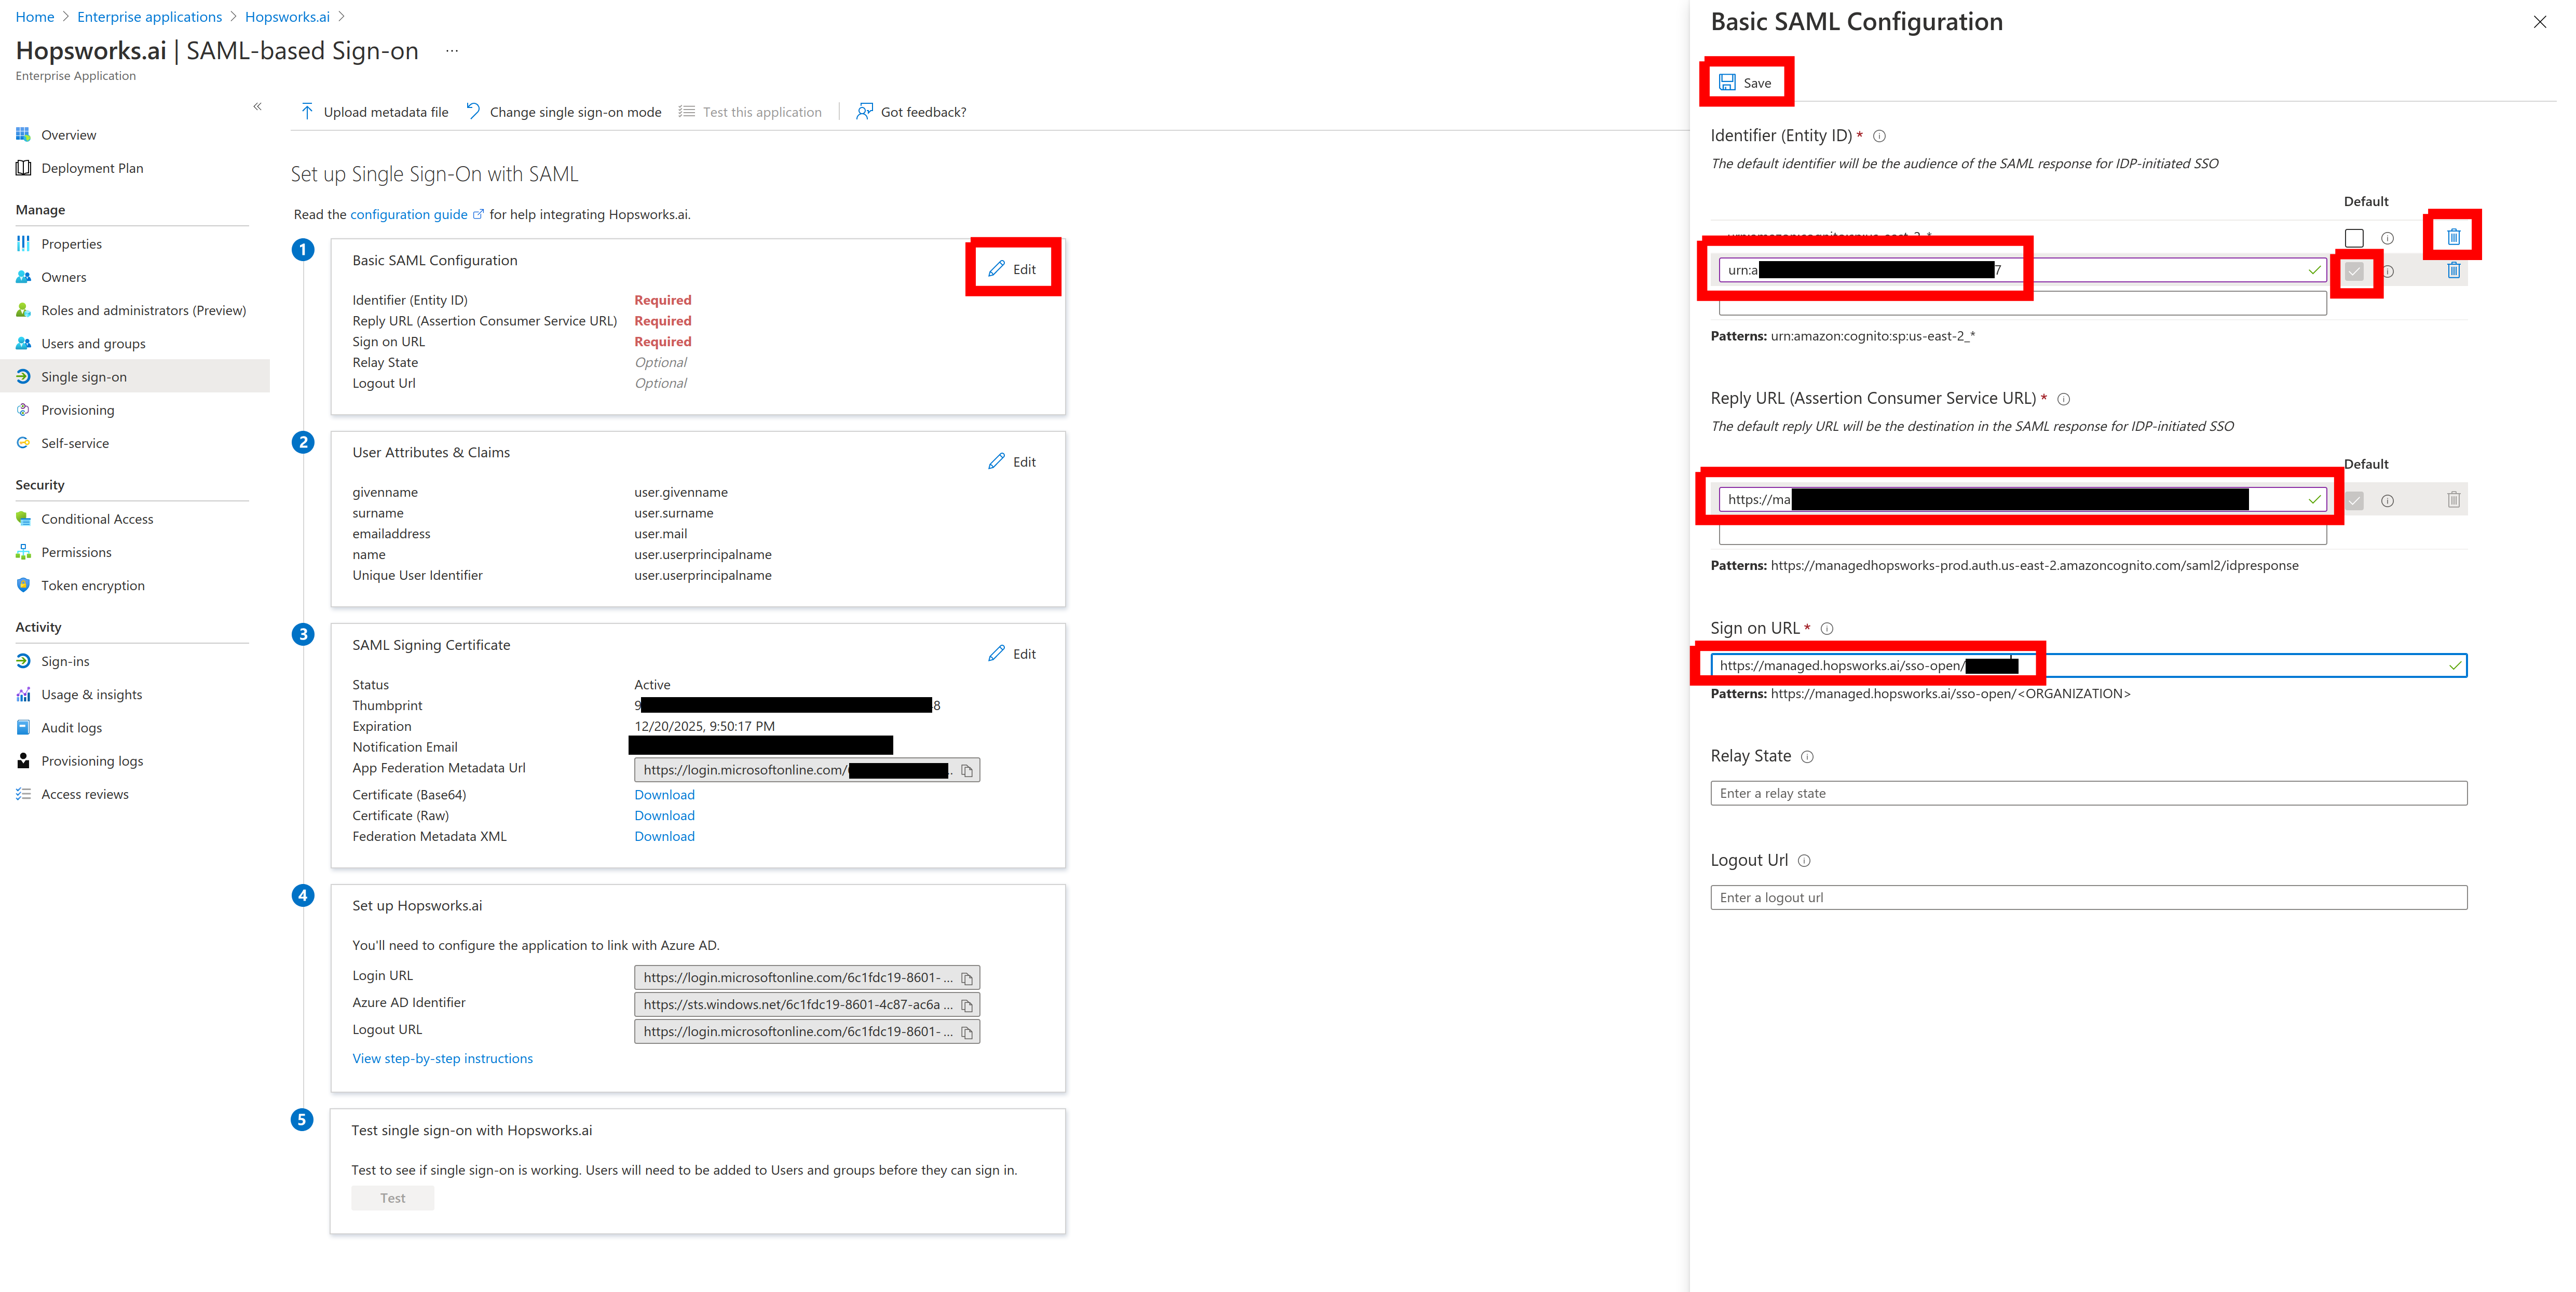
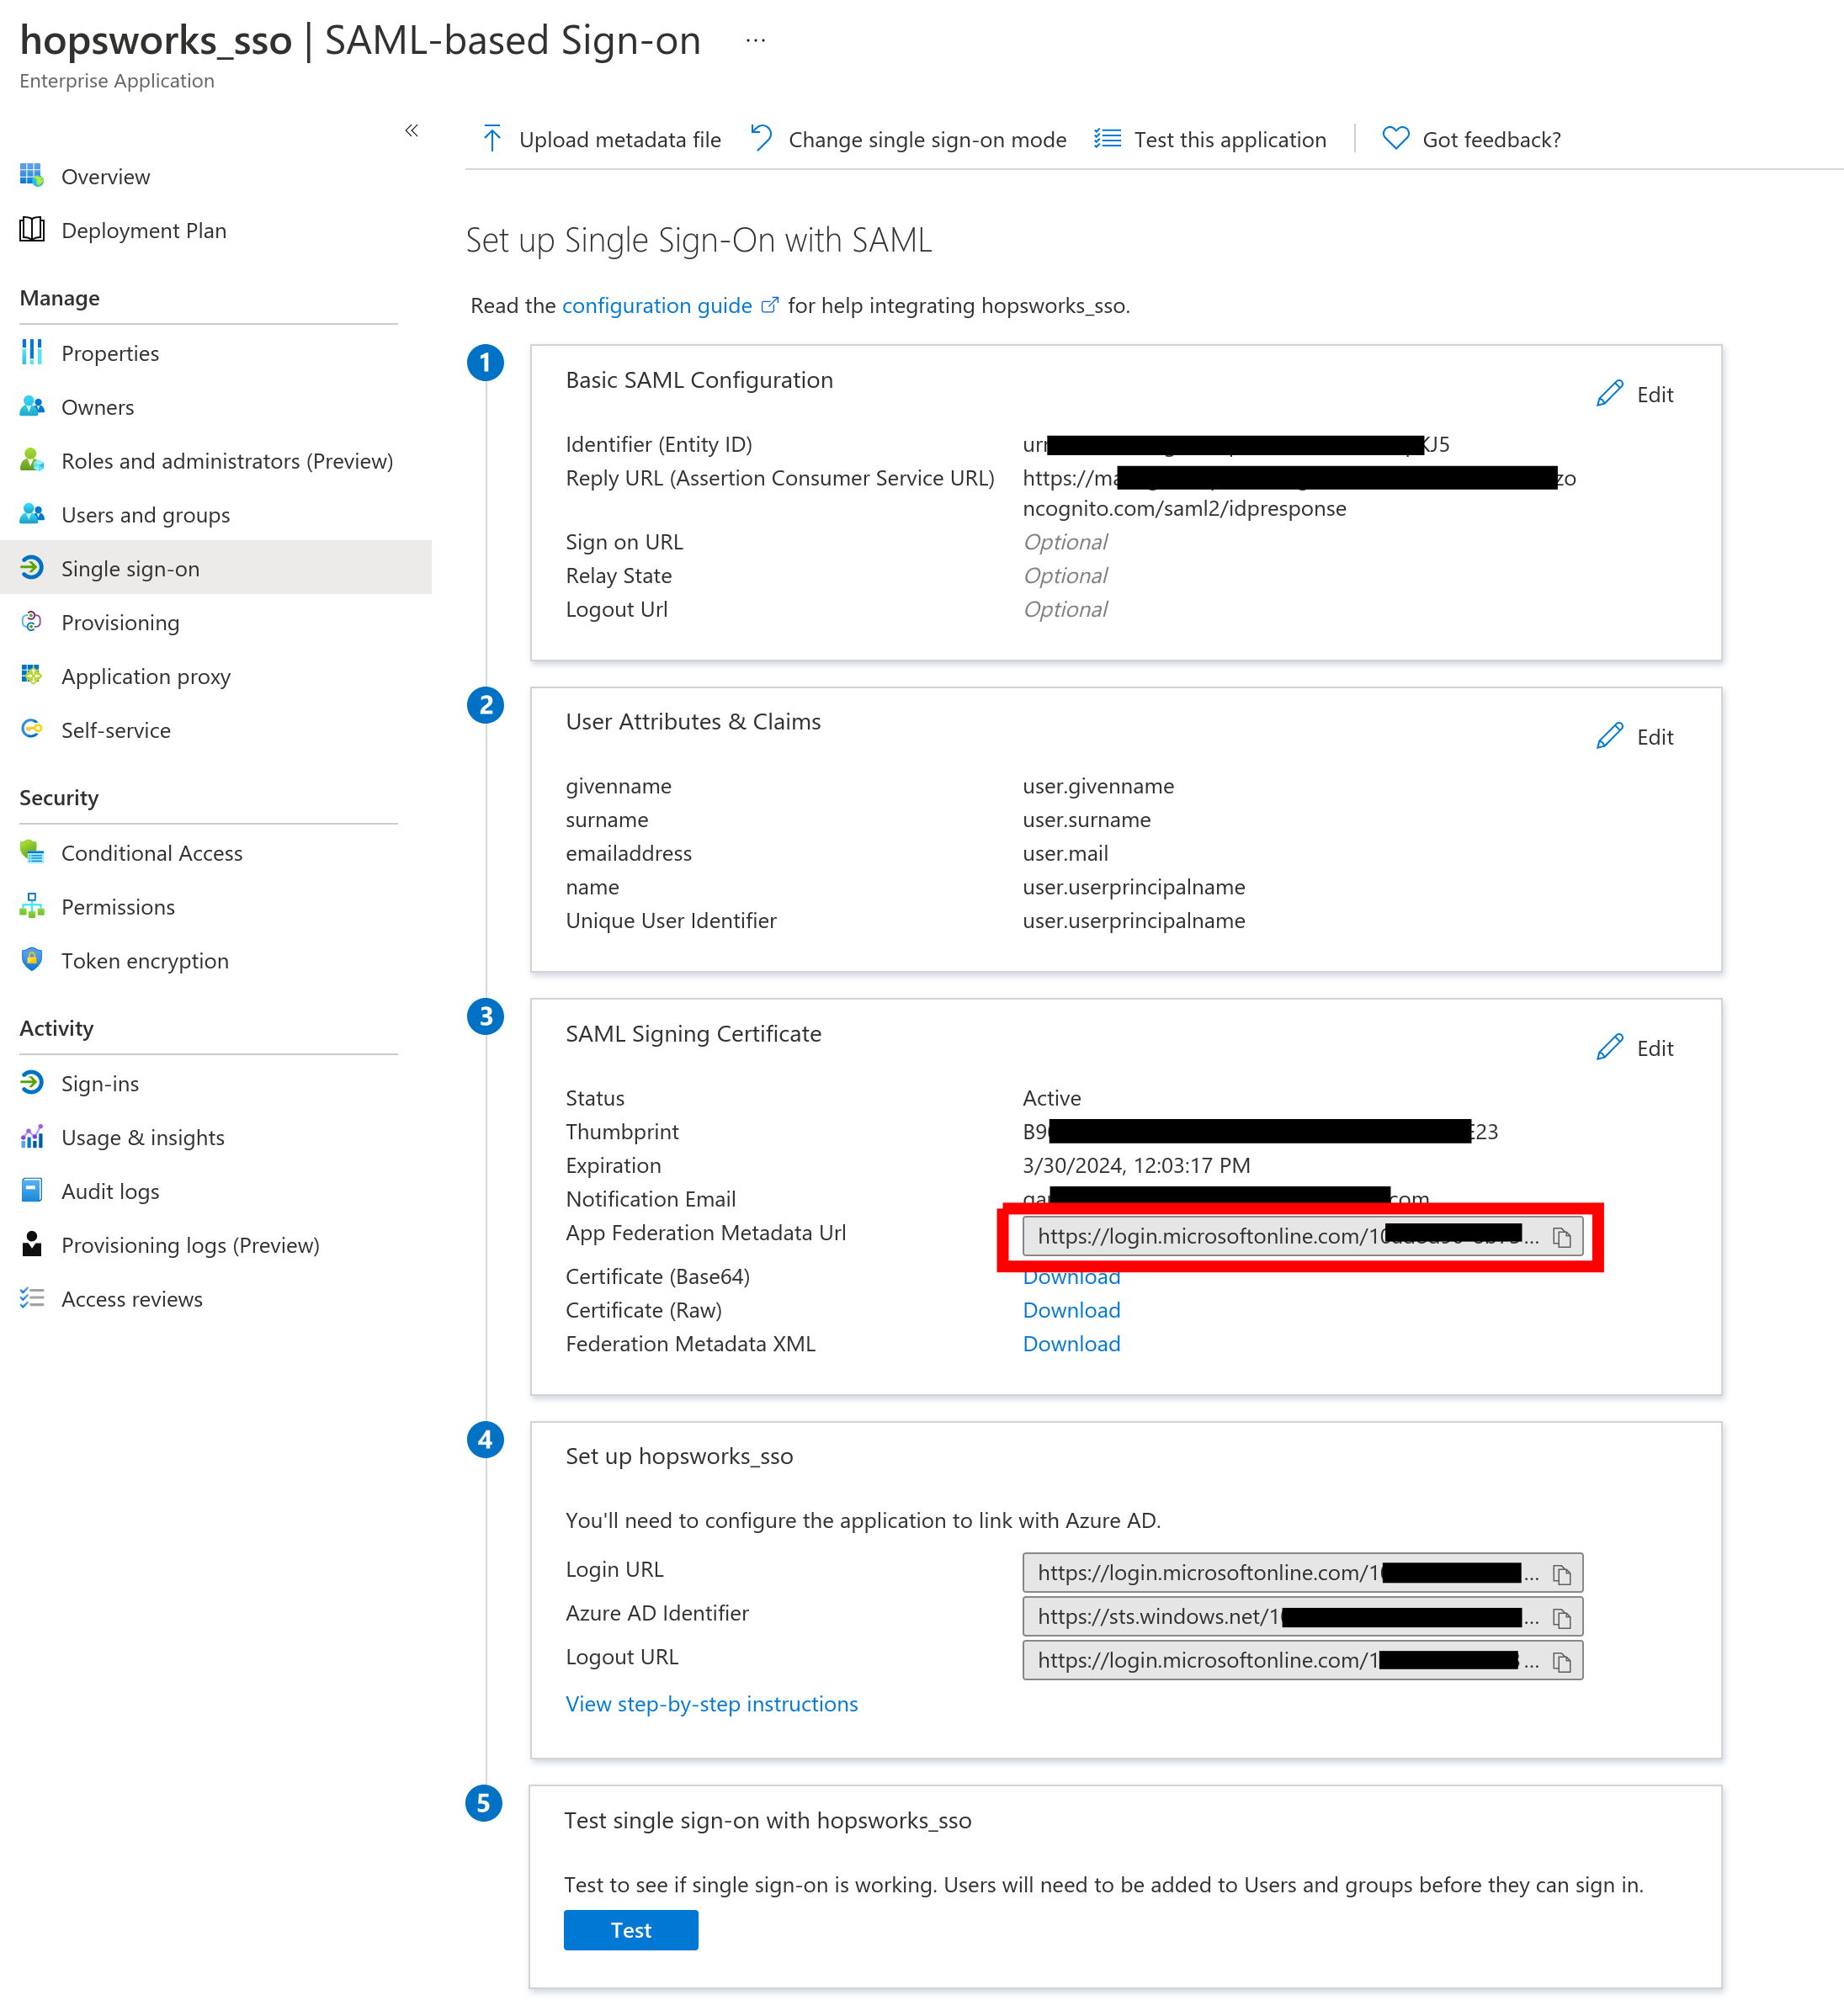
In the SAML Signing Certificate section copy the App Federation Metadata URL.
Click on Users and groups, in the left column, and add the users and groups you want to have access to hopsworks.ai.
Go back to Hopsworks.ai. Click on Next step and keep following the documentation at Configure Hopsworks.ai.

Set the organization name you chose above. This name will be used in your login URL so choose something you will remember. Here we will use hopsworks-demo.
Paste the Metadata URL you copied above and click Finish.

Note
if the organization name you chose is already used you will need to set a new one and to update the Sign on URL in Azure.
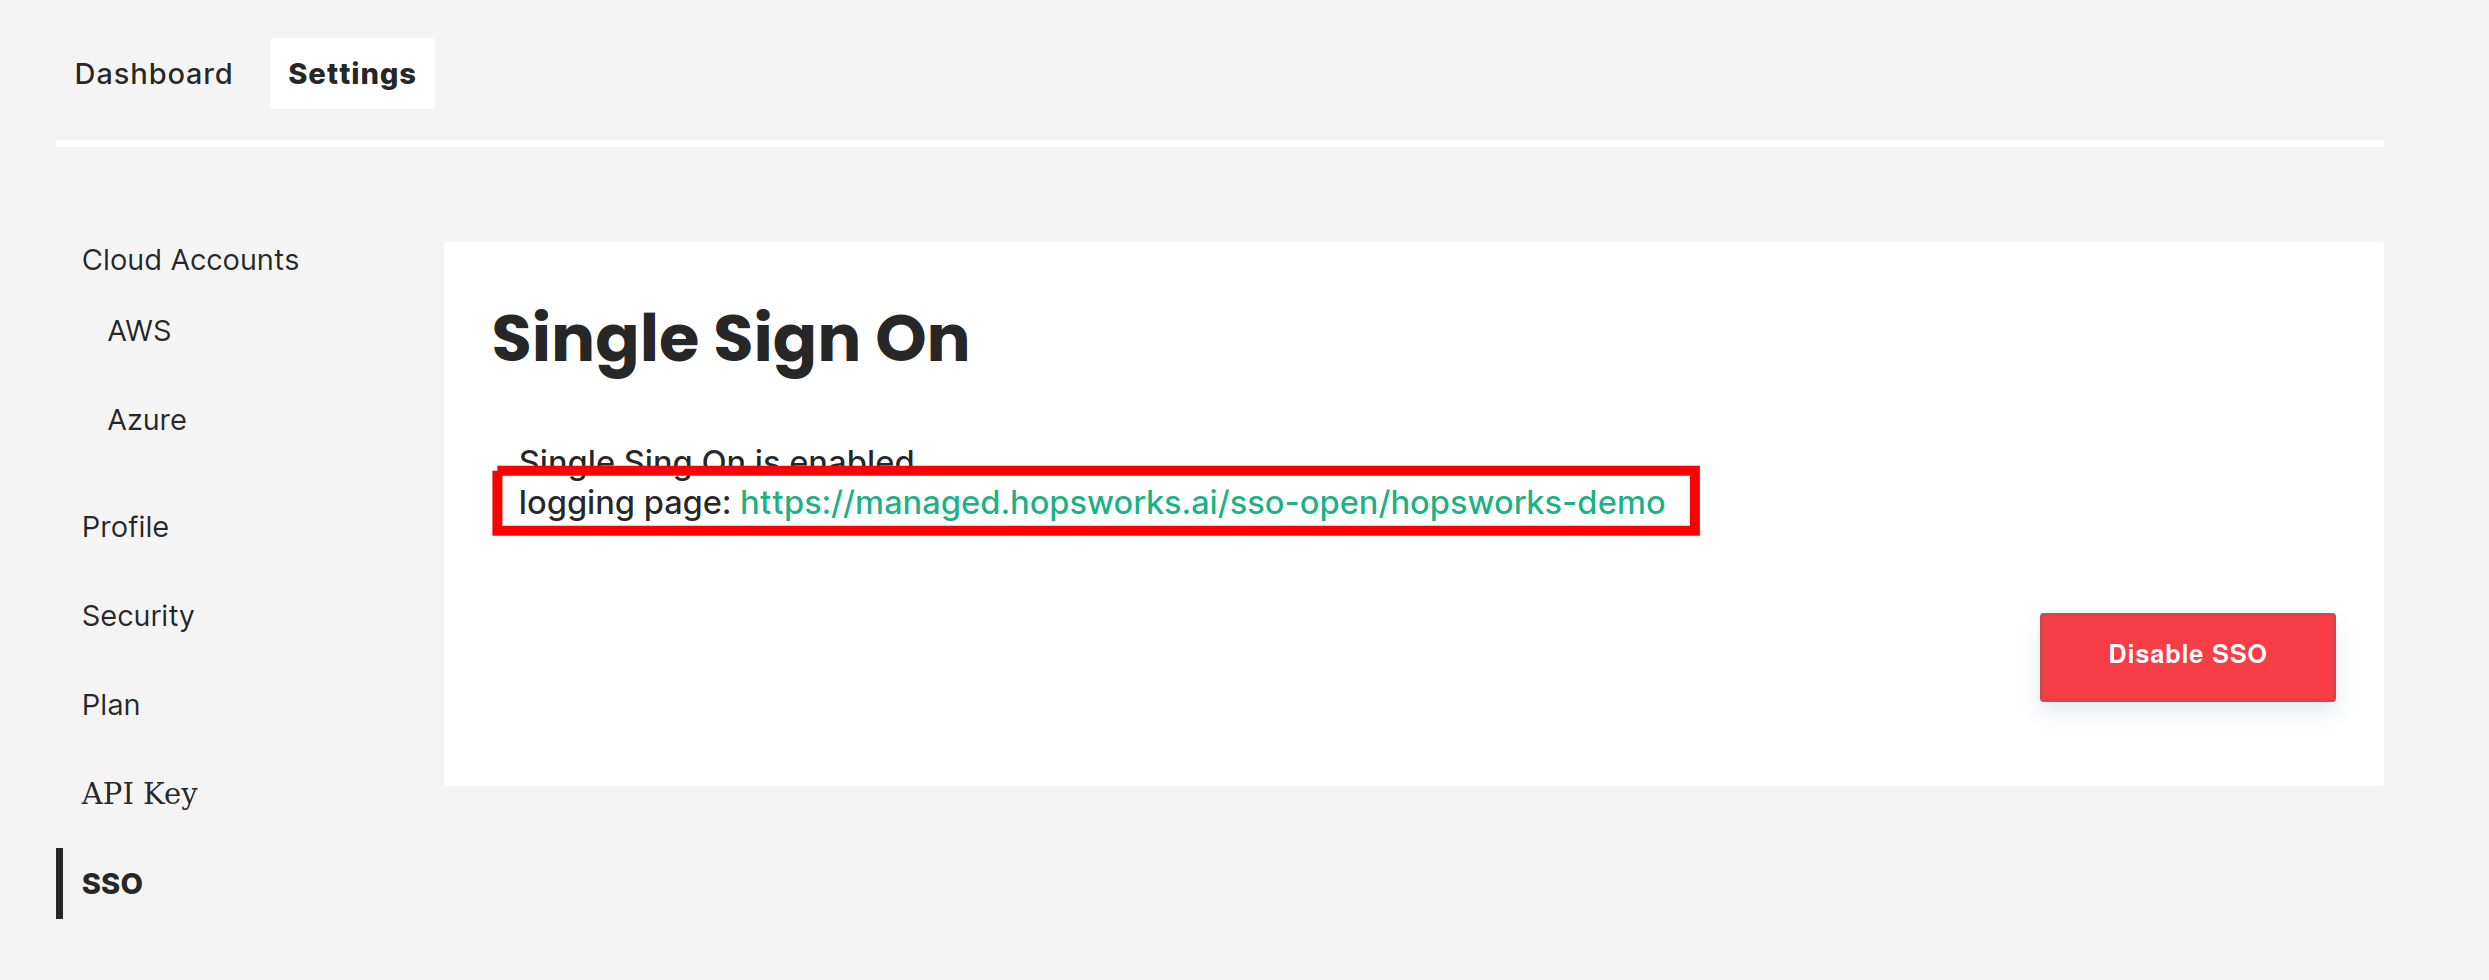
If you go back to the SSO tab of Settings you will get a logging page link. By using this link you will automatically be redirected to your identity provider to login. An account will automatically be created in hopsworks.ai for users of your organization when they log in for the first time.
AWS Single Sign-On#
Go to your hopsworks.ai dashboard. Click on Settings. Click on SSO. Click on Setup SSO.
Click on AWS SSO. You will need the copyable entries on this page in the following steps.

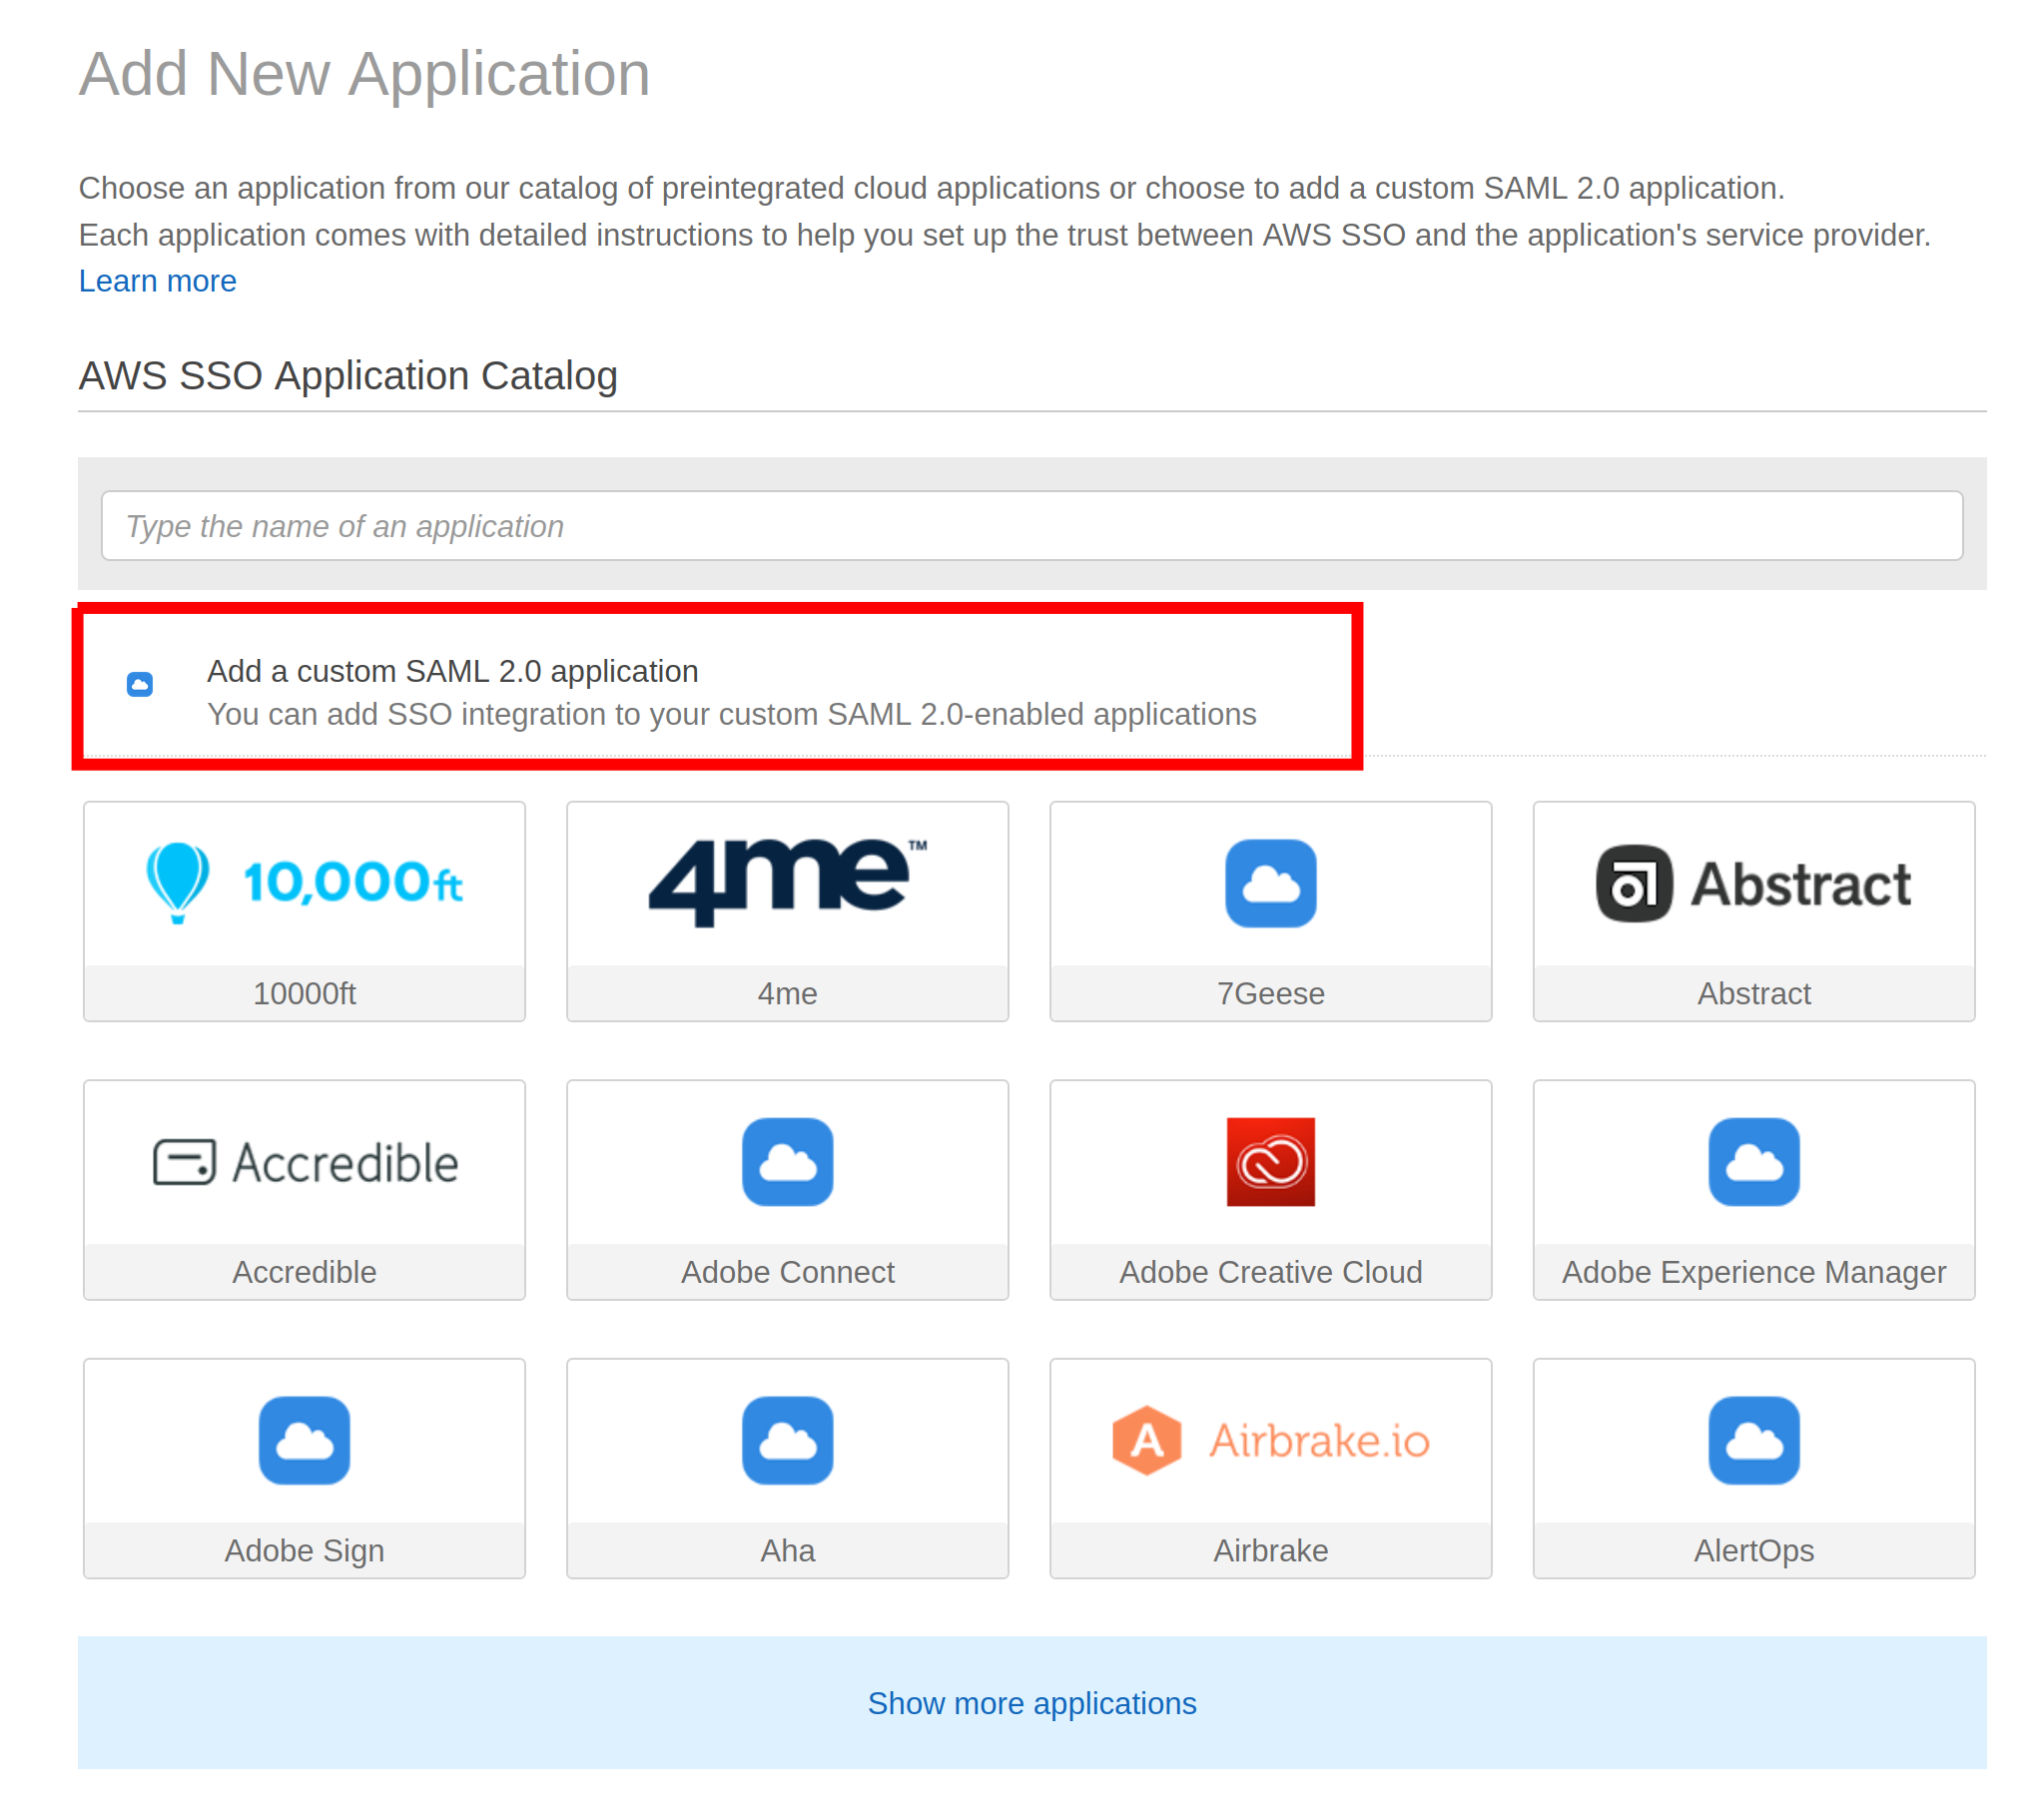
Go to AWS Single Sign-On in the AWS Management Console and click on Applications, then click on Add New Application.
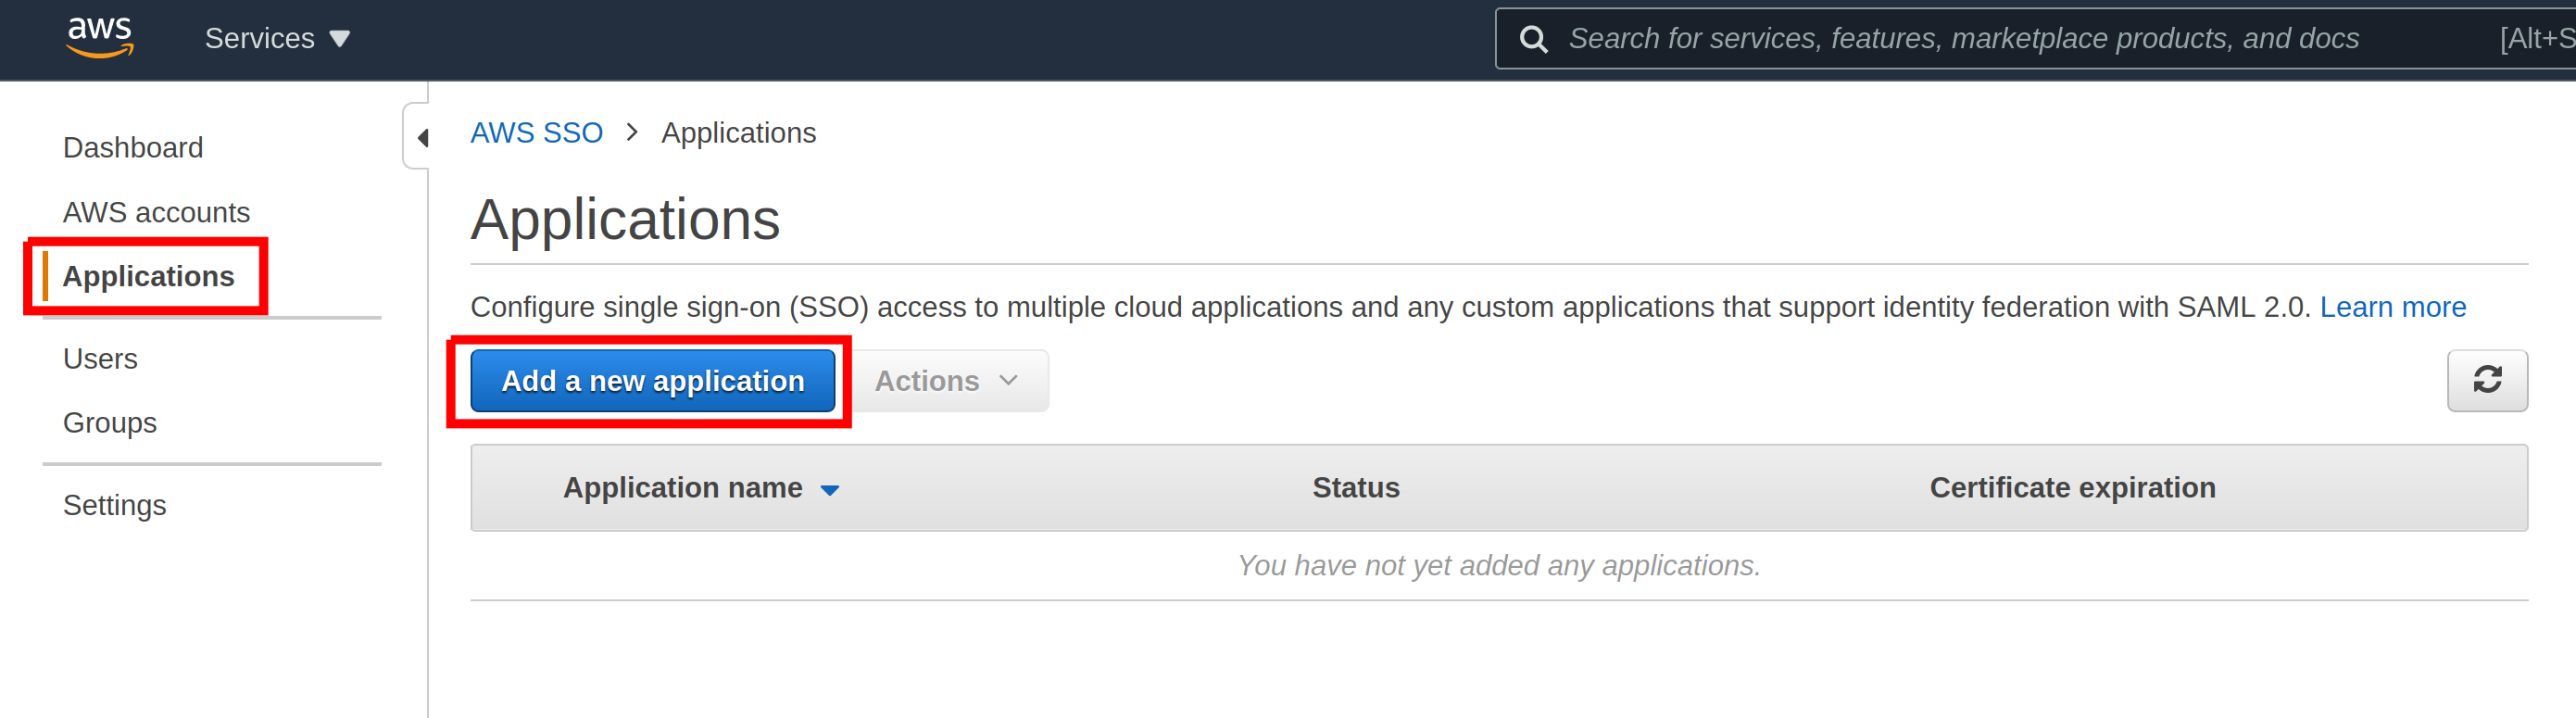
Click on Add a custom SAML 2.0 application.
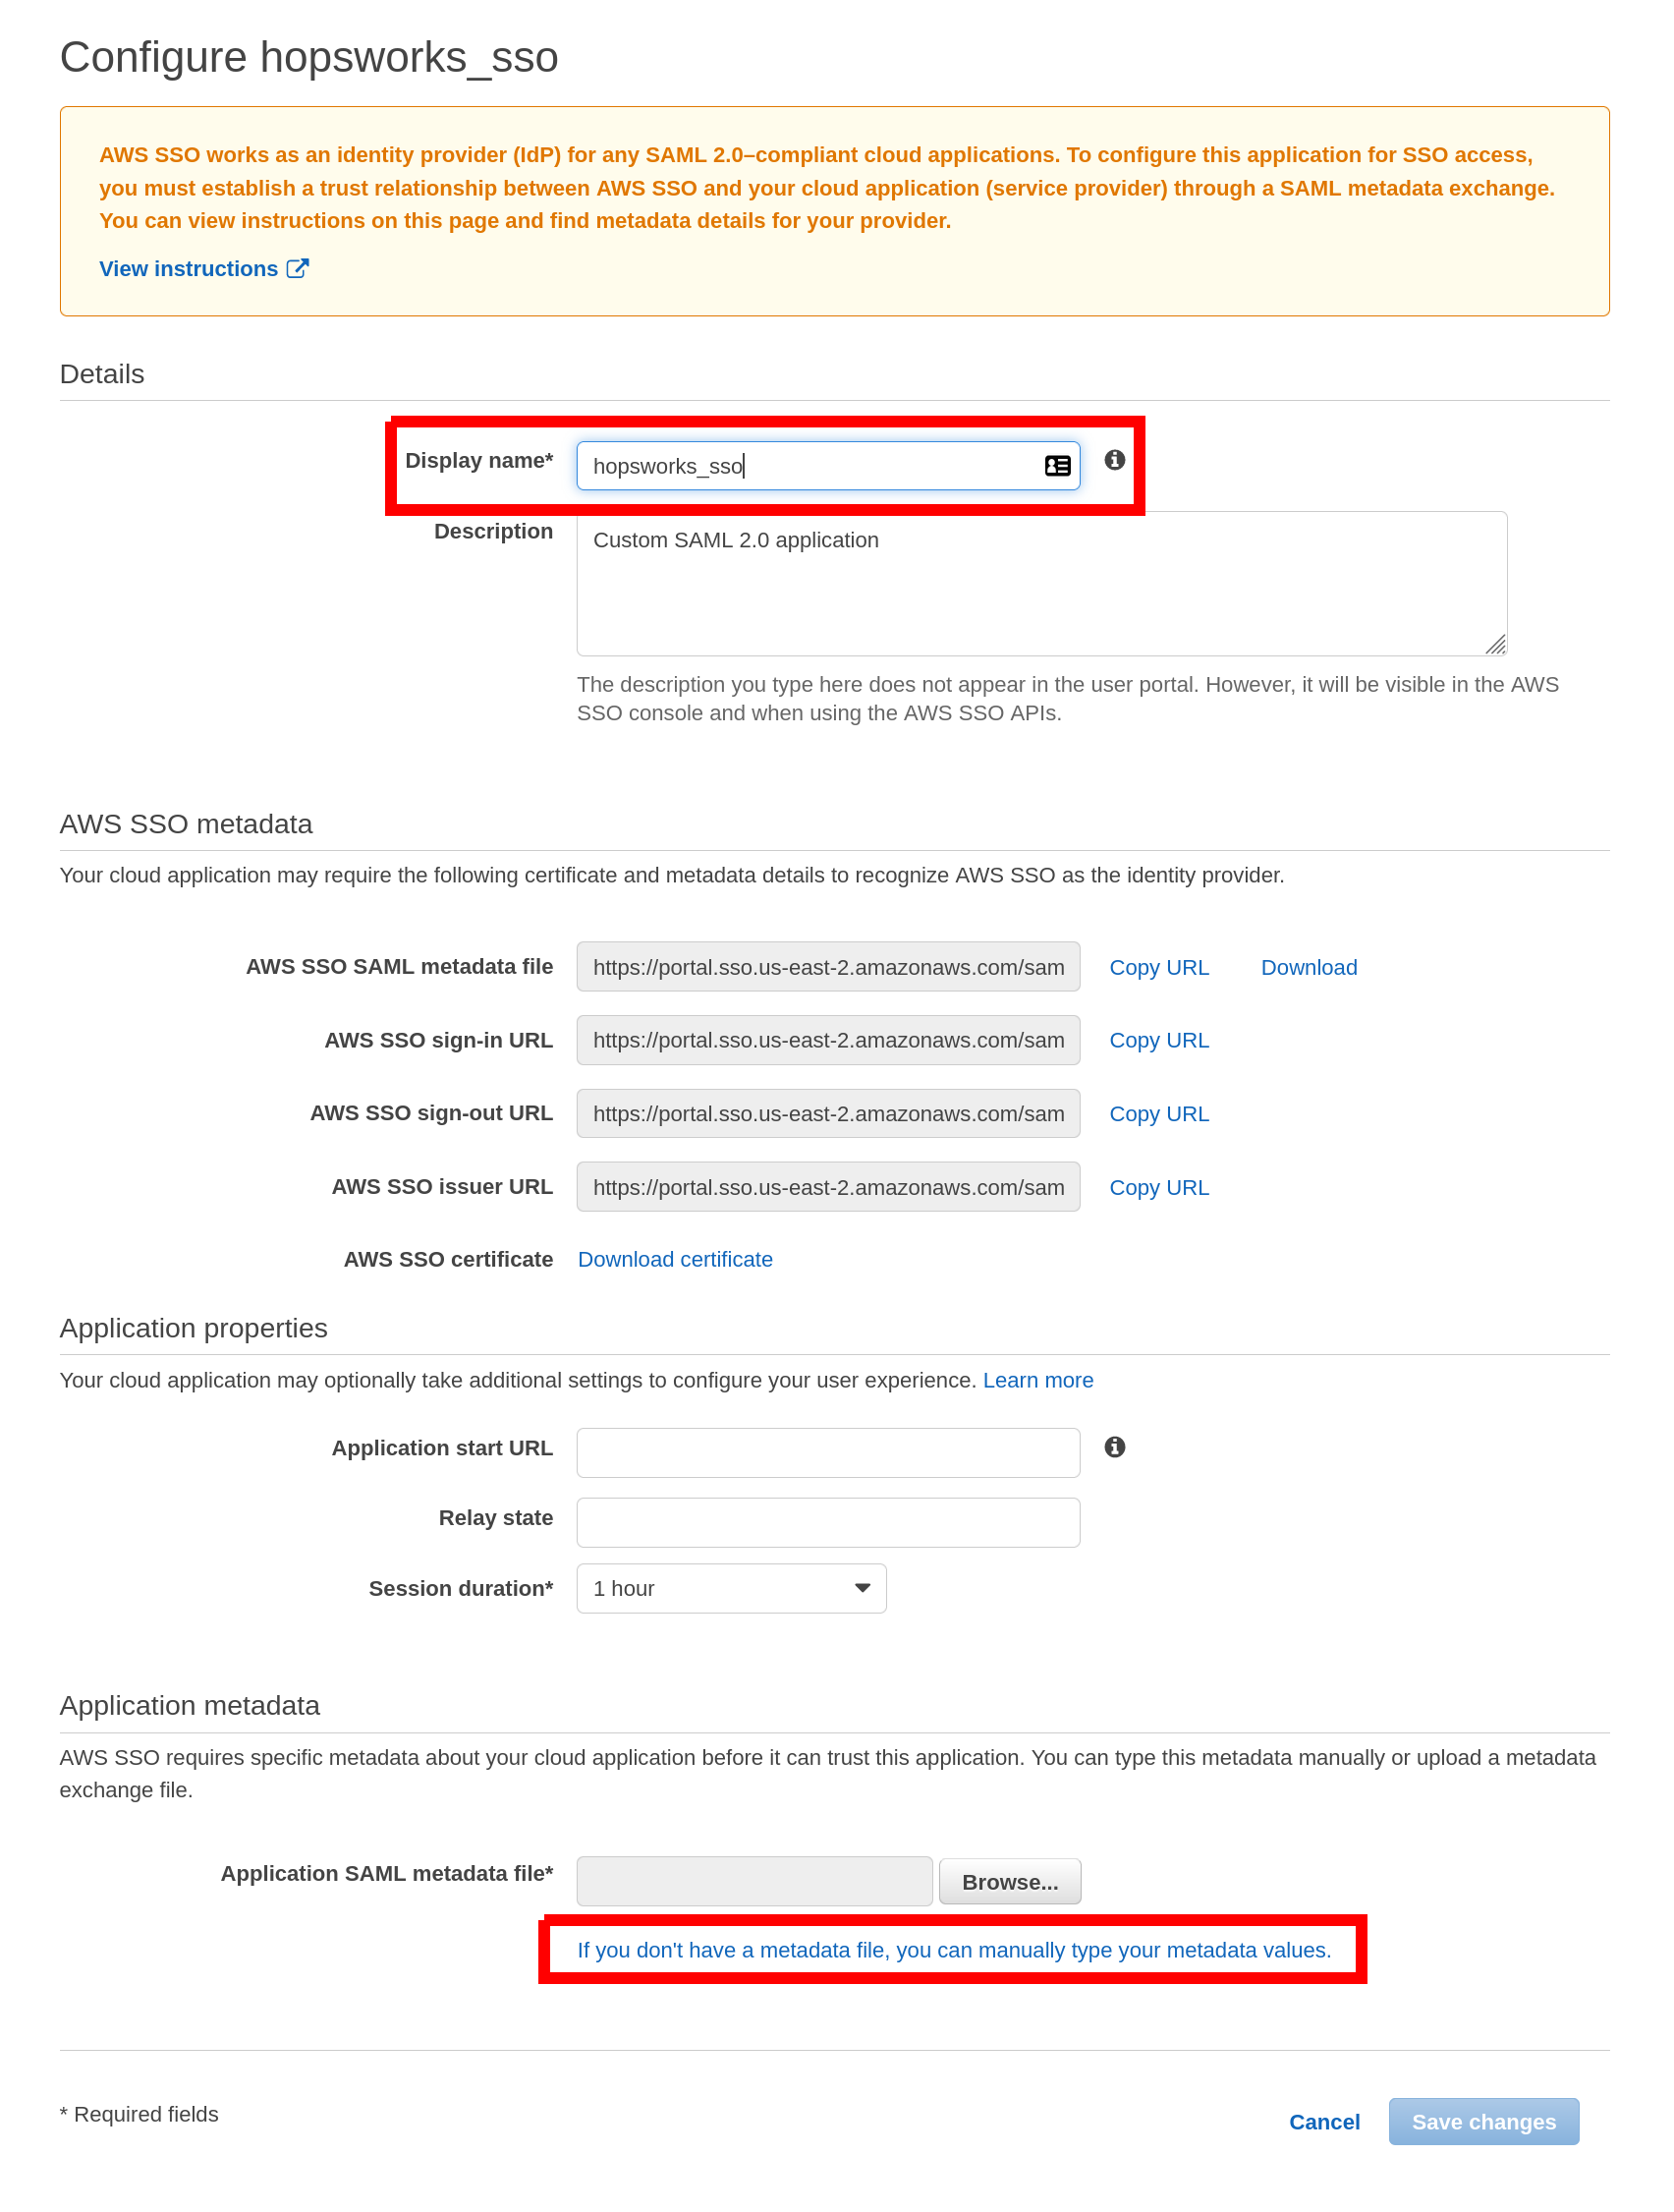
Give a name to your application, for example, hopsworks_sso. Scroll to the bottom and click on If you don't have a metadata file, you can manually type your metadata values.
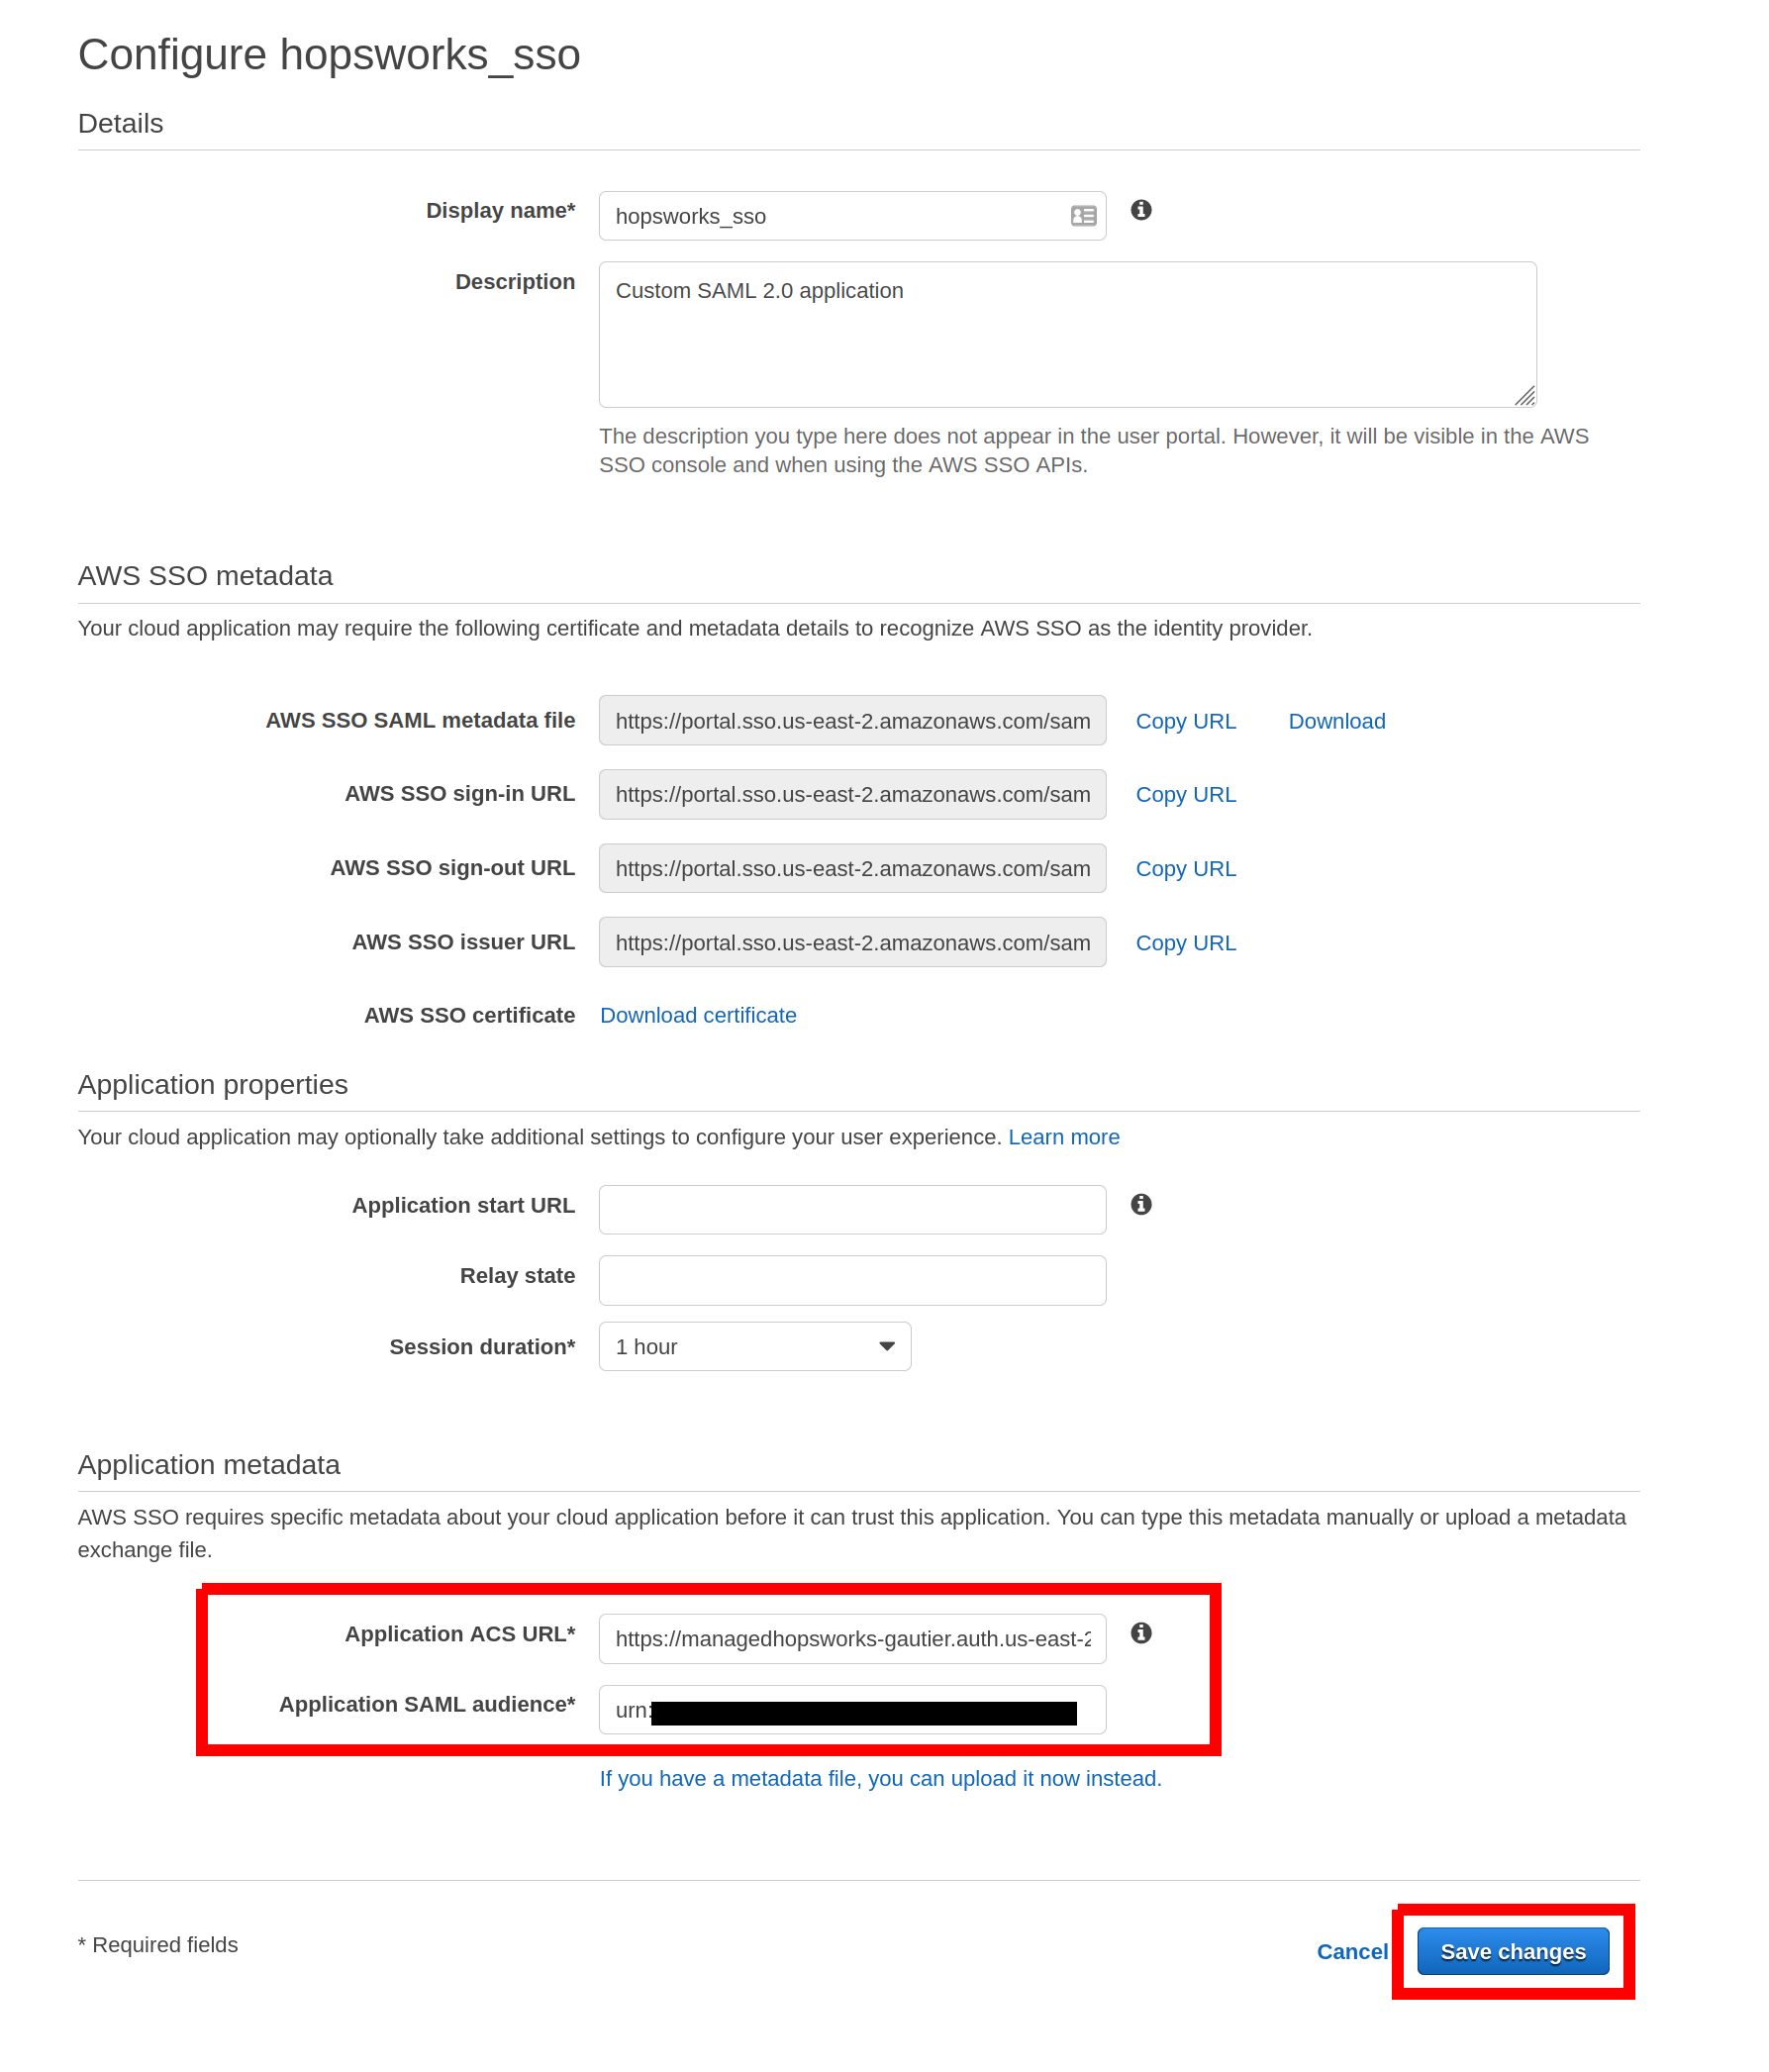
Paste the Application ACS URL and Application SAML audience that you copy from the Hopsworks.ai setup page. Click on Save changes.
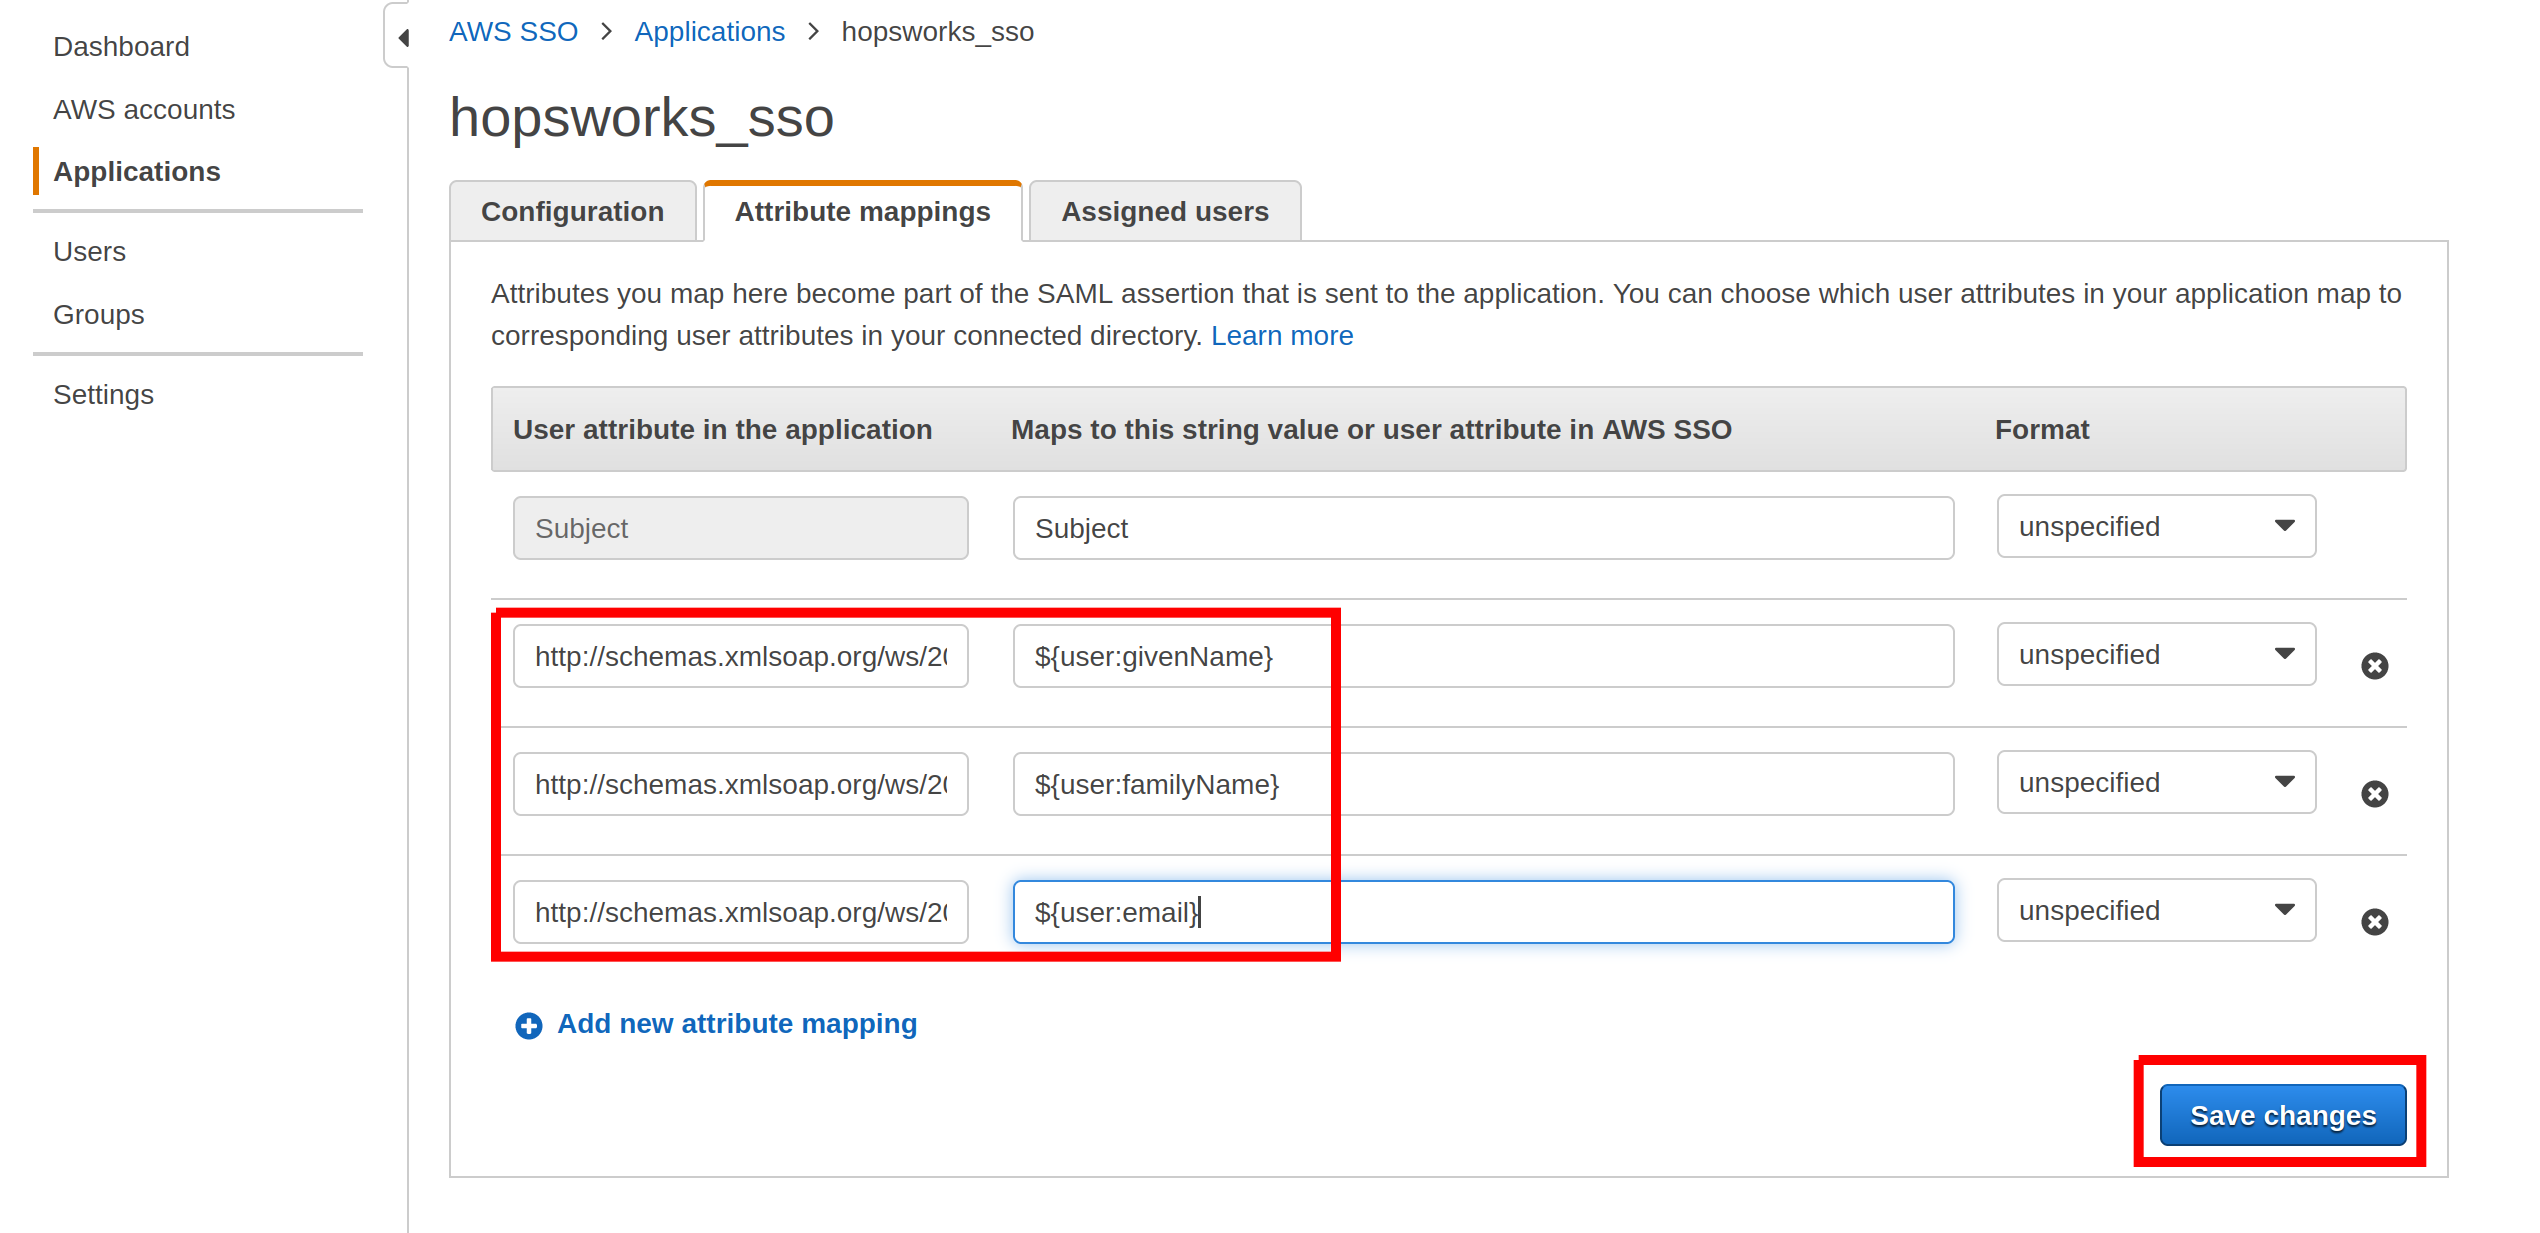
Go to the Attribute mappings tab. On the first line enter the value Subject and select unspecified for the format. then, Click on Add new attribute mapping 3 times.
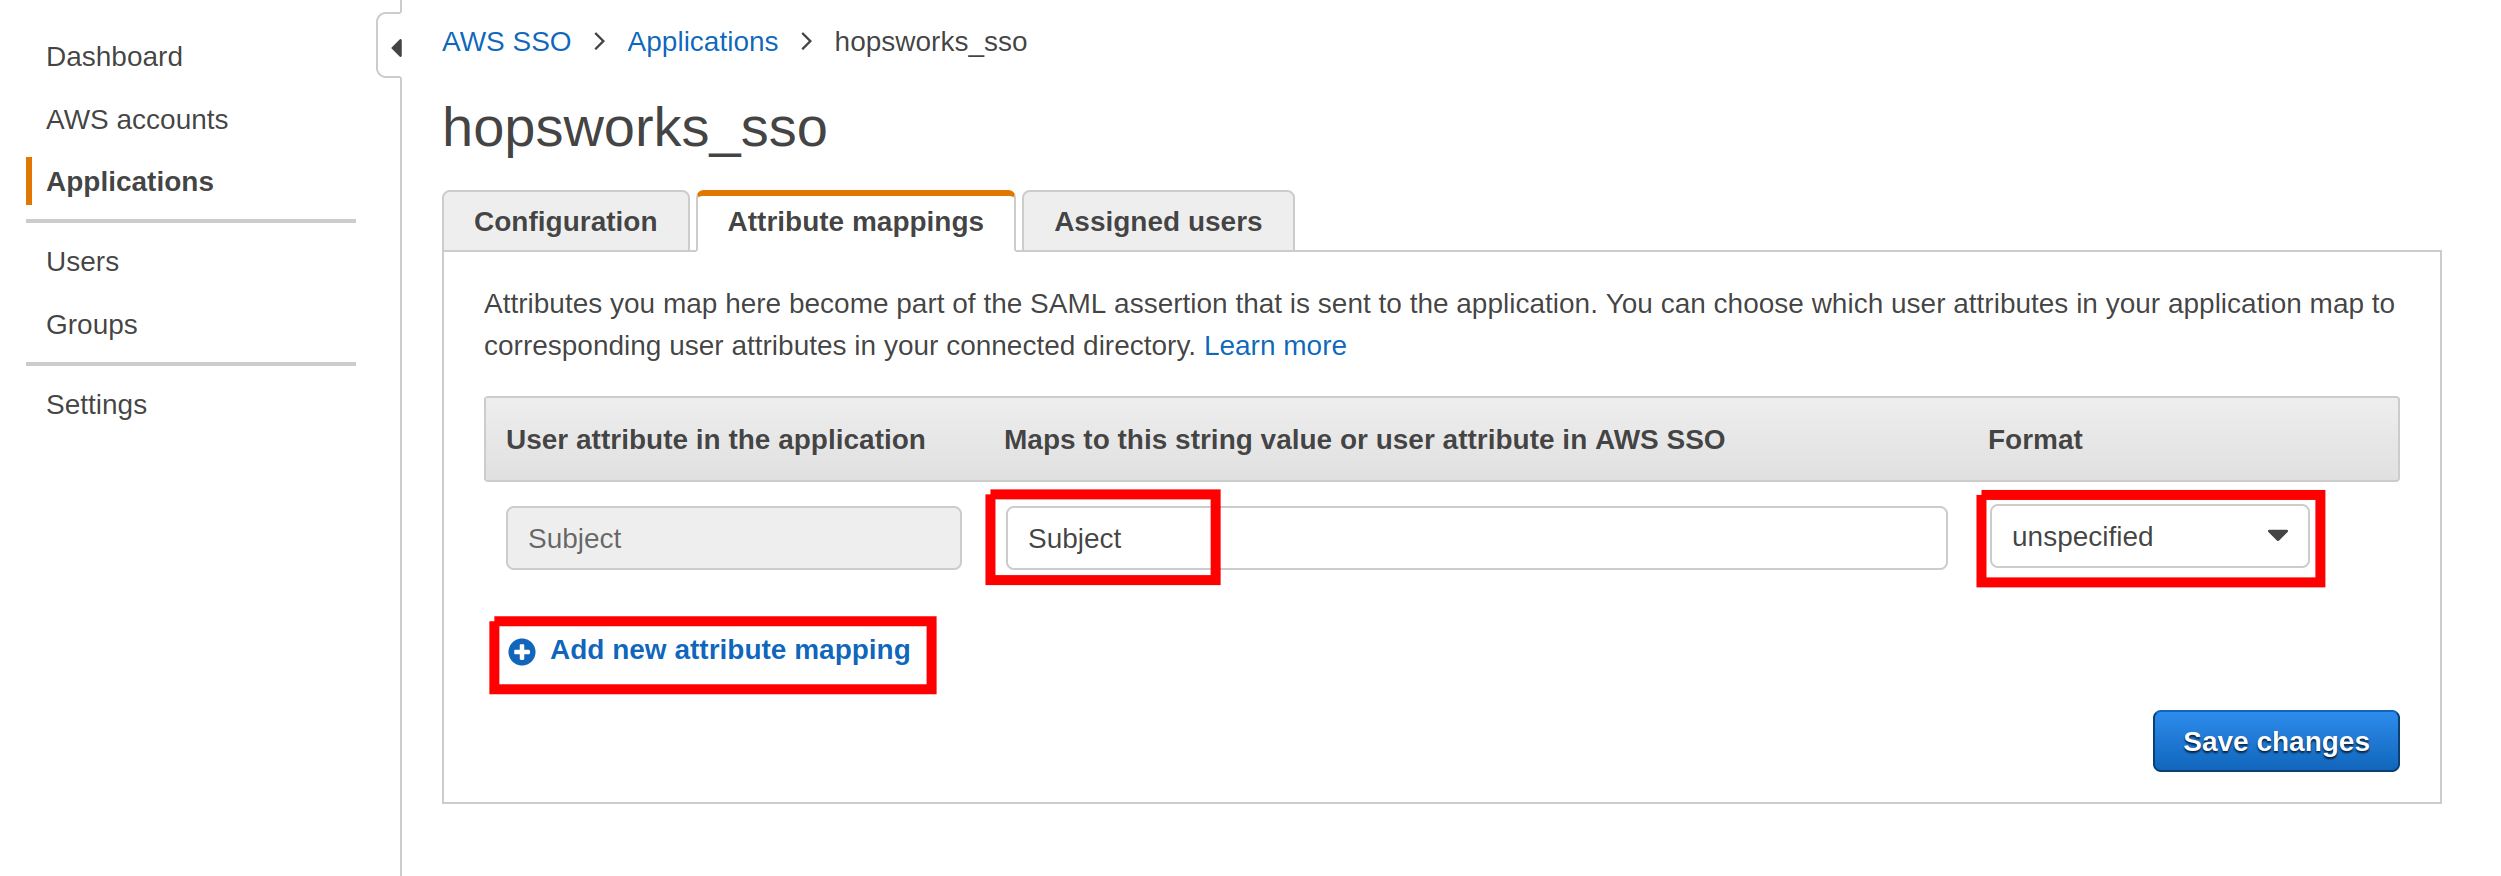
For each of the created lines enter the following values in the first and second columns and let the format as unspecified.
- First: http://schemas.xmlsoap.org/ws/2005/05/identity/claims/emailaddress, second: ${user:email}
- First: http://schemas.xmlsoap.org/ws/2005/05/identity/claims/surname, Second: ${user:familyName}
- First: http://schemas.xmlsoap.org/ws/2005/05/identity/claims/givenname, Second: ${user:givenName}
Click on Save changes.
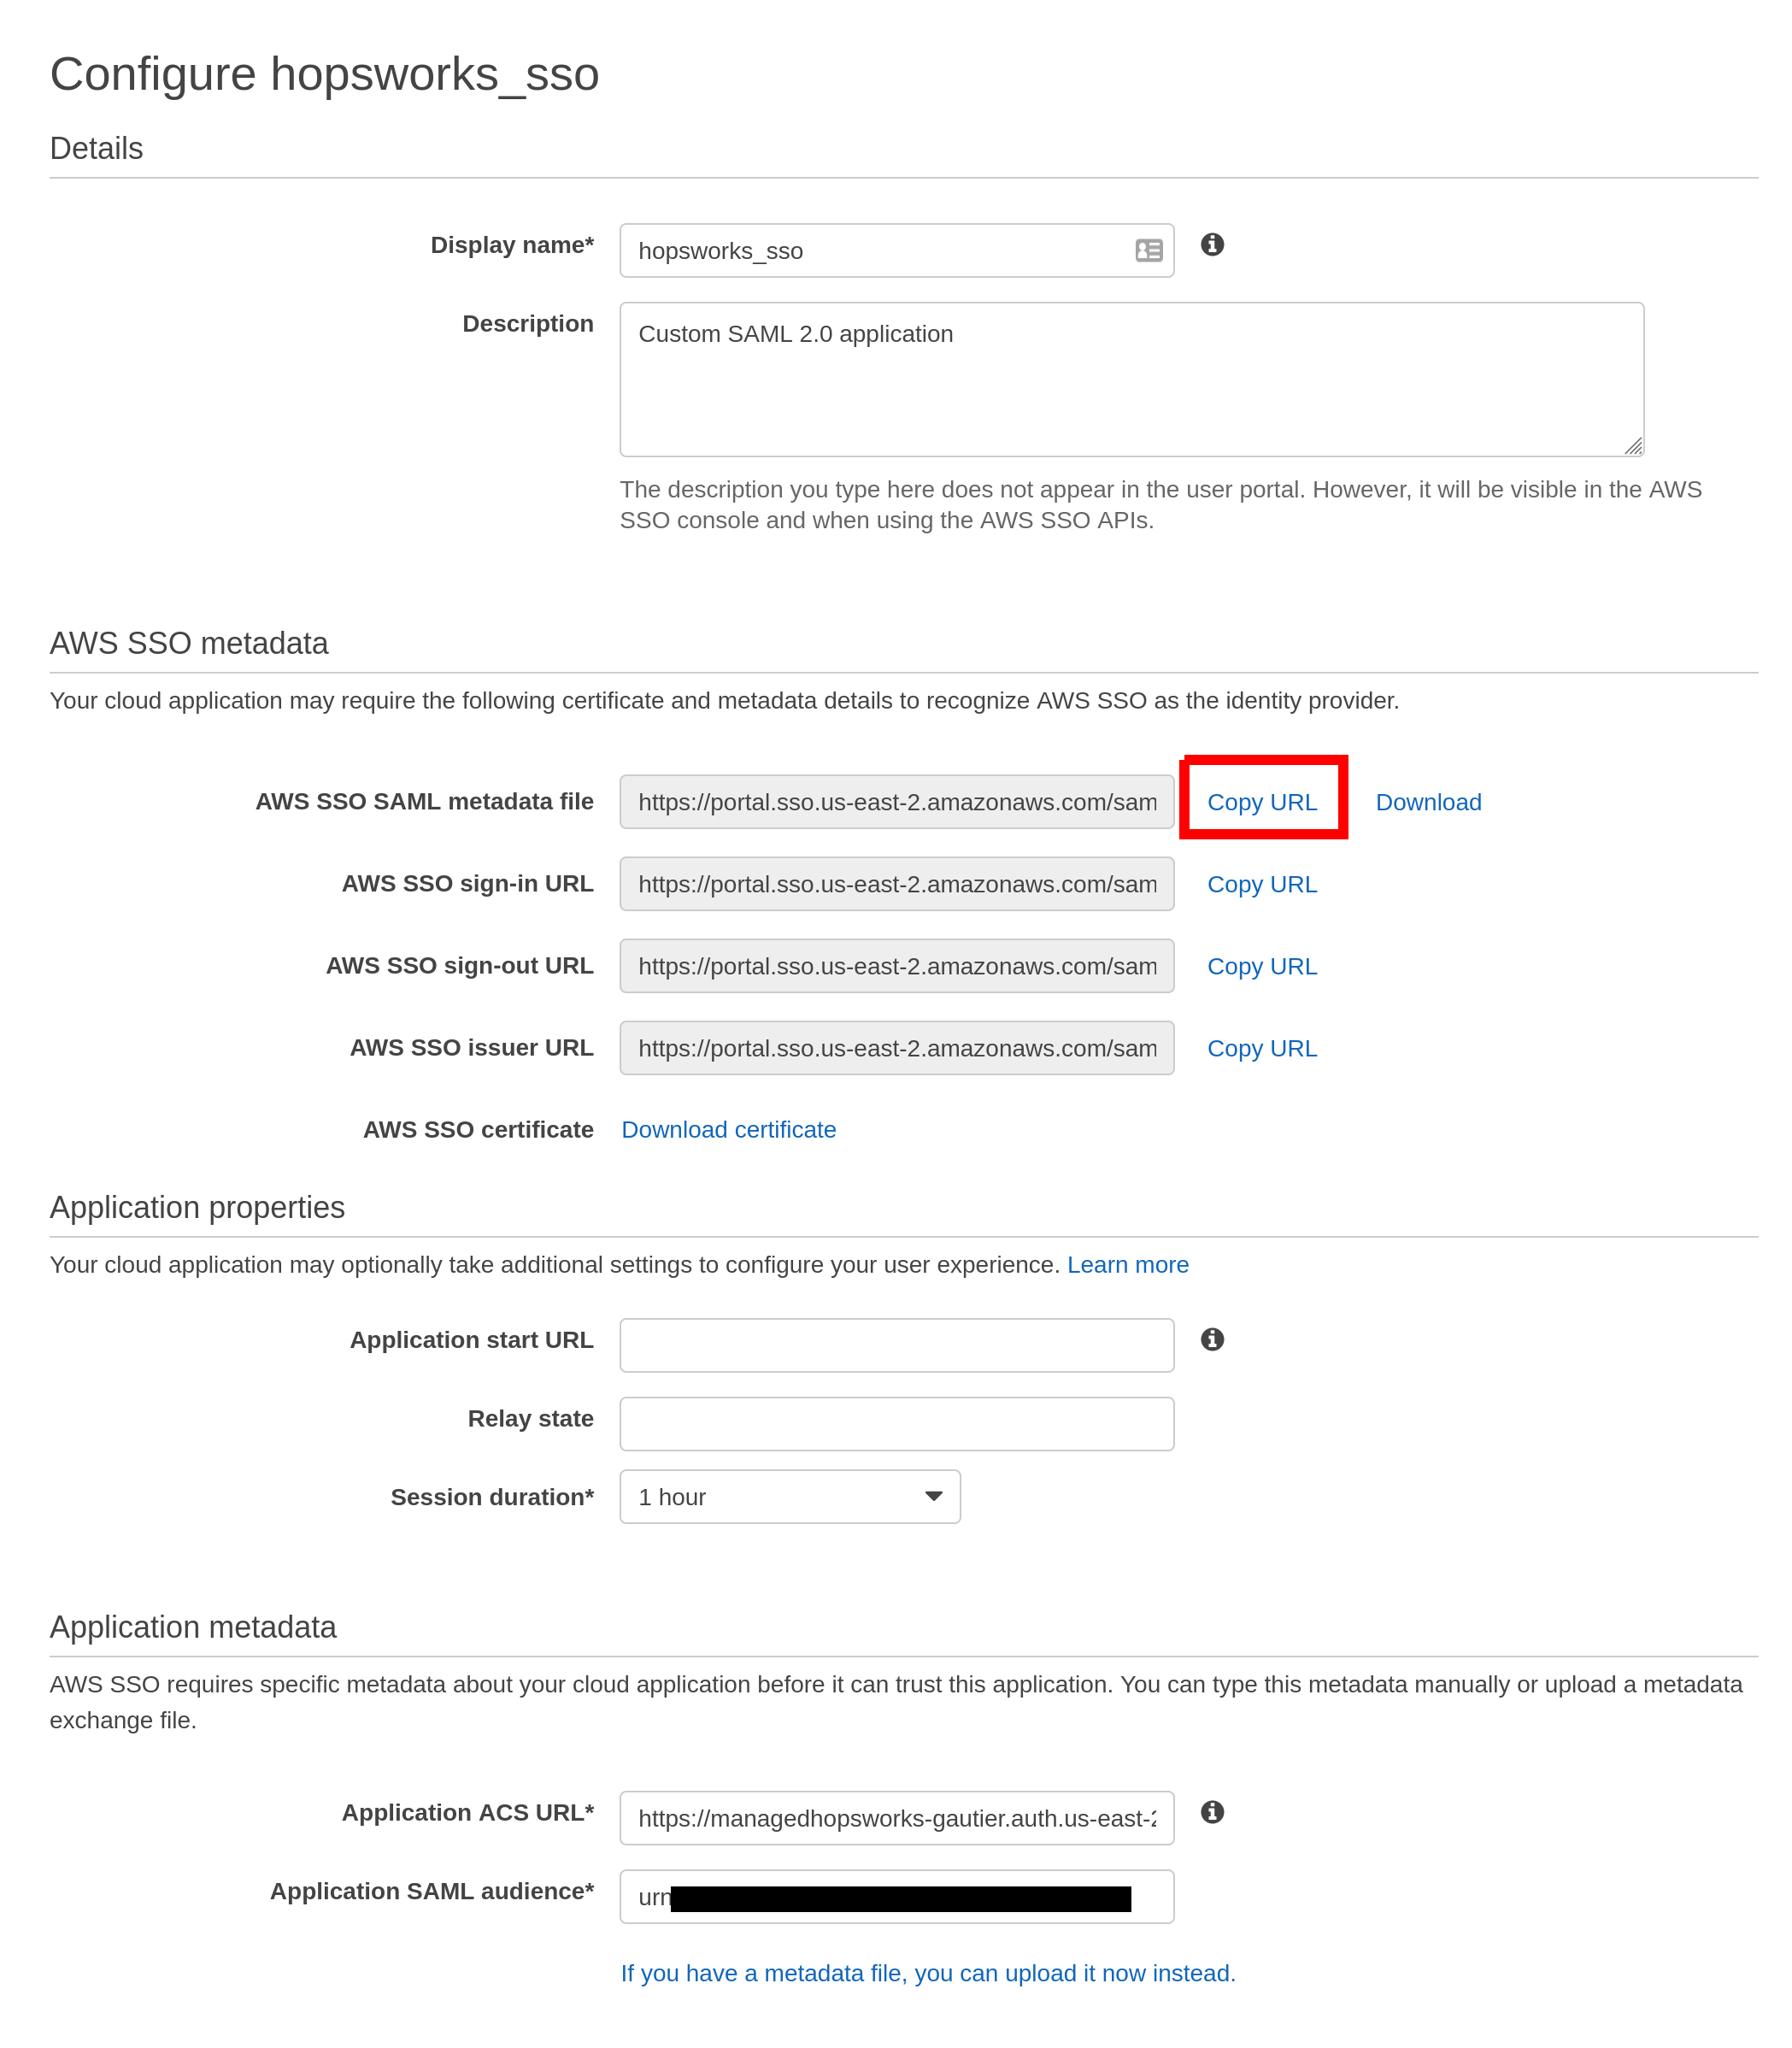
Return to the Configuration tab and click on Edit configuration.
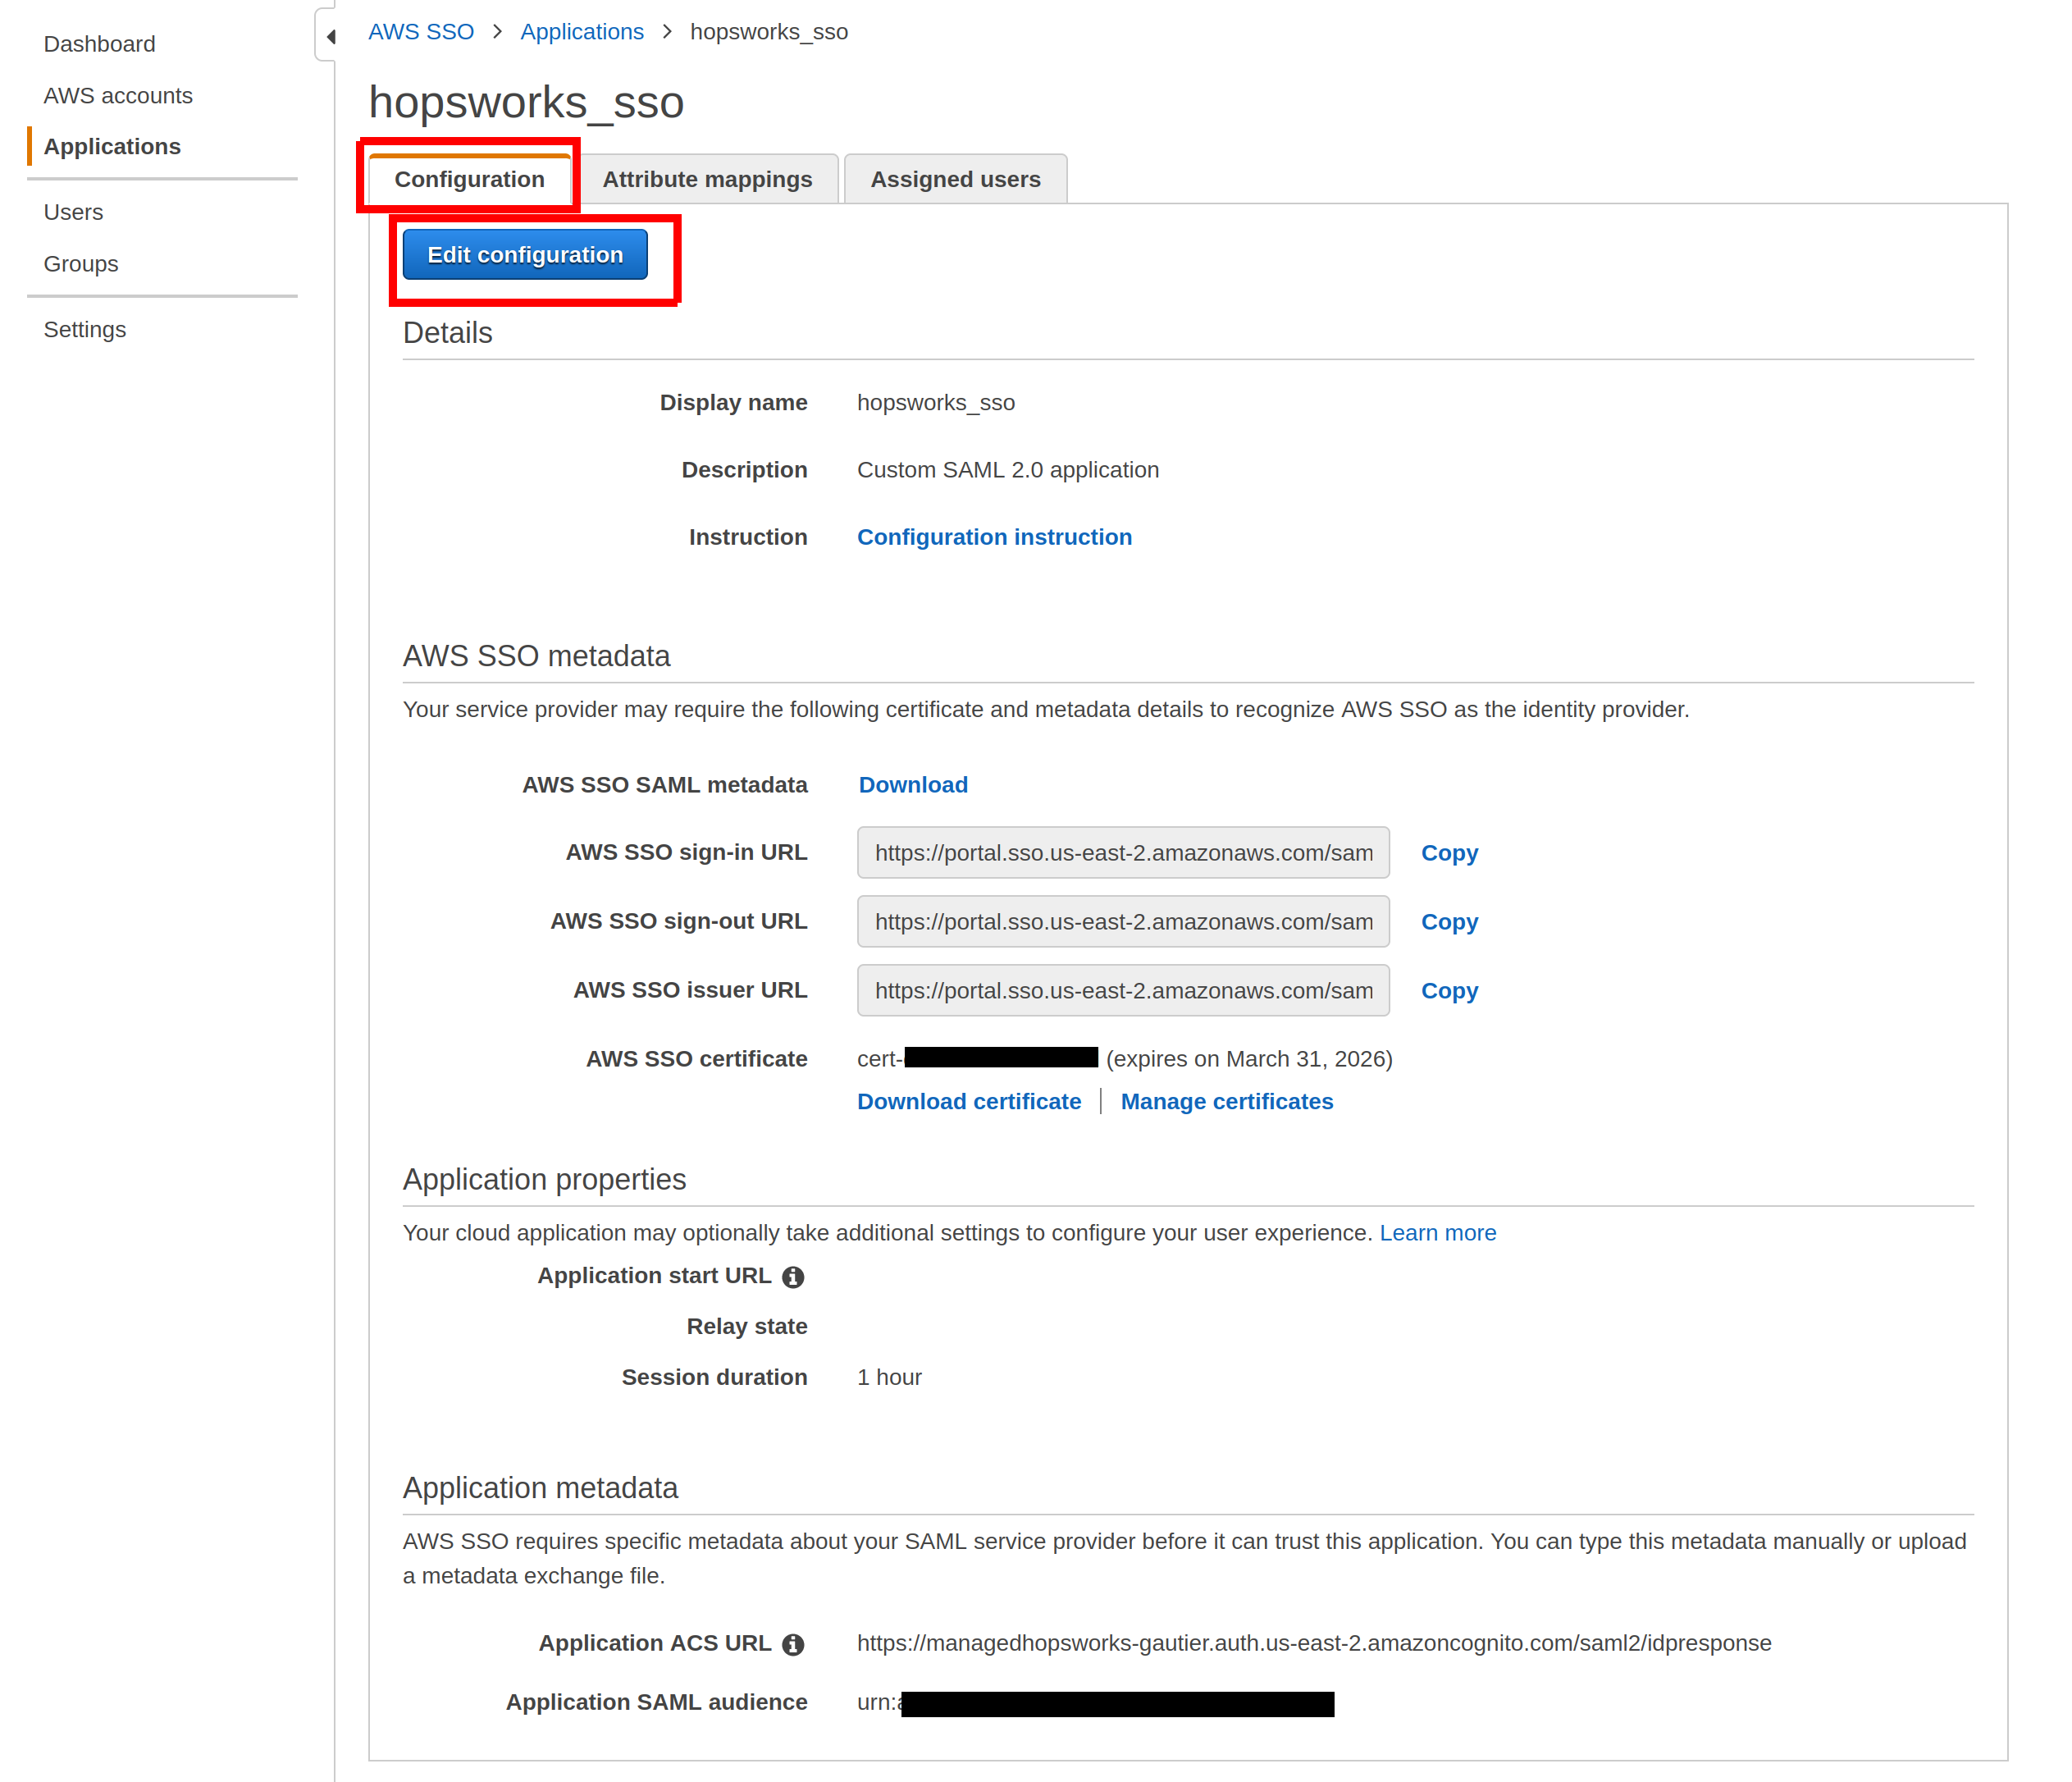
Click on Copy URL on the AWS SSO SAML metadata file line. We will call this URL Metadata URL in the coming steps.
Go back to Hopsworks.ai. Click on Next step.
Give a name to your organization. This name will be used in your login URL so choose something you will remember. Here we will use hopsworks-demo.
Paste the Metadata URL you copied above and click Finish.
If you go back to the SSO tab of Settings you will get a logging page link. By using this link you will automatically be redirected to your identity provider to login. An account will automatically be created in hopsworks.ai for users of your organization when they log in for the first time.