Create An Application in Okta#
Introduction#
This example uses an Okta development account to create an application that will represent a Hopsworks client in the identity provider.
Prerequisites#
Okta development account. To create a developer account go to Okta developer.
Step 1: Register Hopsworks as an application in your identity provider#
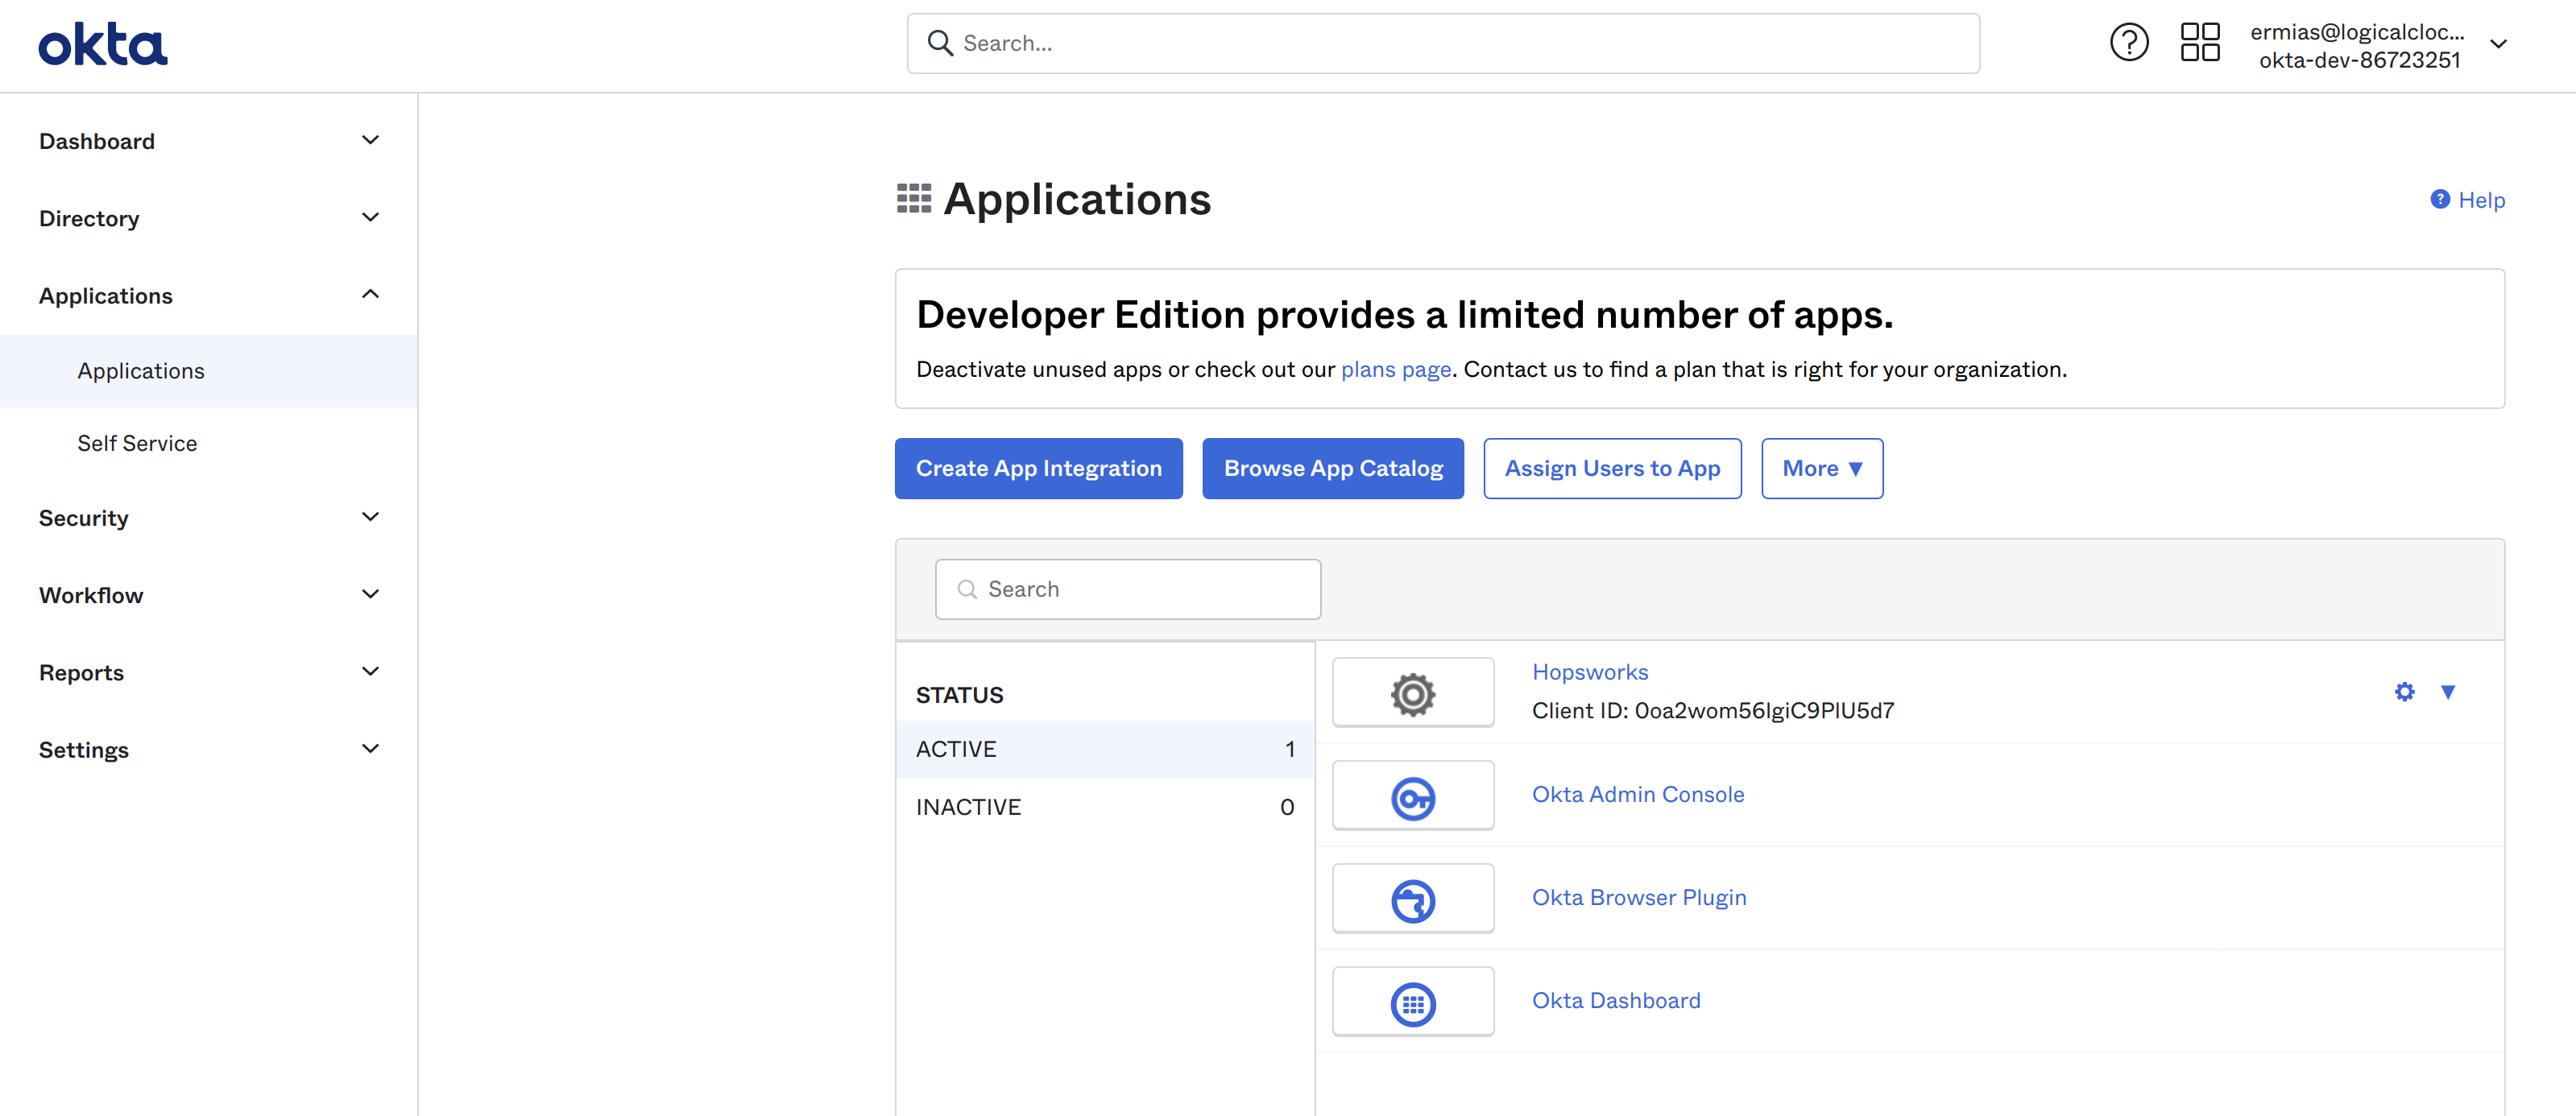
After creating a developer account register a client by going to Applications and click on Create App Integration.
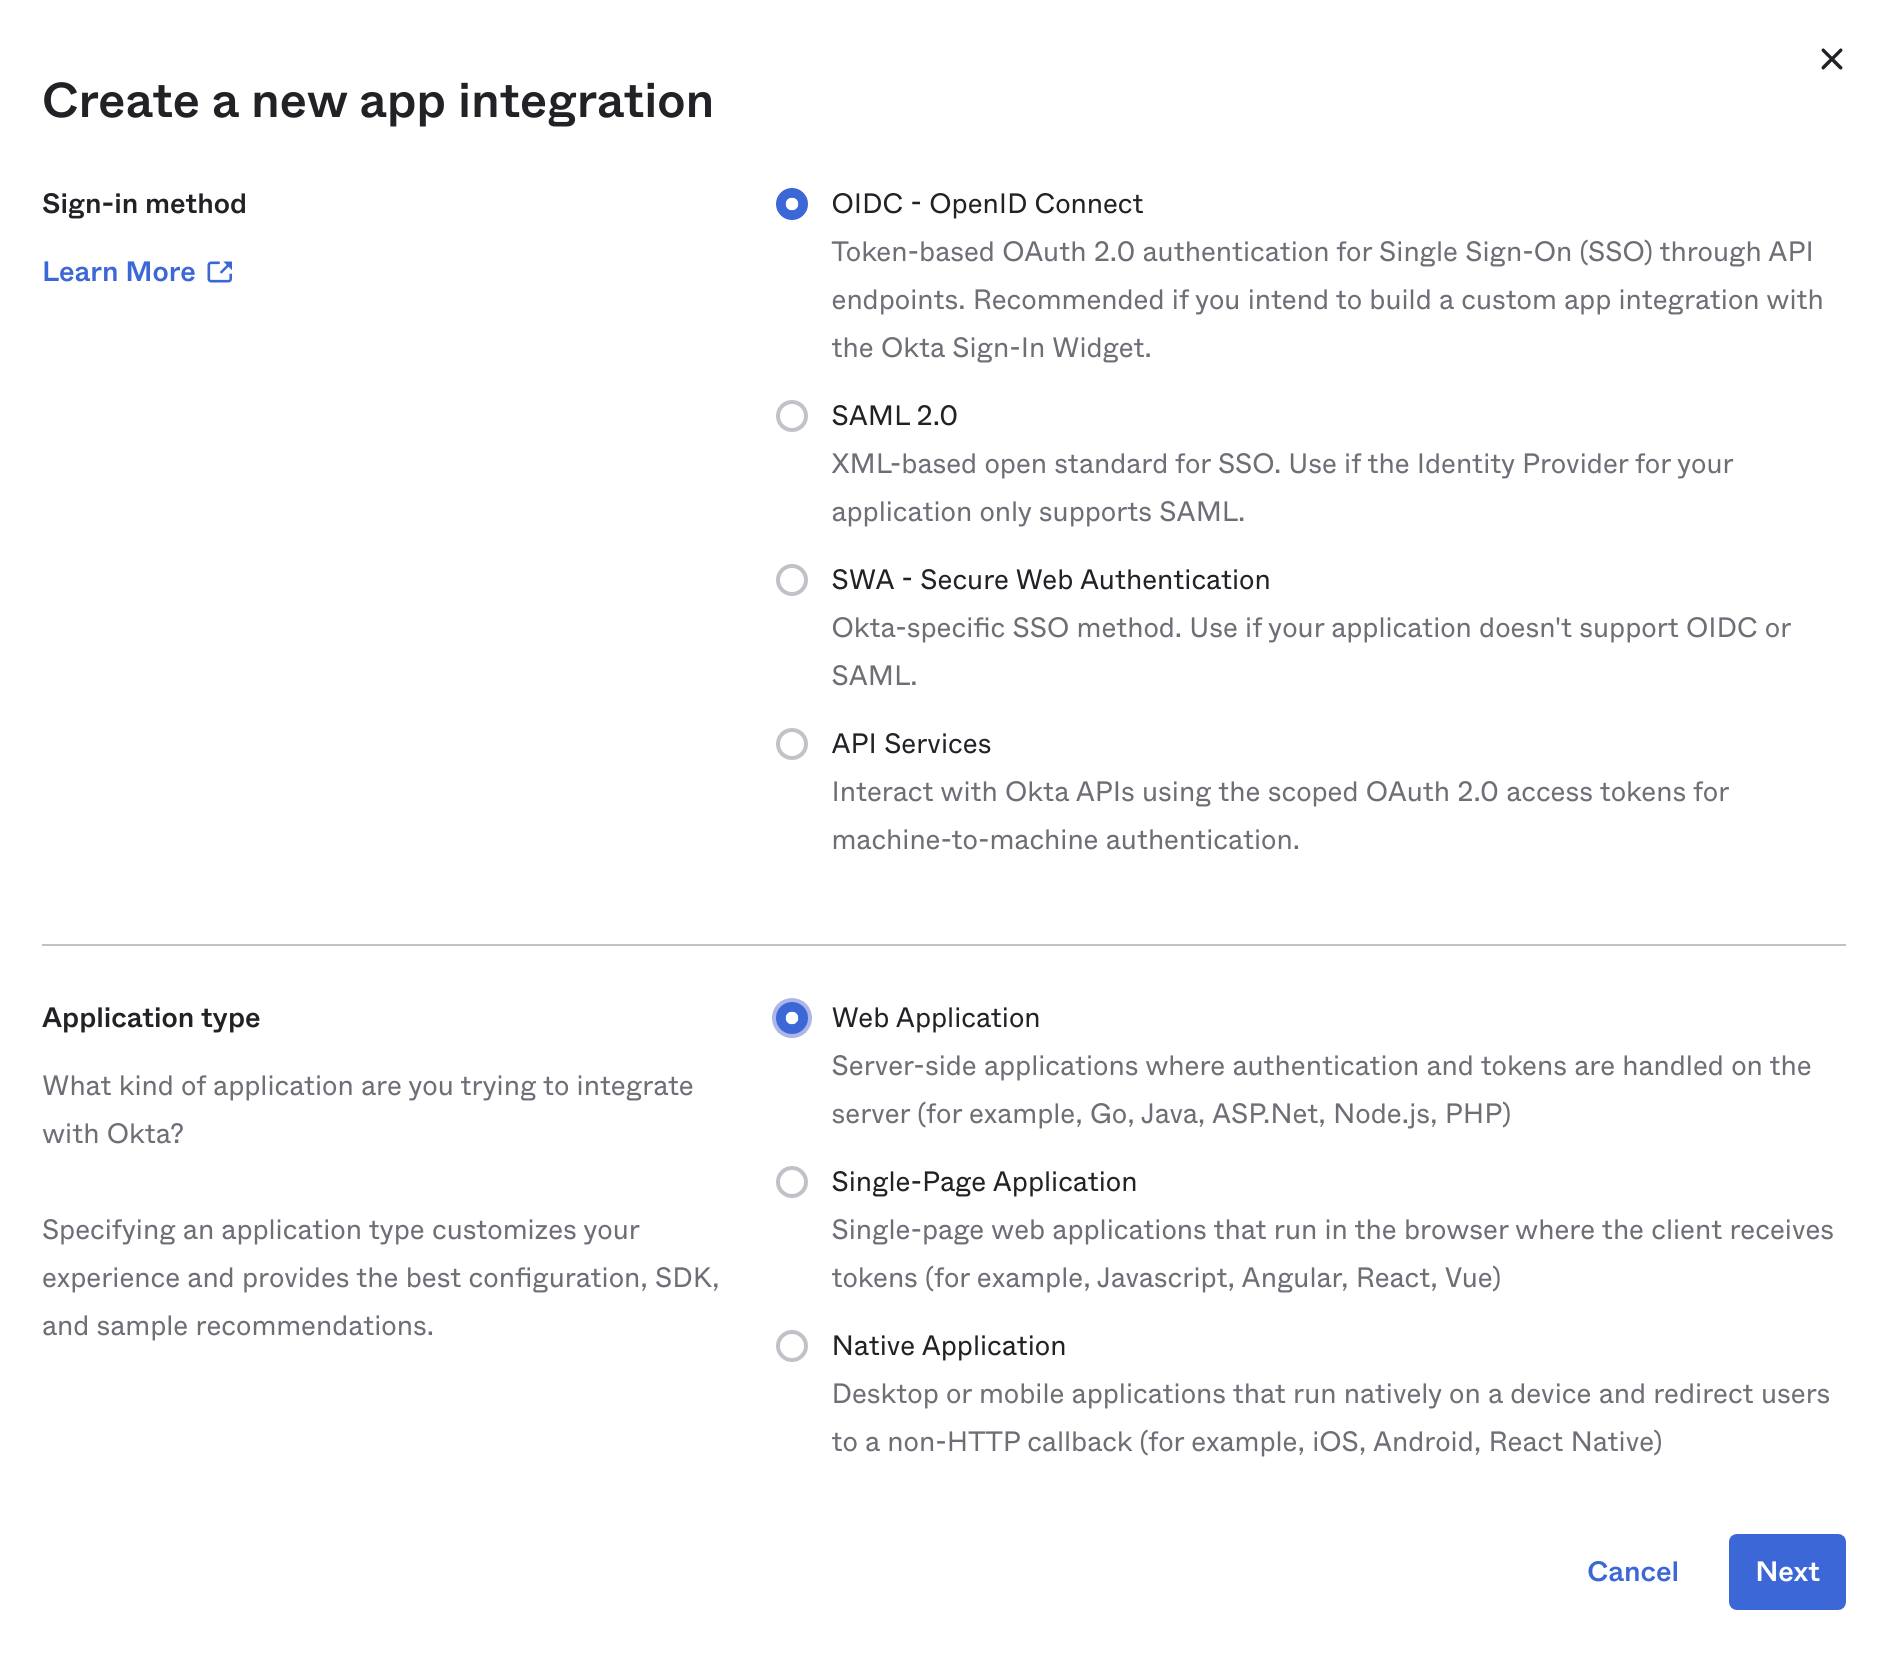
This will open a popup as shown in the figure below. Select OIDC as Sign-in-method and Web Application as
Application type and click next.
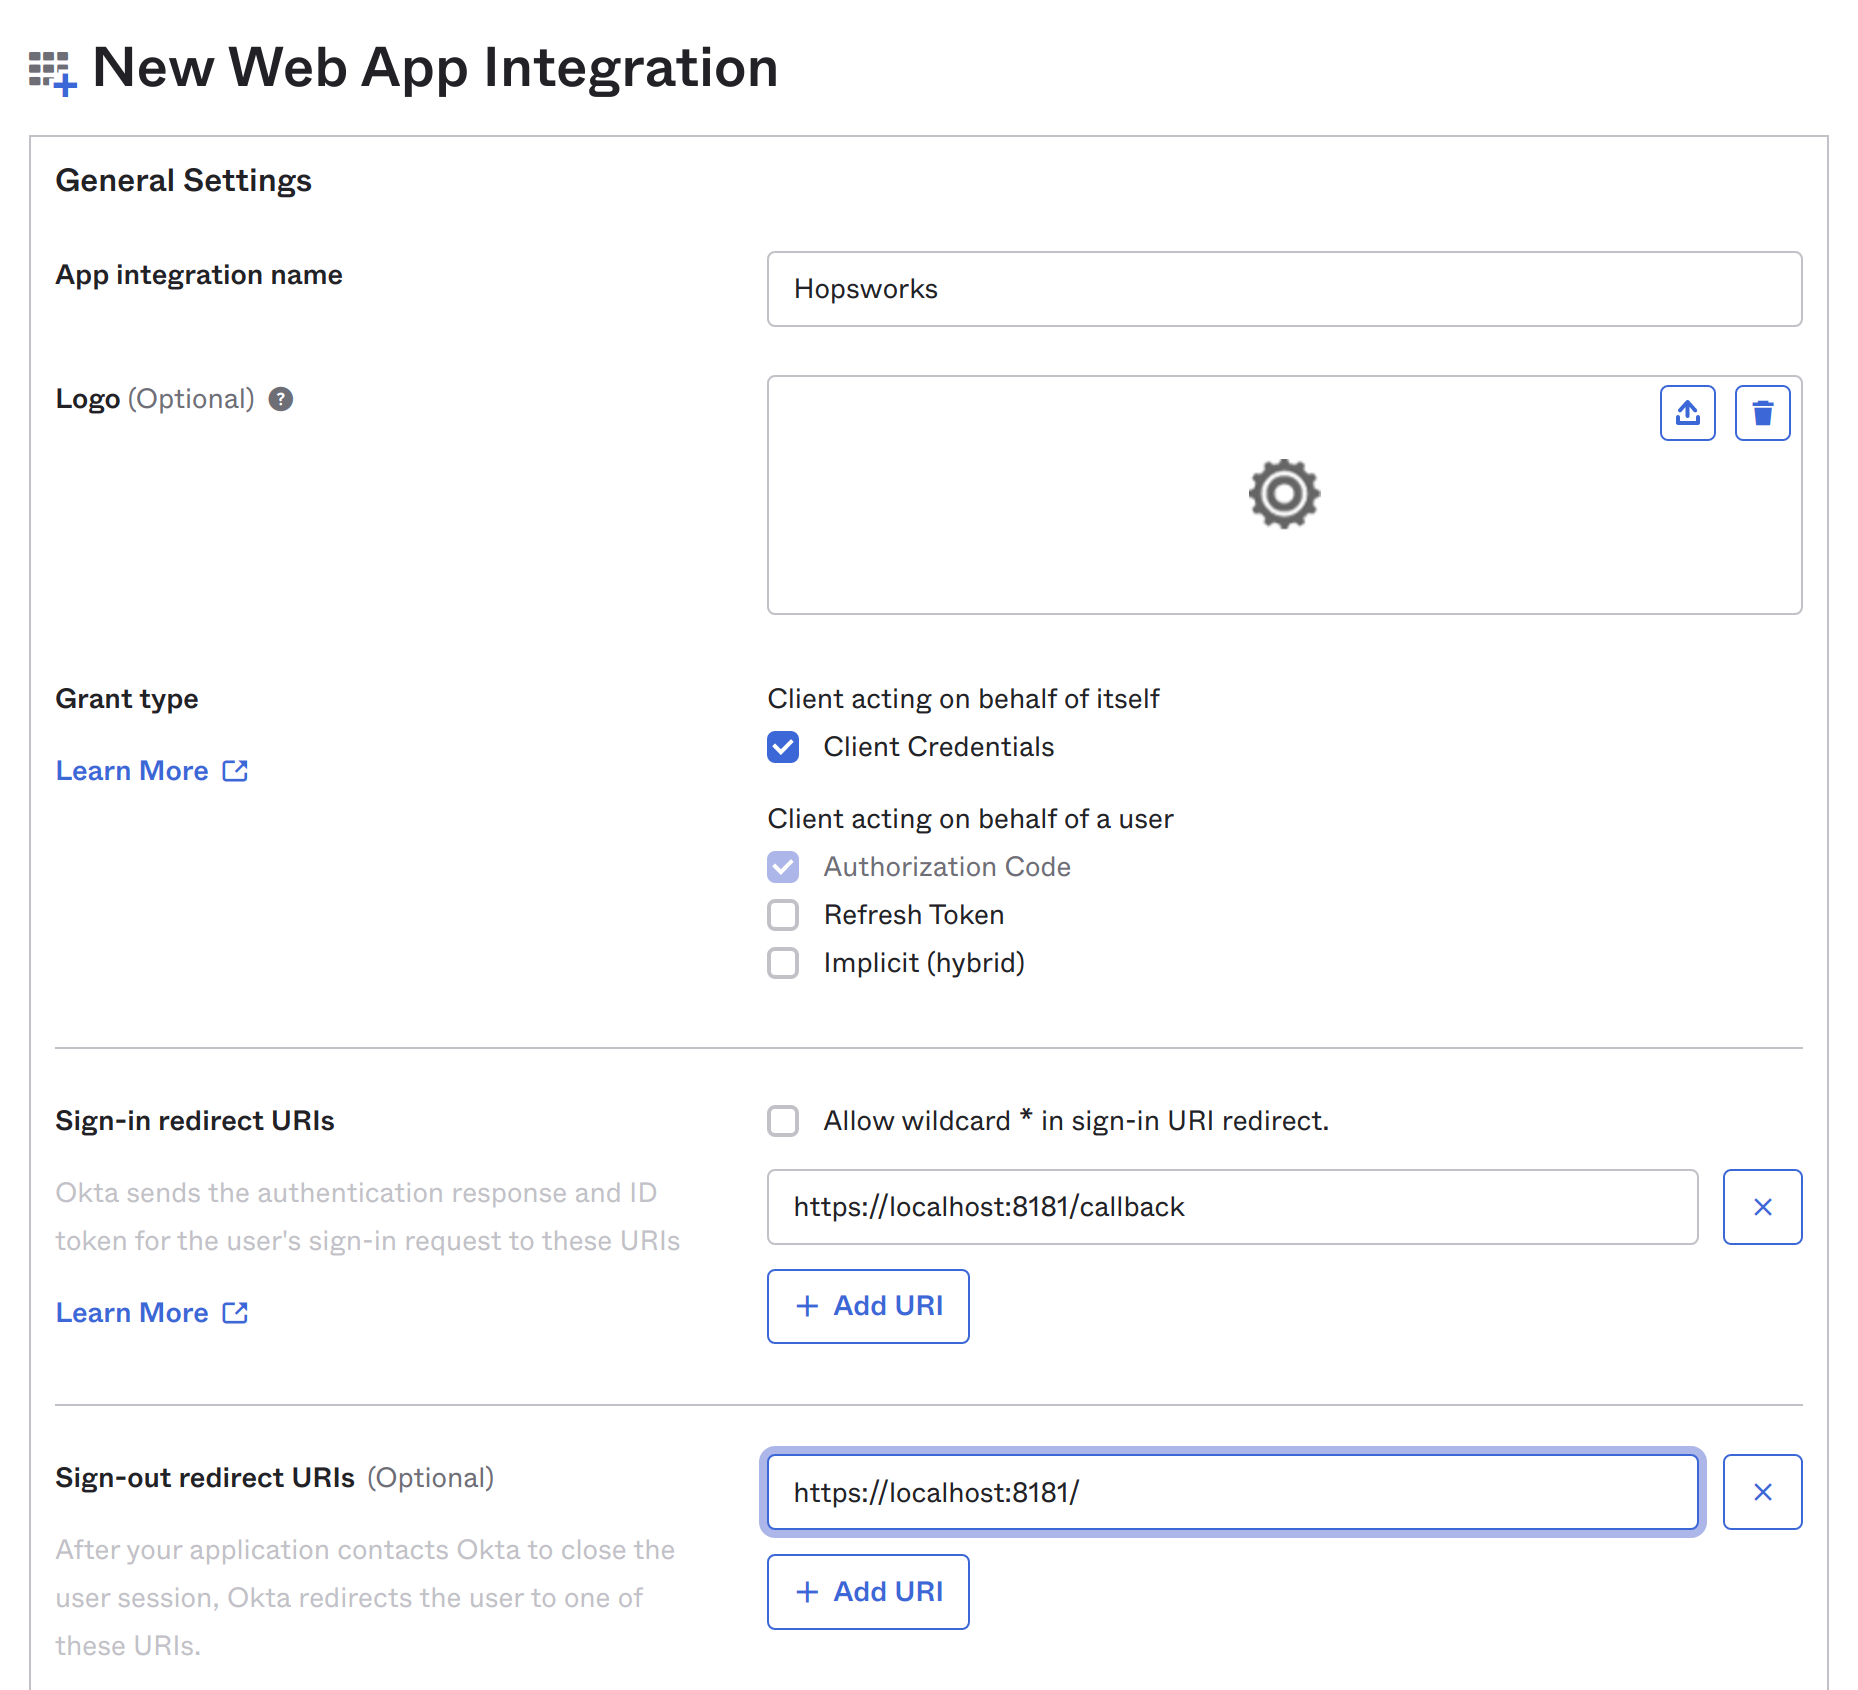
Give your application a name and select Client credential as Grant Type. Then add a Sign-in redirect URI that is your Hopsworks cluster domain name (including the port number if needed) with path /callback, and a Sign-out redirect URI that is Hopsworks cluster domain name (including the port number if needed) with no path.
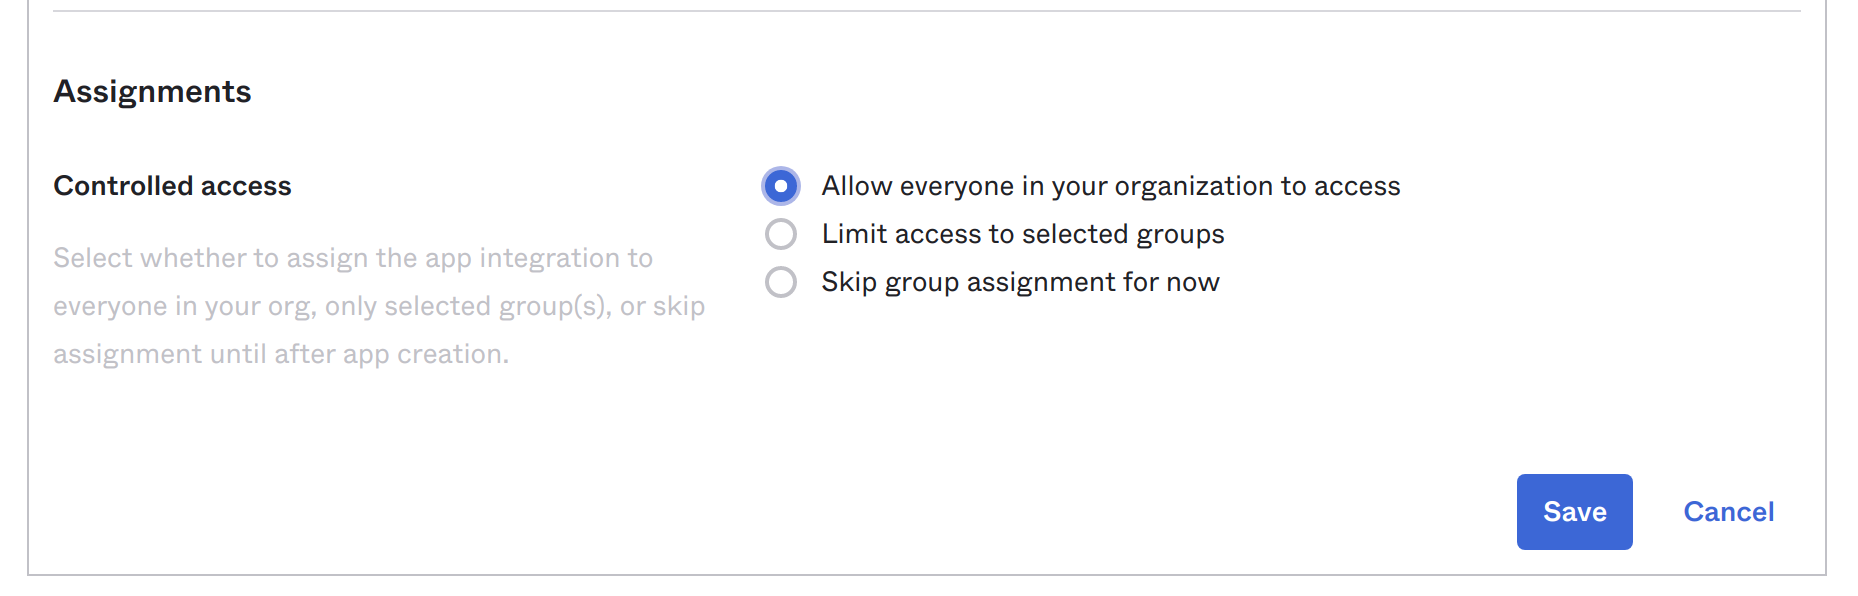
If you want to limit who can access your Hopsworks cluster select Limit access to selected groups and select group(s) you want to give access to. Here we will allow everyone in the organization to access the cluster.
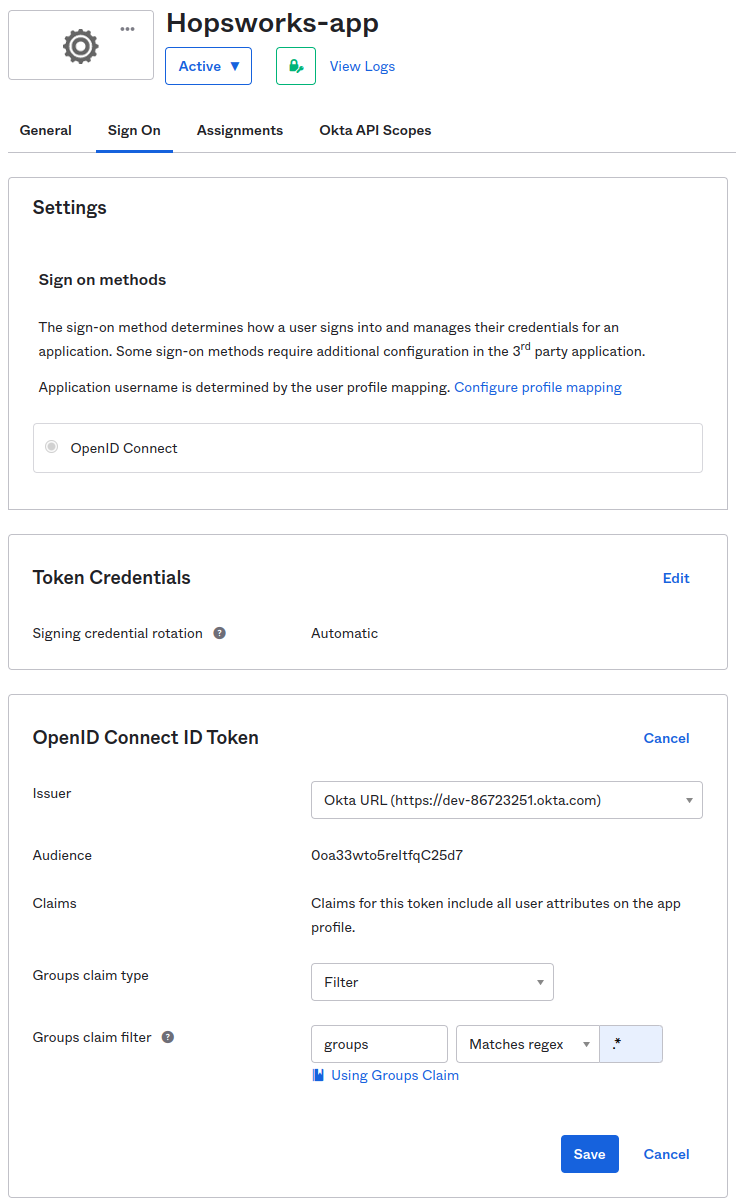
Group mapping#
You can also create mappings from groups in Okta to groups in Hopsworks. To achieve this you need to configure Okta to send Groups with user information. To do this go to Applications and select your application name. In the Sign On tab click edit OpenID Connect ID Token and select Filter for Groups claim type, then for Groups claim filter add groups as the claim name, select Match Regex from the dropdown and .* (dot star) as Regex to match all groups. See Group mapping on how to do the mapping in Hopsworks.
Step 2: Get the nessary fields for client registration#
After the application is created go back to Applications and click on the application you just created. Use the Okta domain (Connection URL), client id and client secret generated for your app in the Identity Provider registration in Hopsworks.
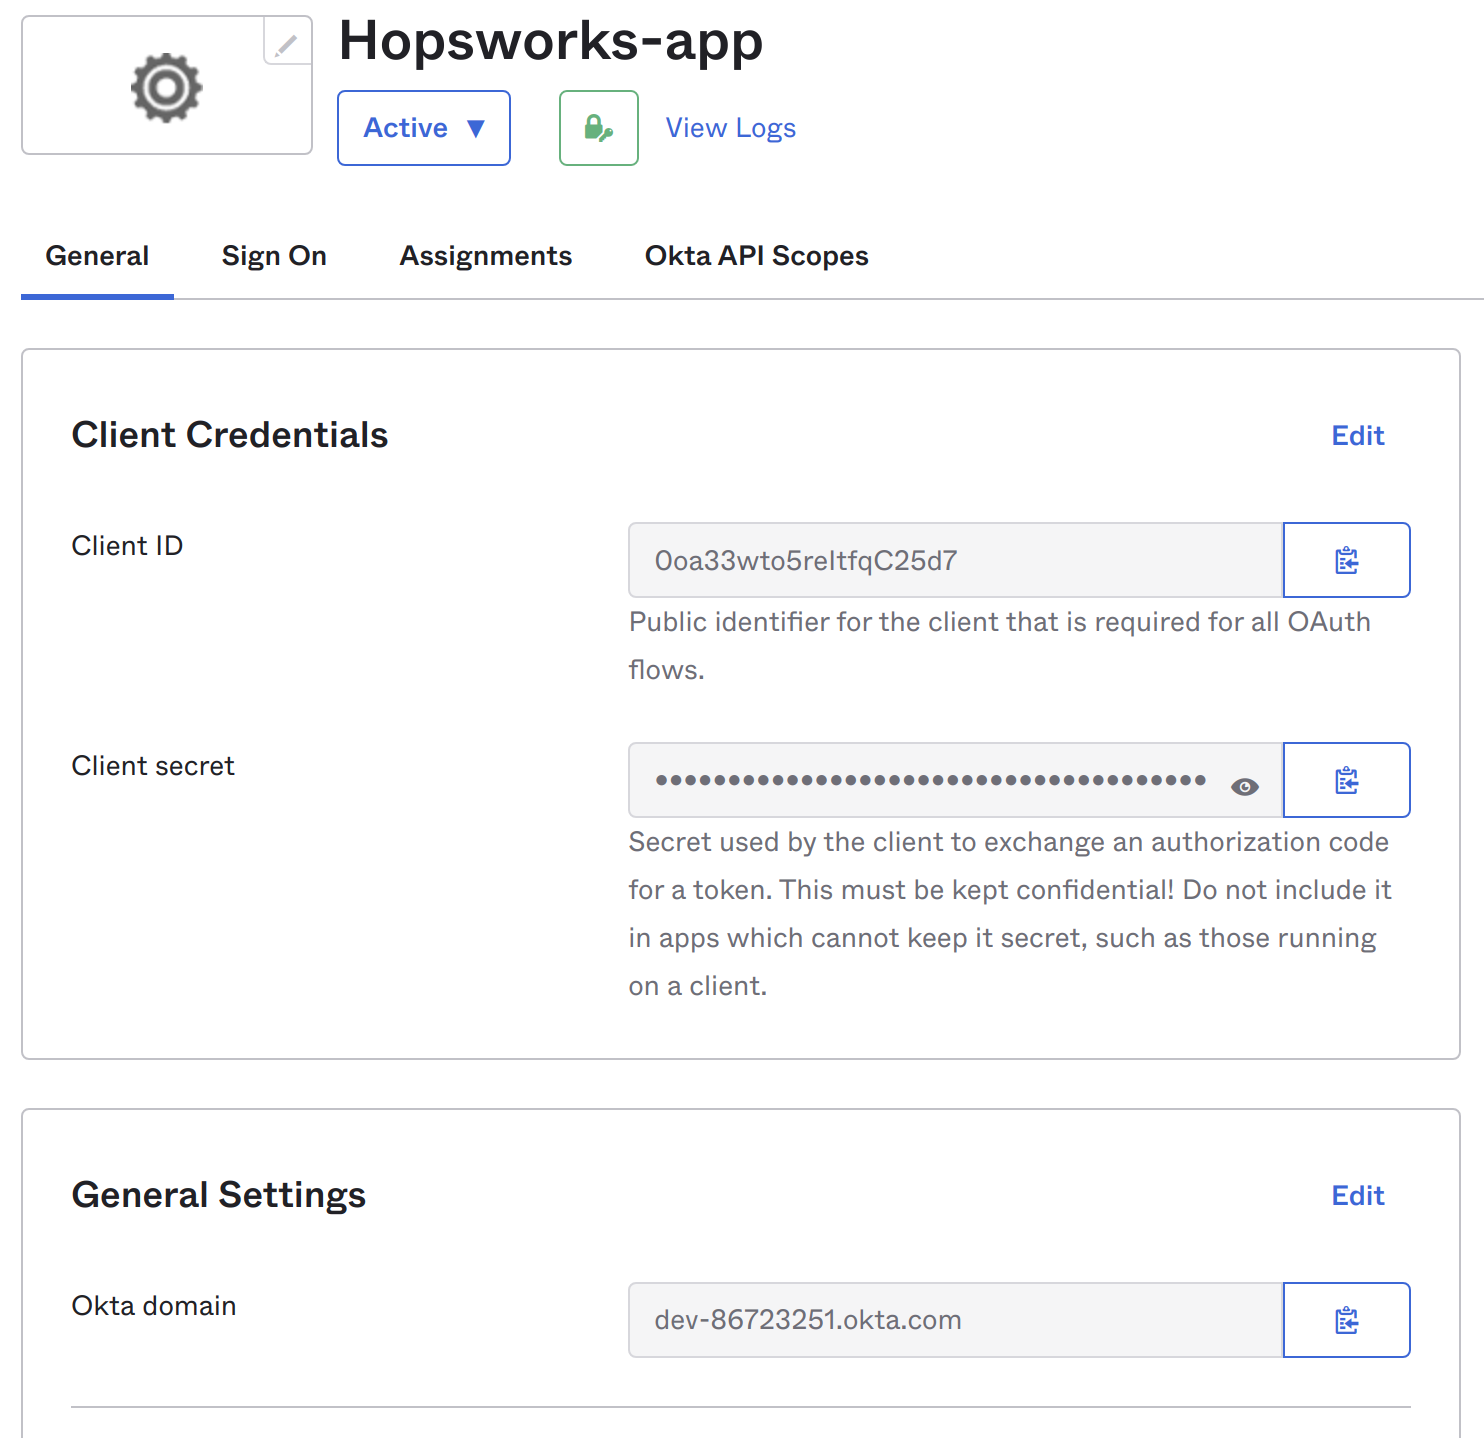
Note
When copying the domain in the figure above make sure to add the url scheme (http:// or https://) when using it in the Connection URL in the Identity Provider registration form.
Conclusion#
In this guide you learned how to create a client in your Okta identity provider and acquire a client id and a client secret.