Hopsworks API key#
In order for the Databricks cluster to be able to communicate with the Hopsworks Feature Store, the clients running on Databricks need to be able to access a Hopsworks API key.
Generate an API key#
For instructions on how to generate an API key follow this user guide. For the Databricks integration to work make sure you add the following scopes to your API key:
- featurestore
- project
- job
- kafka
Quickstart API key Argument#
API key as Argument
To get started quickly, without saving the Hopsworks API in a secret storage, you can simply supply it as an argument when instantiating a connection:
    import hsfs
    conn = hsfs.connection(
        host='my_instance',                 # DNS of your Feature Store instance
        port=443,                           # Port to reach your Hopsworks instance, defaults to 443
        project='my_project',               # Name of your Hopsworks Feature Store project
        api_key_value='apikey',             # The API key to authenticate with Hopsworks
        hostname_verification=True          # Disable for self-signed certificates
    )
    fs = conn.get_feature_store()           # Get the project's default feature store
Store the API key#
AWS#
Step 1: Create an instance profile to attach to your Databricks clusters#
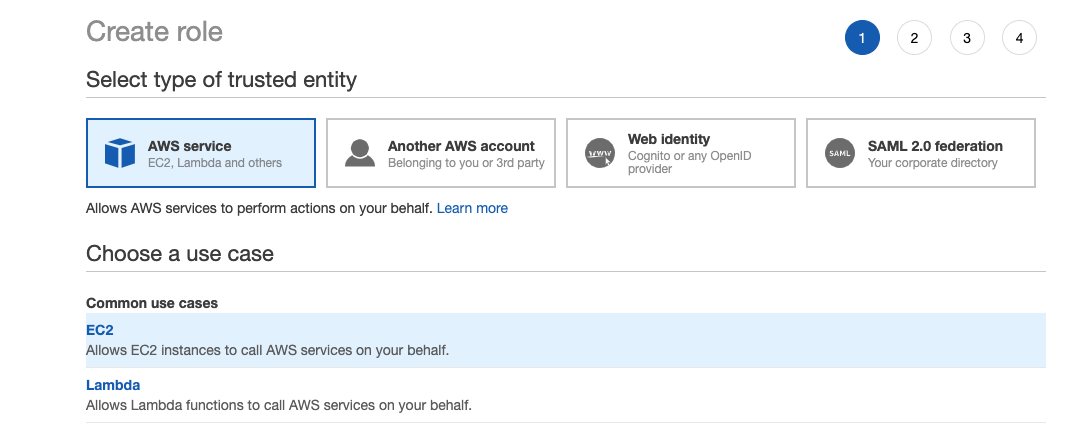
Go to the AWS IAM choose Roles and click on Create Role. Select AWS Service as the type of trusted entity and EC2 as the use case as shown below:
Click on Next: Permissions, Next:Tags, and then Next: Review. Name the instance profile role and then click Create role.
Step 2: Storing the API Key#
Option 1: Using the AWS Systems Manager Parameter Store
In the AWS Management Console, ensure that your active region is the region you use for Databricks.
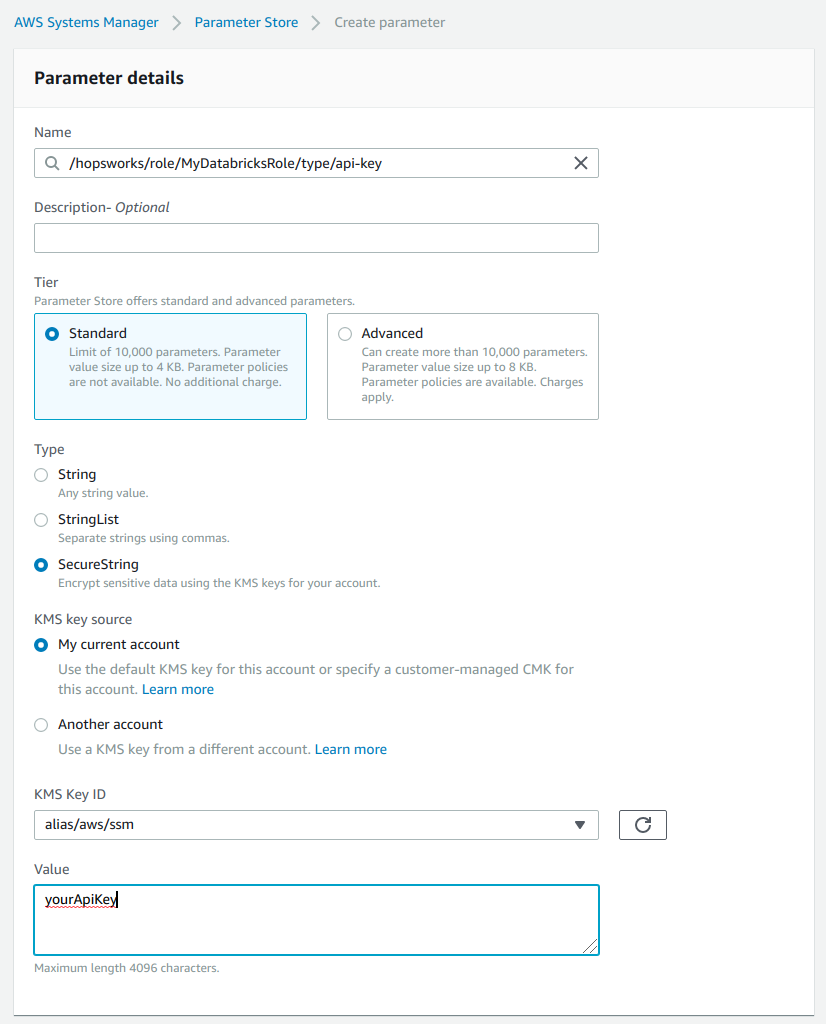
Go to the AWS Systems Manager choose Parameter Store and select Create Parameter.
As name enter /hopsworks/role/[MY_DATABRICKS_ROLE]/type/api-key replacing [MY_DATABRICKS_ROLE] with the name of the AWS role you have created in Step 1. Select Secure String as type and create the parameter.
Once the API Key is stored, you need to grant access to it from the AWS role that you have created in Step 1. In the AWS Management Console, go to IAM, select Roles and then search for the role that you have created in Step 1. Select Add inline policy. Choose Systems Manager as service, expand the Read access level and check GetParameter. Expand Resources and select Add ARN. Enter the region of the Systems Manager as well as the name of the parameter WITHOUT the leading slash e.g. hopsworks/role/[MY_DATABRICKS_ROLE]/type/api-key and click Add. Click on Review, give the policy a name und click on Create policy.

Option 2: Using the AWS Secrets Manager
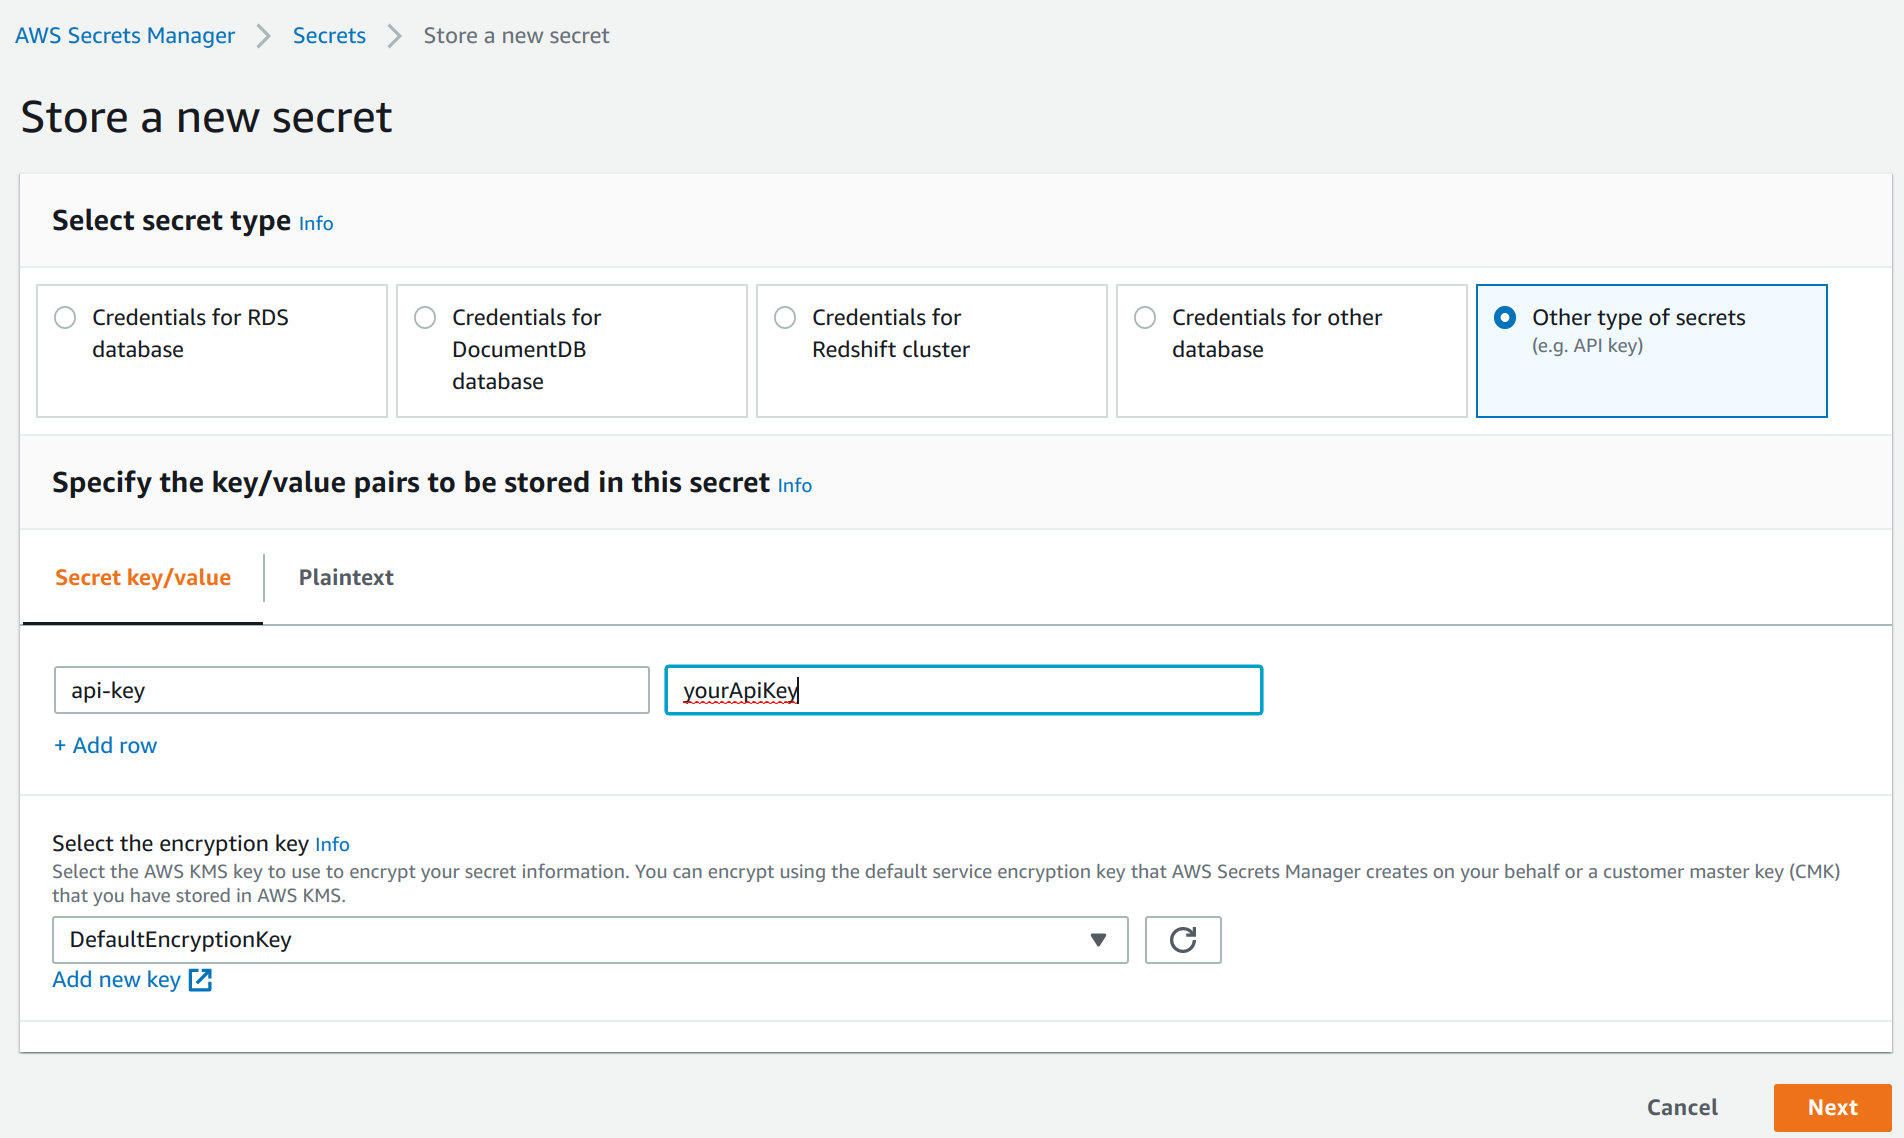
In the AWS management console ensure that your active region is the region you use for Databricks. Go to the AWS Secrets Manager and select Store new secret. Select Other type of secrets and add api-key as the key and paste the API key created in the previous step as the value. Click next.
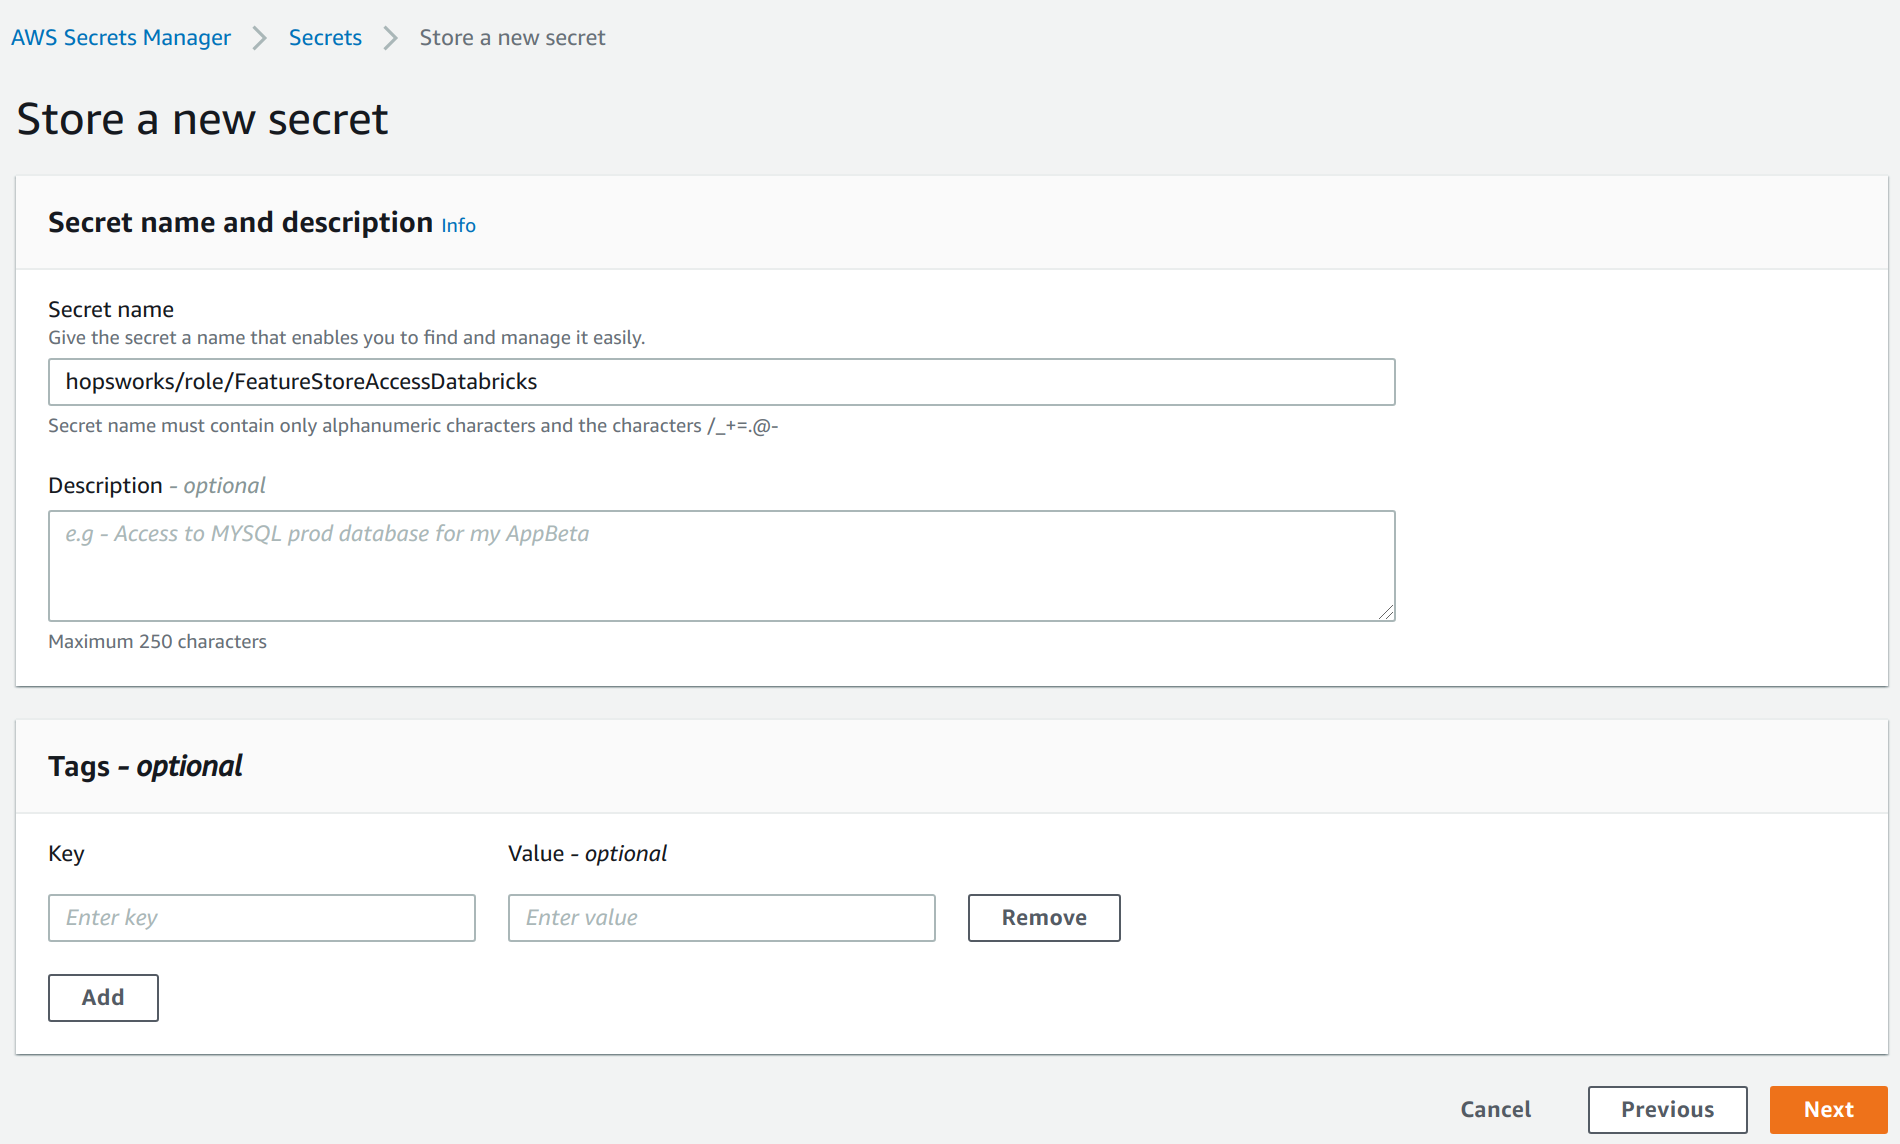
As secret name, enter hopsworks/role/[MY_DATABRICKS_ROLE] replacing [MY_DATABRICKS_ROLE] with the AWS role you have created in Step 1. Select next twice and finally store the secret. Then click on the secret in the secrets list and take note of the Secret ARN.
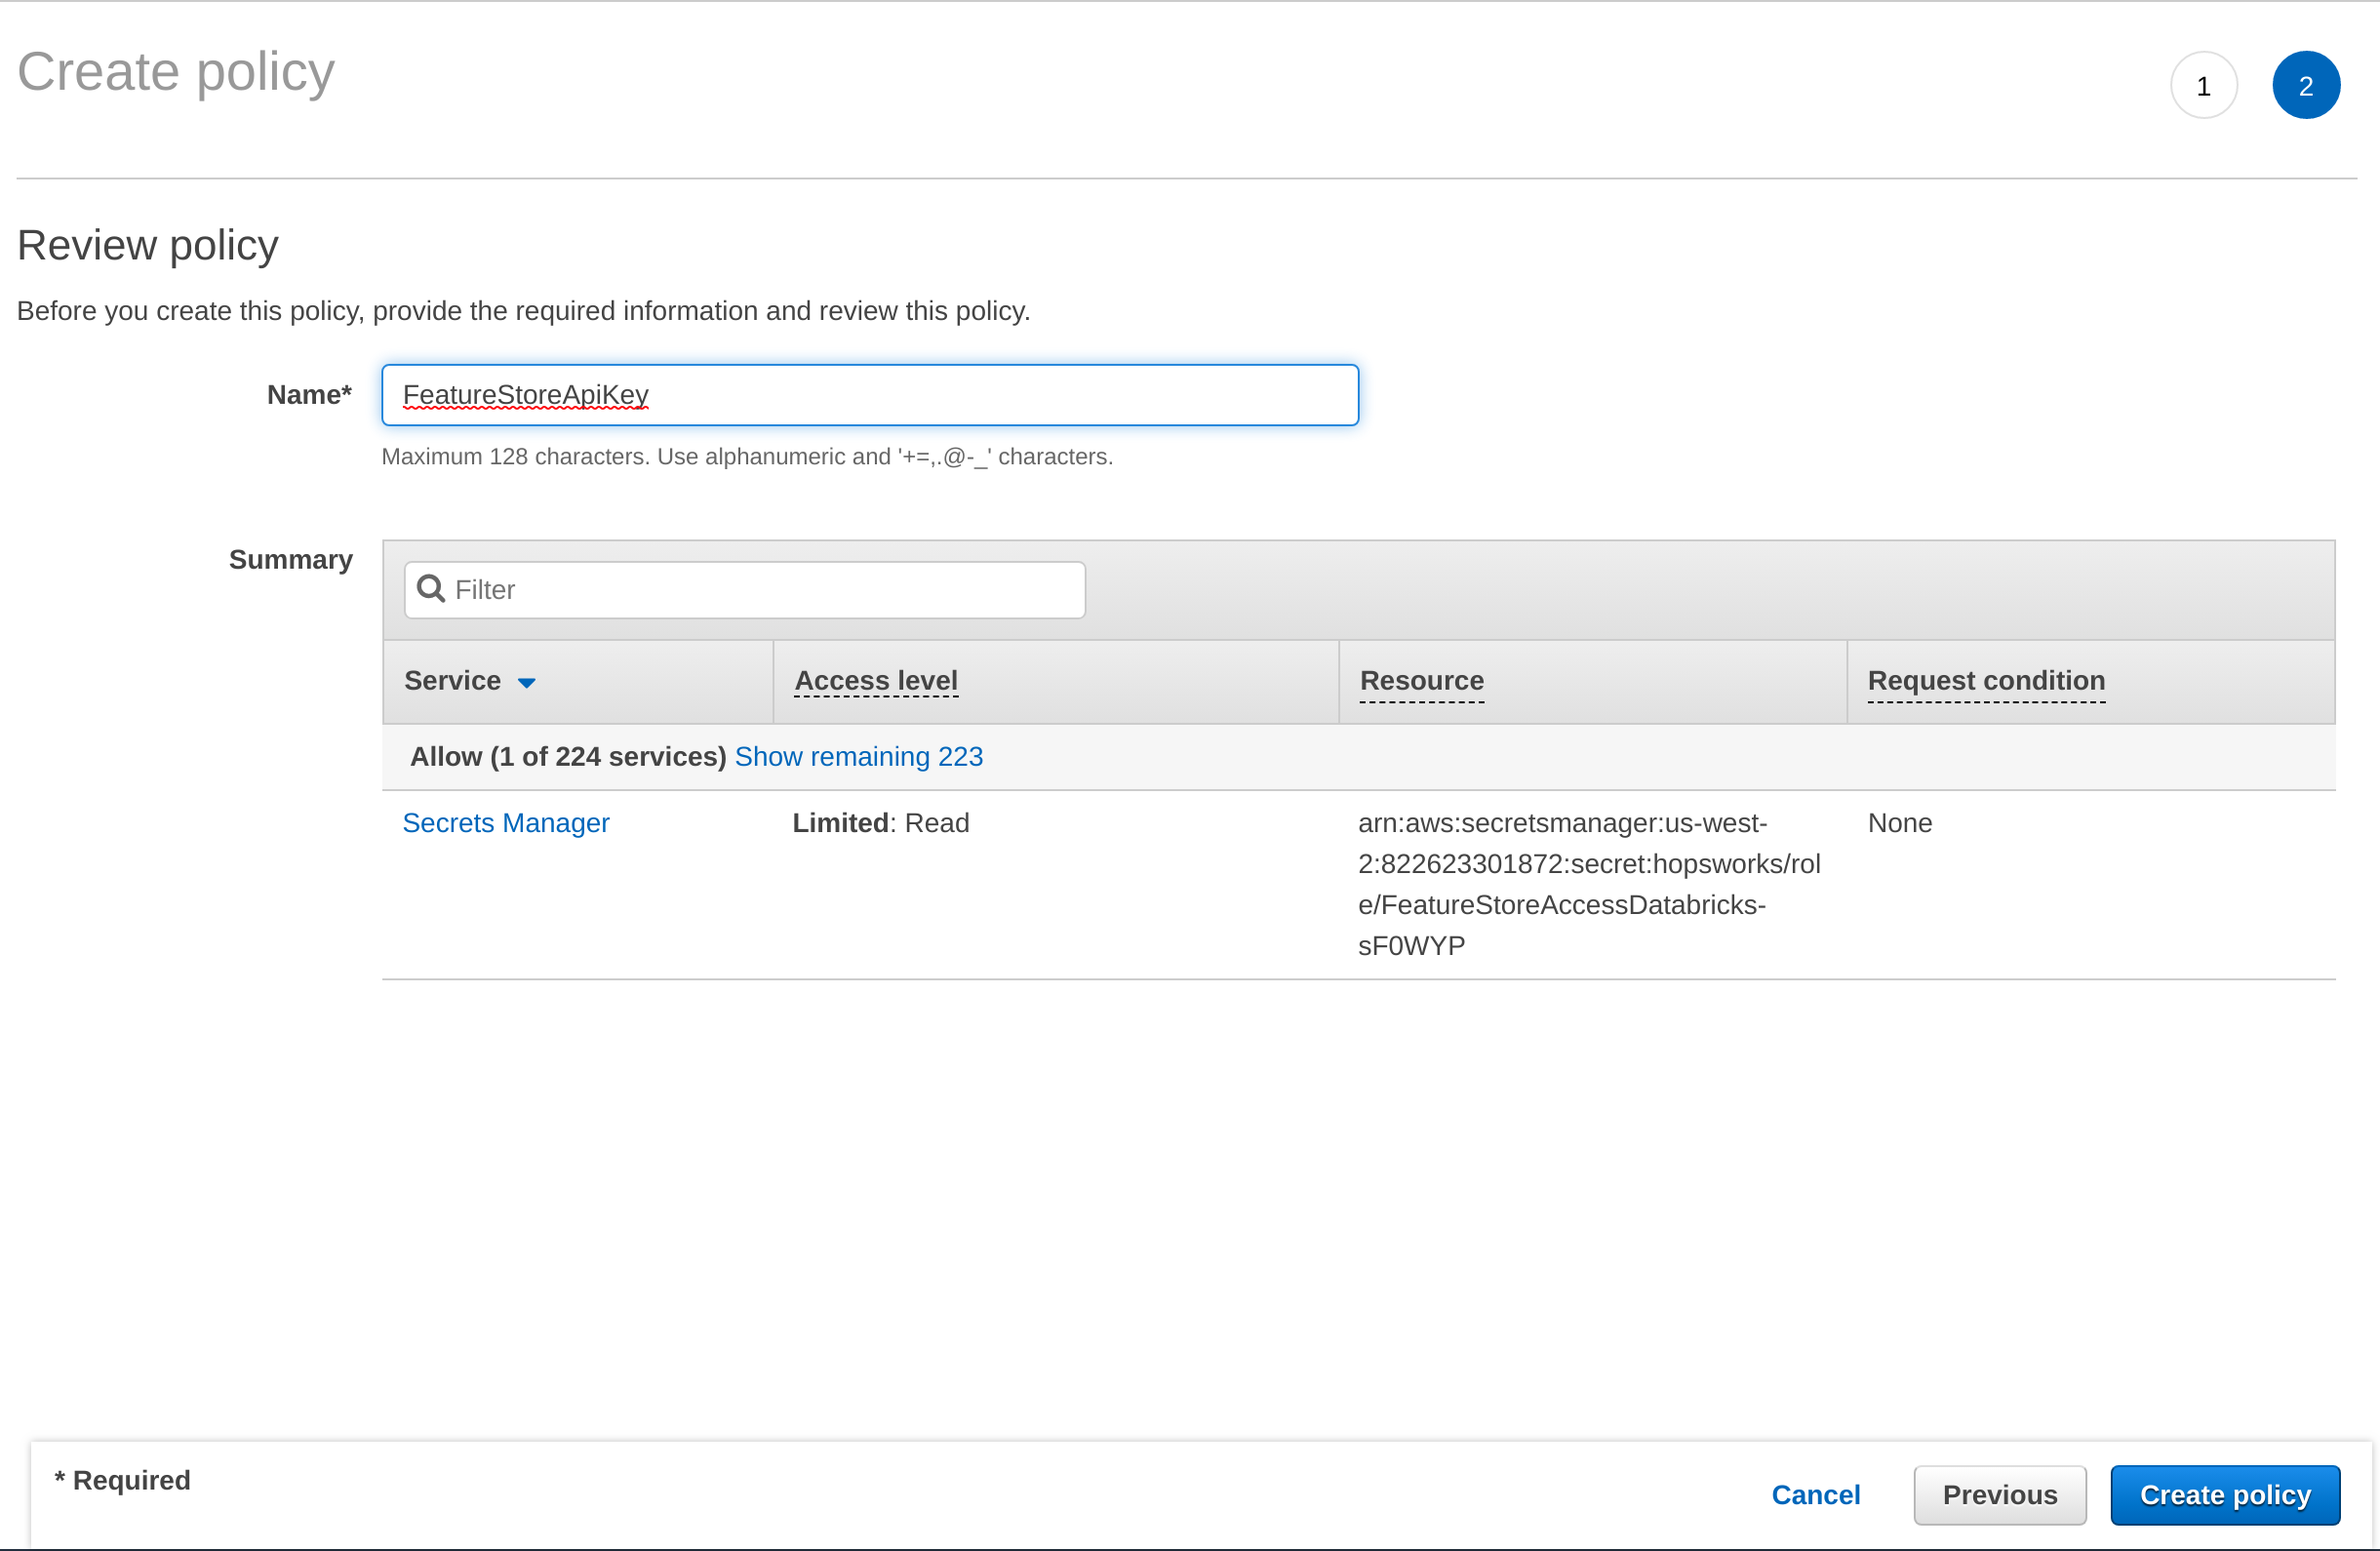
Once the API Key is stored, you need to grant access to it from the AWS role that you have created in Step 1. In the AWS Management Console, go to IAM, select Roles and then the role that that you have created in Step 1. Select Add inline policy. Choose Secrets Manager as service, expand the Read access level and check GetSecretValue. Expand Resources and select Add ARN. Paste the ARN of the secret created in the previous step. Click on Review, give the policy a name und click on Create policy.
Step 3: Allow Databricks to use the AWS role created in Step 1#
First you need to get the AWS role used by Databricks for deployments as described in this step. Once you get the role name, go to AWS IAM, search for the role, and click on it. Then, select the Permissions tab, click on Add inline policy, select the JSON tab, and paste the following snippet. Replace [ACCOUNT_ID] with your AWS account id, and [MY_DATABRICKS_ROLE] with the AWS role name created in Step 1.
{
    "Version": "2012-10-17",
    "Statement": [
        {
            "Sid": "PassRole",
            "Effect": "Allow",
            "Action": "iam:PassRole",
            "Resource": "arn:aws:iam::[ACCOUNT_ID]:role/[MY_DATABRICKS_ROLE]"
        }
    ]
}
Click Review Policy, name the policy, and click Create Policy. Then, go to your Databricks workspace and follow this step to add the instance profile to your workspace. Finally, when launching Databricks clusters, select Advanced settings and choose the instance profile you have just added.
Azure#
On Azure we currently do not support storing the API key in a secret storage. Instead just store the API key in a file in your Databricks workspace so you can access it when connecting to the Feature Store.
Next Steps#
Continue with the configuration guide to finalize the configuration of the Databricks Cluster to communicate with the Hopsworks Feature Store.