Integration with Azure AKS#
This guide shows how to create a cluster in managed.hopsworks.ai with integrated support for Azure Kubernetes Service (AKS). This enables Hopsworks to launch Python jobs, Jupyter servers, and serve models on top of AKS.
This guide provides an example setup with a private AKS cluster.
Note
If you prefer to use Terraform over command lines you can refer to our Terraform example here.
Step 1: Create a Virtual network and a subnet#
First, you need to create the virtual network and the subnet in which Hopsworks and the AKS nodes will run. To do this run the following commands, replacing $RESOURCE_GROUP with the resource group in which you will run your cluster.
az network vnet create --resource-group $RESOURCE_GROUP --name hopsworks-vnet --address-prefixes 172.18.0.0/16
az network vnet subnet create --resource-group $RESOURCE_GROUP --name hopsworks-subnet --vnet-name hopsworks-vnet --address-prefixes 172.18.0.0/24
Step 2: Create the AKS cluster.#
Run the following command to create the AKS cluster. Replace $RESOURCE_GROUP with the resource group in which you will run your cluster and $SUBSCRIPTION_ID .
aksidentity=$(az aks create --resource-group $RESOURCE_GROUP --name hopsworks-aks --network-plugin azure --enable-private-cluster --enable-managed-identity --vnet-subnet-id /subscriptions/$SUBSCRIPTION_ID/resourceGroups/$RESOURCE_GROUP/providers/Microsoft.Network/virtualNetworks/hopsworks-vnet/subnets/hopsworks-subnet --query identityProfile.kubeletidentity.objectId -o tsv)
Step 3: Add permissions to the managed identity#
You need to add permission to the managed identity you will assign to your Hopsworks cluster to access the AKS cluster. To do it run the following command, replacing $RESOURCE_GROUP with the resource group in which you will run your cluster and $identityId with the id of the identity you will assign to your Hopsworks cluster.
az role assignment create --resource-group $RESOURCE_GROUP --role "Azure Kubernetes Service Cluster User Role" --assignee $identityId
You also need to grant permission to pull images from the ACR to the AKS nodes. To do it run the following command, replacing $RESOURCE_GROUP with the resource group in which you will run your cluster
az role assignment create --resource-group $RESOURCE_GROUP --role "AcrPull" --assignee $aksidentity
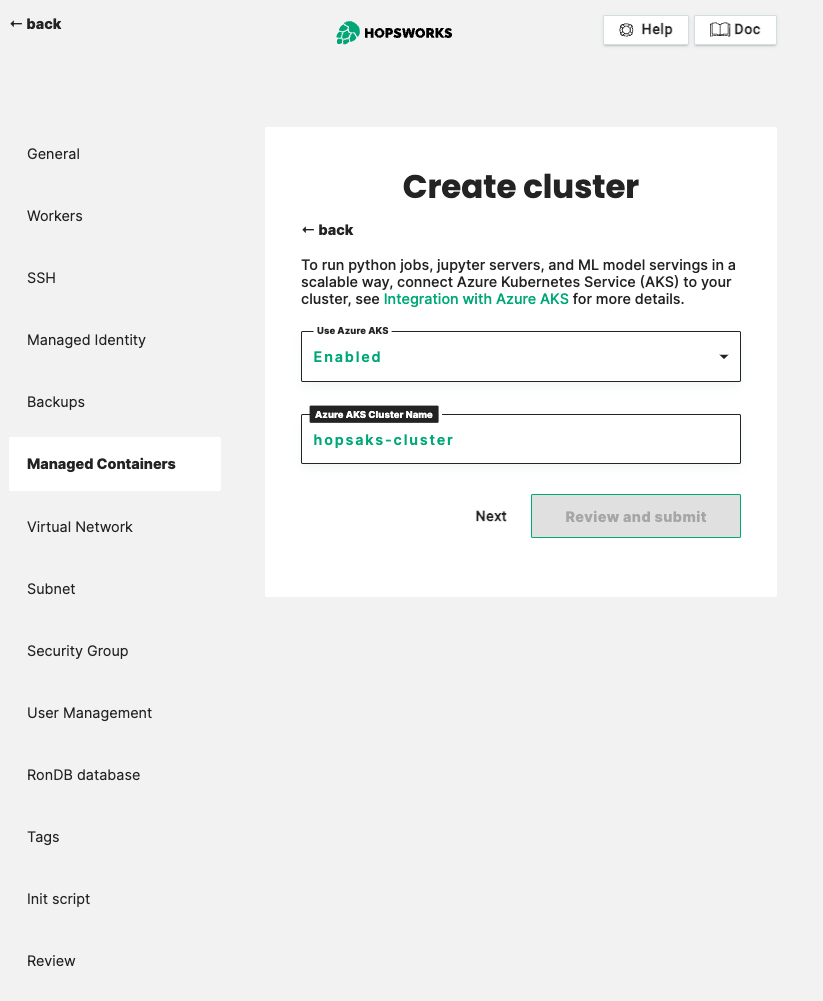
Step 4: Create the Hopsworks cluster#
Create the hopsworks cluster by following the same steps as in the getting started until the backup tab. Then click on next to get to the Managed containers tab. Set Use Azure AKS as enabled. One new field will pop up. Fill it with the name of the AKS you created above (hopsworks-aks). Click next and in the Virtual Network tab select the virtual network we created above (hopsworks-vnet). Finally, click next and select the subnet we created above (hopsworks-subnet) in the Subnet tab. You can now click on Review and Submit and create your cluster.
Going further#
You can also deploy the AKS cluster and the Hopsworks cluster in two different virtual networks by using network peering. For this we recommend to use our terraform provider and to refer to our example