How-To set up a BigQuery Storage Connector#
Introduction#
A BigQuery storage connector provides integration to Google Cloud BigQuery. BigQuery is Google Cloud's managed data warehouse supporting that lets you run analytics and execute SQL queries over large scale data. Such data warehouses are often the source of raw data for feature engineering pipelines.
In this guide, you will configure a Storage Connector in Hopsworks to connect to your BigQuery project by saving the necessary information. When you're finished, you'll be able to execute queries and read results of BigQuery using Spark through HSFS APIs.
The storage connector uses the Google spark-bigquery-connector behind the scenes.
To read more about the spark connector, like the spark options or usage, check Apache Spark SQL connector for Google BigQuery.
Note
Currently, it is only possible to create storage connectors in the Hopsworks UI. You cannot create a storage connector programmatically.
Prerequisites#
Before you begin this guide you'll need to retrieve the following information about your GCP account:
- BigQuery Project: You need a BigQuery project, dataset and table created and have read access to it. Or, if you wish to query a public dataset you need its corresponding details.
- Authentication Method: Authentication to GCP account is handled by uploading the
JSON keyfile for service
  account
to the Hopsworks Project. You will need to create this JSON keyfile from GCP. For more information on service accounts and creating keyfile in GCP, read Google Cloud documentation.
Creation in the UI#
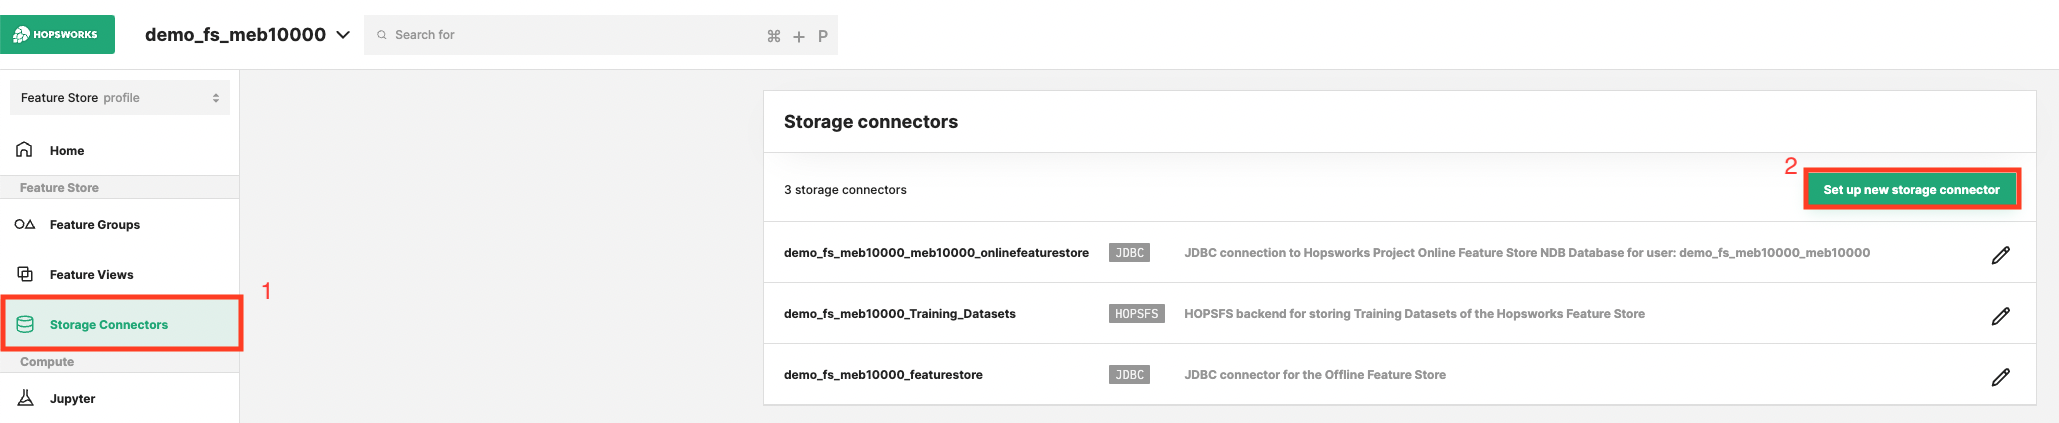
Step 1: Set up new storage connector#
Head to the Storage Connector View on Hopsworks (1) and set up a new storage connector (2).
Step 2: Enter connector details#
Enter the details for your BigQuery connector. Start by giving it a unique name and an optional description.
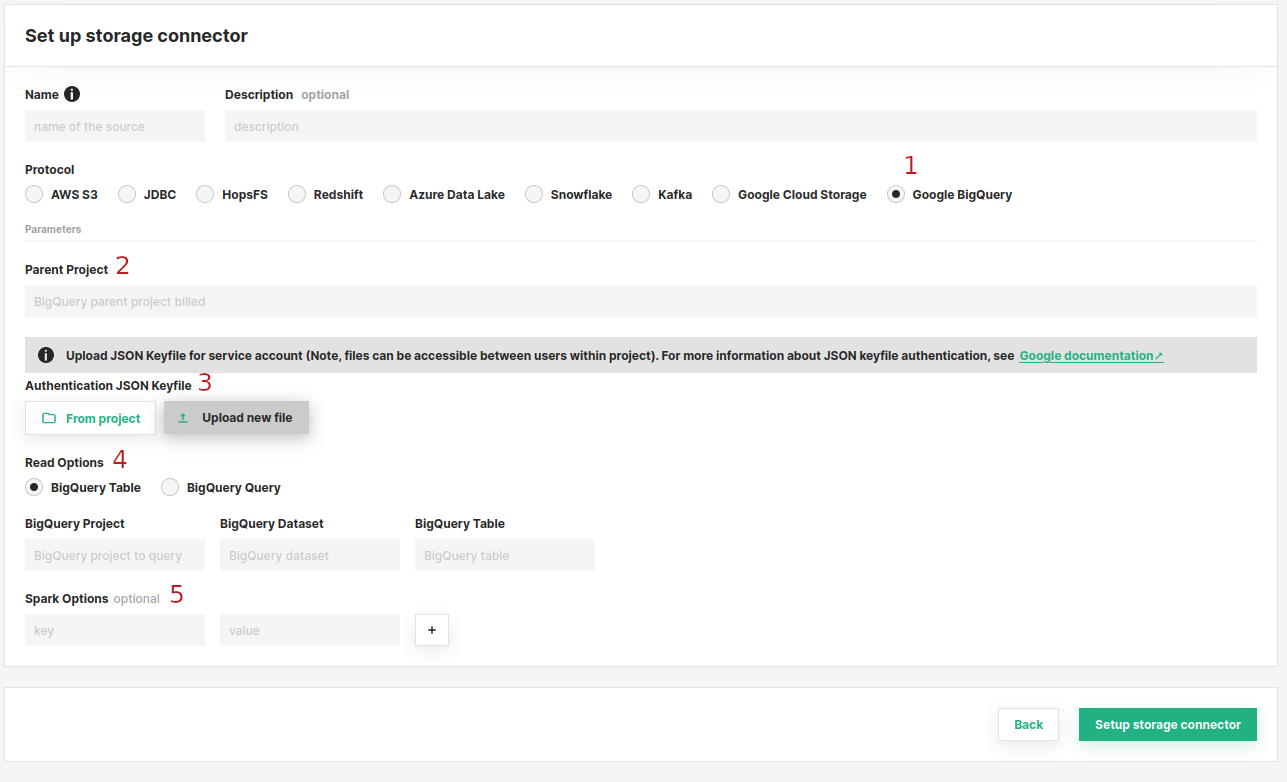
- Choose
Google BigQueryfrom the connector options. - Next, set the name of the parent BigQuery project. This is used for billing by GCP.
- Authentication: Here you should upload your
JSON keyfile for service
   account
used for authentication. You can choose to either upload from your local usingUpload new fileor choose an existing file within project usingFrom Project. -
Read Options: There are two ways to read via BigQuery, using the BigQuery Table or BigQuery Query option:
- The table option reads directly from the BigQuery table reference. In the UI set the below fields,
- BigQuery Project: The BigQuery project
- BigQuery Dataset: The dataset of the table
- BigQuery Table: The table to read
- The second option is to read by executing a SQL query at runtime, by selecting BigQuery Query and setting,
- Materiliazation Dataset: Temporary dataset used by BigQuery for writing
- The table option reads directly from the BigQuery table reference. In the UI set the below fields,
-
Spark Options: Optionally, you can set additional spark options using the
Key - Valuepairs
Next Steps#
Move on to the usage guide for storage connectors to see how you can use your newly created BigQuery connector.