Upgrade existing clusters on managed.hopsworks.ai from version 2.2 or older (Azure)#
This guide shows you how to upgrade your existing Hopsworks cluster to a newer version of Hopsworks.
Step 1: Make sure your cluster is running#
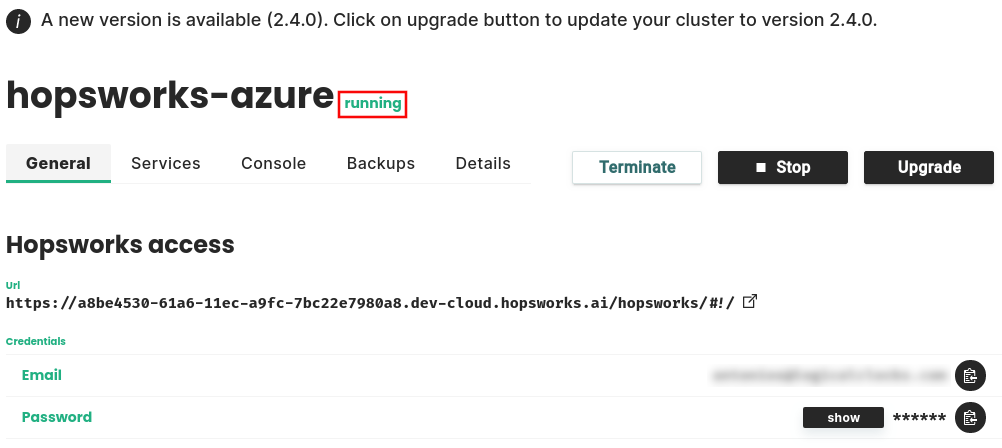
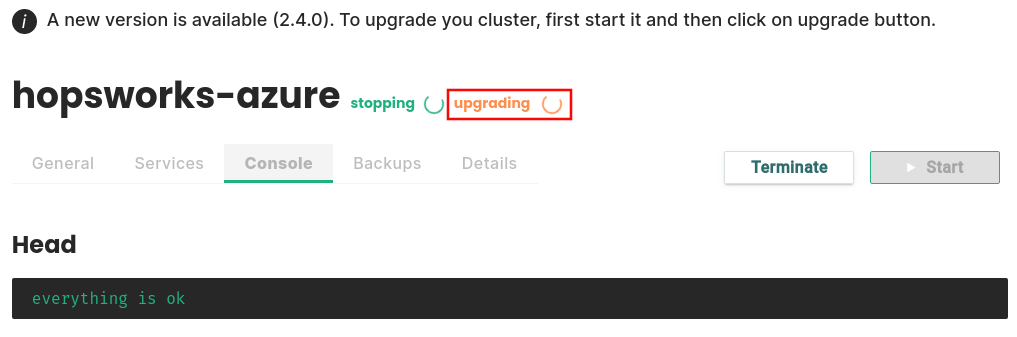
It is important that your cluster is Running. Otherwise you will not be able to upgrade. As soon as a new version is available an upgrade notification will appear:
Step 2: Add upgrade permissions to your user assigned managed identity#
Note
You can skip this step if you already have the following permissions in your user assigned managed identity:
[
  "Microsoft.Compute/virtualMachines/read",
  "Microsoft.Compute/virtualMachines/write",
  "Microsoft.Compute/disks/read",
  "Microsoft.Compute/disks/write",
  "Microsoft.Storage/storageAccounts/listKeys/action"
]
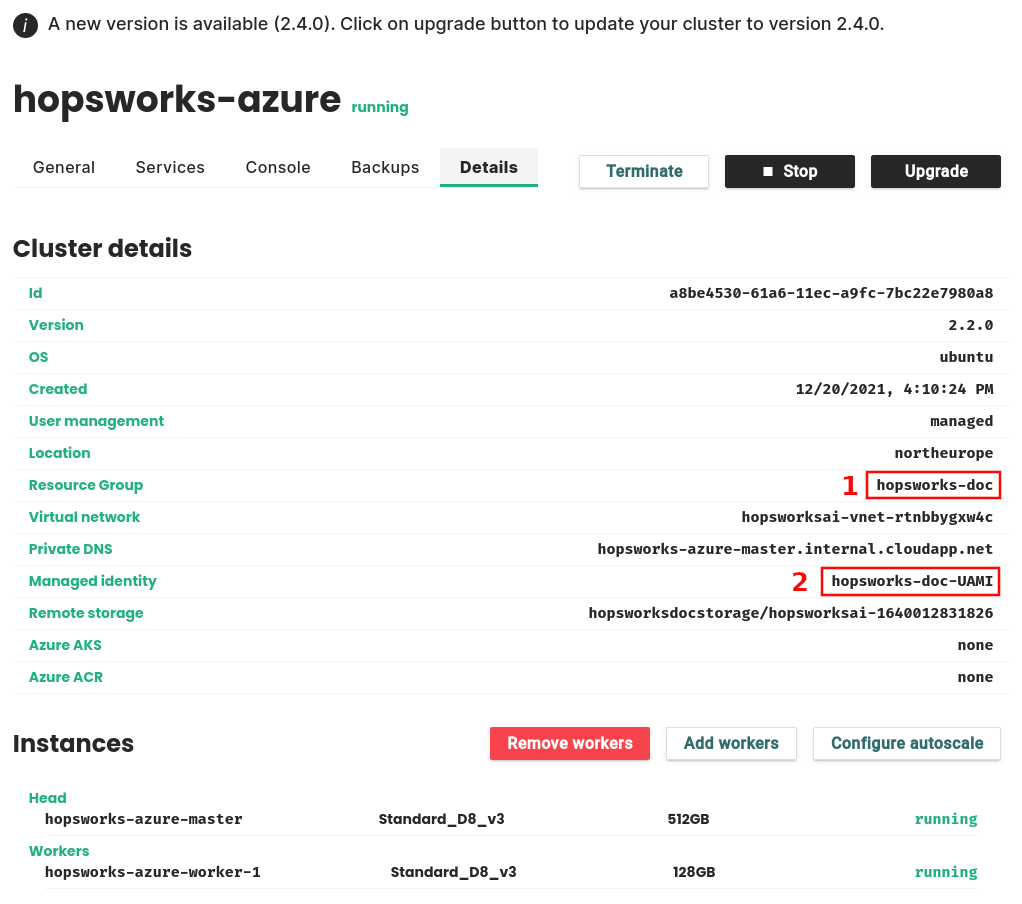
We require extra permissions to be added to the user assigned managed identity attached to your cluster to proceed with the upgrade. First to get the name of your user assigned managed identity and the resource group of your cluster, click on the Details tab as shown below:
Step 2.1: Add custom role for upgrade permissions#
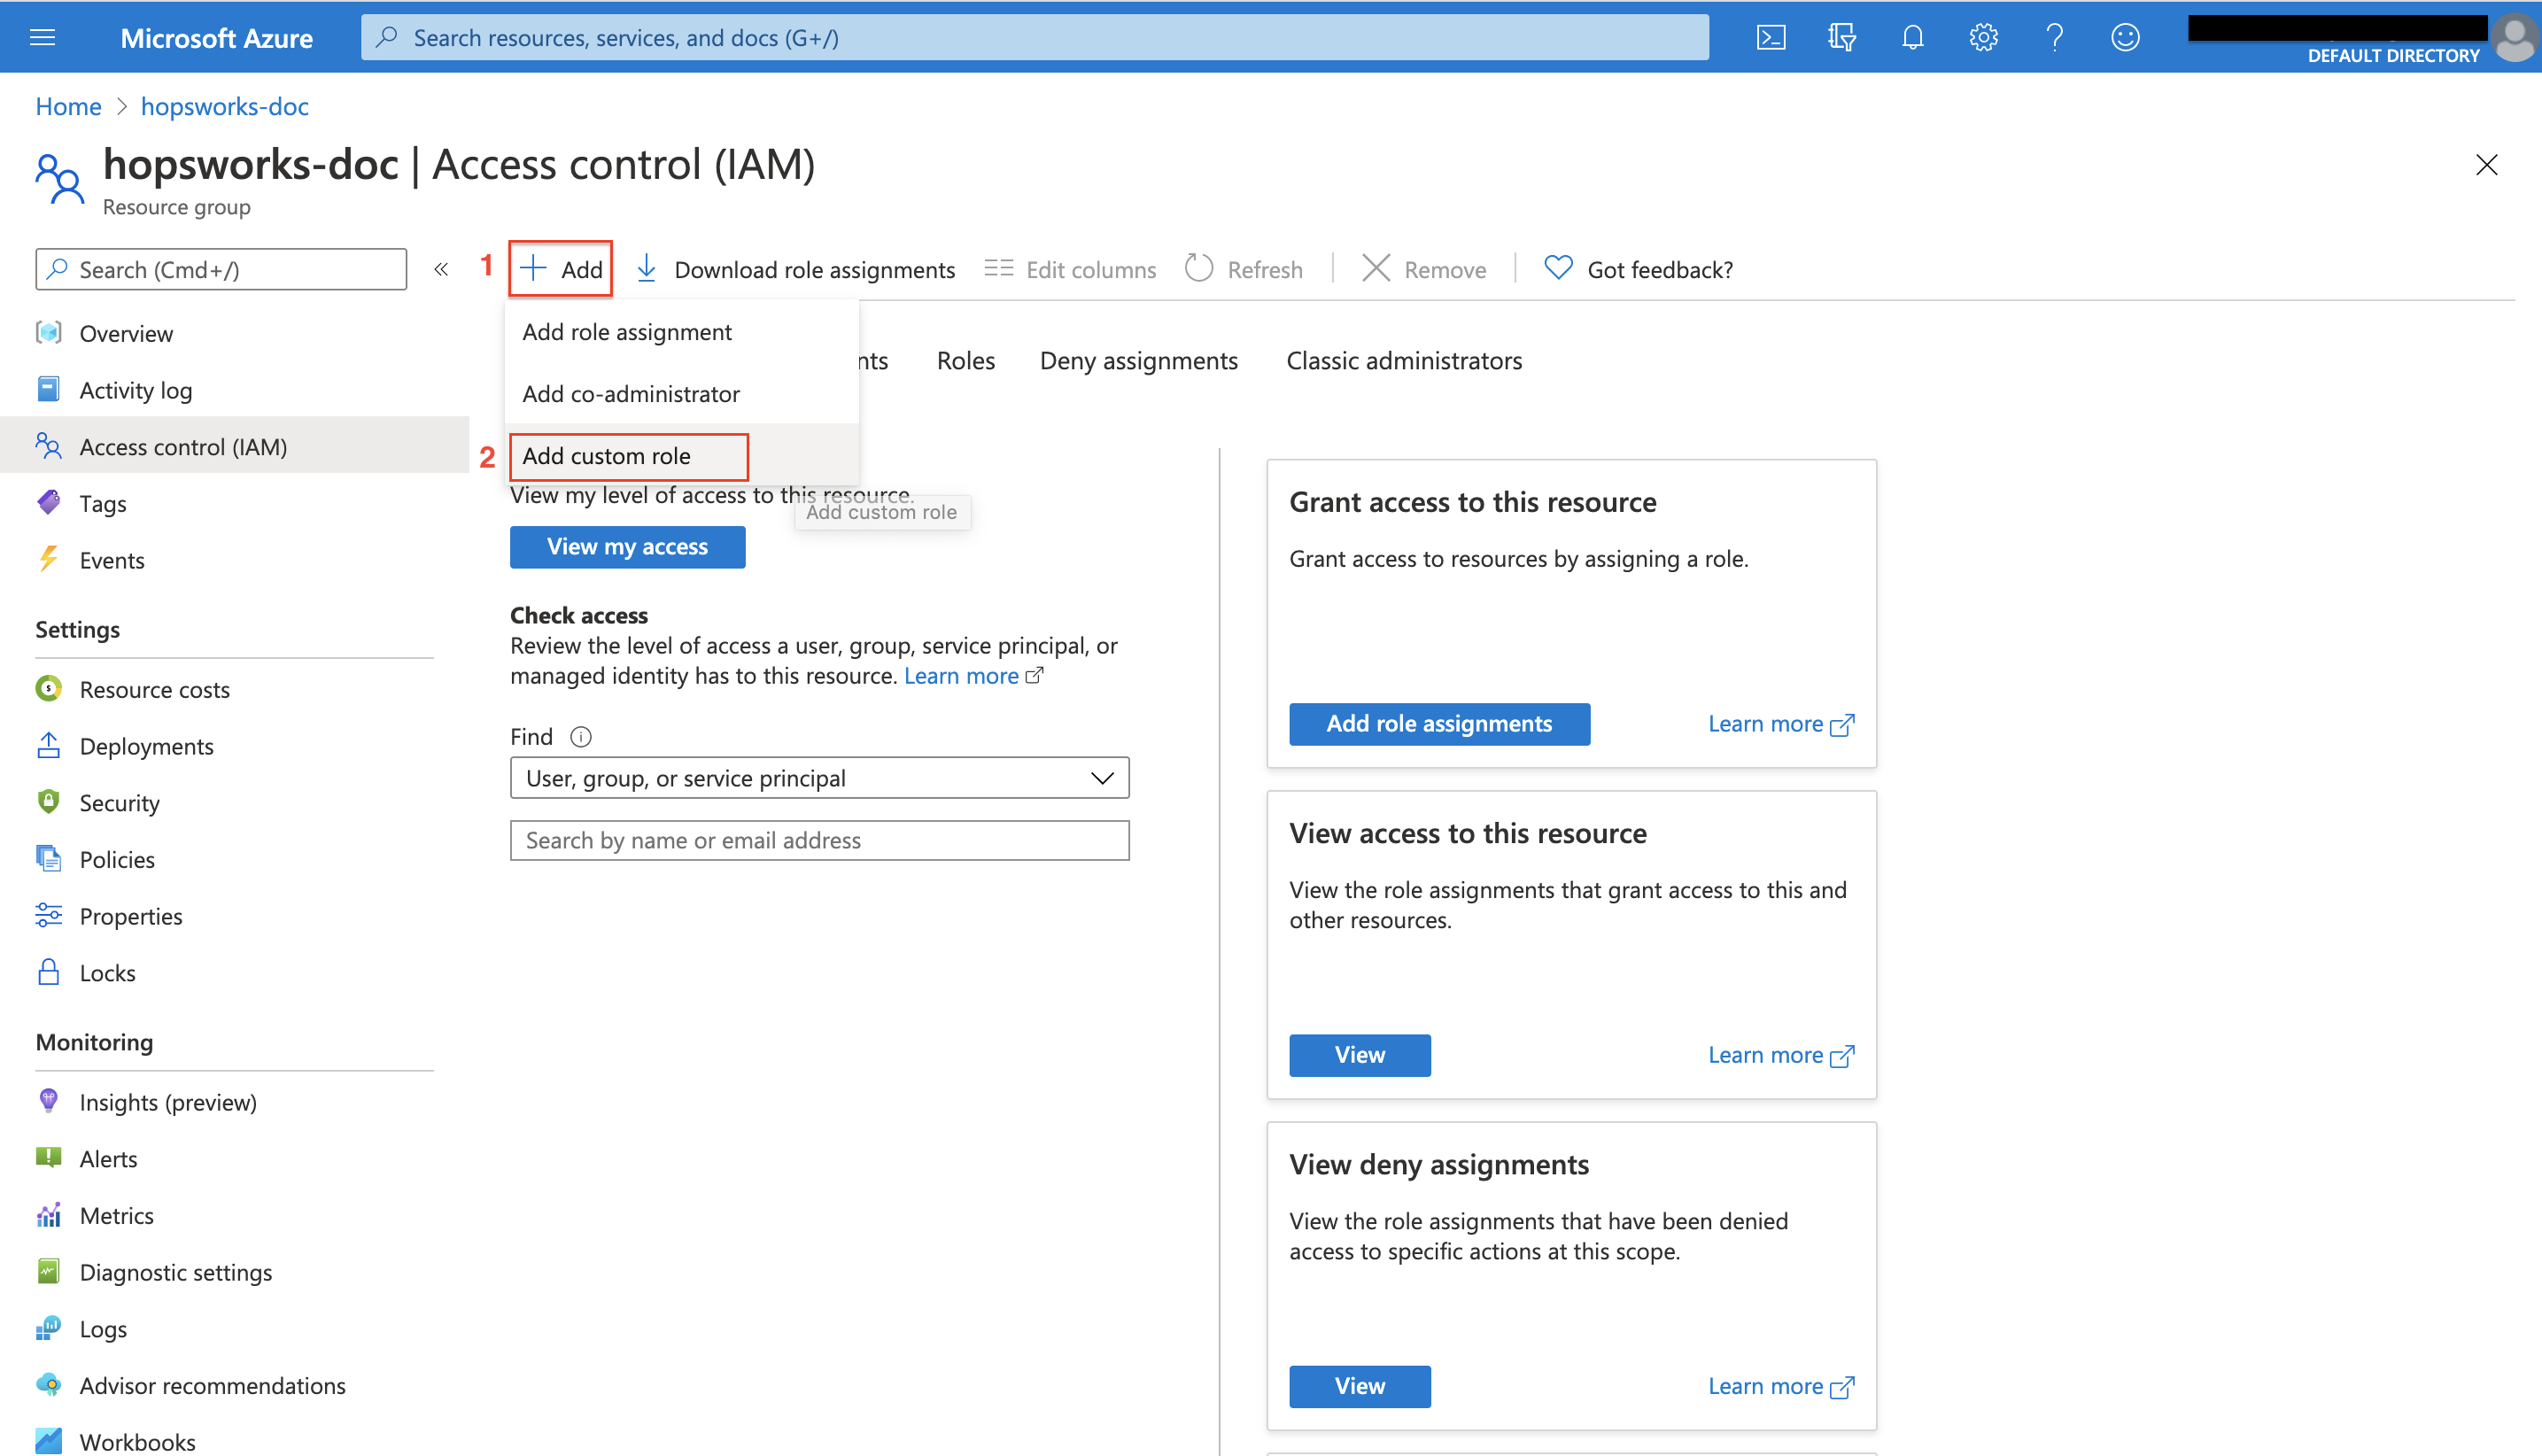
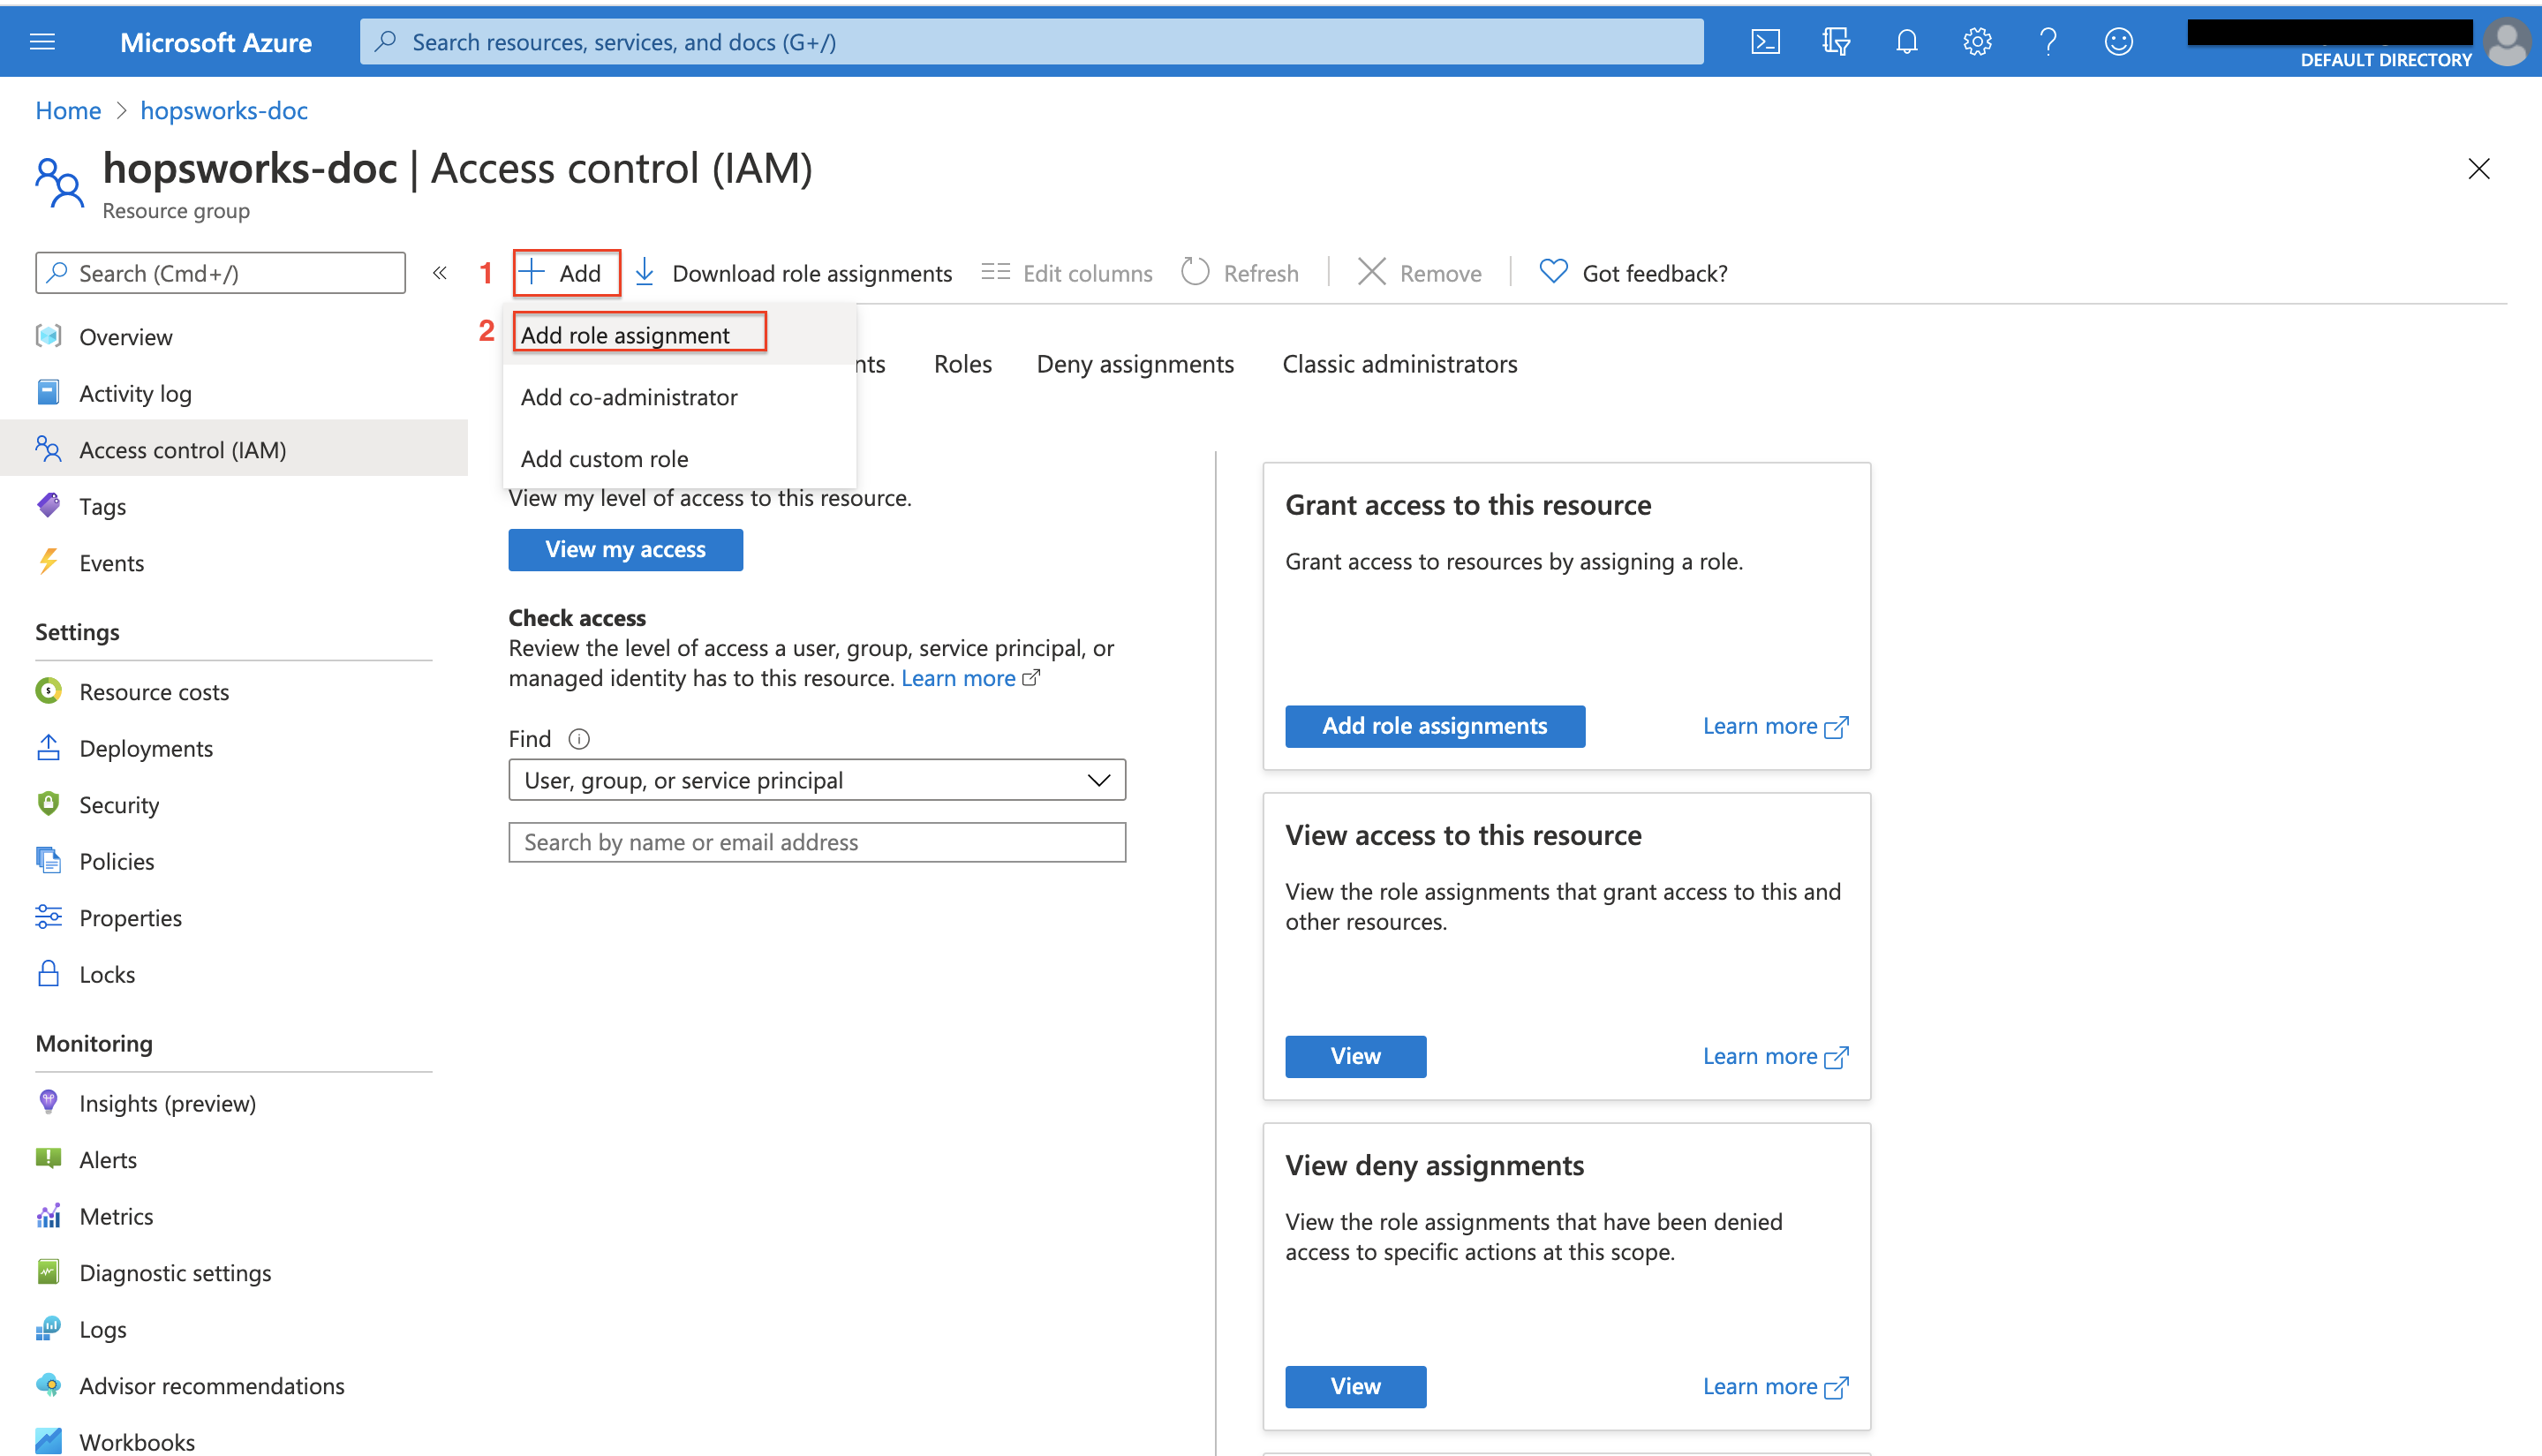
Once you get the names of the resource group and user-assigned managed identity, follow the same steps as in getting started to add a custom role. First, navigate to Azure portal, then click on Resource groups and then search for your resource group and click on it. Go to the Access control (IAM) tab, select Add, and click on Add custom role
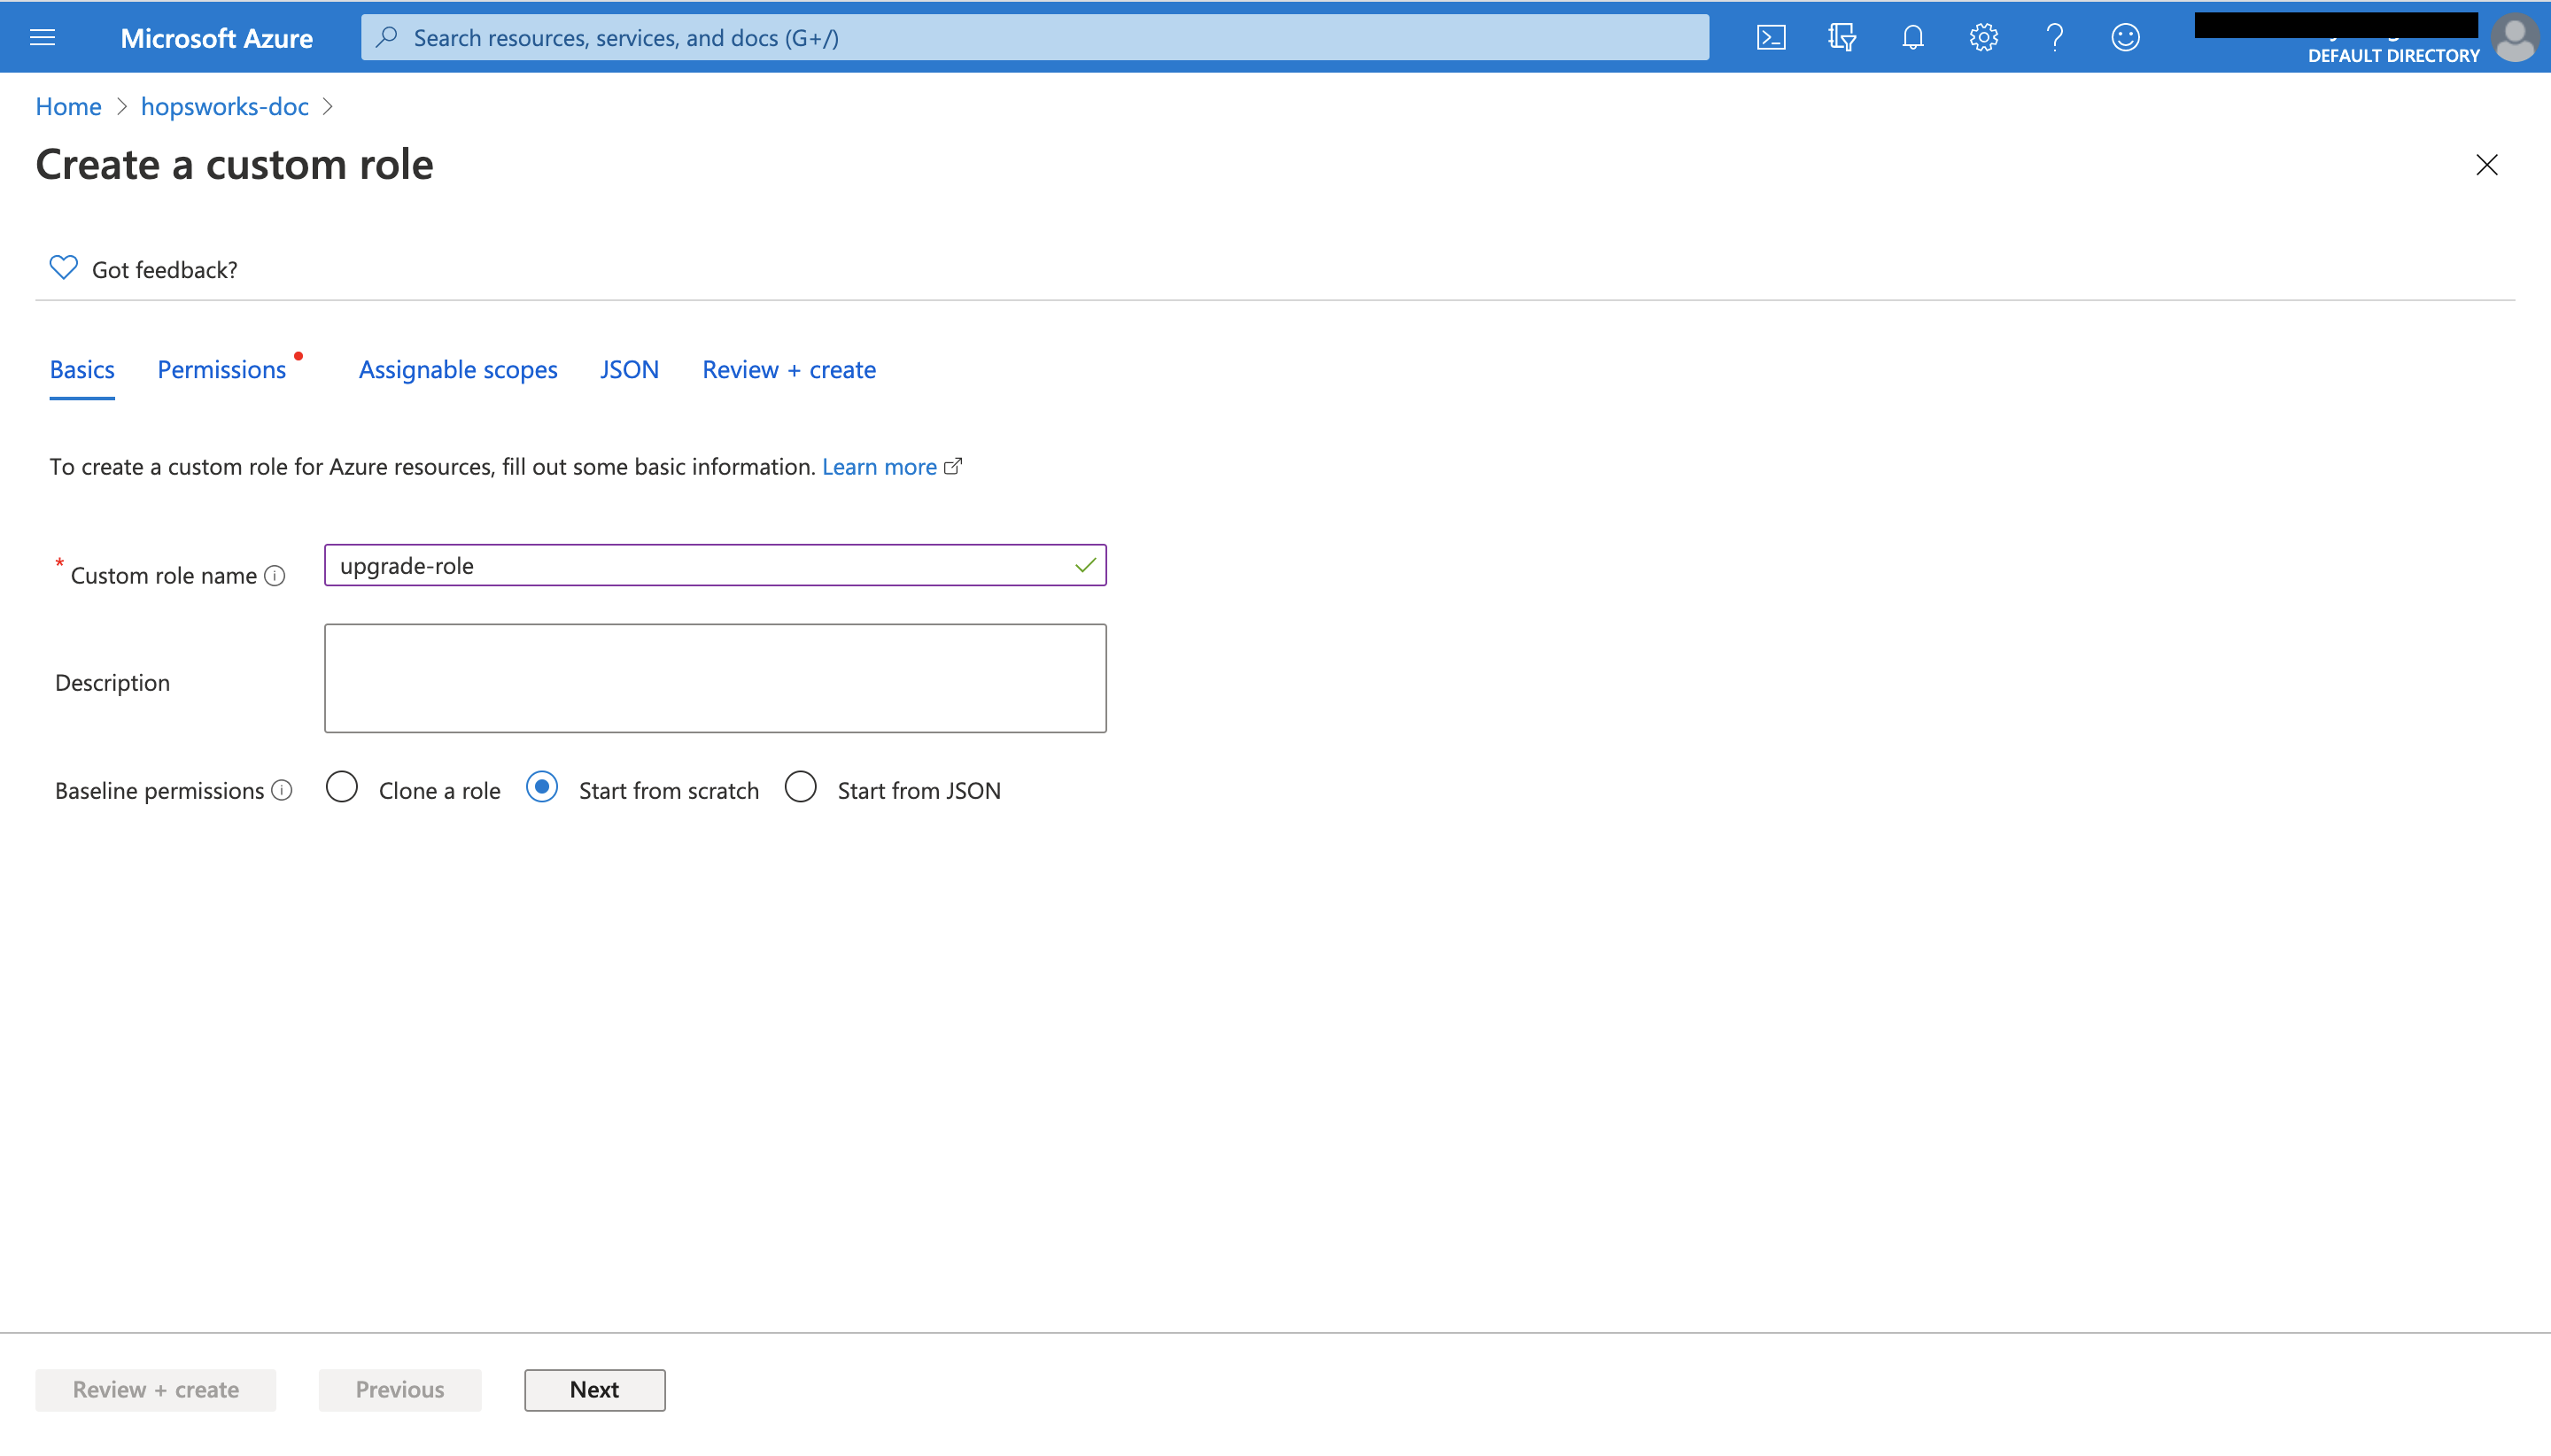
Name the custom role and then click on next till you reach the JSON tab.
Once you reach the JSON tab, click on Edit to edit the role permissions:
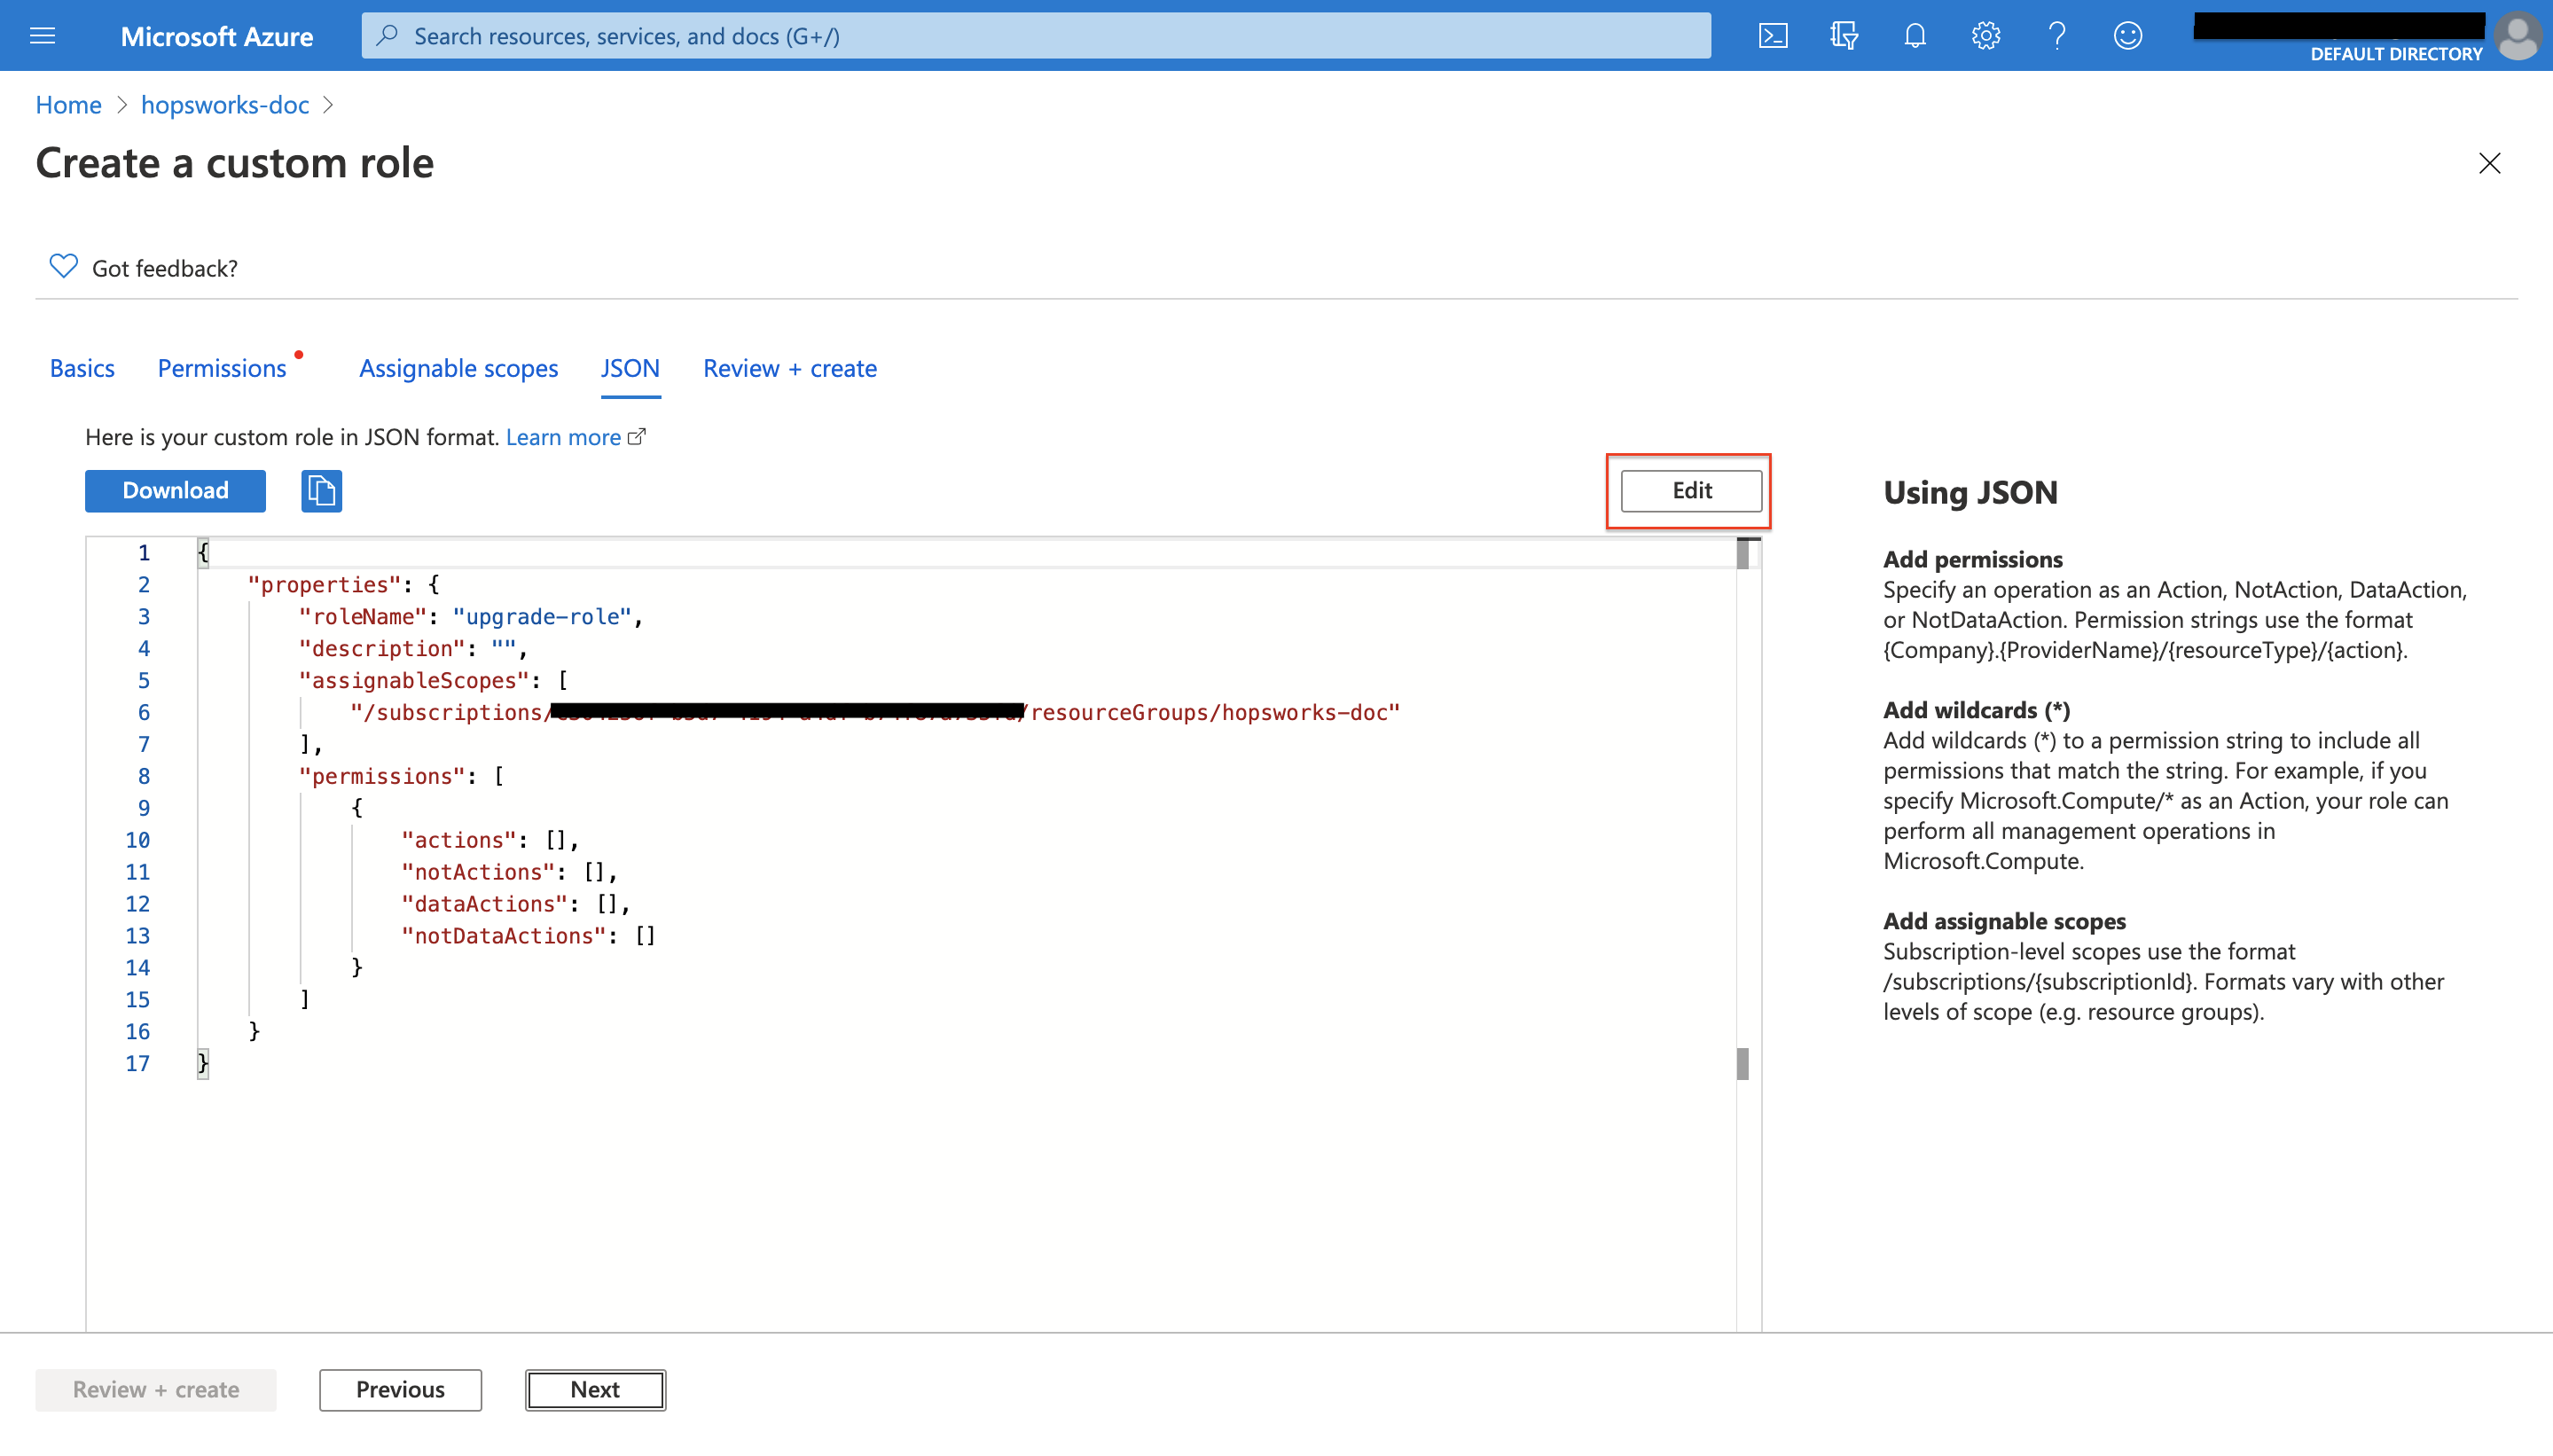
Once you have clicked on Edit, replace the permissions array with the following snippet:
"permissions": [
    {
        "actions": [
            "Microsoft.Compute/virtualMachines/read",
            "Microsoft.Compute/virtualMachines/write",
            "Microsoft.Compute/disks/read",
            "Microsoft.Compute/disks/write",
            "Microsoft.Storage/storageAccounts/listKeys/action"
        ],
        "notActions": [],
        "dataActions": [],
        "notDataActions": []
    }
]
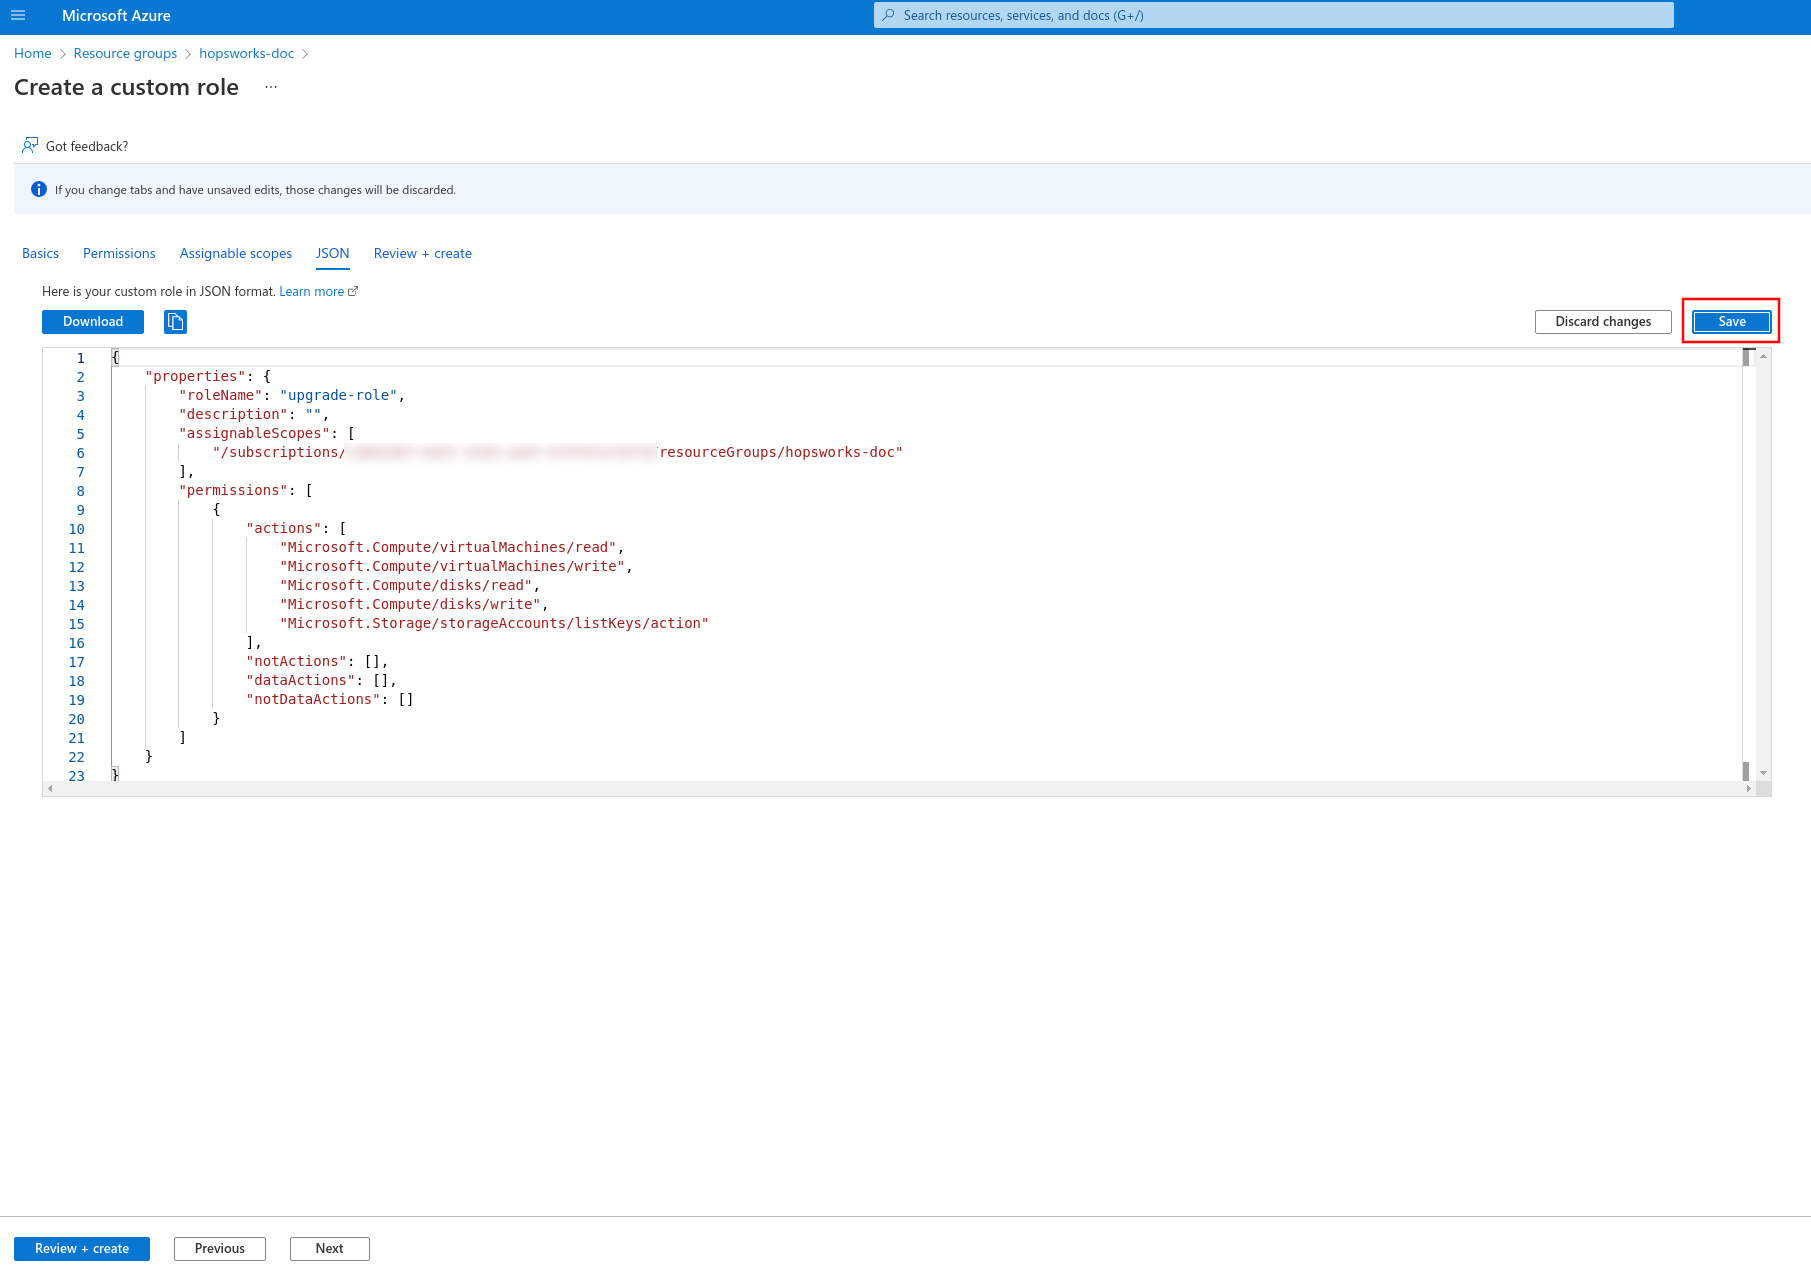
Then, click on Save to save the updated permissions
Click on Review and create and then click on Create to create the custom role:

Step 2.2: Assign the custom role to your user-assigned managed identity#
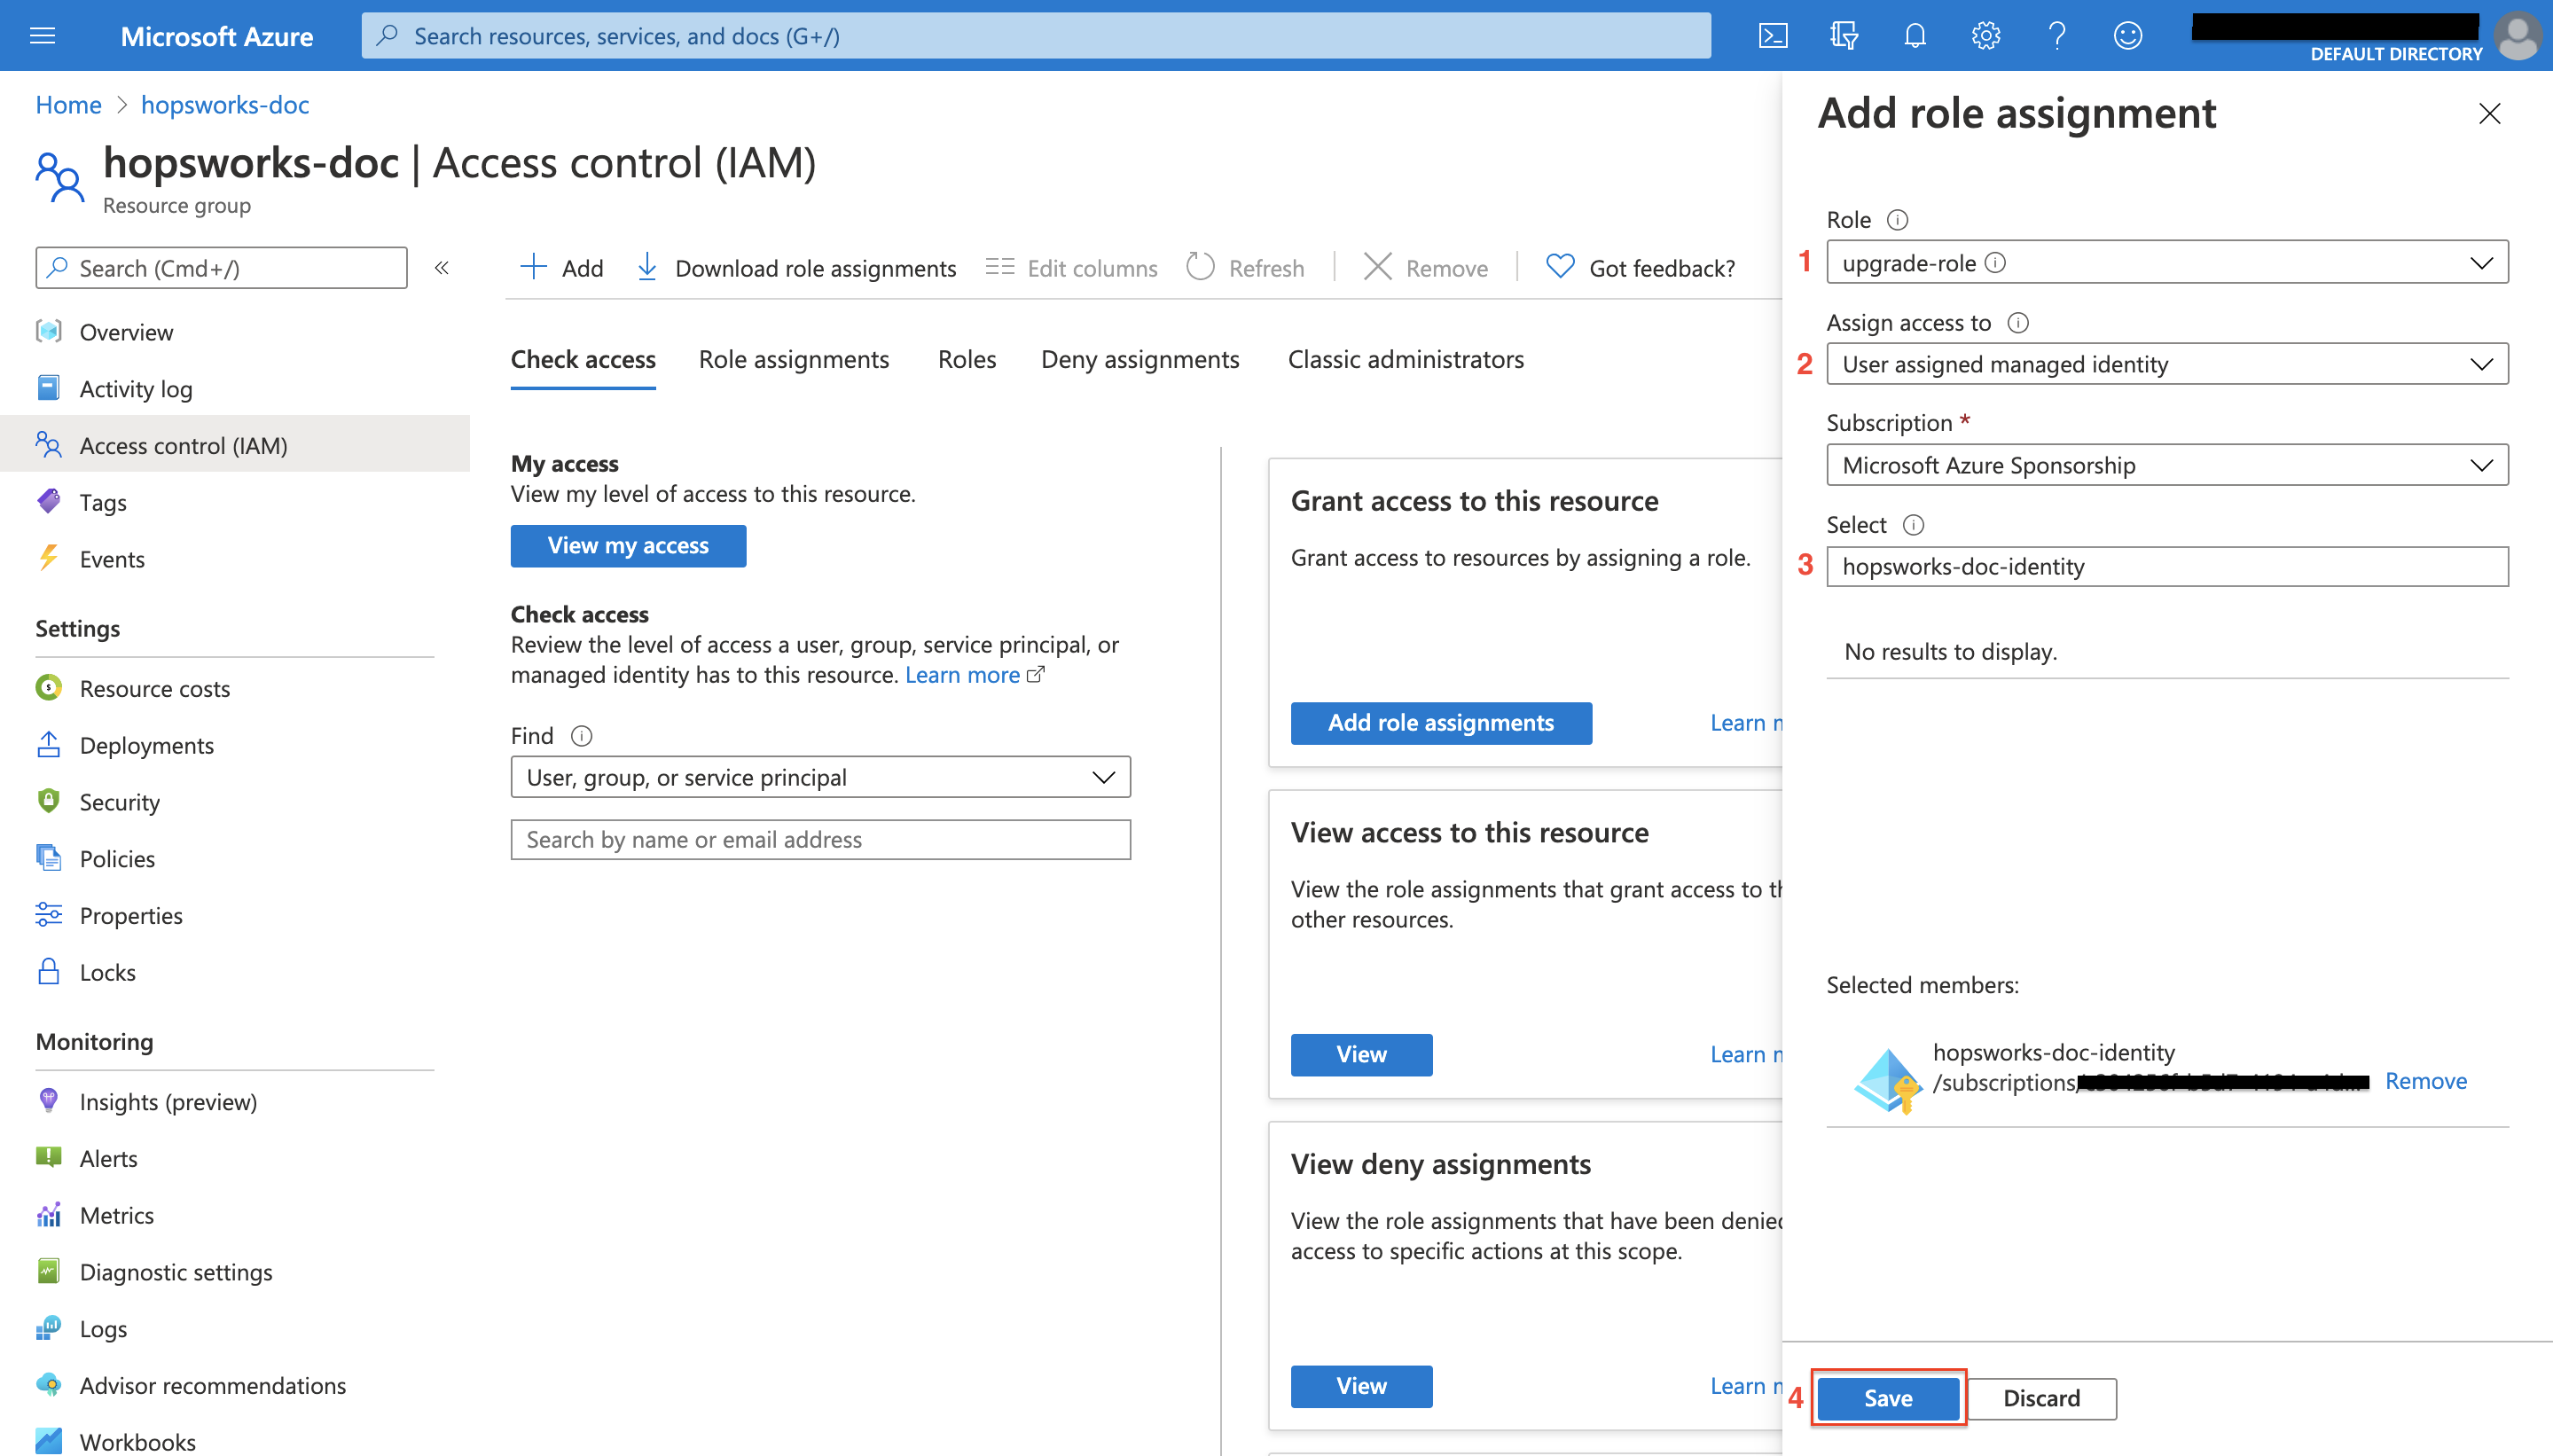
Navigate back to the your Resource group home page at Azure portal, click on Add and then click on Add role assignment
(1) choose the upgrade role that you have just created in Step 2.1, (2) choose User Assigned Managed Identity, (3) search for the user assigned managed identity attached to your cluster and select it. Finally, (4) click on Save to save the role assignment.
Step 3: Add disk read permissions to your role connected to managed.hopsworks.ai#
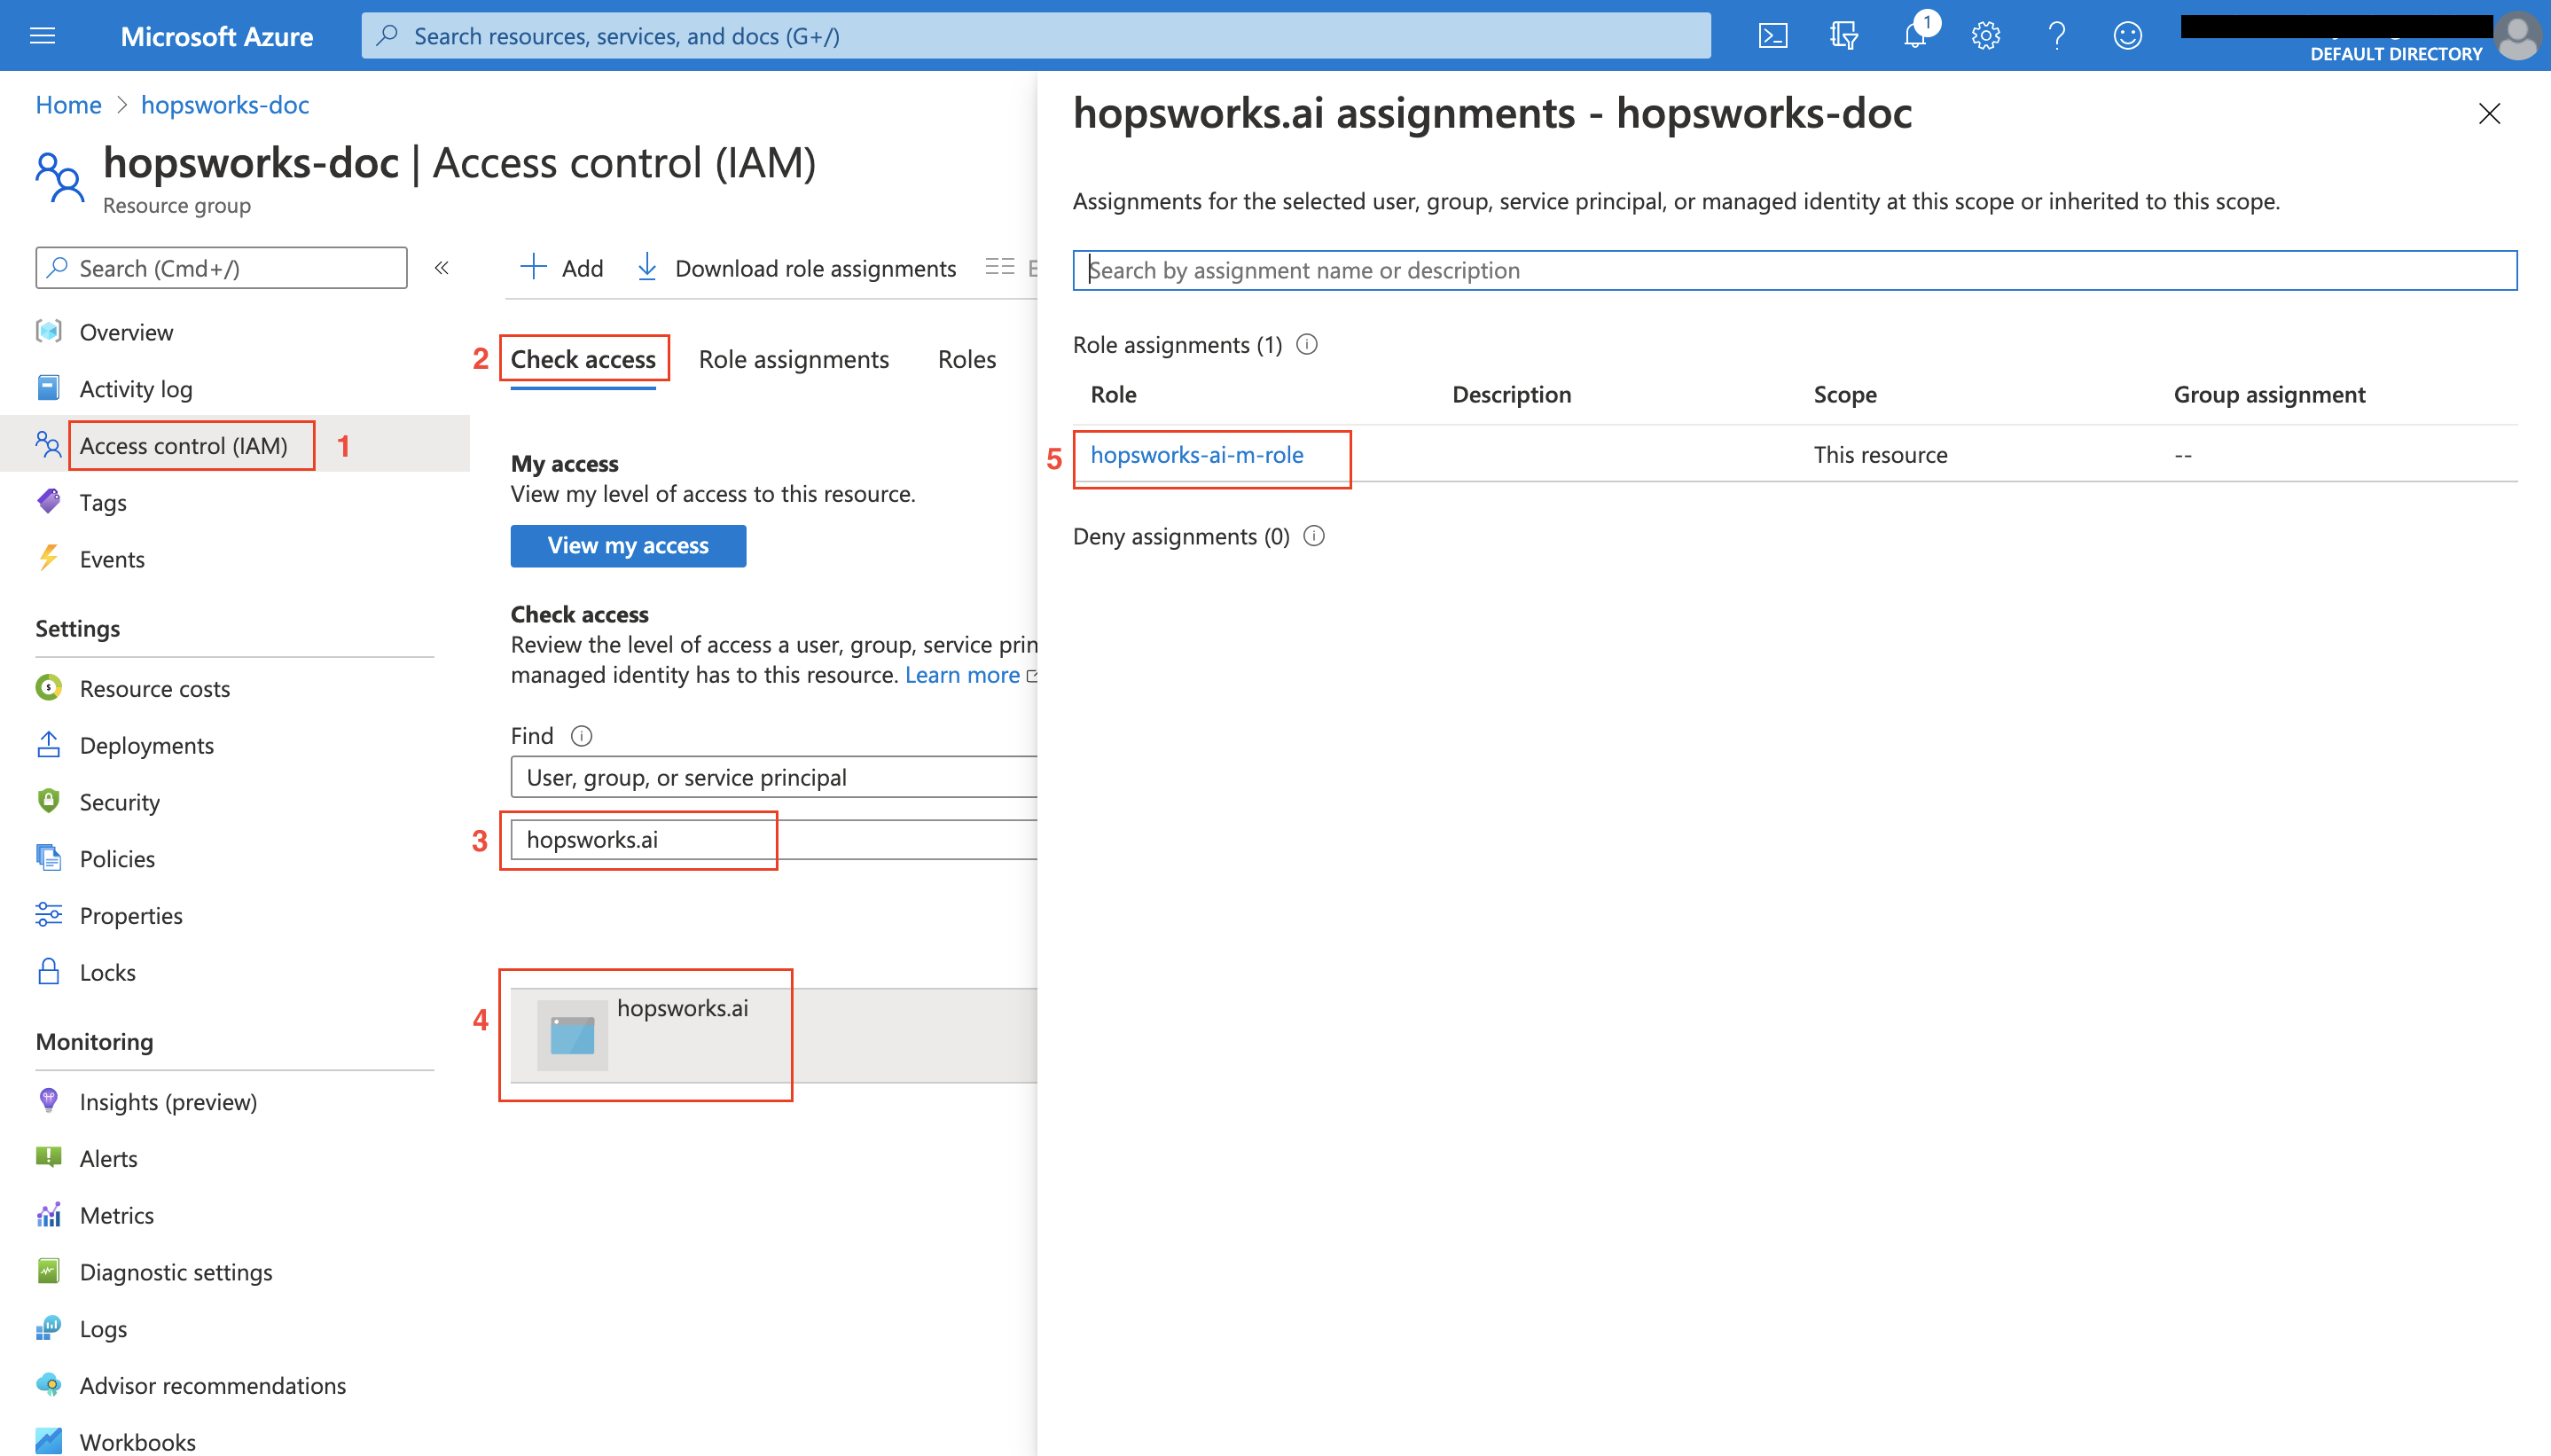
We require extra permission ("Microsoft.Compute/disks/read") to be added to the role you used to connect to managed.hopsworks.ai, the one that you have created in Getting started Step 1.2. If you don't remember the name of the role that you have created in Getting started Step 1.2, you can navigate to your Resource group, (1) click on Access Control, (2) navigate to the Check Access tab, (3) search for hopsworks.ai, (4) click on it, (5) now you have the name of your custom role used to connect to managed.hopsworks.ai.
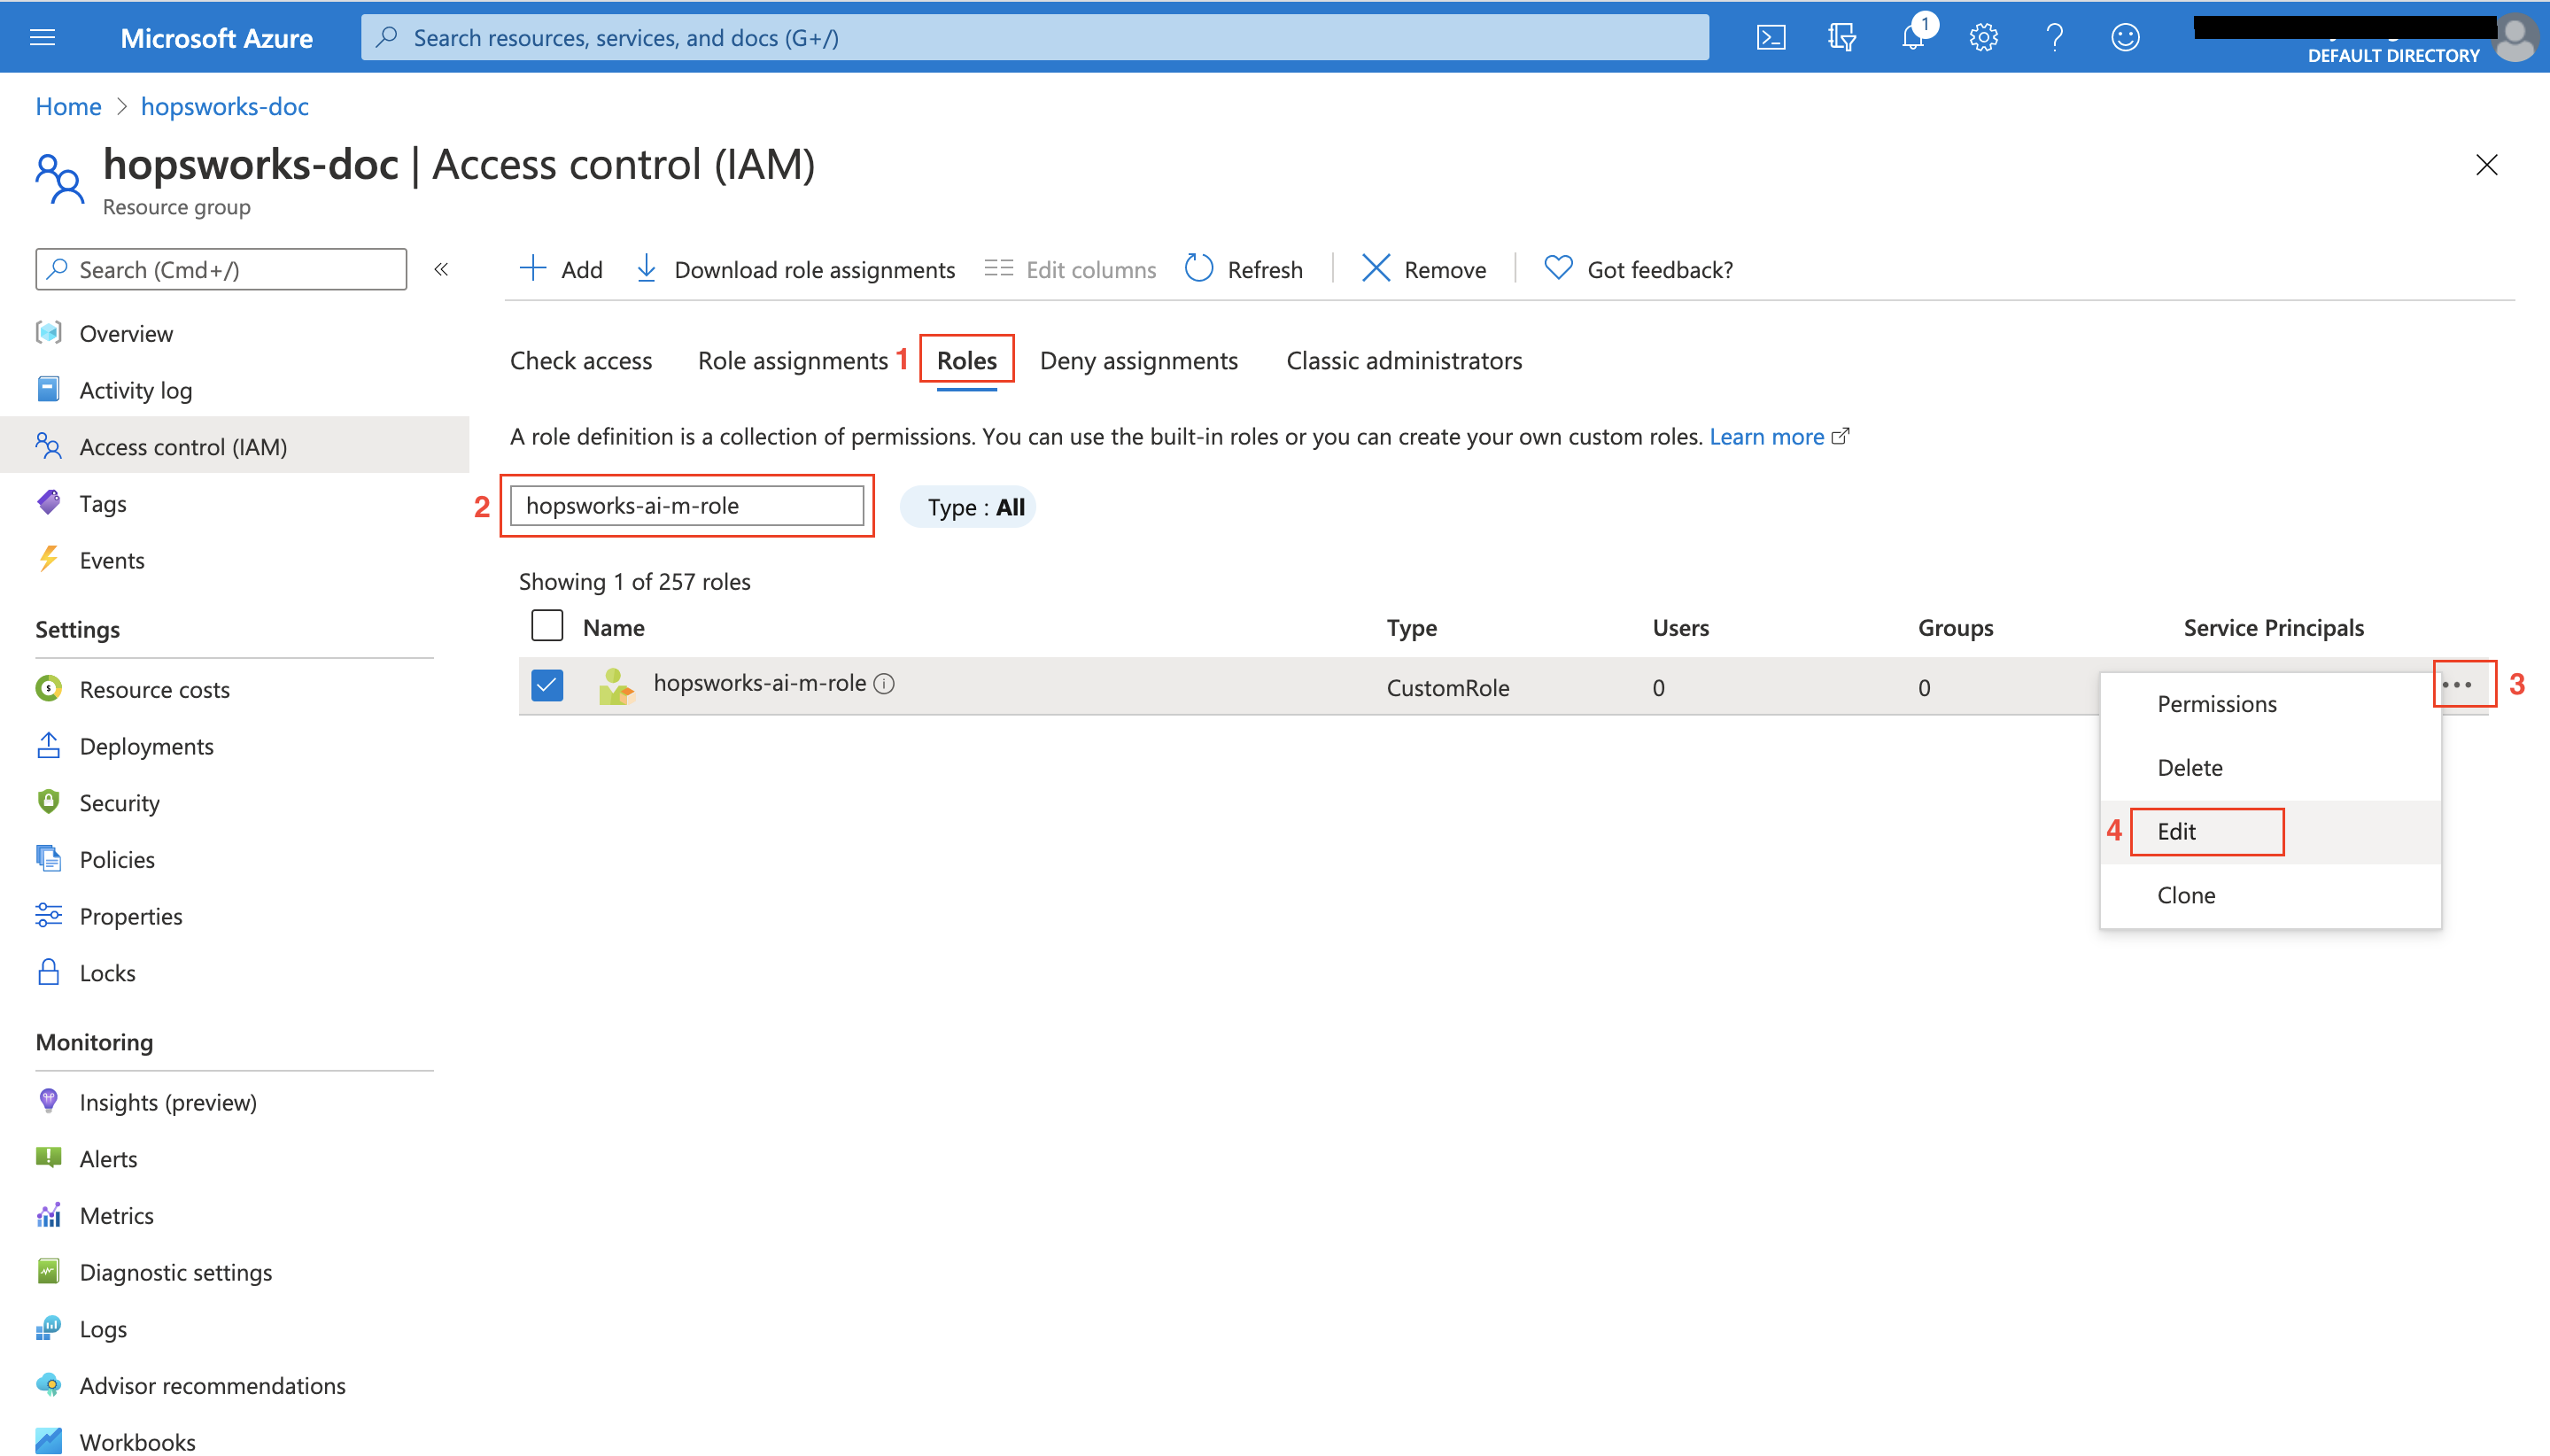
To edit the permissions associated with your role, stay on the same Access Control page, (1) click on the Roles tab, (2) search for your role name (the one you obtained above), (3) click on ..., (4) click on Edit.
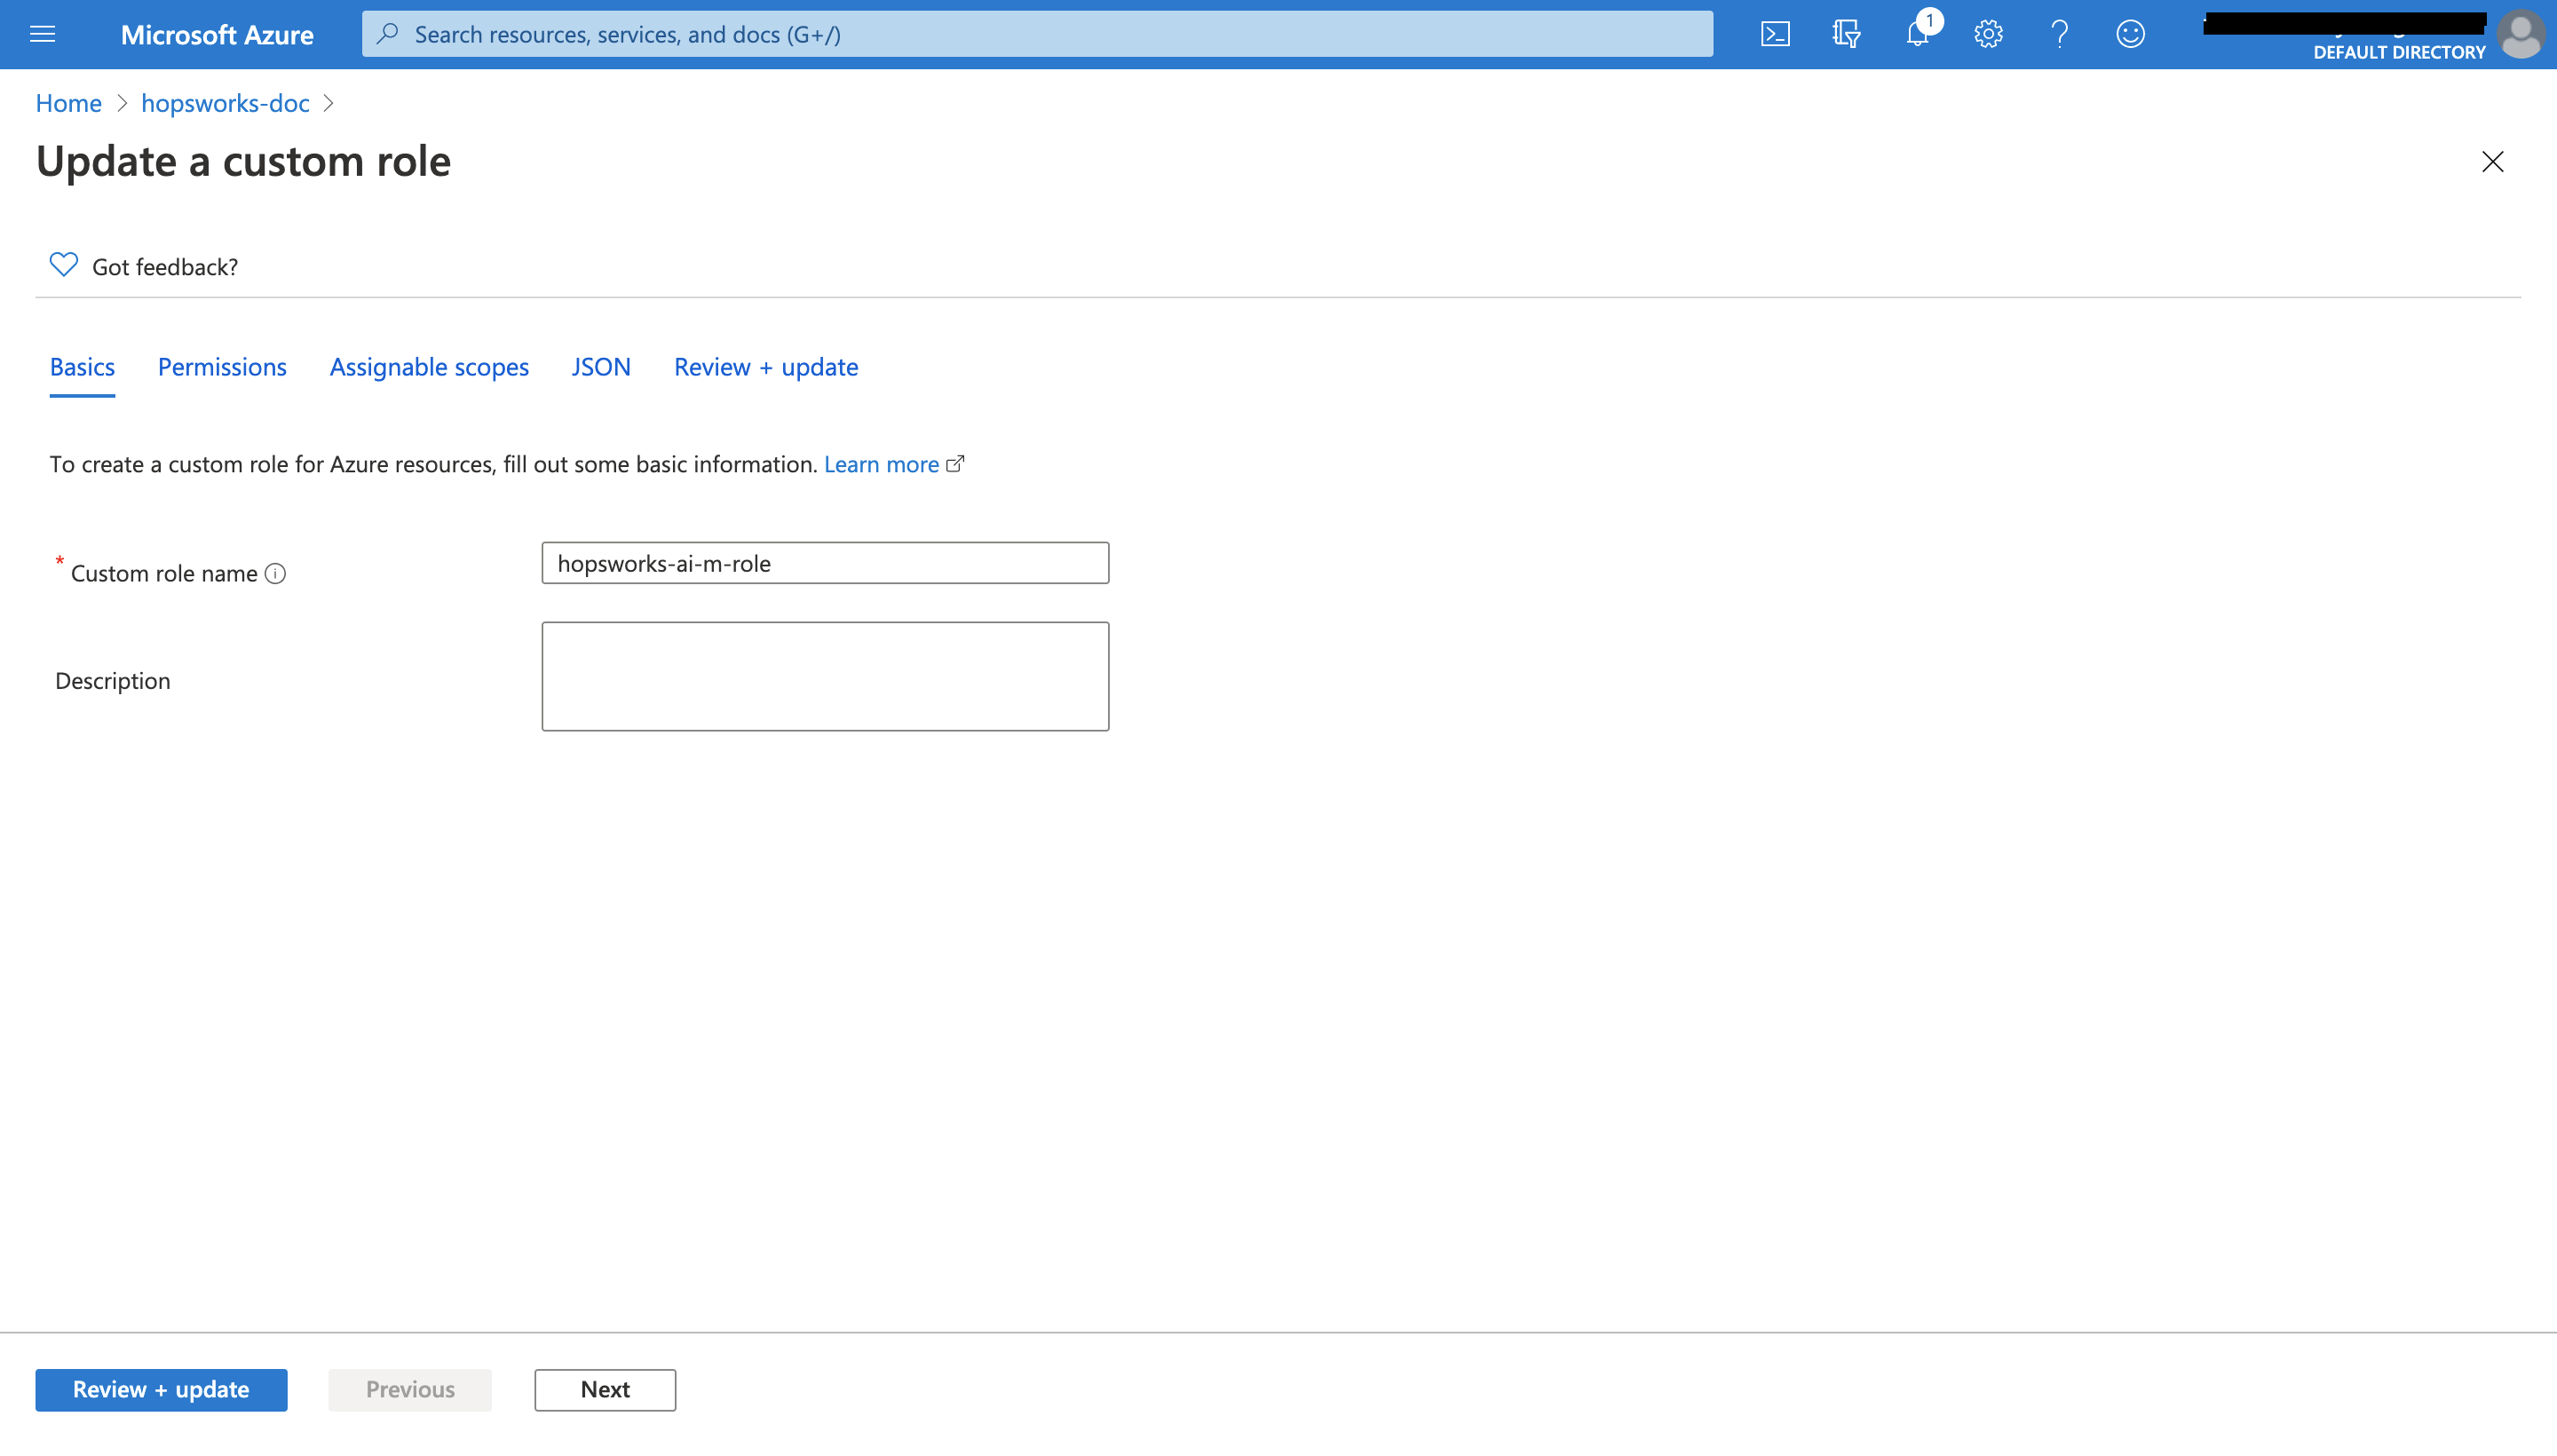
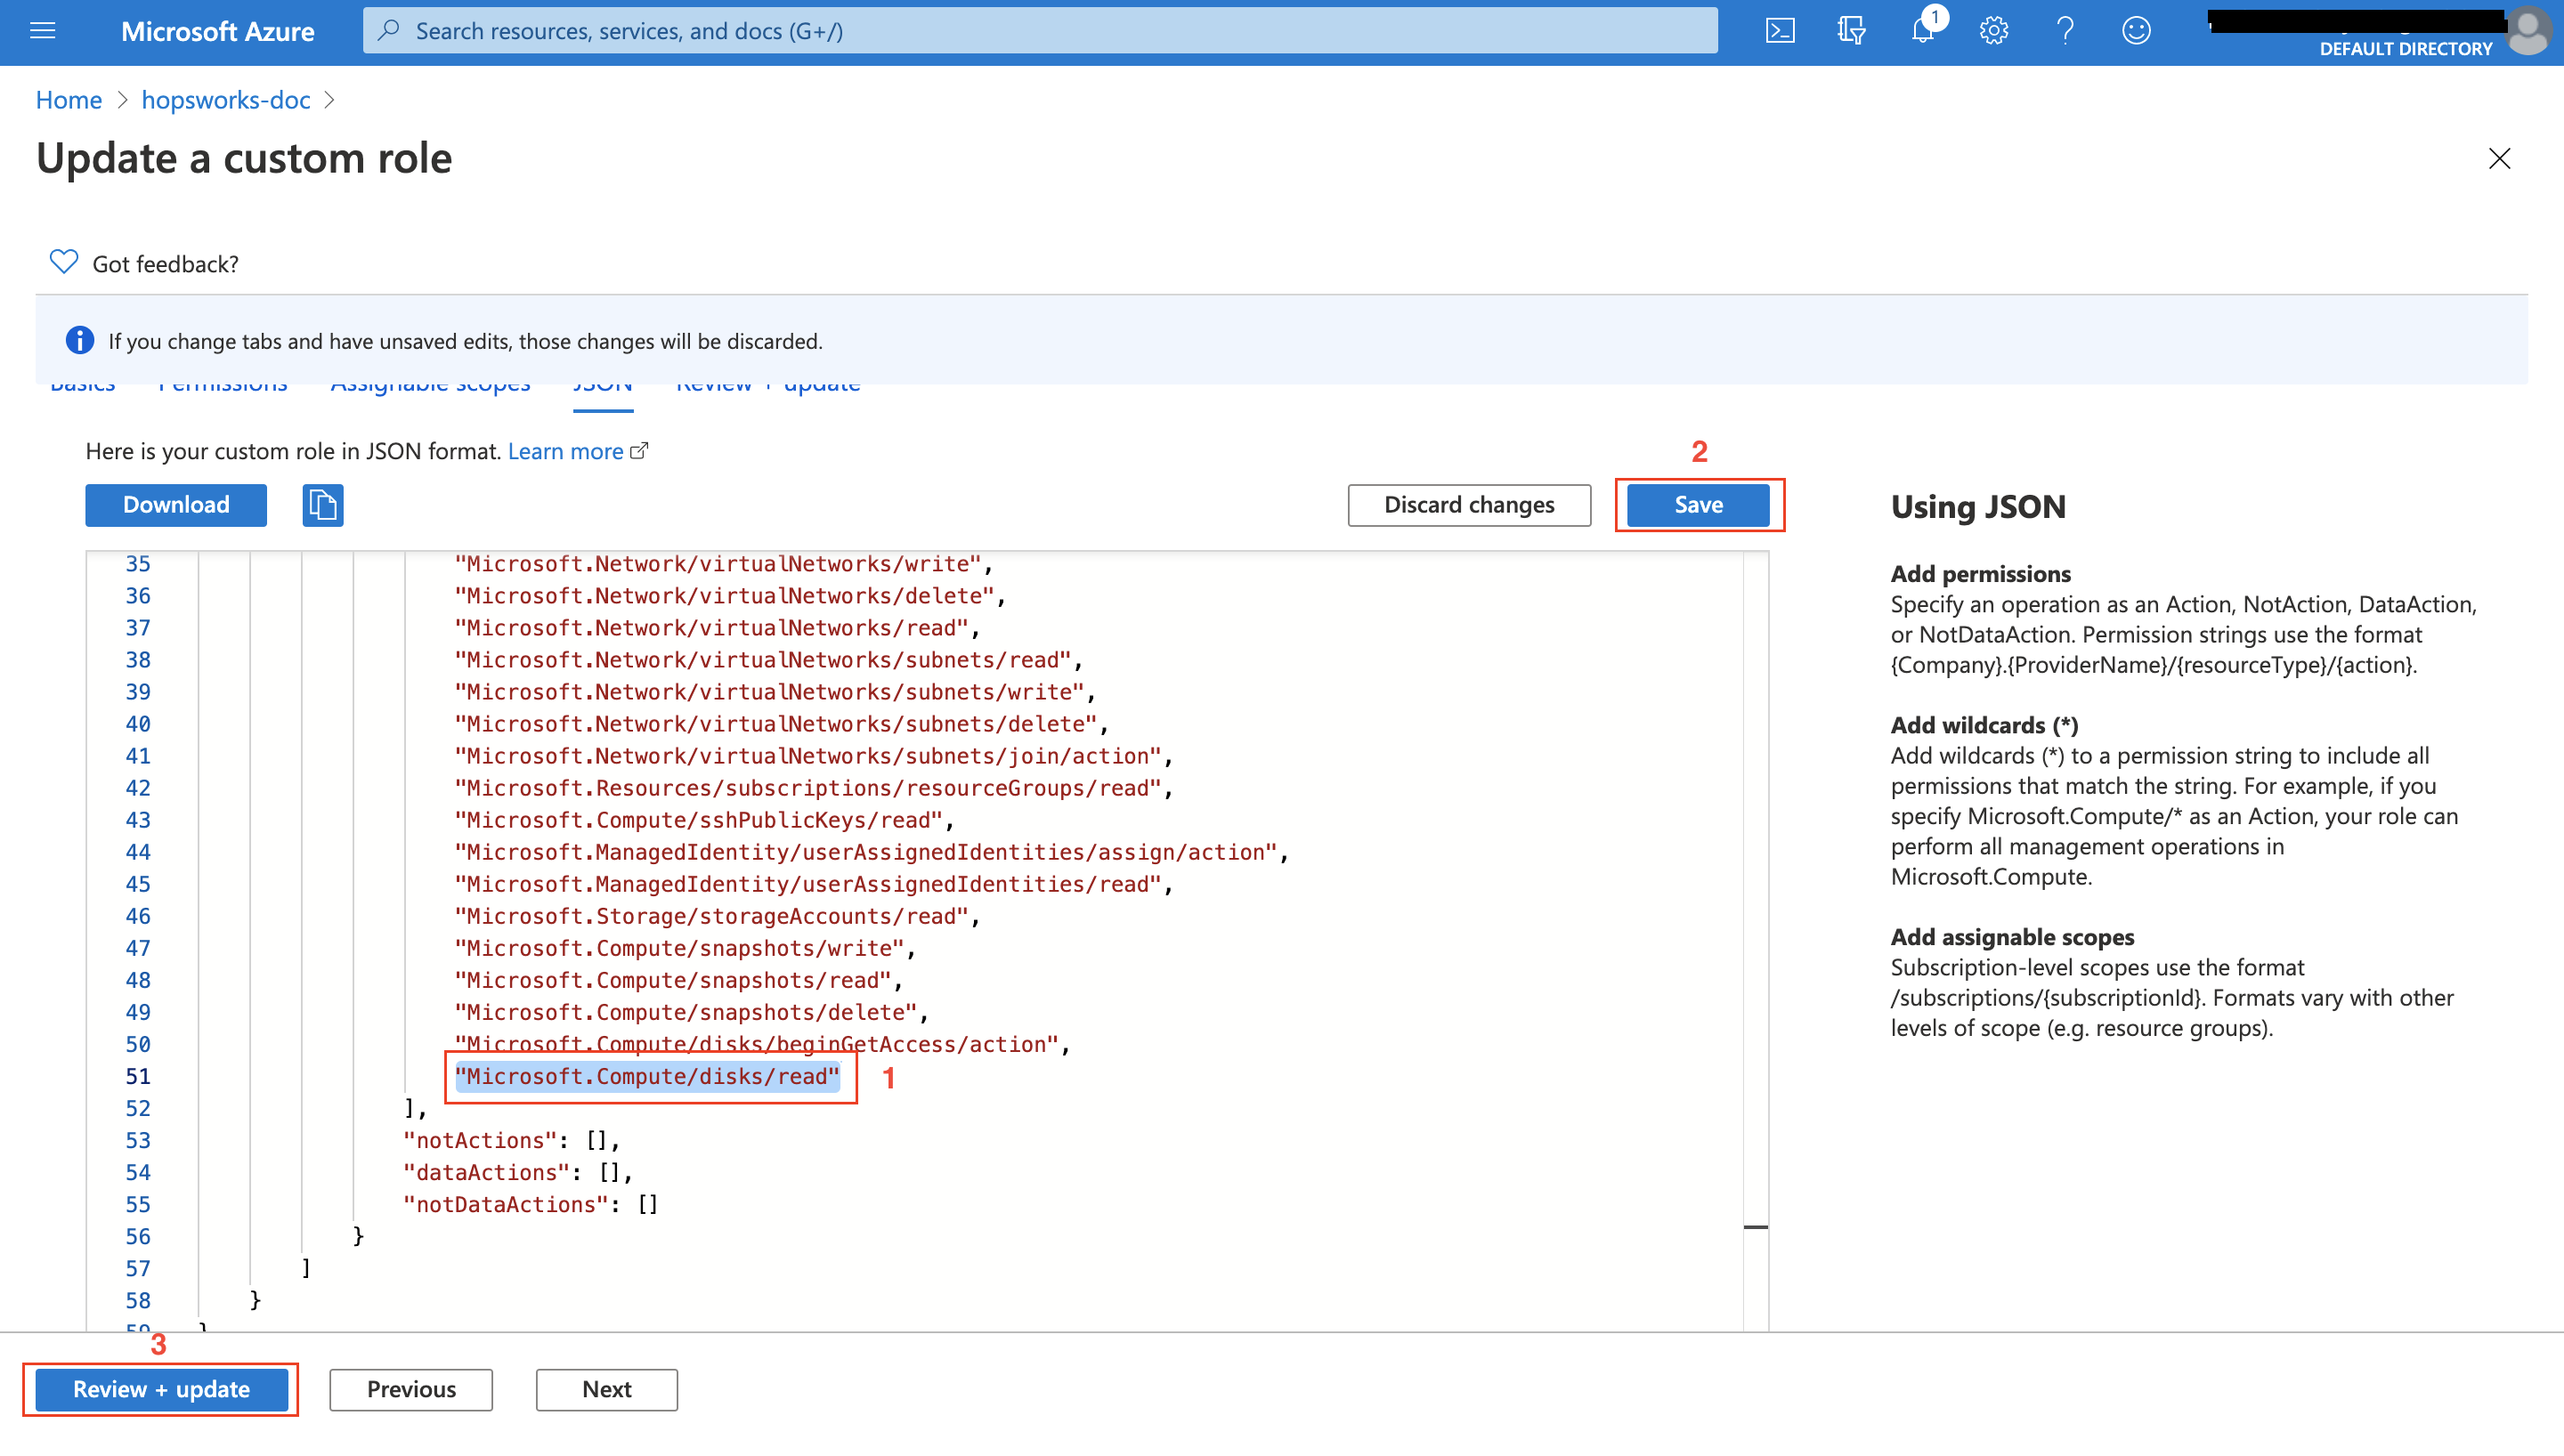
You will arrive at the Update a custom role page as shown below:
Navigate to the JSON tab, then click on Edit, as shown below:
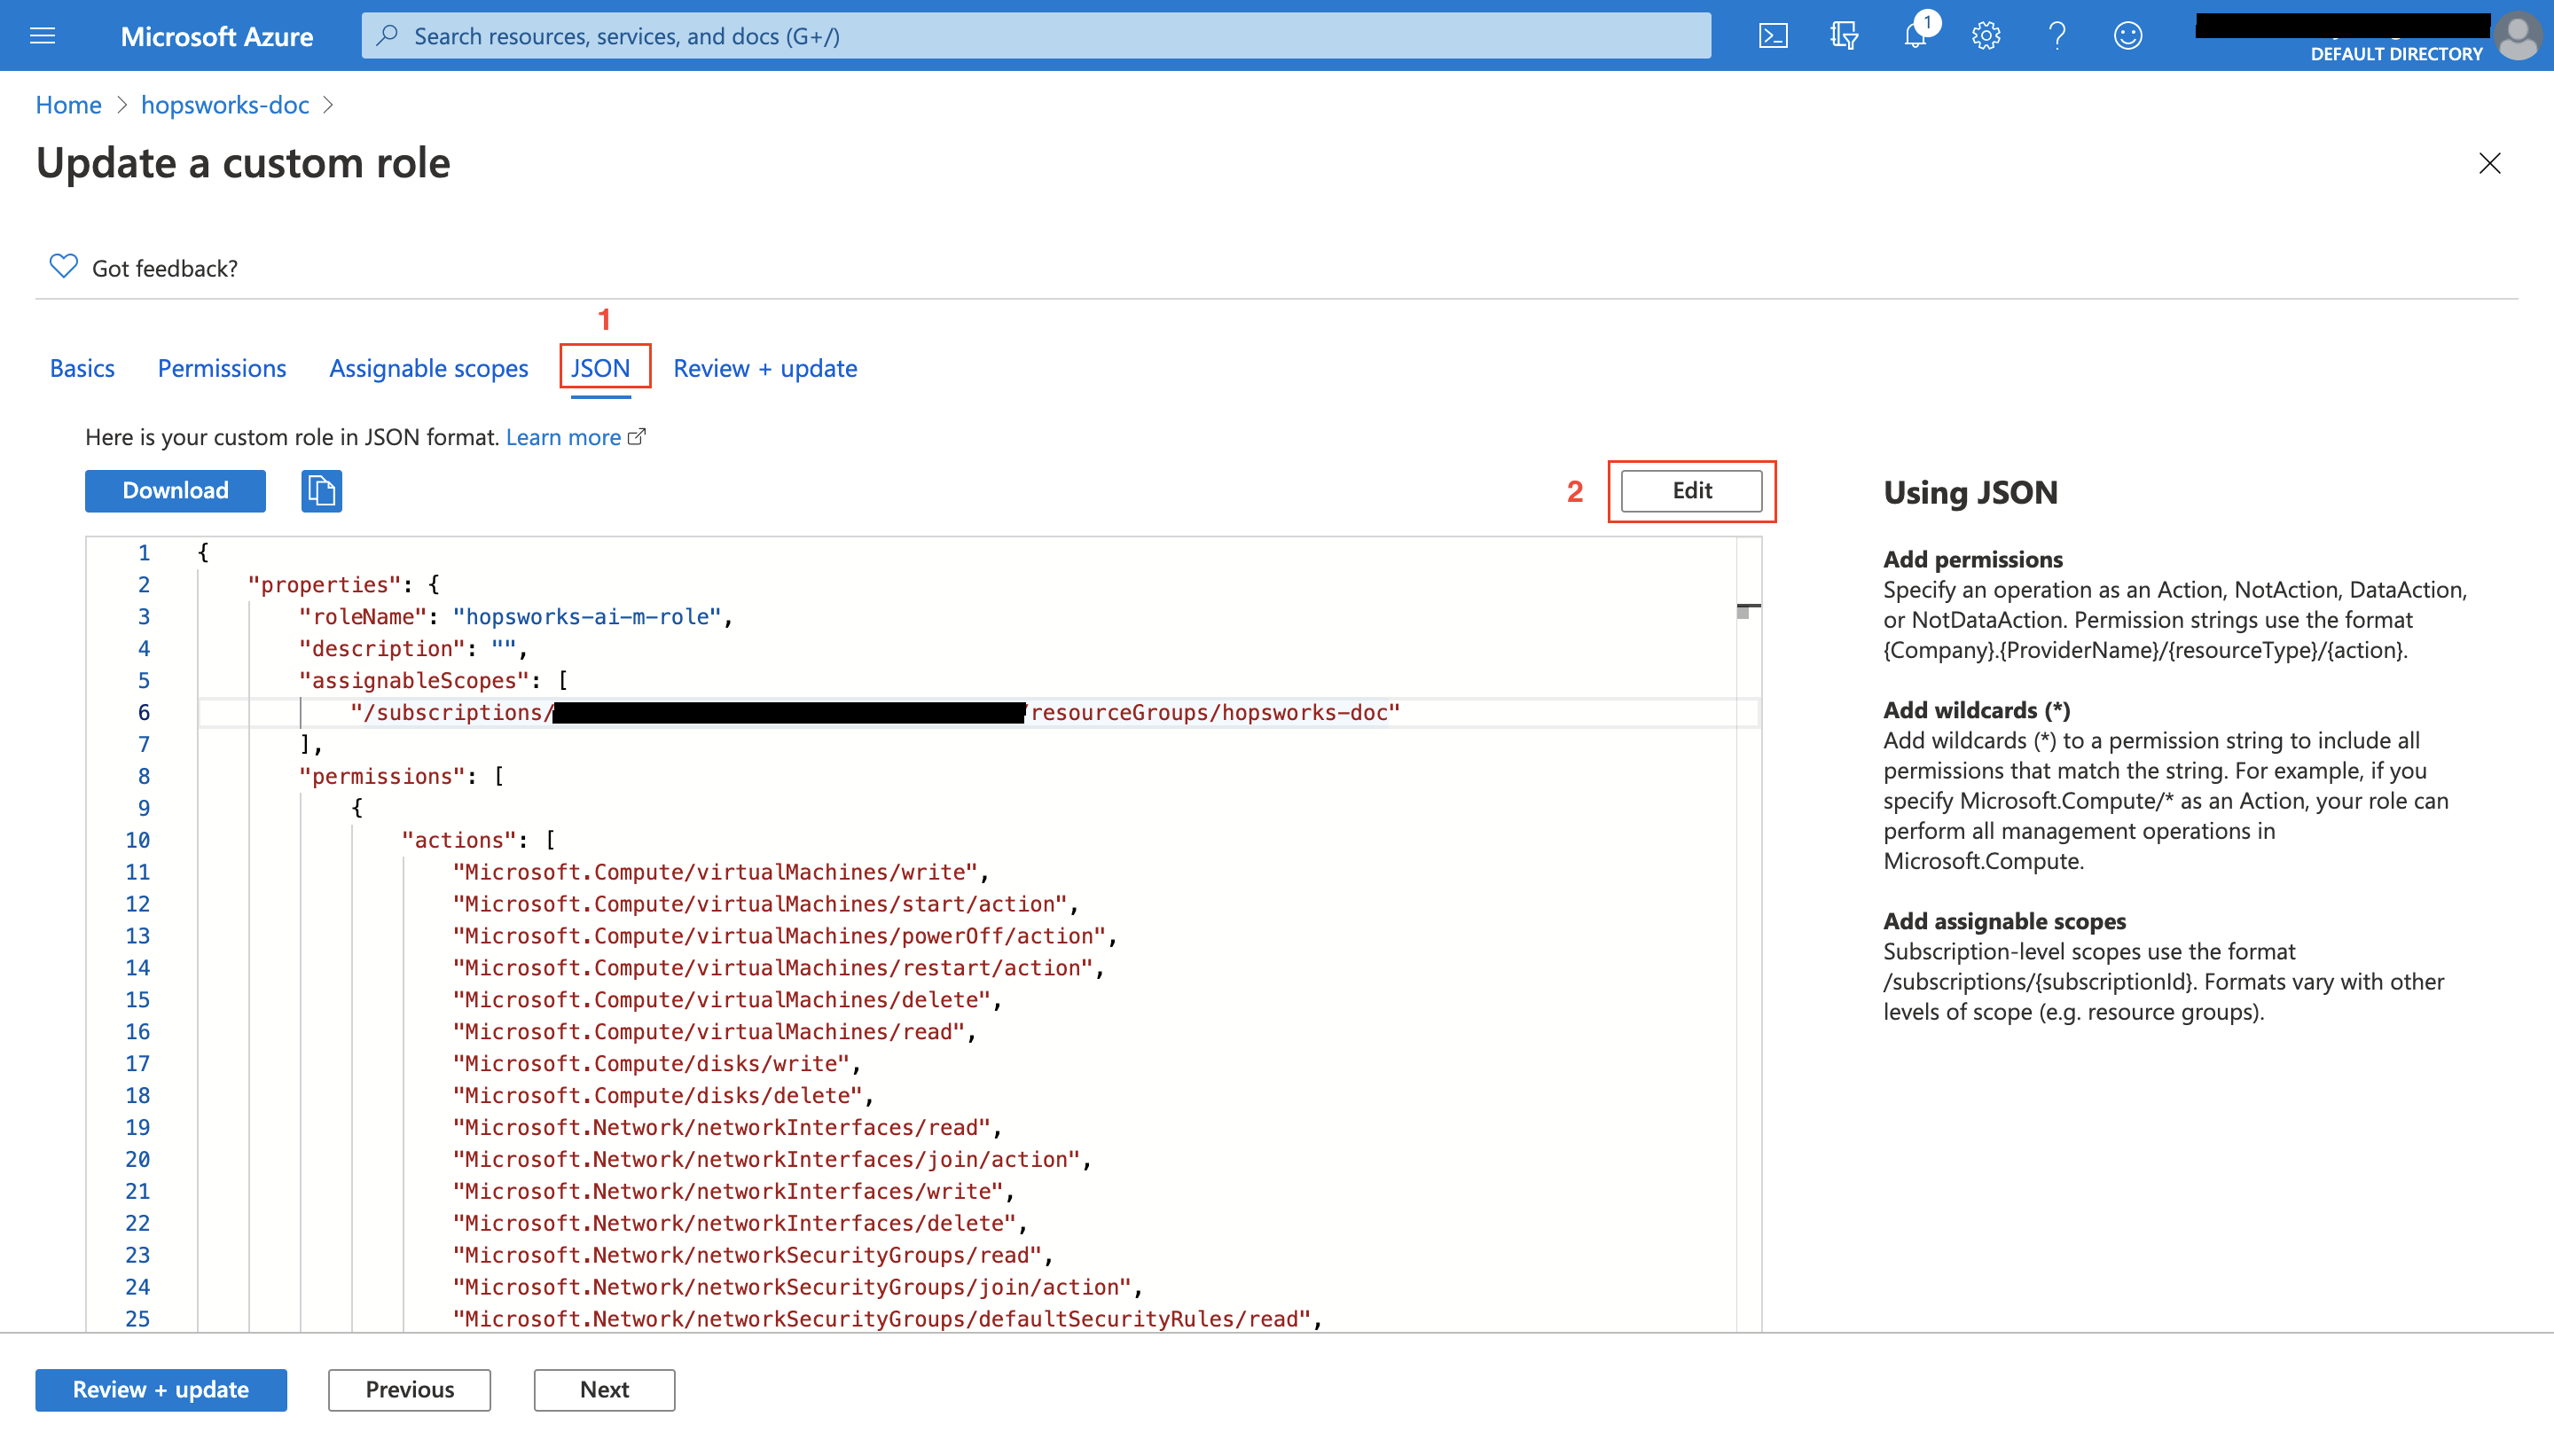
Now, add the missing permission "Microsoft.Compute/disks/read" to the list of actions, then click on Save, click on Review + update, and finally click on Update.
Step 4: Run the upgrade process#
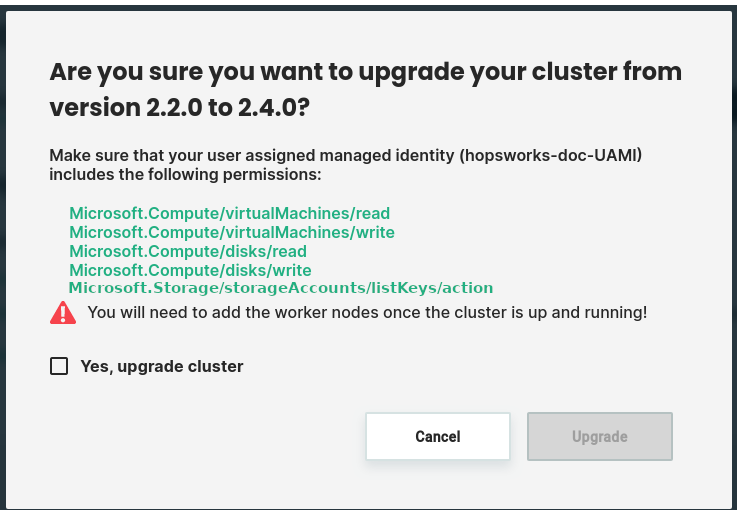
You need to click on Upgrade to start the upgrade process. You will be prompted with the screen shown below to confirm your intention to upgrade:
Note
No need to worry about the following message since this is done already in Step 2
Make sure that your user assigned managed identity (hopsworks-doc-identity) includes the following permissions: [ "Microsoft.Compute/virtualMachines/read", "Microsoft.Compute/virtualMachines/write", "Microsoft.Compute/disks/read", "Microsoft.Compute/disks/write", "Microsoft.Storage/storageAccounts/listKeys/action" ]
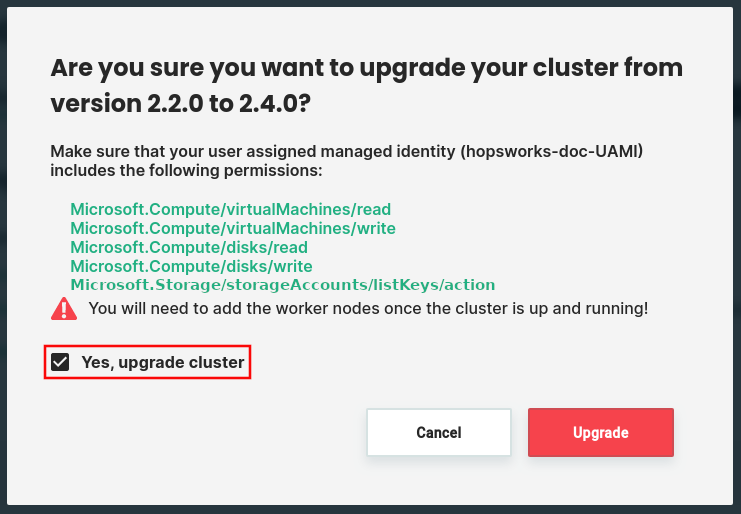
Check the Yes, upgrade cluster checkbox to proceed, then the Upgrade button will be activated as shown below:
Warning
Currently, we only support upgrade for the head node and you will need to recreate your workers once the upgrade is successfully completed.
Depending on how big your current cluster is, the upgrade process may take from 1 hour to a few hours until completion.
Note
We don't delete your old cluster until the upgrade process is successfully completed.
Once the upgrade is completed, you can confirm that you have the new Hopsworks version by checking the Details tab of your cluster as below:

Error handling#
There are two categories of errors that you may encounter during an upgrade. First, a permission error due to a missing permission in your role connected to managed.hopsworks.ai, see Error 1. Second, an error during the upgrade process running on your cluster, see Error 2.
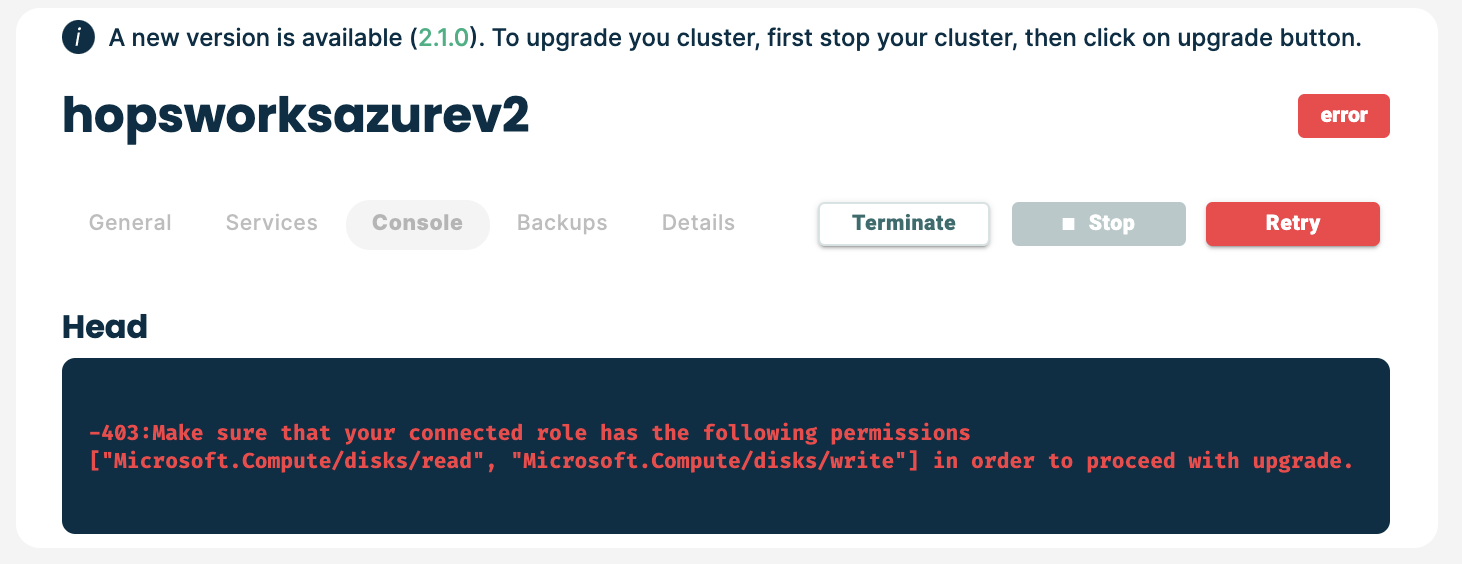
Error 1: Missing permissions error#
If you encounter the following permission error right after starting an upgrade, then you need to make sure that the role you used to connect to managed.hopsworks.ai, the one that you have created in Getting started Step 1.2, have permissions to read and write disks ("Microsoft.Compute/disks/read", "Microsoft.Compute/disks/write").
If you don't remember the name of the role that you have created in Getting started Step 1.2, you can navigate to your Resource group, (1) click on Access Control, (2) navigate to the Check Access tab, (3) search for hopsworks.ai, (4) click on it, (5) now you have the name of your custom role used to connect to managed.hopsworks.ai.
To edit the permissions associated with your role, stay on the same Access Control page, (1) click on the Roles tab, (2) search for your role name (the one you obtained above), (3) click on ..., (4) click on Edit.
You will arrive at the Update a custom role page as shown below:
Navigate to the JSON tab, then click on Edit, as shown below:
In our example, we were missing only the read permission ("Microsoft.Compute/disks/read"). First, add the missing permission, then click on Save, click on Review + update, and finally click on Update.
Once you have updated your role, click on Retry to retry the upgrade process.
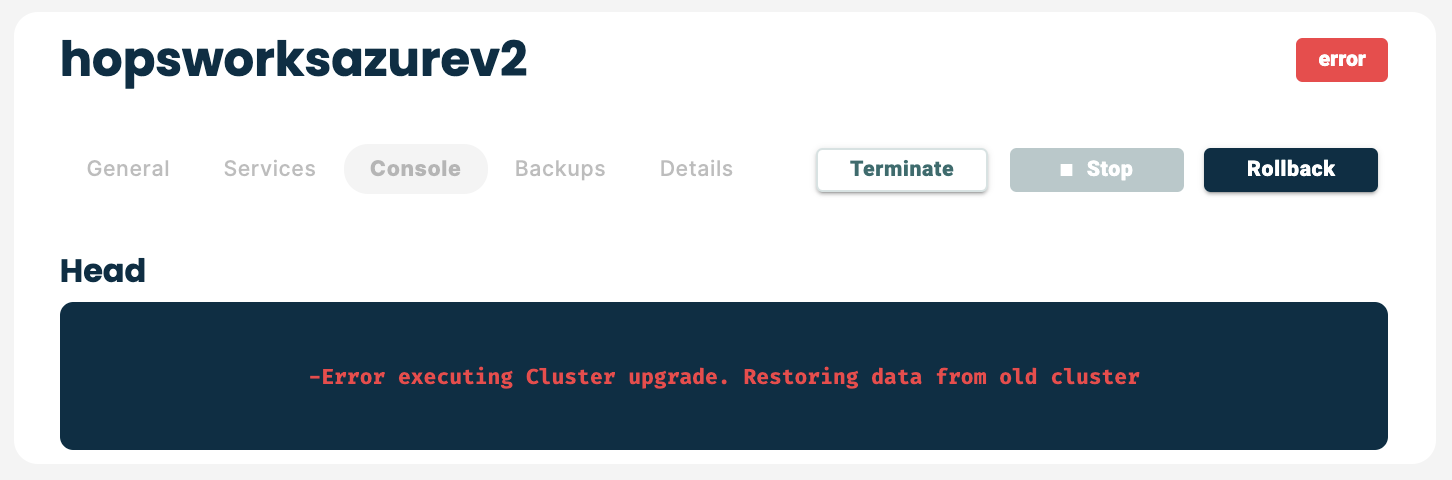
Error 2: Upgrade process error#
If an error occurs during the upgrade process, you will have the option to rollback to your old cluster as shown below:
Click on Rollback to recover your old cluster before upgrade.
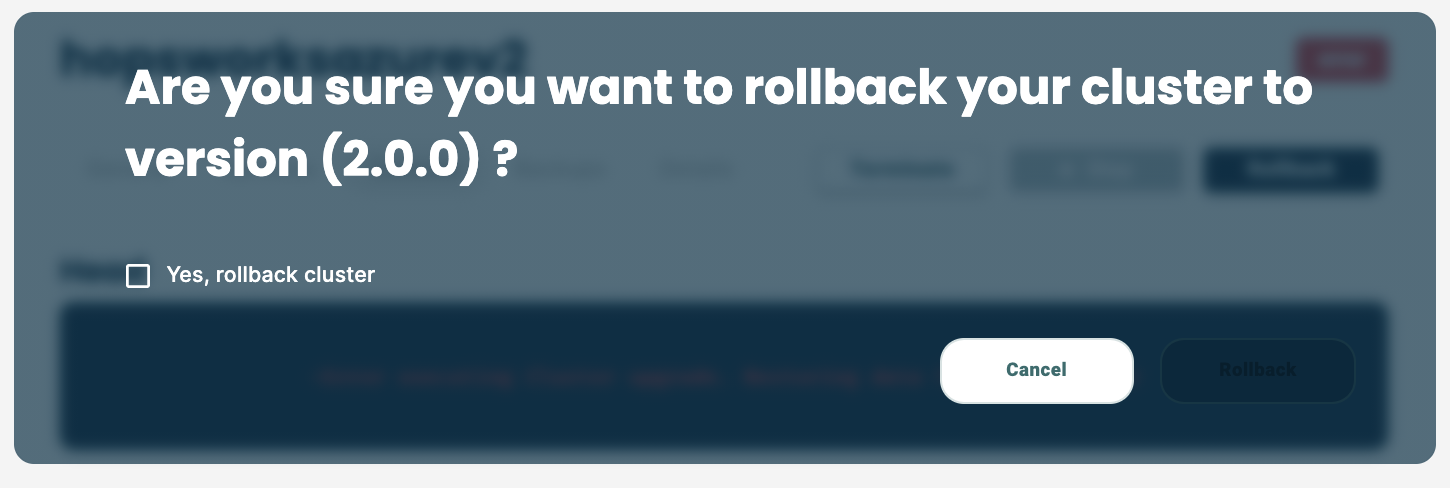
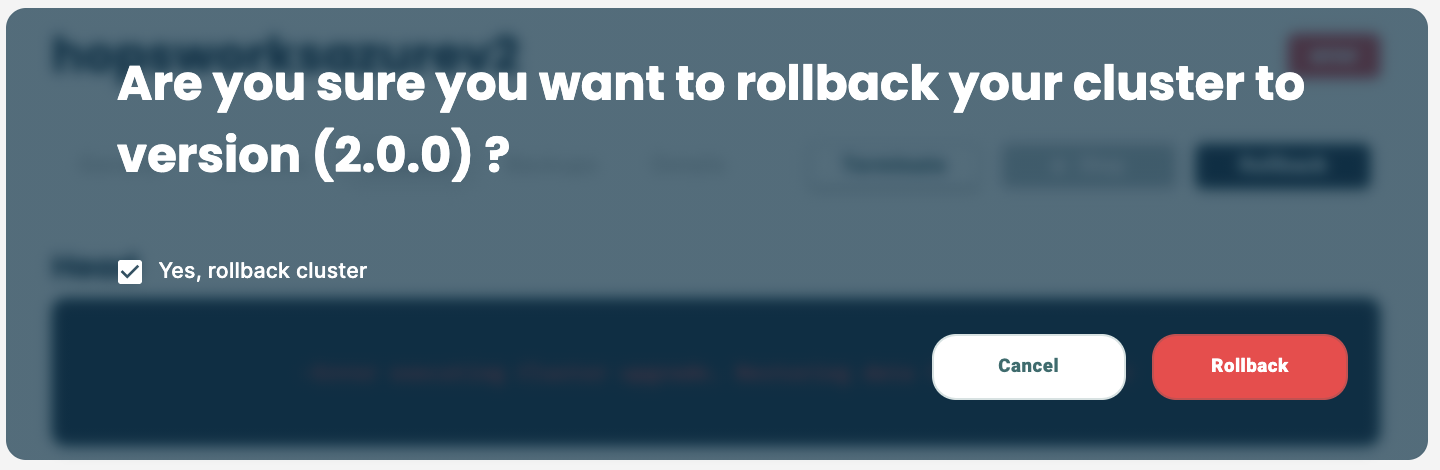
Check the Yes, rollback cluster checkbox to proceed, then the Rollback button will be activated as shown below:
Once the rollback is completed, you will be able to continue working as normal with your old cluster.
Note
The old cluster will be stopped after the rollback. You have to click on the Start button.