Getting started with managed.hopsworks.ai (Google Cloud Platform)#
Managed.hopsworks.ai is our managed platform for running Hopsworks and the Feature Store in the cloud. It integrates seamlessly with third-party platforms such as Databricks, SageMaker and KubeFlow. This guide shows how to set up managed.hopsworks.ai with your organization's Google Cloud Platform's (GCP) account.
Prerequisite#
To follow the instruction of this page you will need the following:
- A GCP project in which the Hopsworks cluster will be deployed. Make sure to enable Compute Engine API, Cloud Resource Manager API, and Identity and Access Management (IAM) API on that project by following this guide.
- The gcloud CLI
- The gsutil tool
Step 1: Connecting your GCP account#
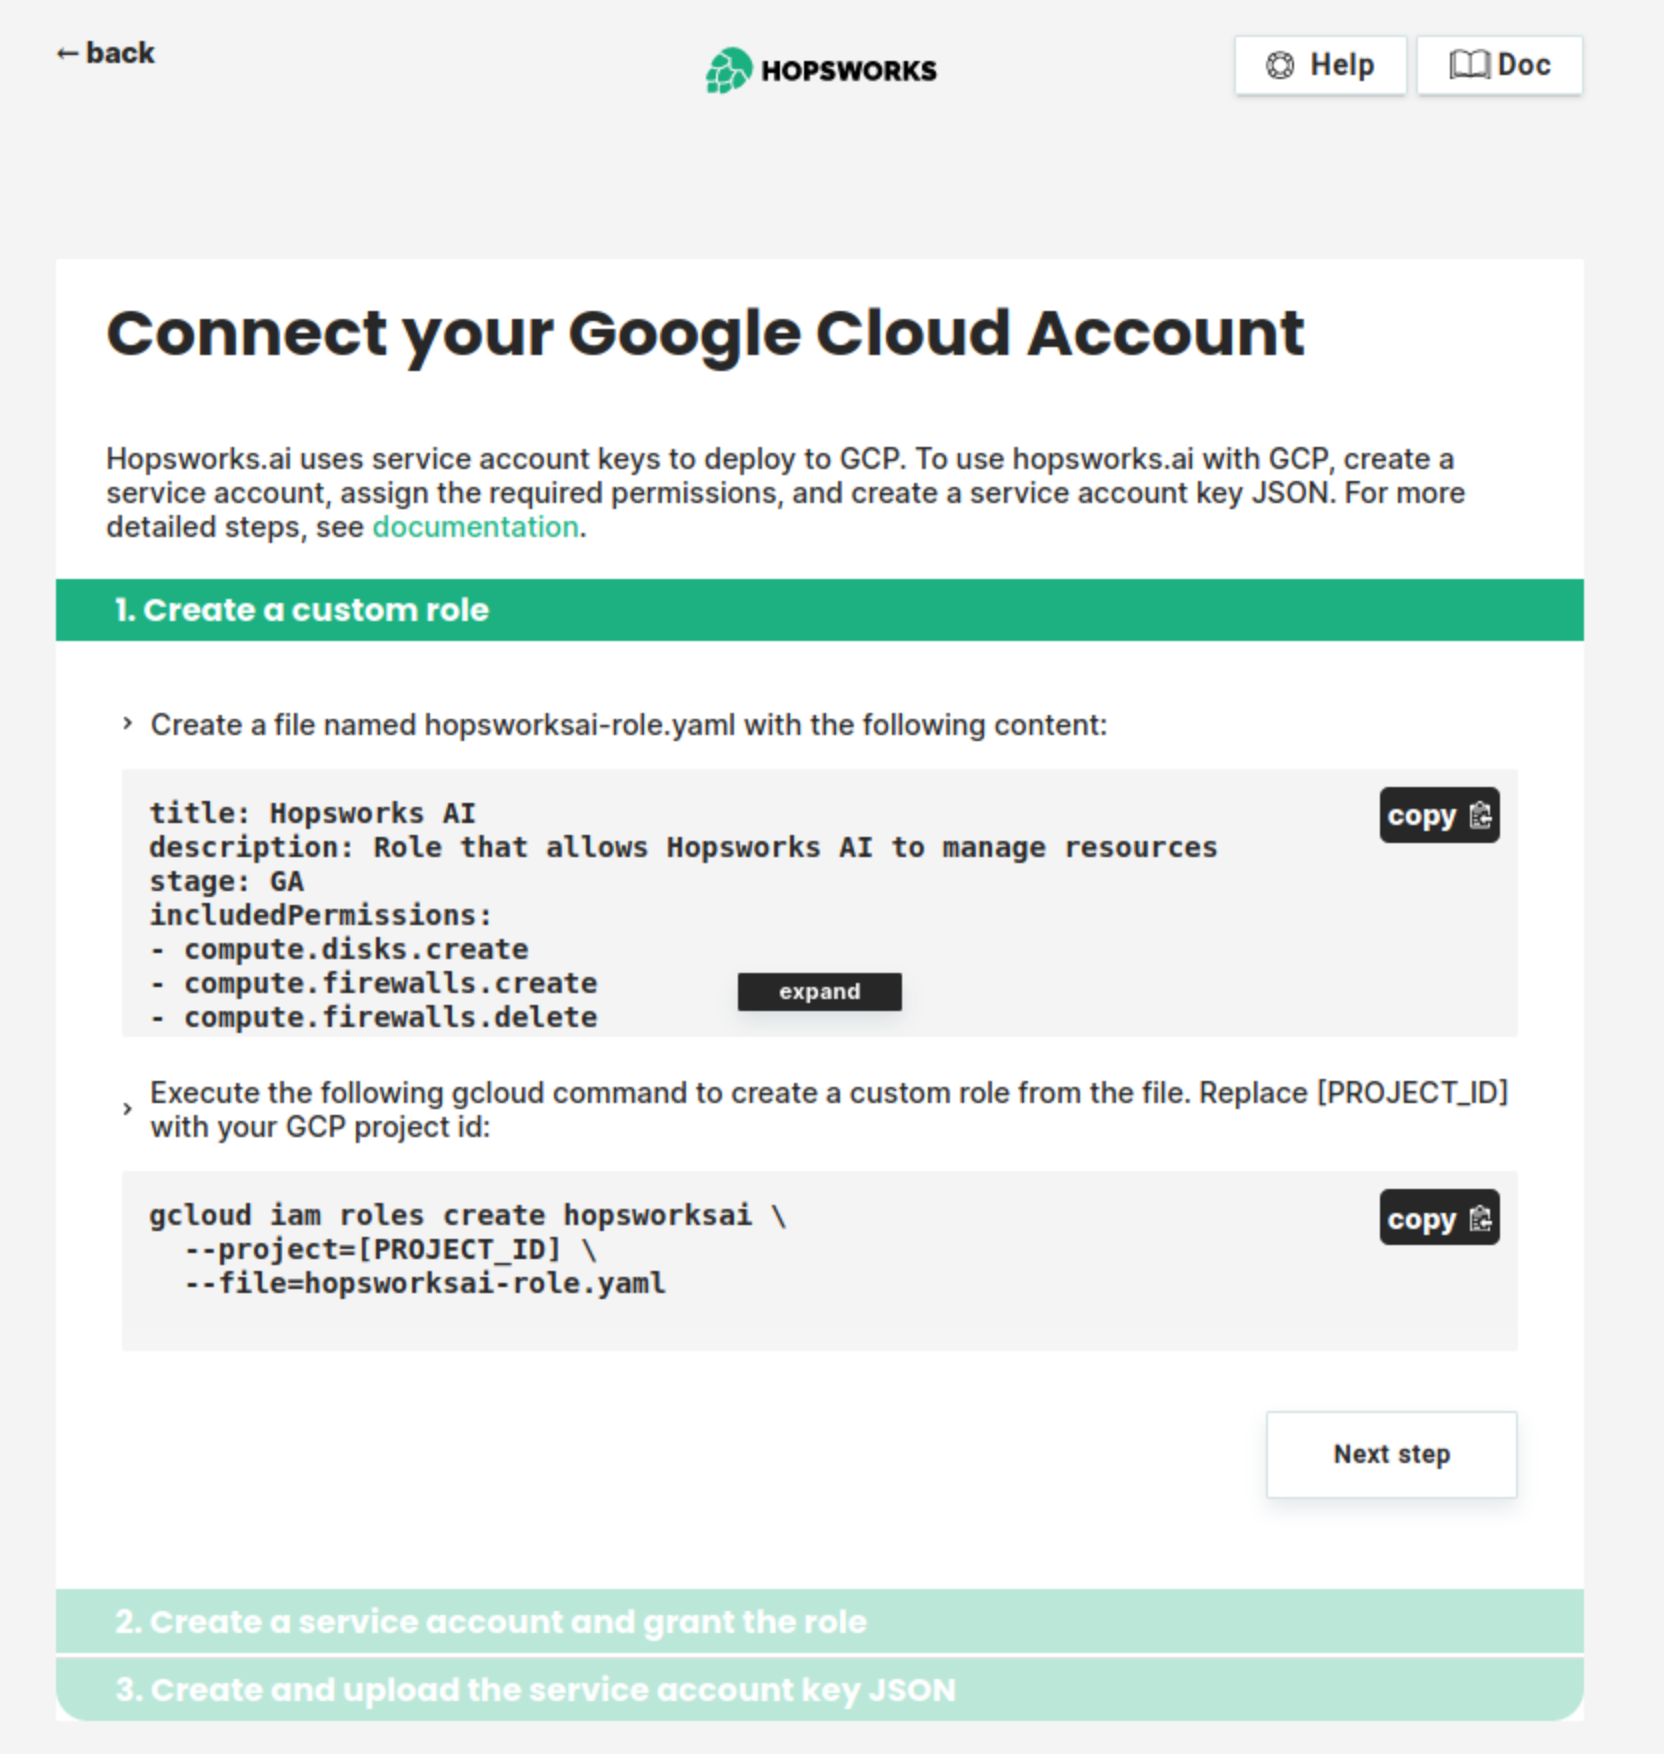
Managed.hopsworks.ai deploys Hopsworks clusters to a project in your GCP account. Managed.hopsworks.ai uses service account keys to connect to your GCP project. To enable this, you need to create a service account in your GCP project. Assign to the service account the required permissions. And, create a service account key JSON. For more details about creating and managing service accounts steps in GCP, see documentation.
In managed.hopsworks.ai click on Connect to GCP or go to Settings and click on Configure next to GCP. This will direct you to a page with the instructions needed to create the service account and set up the connection. Follow the instructions.
Note
it is possible to limit the permissions that step up during this phase. For more details see restrictive-permissions.
Step 2: Creating and configuring a storage#
The Hopsworks clusters deployed by managed.hopsworks.ai store their data in a bucket in your GCP account. To enable this you need to create a bucket and to create a service account with permissions to access the storage.
Step 2.1: Creating a custom role for accessing storage#
Create a file named hopsworksai_instances_role.yaml with the following content:
title: Hopsworks AI Instances
description: Role that allows Hopsworks AI Instances to access resources
stage: GA
includedPermissions:
- storage.buckets.get
- storage.buckets.update
- storage.multipartUploads.abort
- storage.multipartUploads.create
- storage.multipartUploads.list
- storage.multipartUploads.listParts
- storage.objects.create
- storage.objects.delete
- storage.objects.get
- storage.objects.list
- storage.objects.update
Note
it is possible to limit the permissions that set up during this phase. For more details see restrictive-permissions.
Execute the following gcloud command to create a custom role from the file. Replace [PROJECT_ID] with your GCP project id:
gcloud iam roles create hopsworksai_instances \
  --project=[PROJECT_ID] \
  --file=hopsworksai_instances_role.yaml
Step 2.2: Creating a service account#
Execute the following gcloud command to create a service account for Hopsworks AI instances. Replace [PROJECT_ID] with your GCP project id:
gcloud iam service-accounts create hopsworks-ai-instances \
  --project=[PROJECT_ID] \
  --description="Service account for Hopsworks AI instances" \
  --display-name="Hopsworks AI instances"
Execute the following gcloud command to bind the custom role to the service account. Replace all occurrences [PROJECT_ID] with your GCP project id:
gcloud projects add-iam-policy-binding [PROJECT_ID] \
  --member="serviceAccount:hopsworks-ai-instances@[PROJECT_ID].iam.gserviceaccount.com" \
  --role="projects/[PROJECT_ID]/roles/hopsworksai_instances"
Step 2.3: Creating a Bucket#
Execute the following gsutil command to create a bucket. Replace all occurrences [PROJECT_ID] with your GCP project id and [BUCKET_NAME] by the name you want to give to your bucket:
gsutil mb -p [PROJECT_ID] gs://[BUCKET_NAME]
Note
The Hopsworks cluster created by managed.hopsworks.ai must be in the same region as the bucket. The above command will create the bucket in the US so in the following steps, you must deploy your cluster in a US region. If you want to deploy your cluster in another part of the word us the -l option of gsutil mb. For more detail about creating buckets with gsutil see the documentation
Step 4: Deploying a Hopsworks cluster#
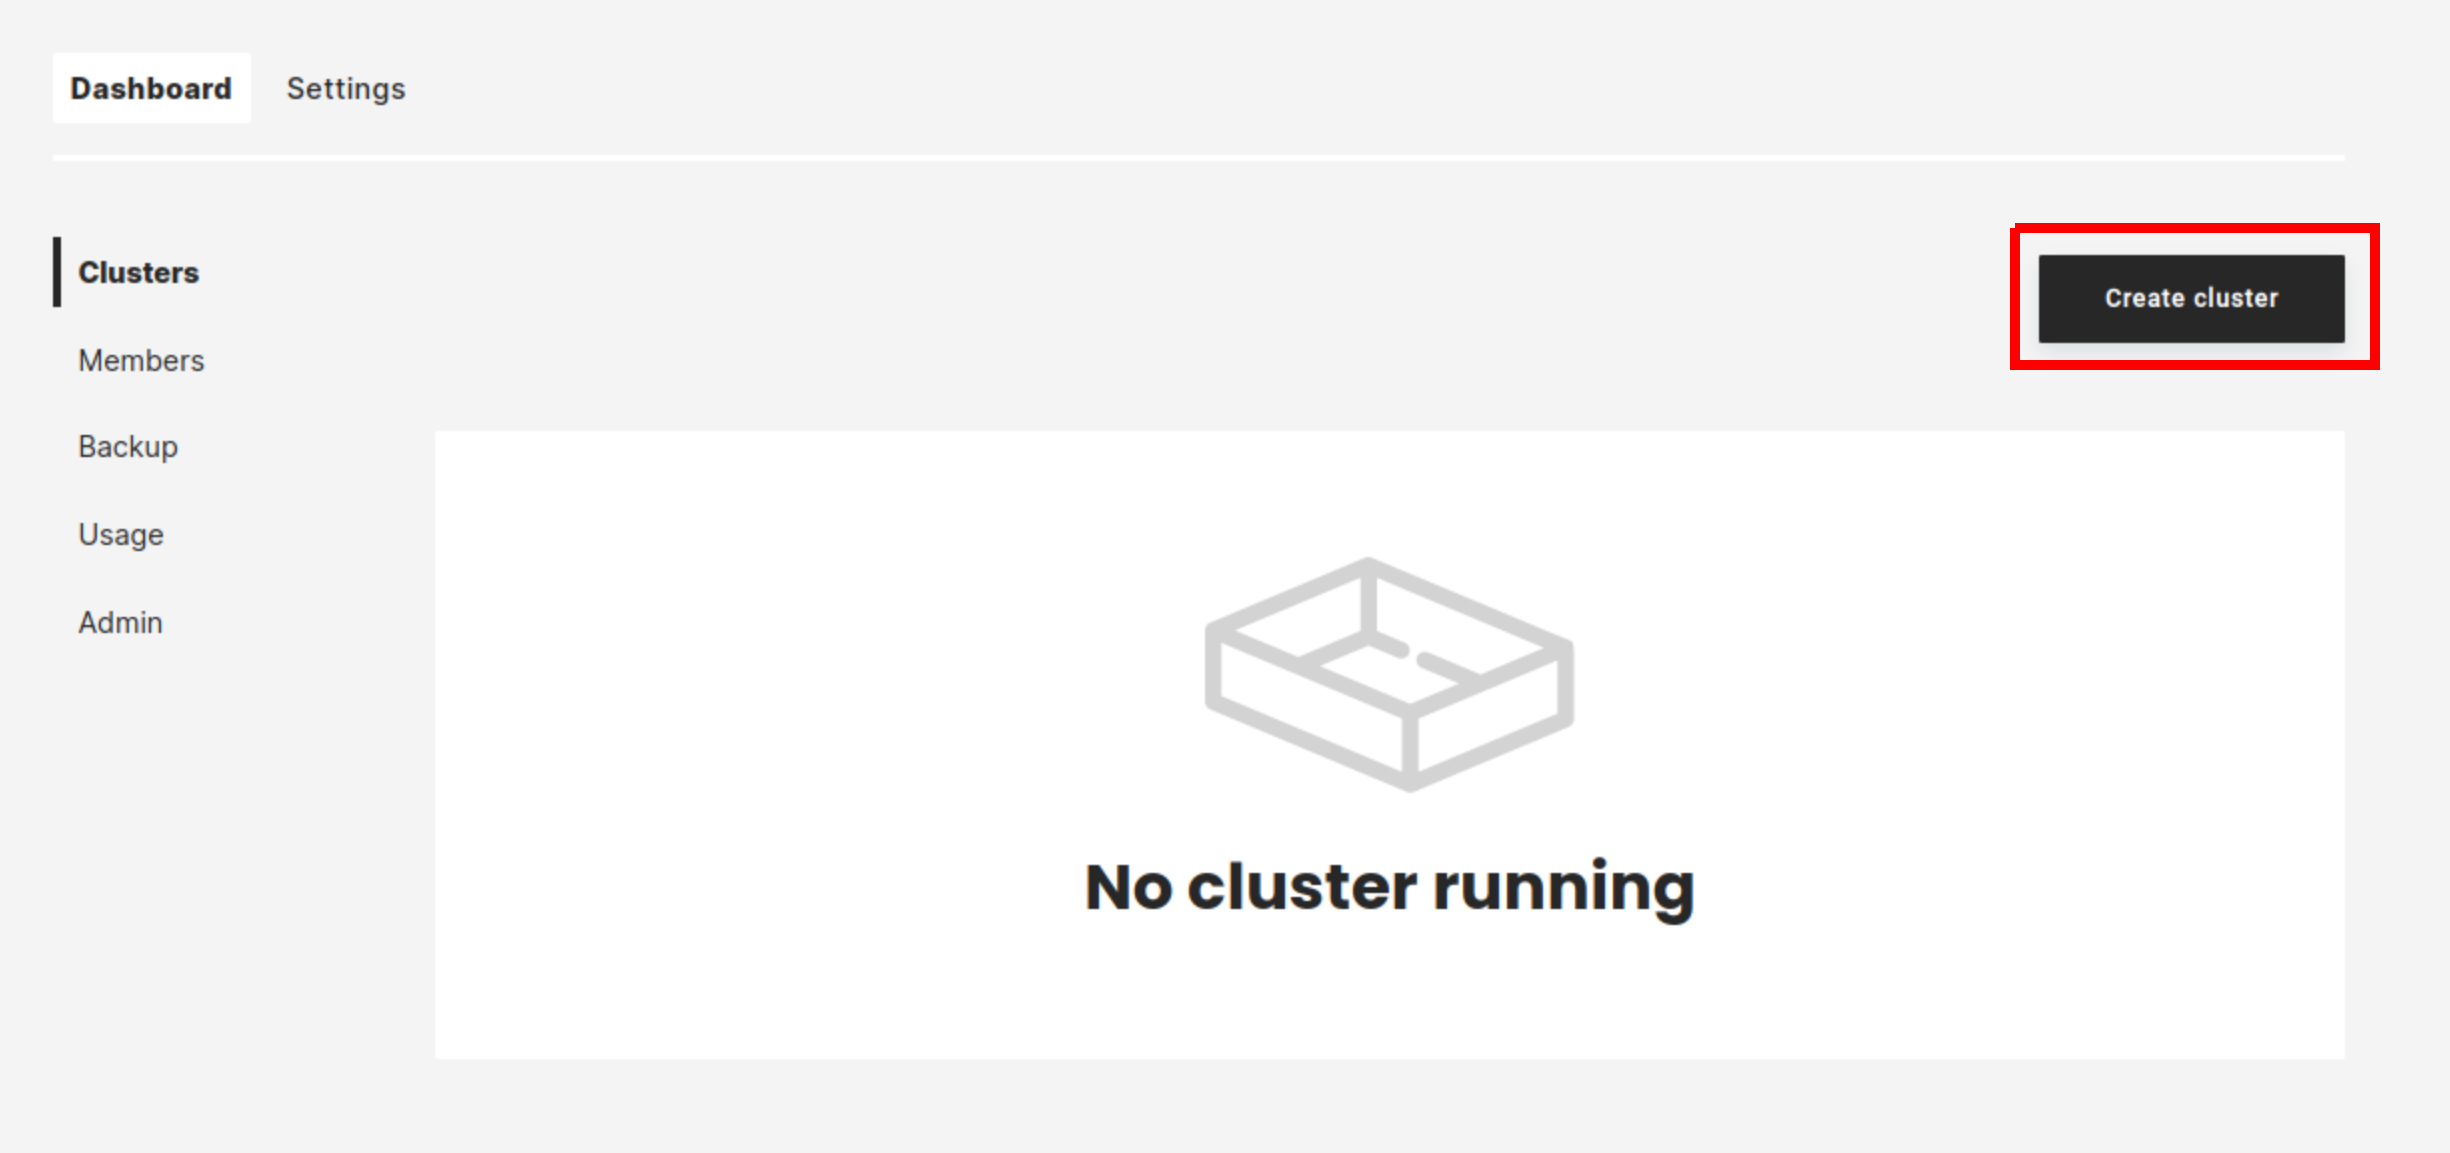
In managed.hopsworks.ai, select Create cluster:
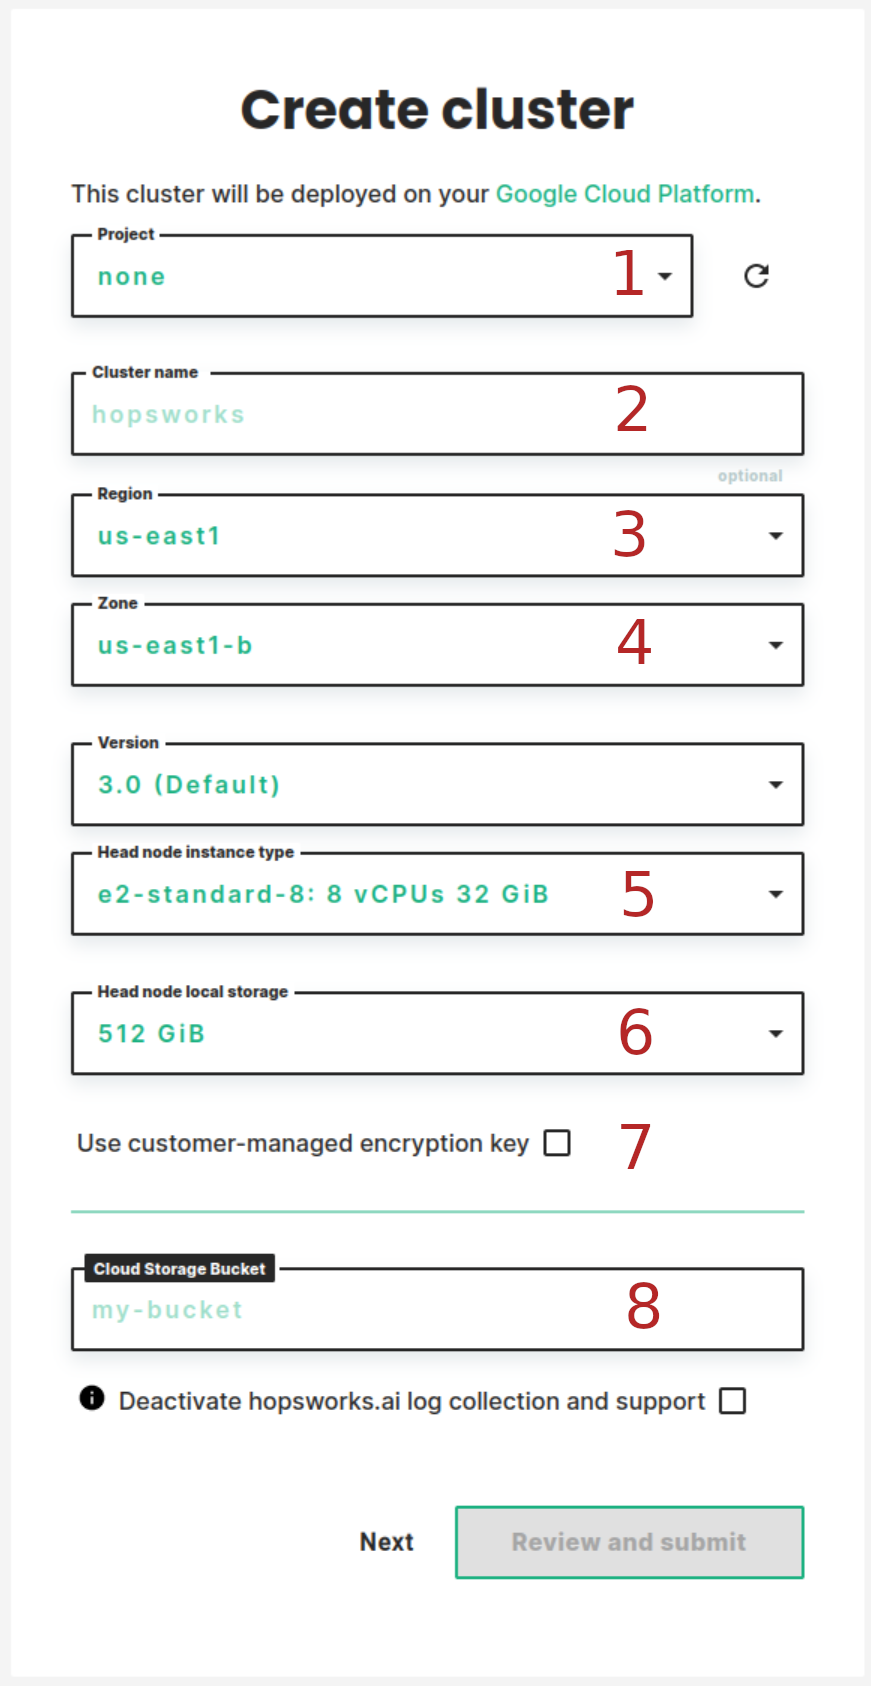
Select the Project (1) in which you created your Bucket and Service Account (see above).
Note
If the Project does not appear in the drop-down, make sure that you properly Connected your GCP account for this project.
Name your cluster (2). Choose the Region(3) and Zone(4) in which to deploy the cluster.
Warning
The cluster must be deployed in a region having access to the bucket you created above.
Select the Instance type (5) and Local storage (6) size for the cluster Head node.
Enter the name of the bucket you created above in Cloud Storage Bucket (7)
Press Next:
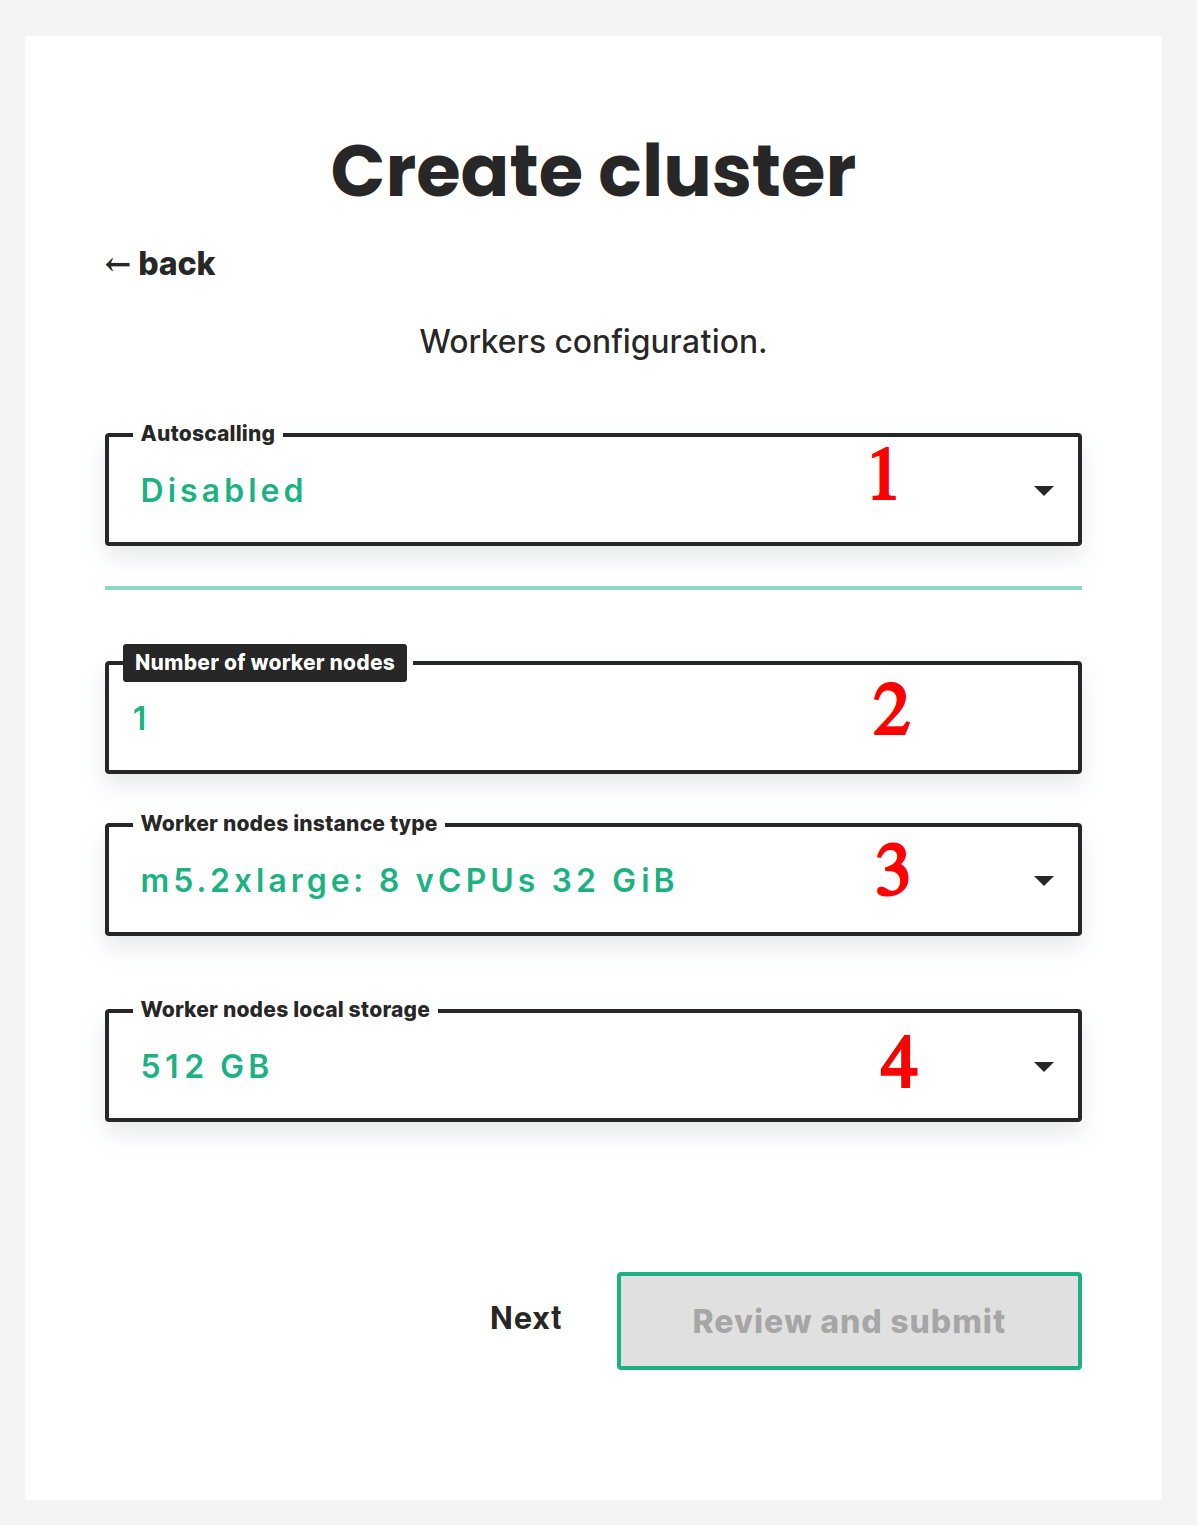
Select the number of workers you want to start the cluster with (2). Select the Instance type (3) and Local storage size (4) for the worker nodes.
Note
It is possible to add or remove workers or to enable autoscaling once the cluster is running.
Press Next:
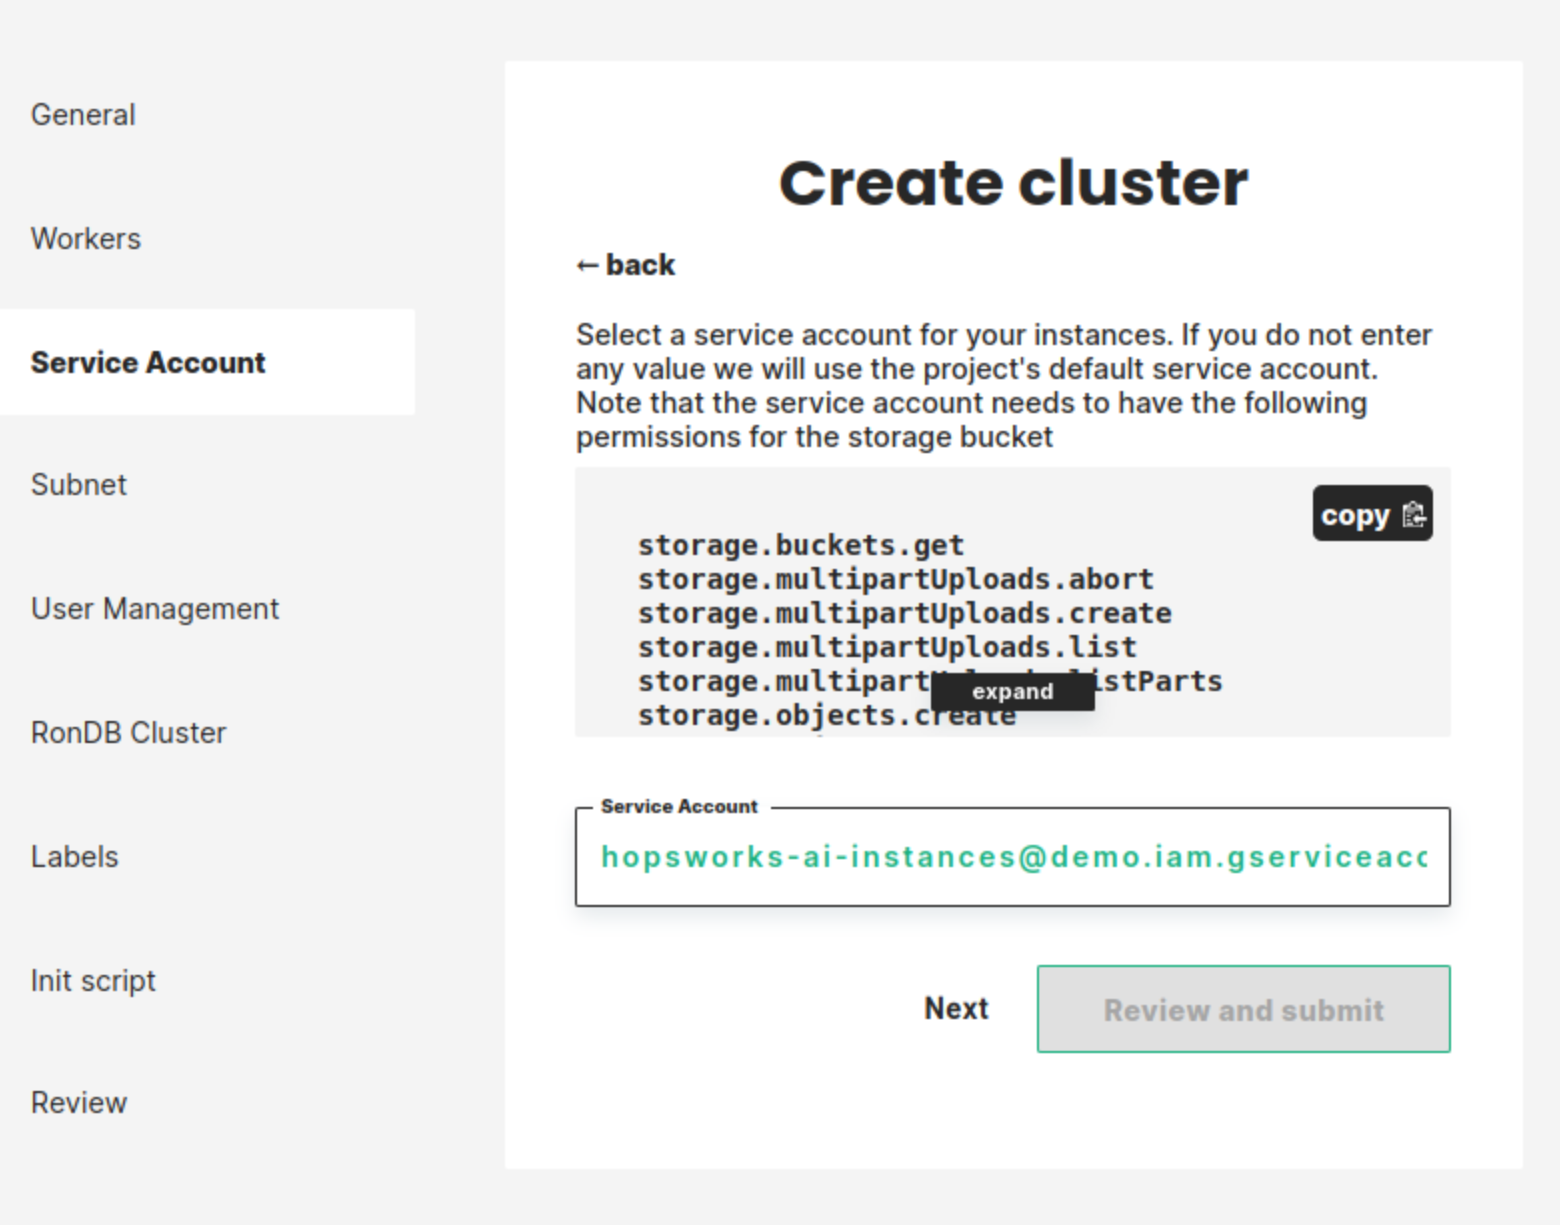
Enter Email of the instances service account that you created above. If you followed the instruction it should be hopsworks-ai-instances@[PROJECT_ID].iam.gserviceaccount.com with [PROJECT_ID] the name of your project:
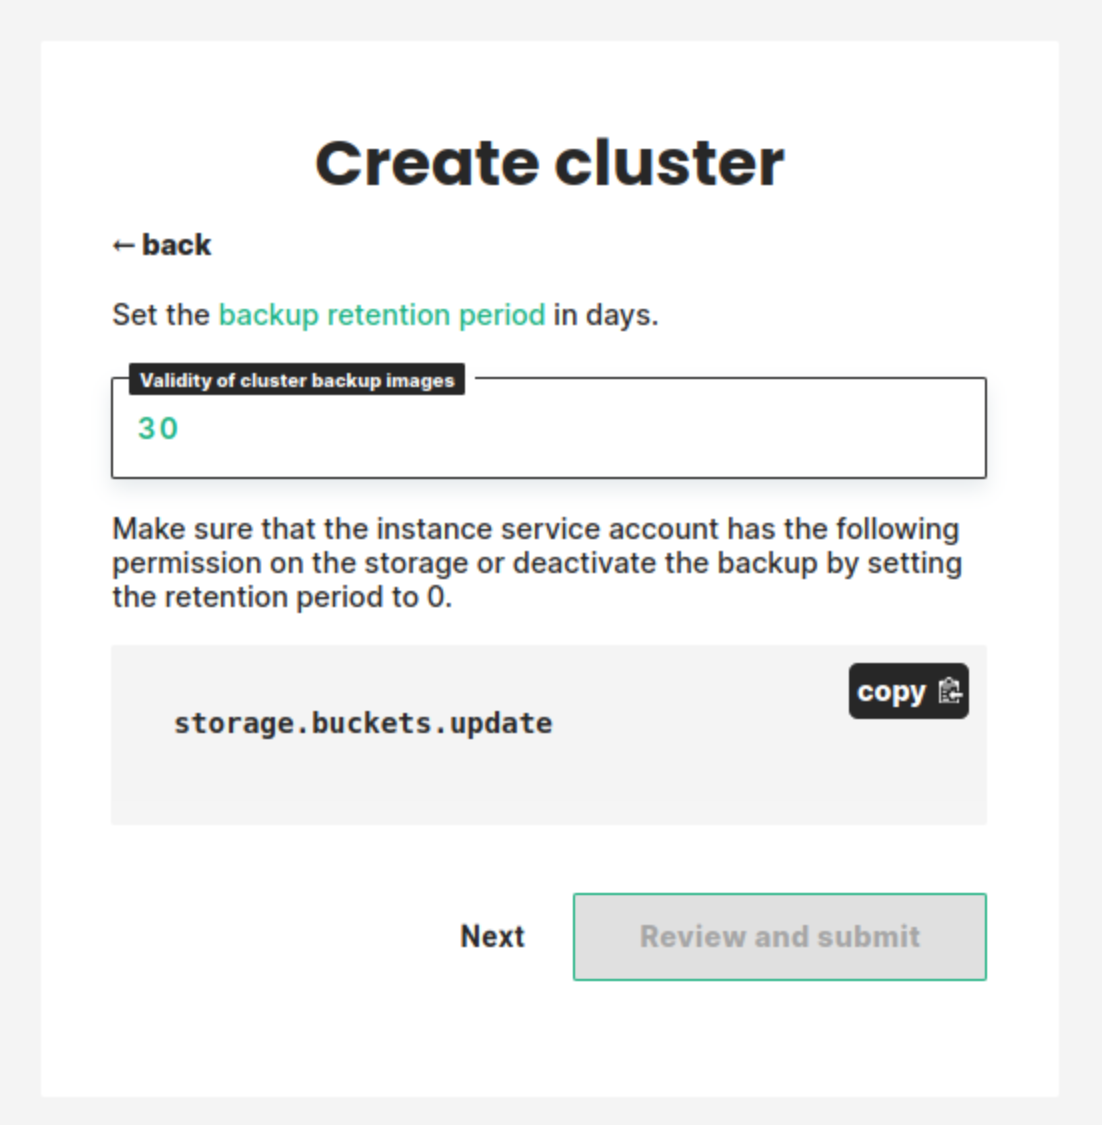
To backup the storage bucket data when taking a cluster backup we need to set a retention policy for the bucket. You can deactivate the retention policy by setting this value to 0 but this will block you from taking any backup of your cluster. Choose the retention period in days and click on Review and submit.
Review all information and select Create:
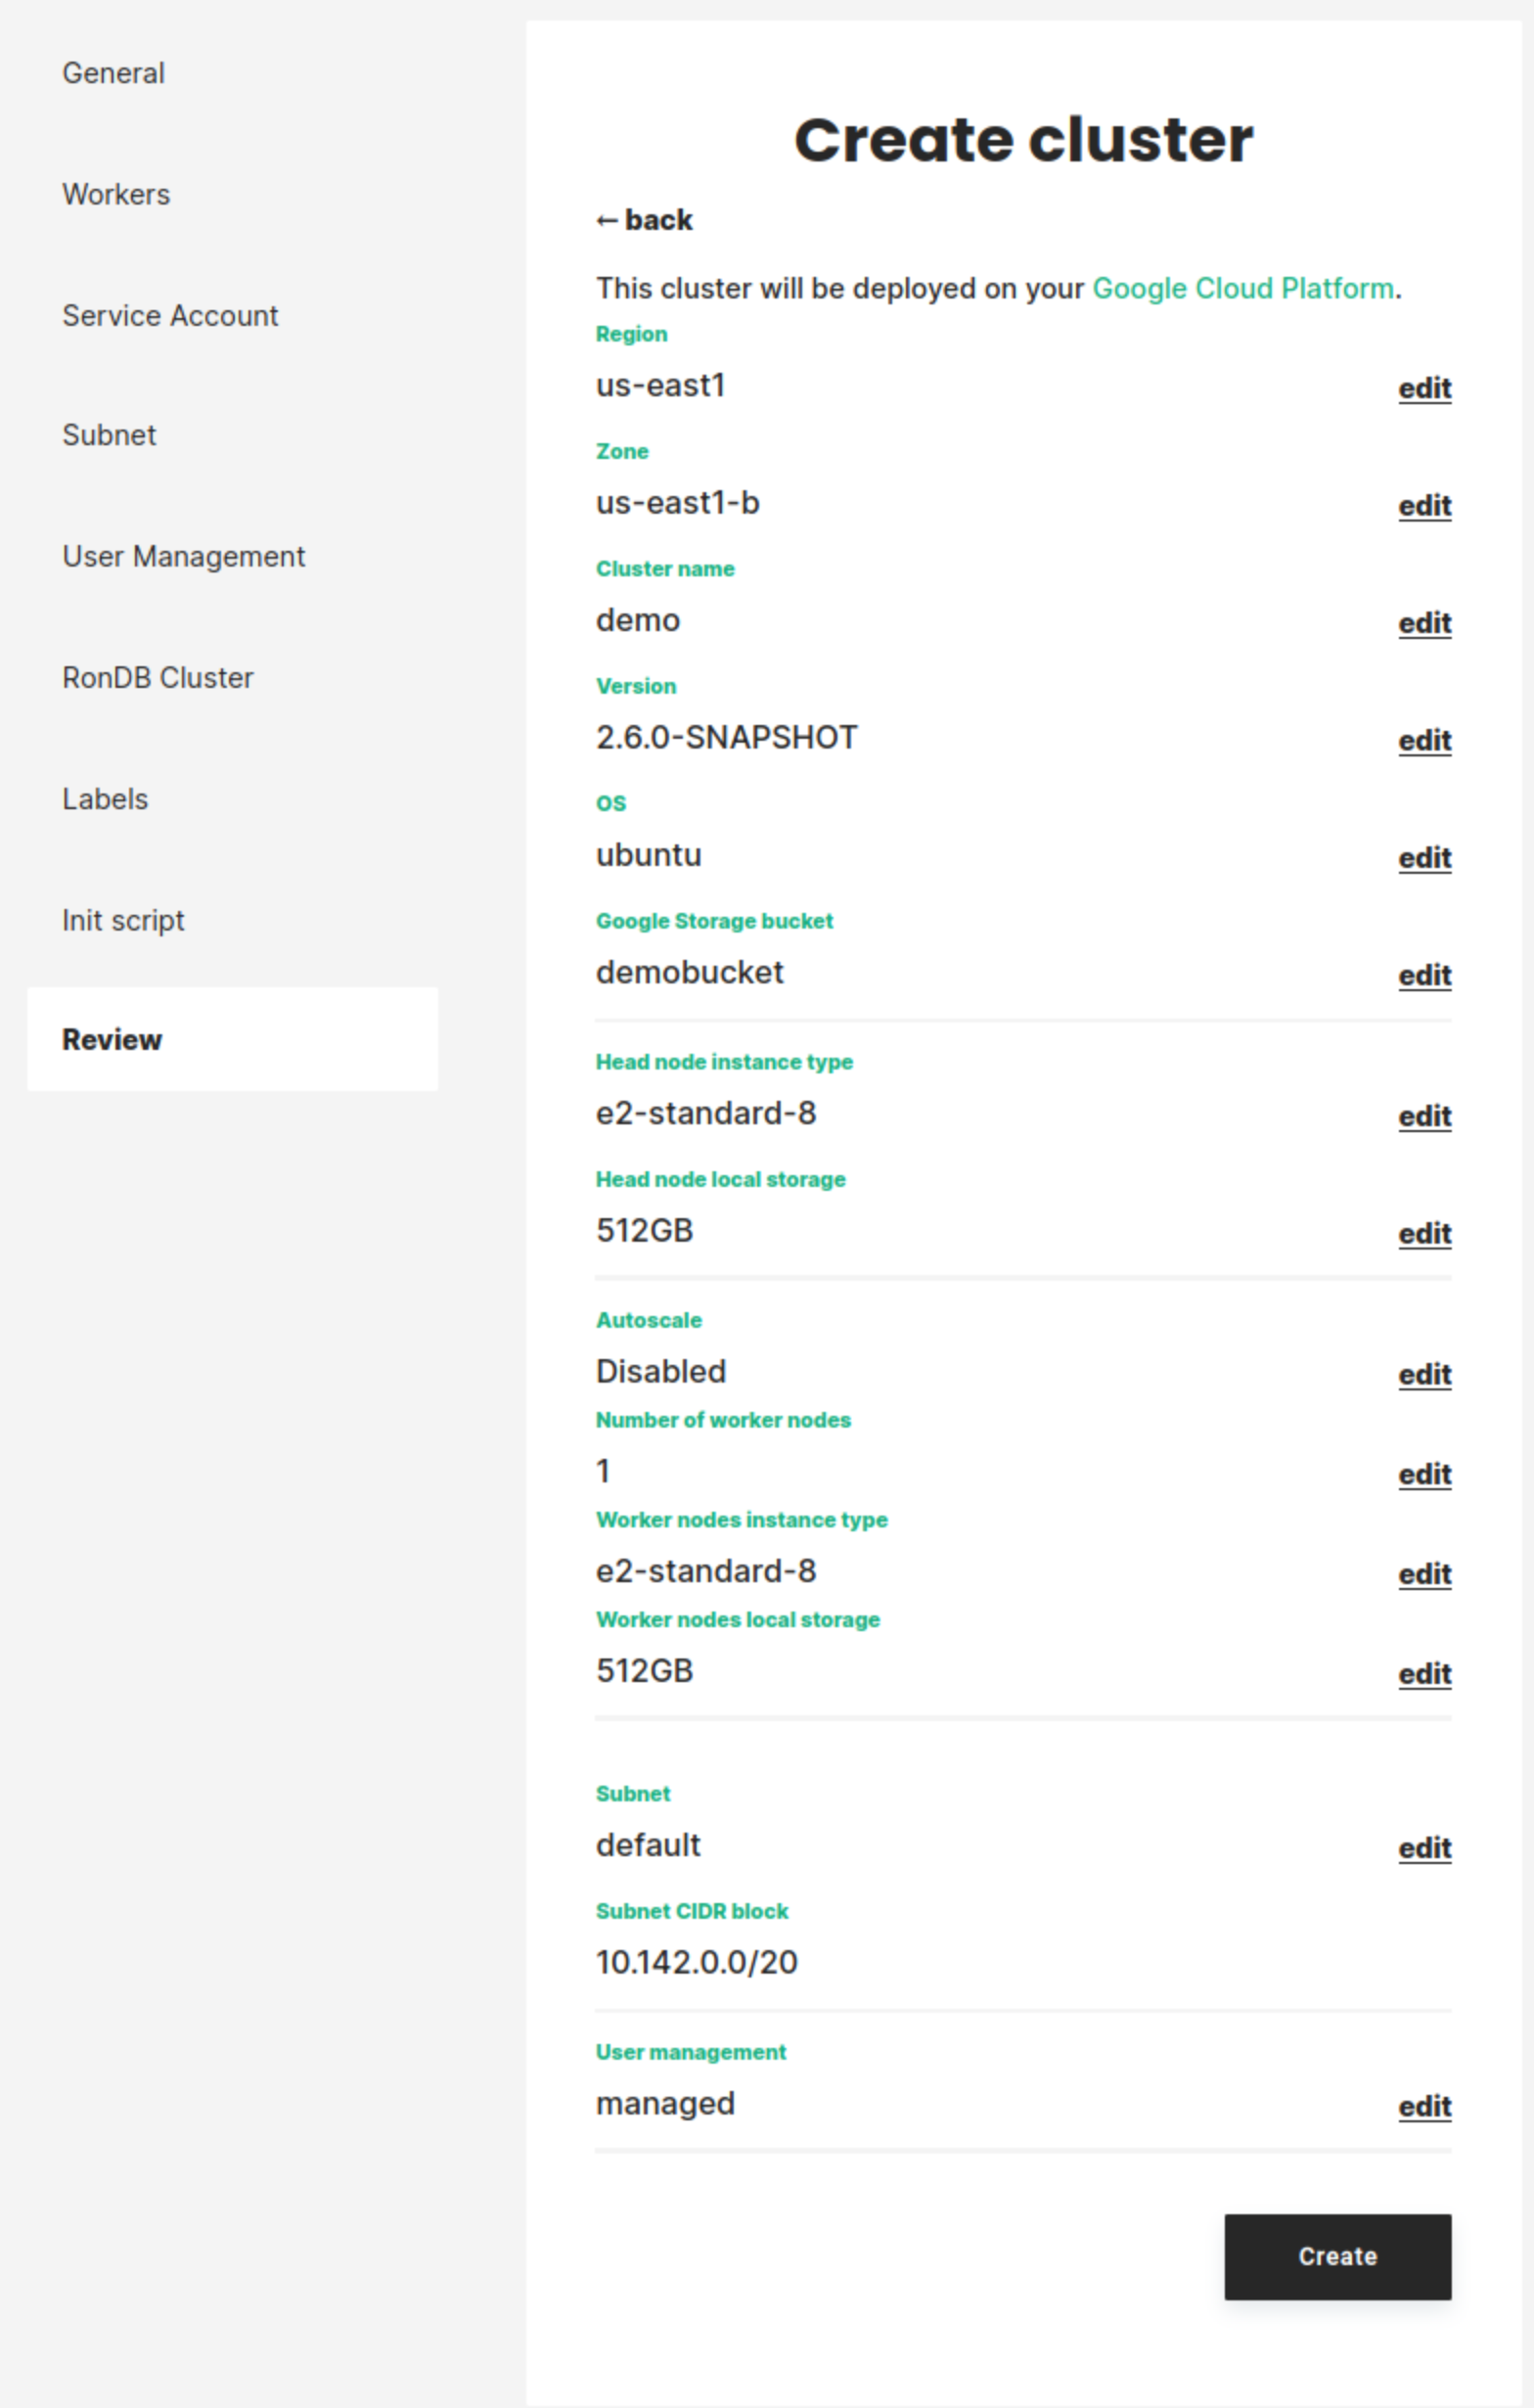
Note
We skipped cluster creation steps that are not mandatory.
The cluster will start. This will take a few minutes:
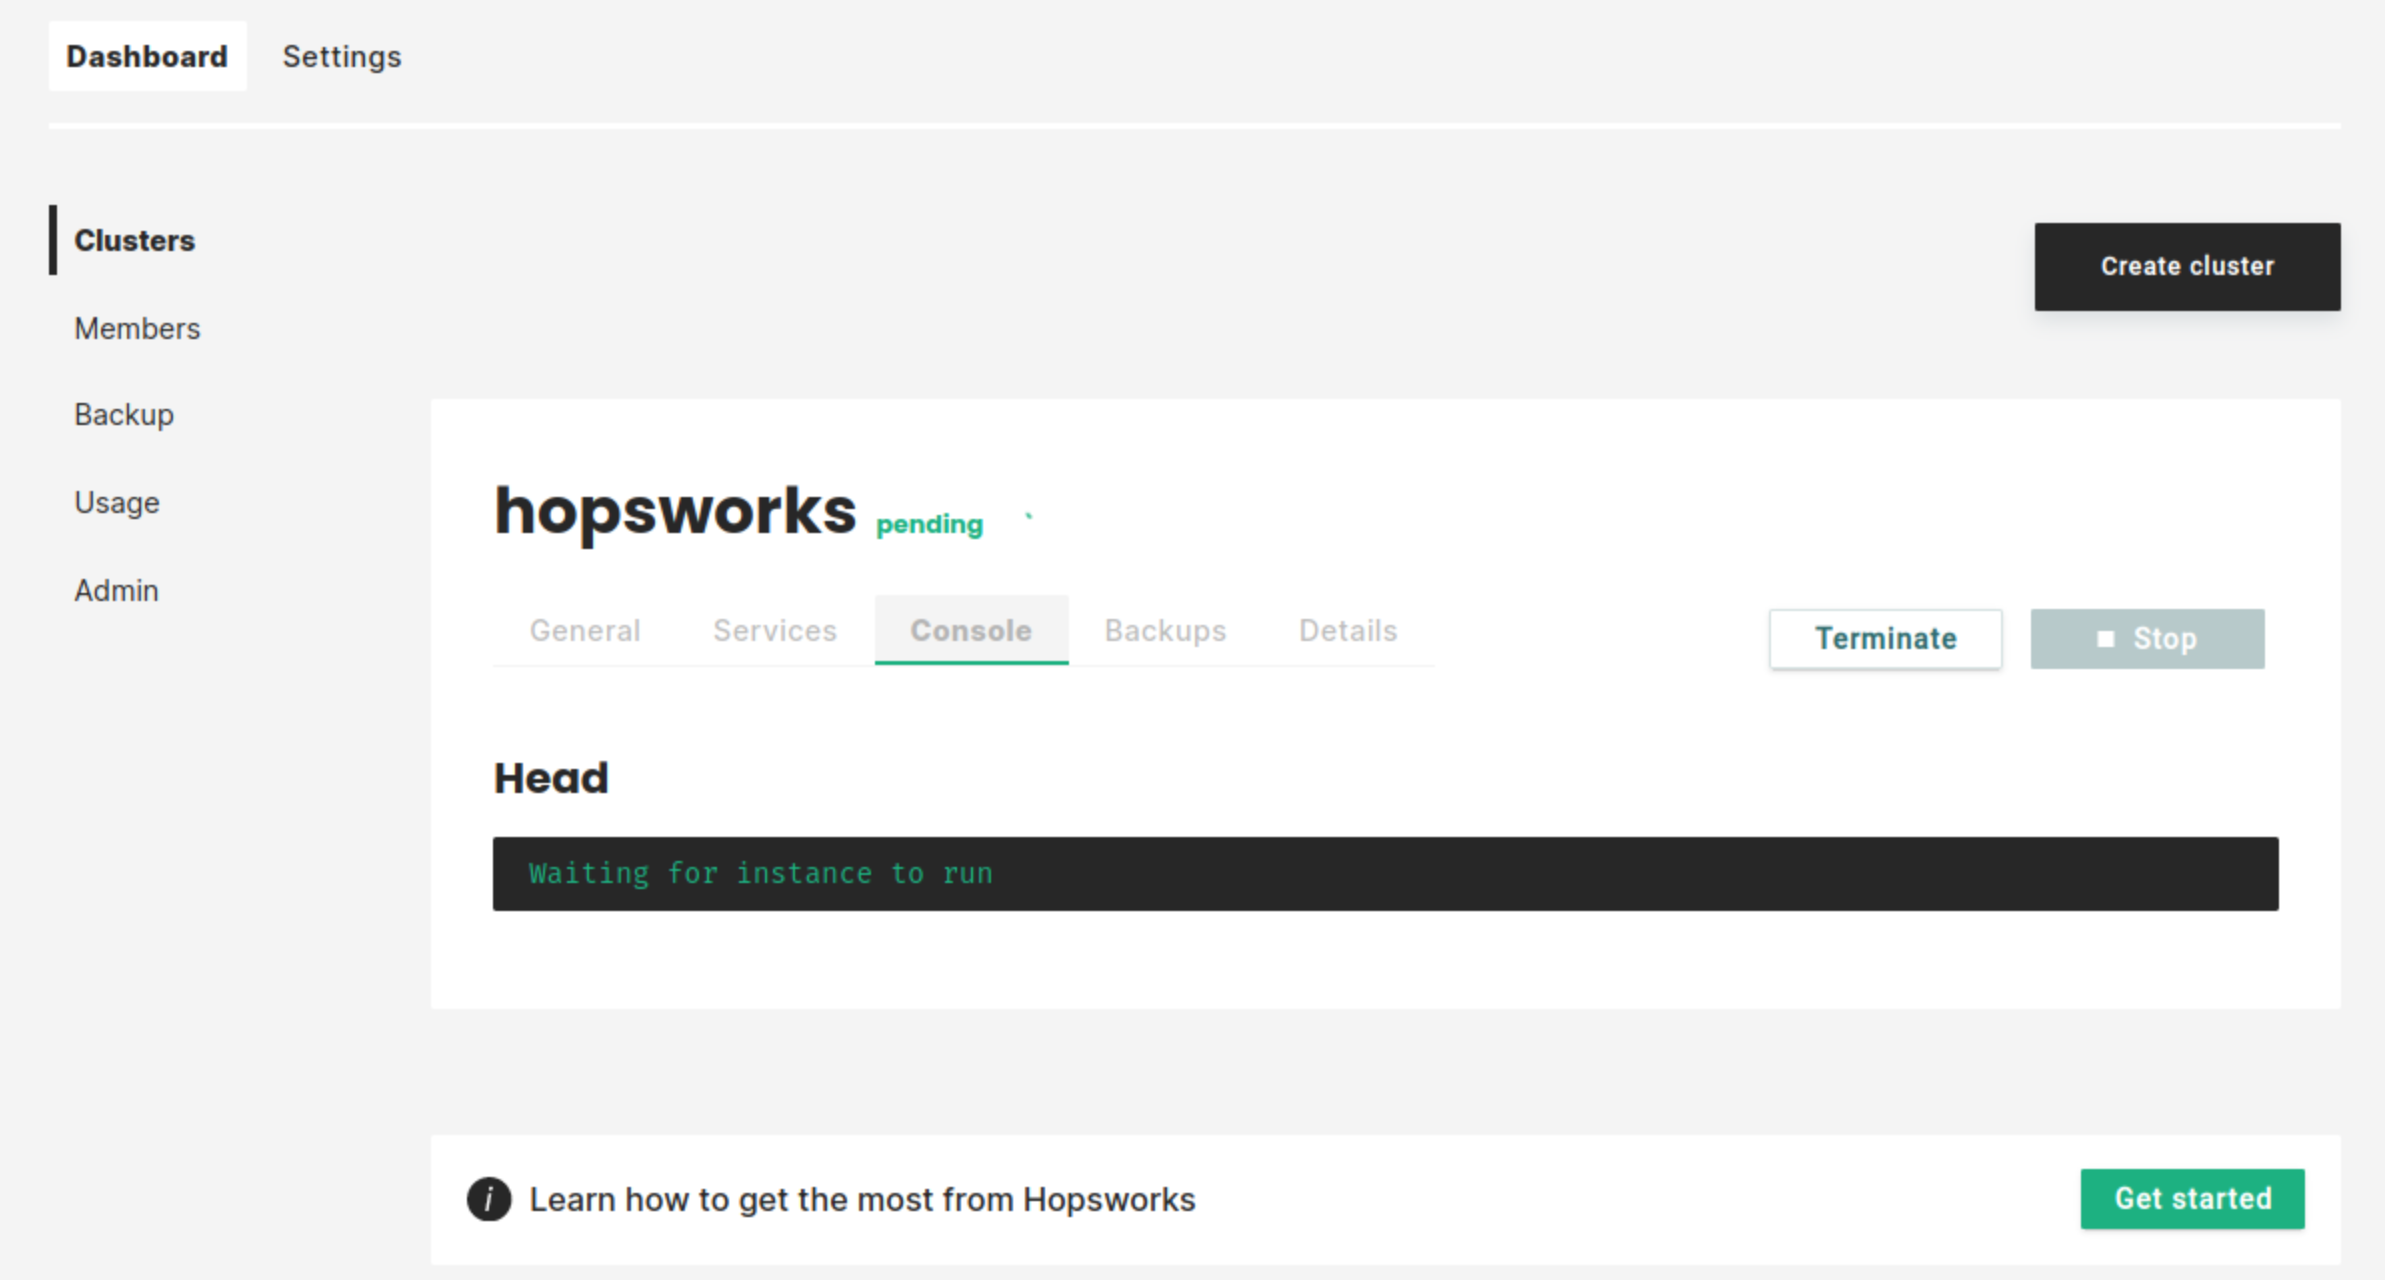
As soon as the cluster has started, you will be able to log in to your new Hopsworks cluster. You will also be able to stop, restart or terminate the cluster.

Step 5: Next steps#
Check out our other guides for how to get started with Hopsworks and the Feature Store:
- Make Hopsworks services accessible from outside services
- Get started with the Hopsworks Feature Store
- Follow one of our tutorials
- Follow one of our Guide
- Code examples and notebooks: hops-examples