How To Run A Spark Notebook#
Introduction#
Jupyter is provided as a service in Hopsworks, providing the same user experience and features as if run on your laptop.
- Supports JupyterLab and the classic Jupyter front-end
- Configured with Python3, Spark, PySpark and SparkR kernels
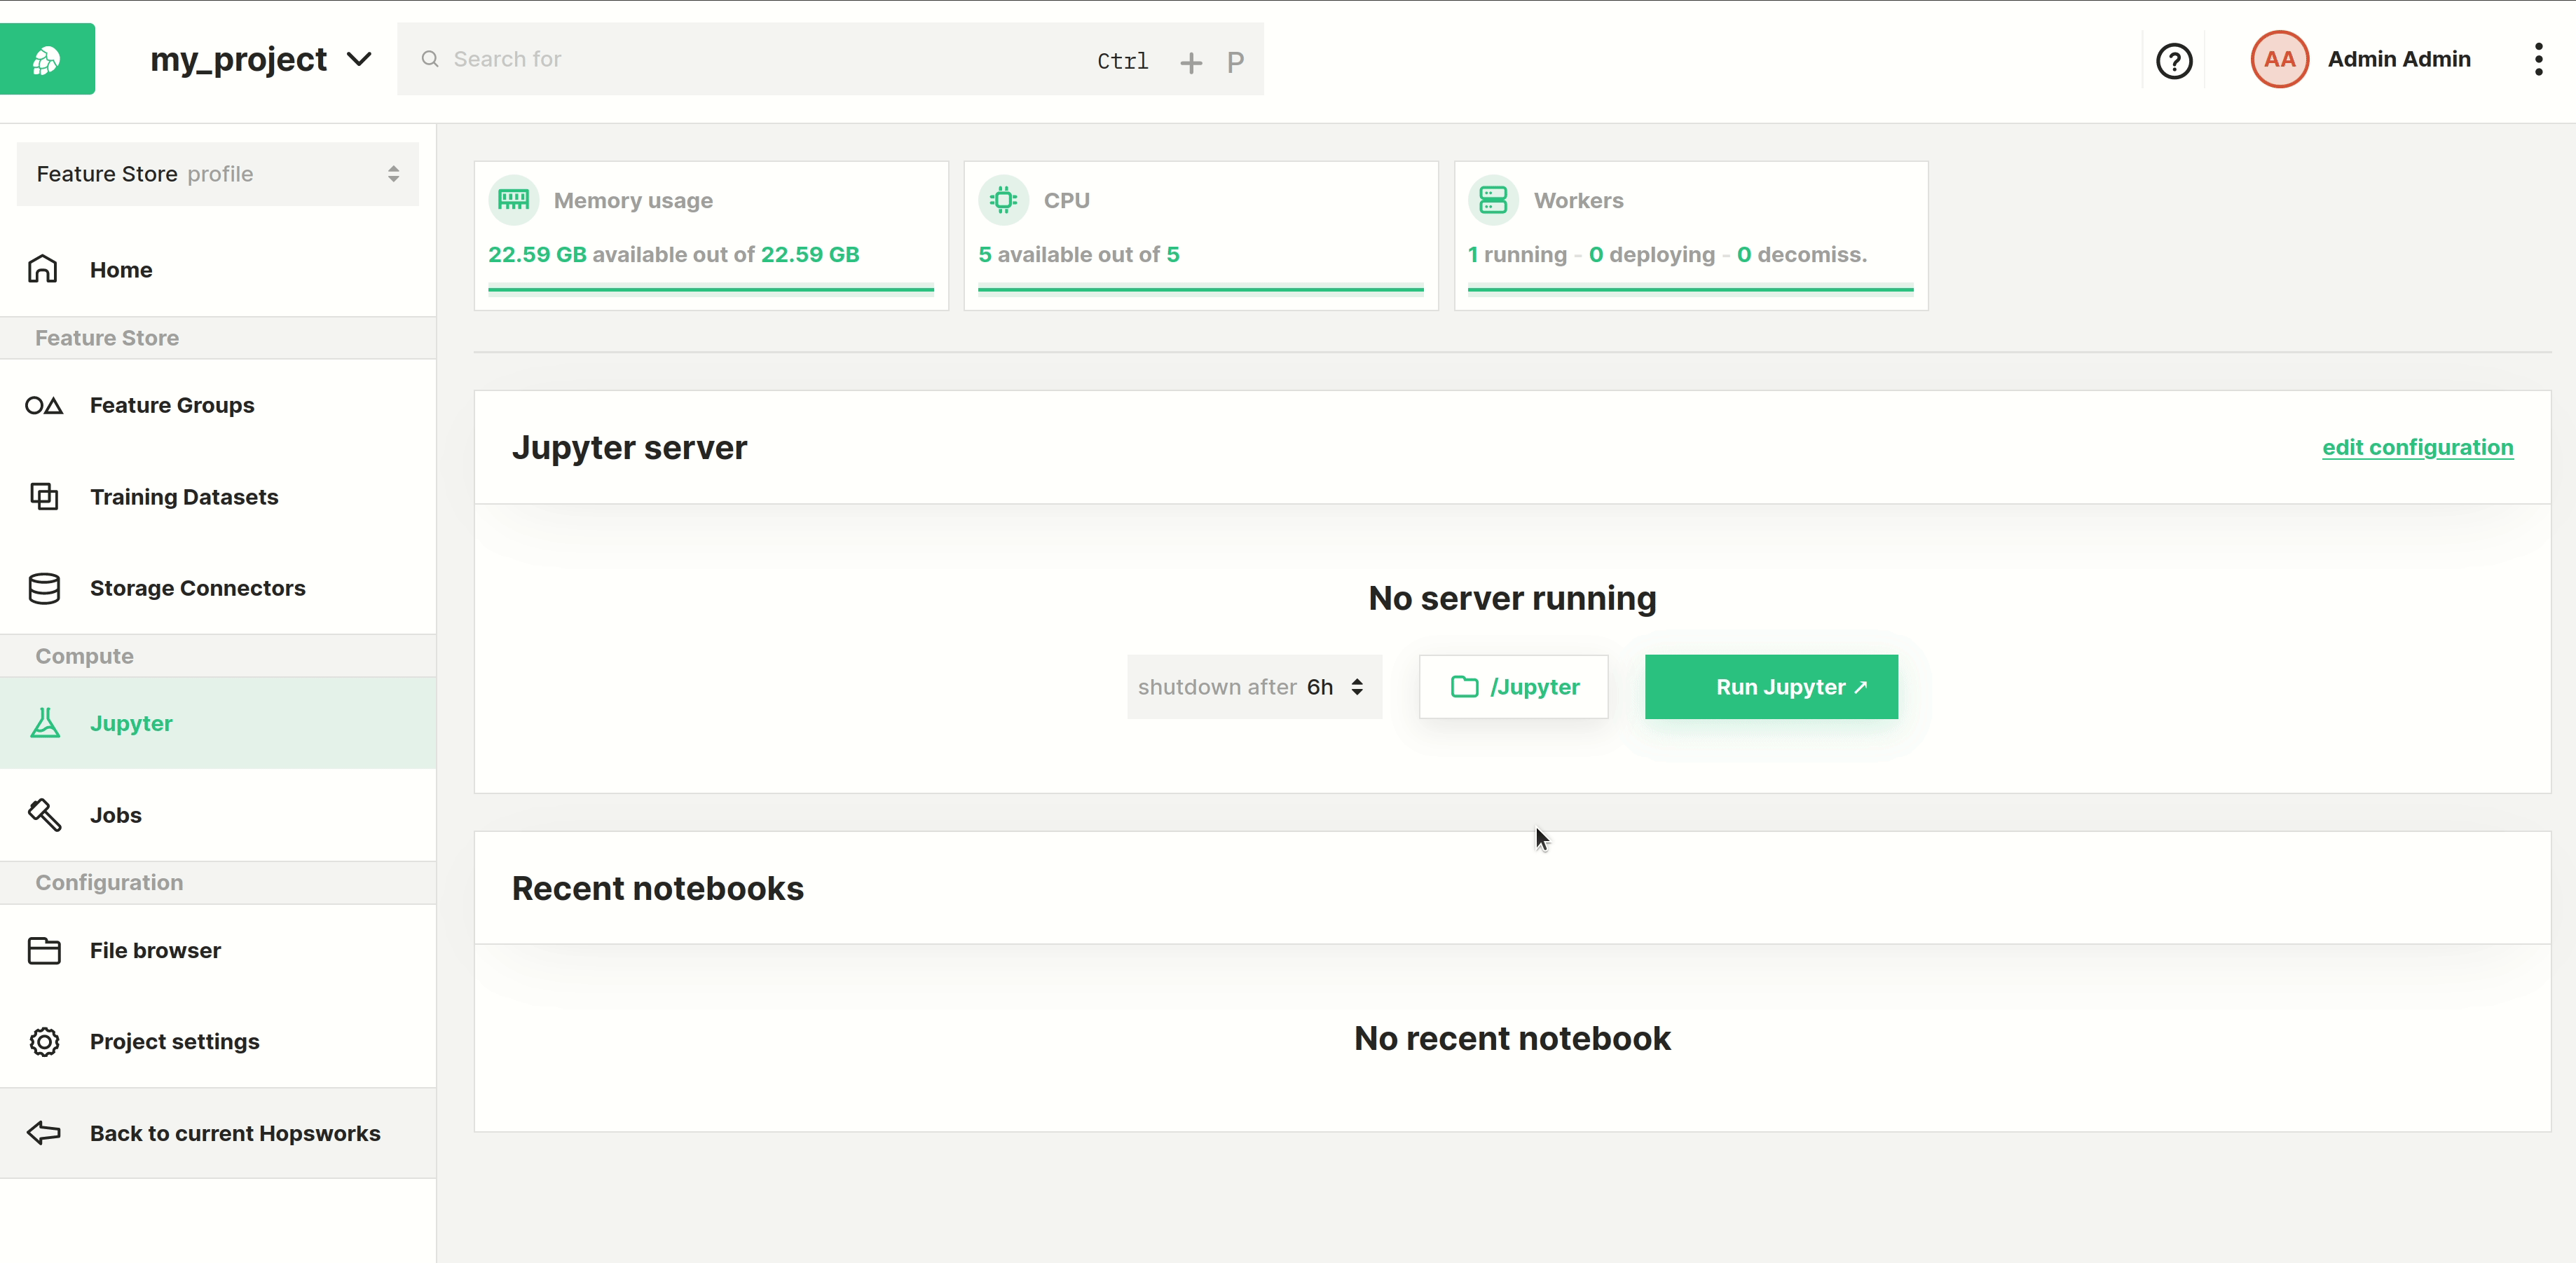
Step 1: Jupyter dashboard#
The image below shows the Jupyter service page in Hopsworks and is accessed by clicking Jupyter in the sidebar.
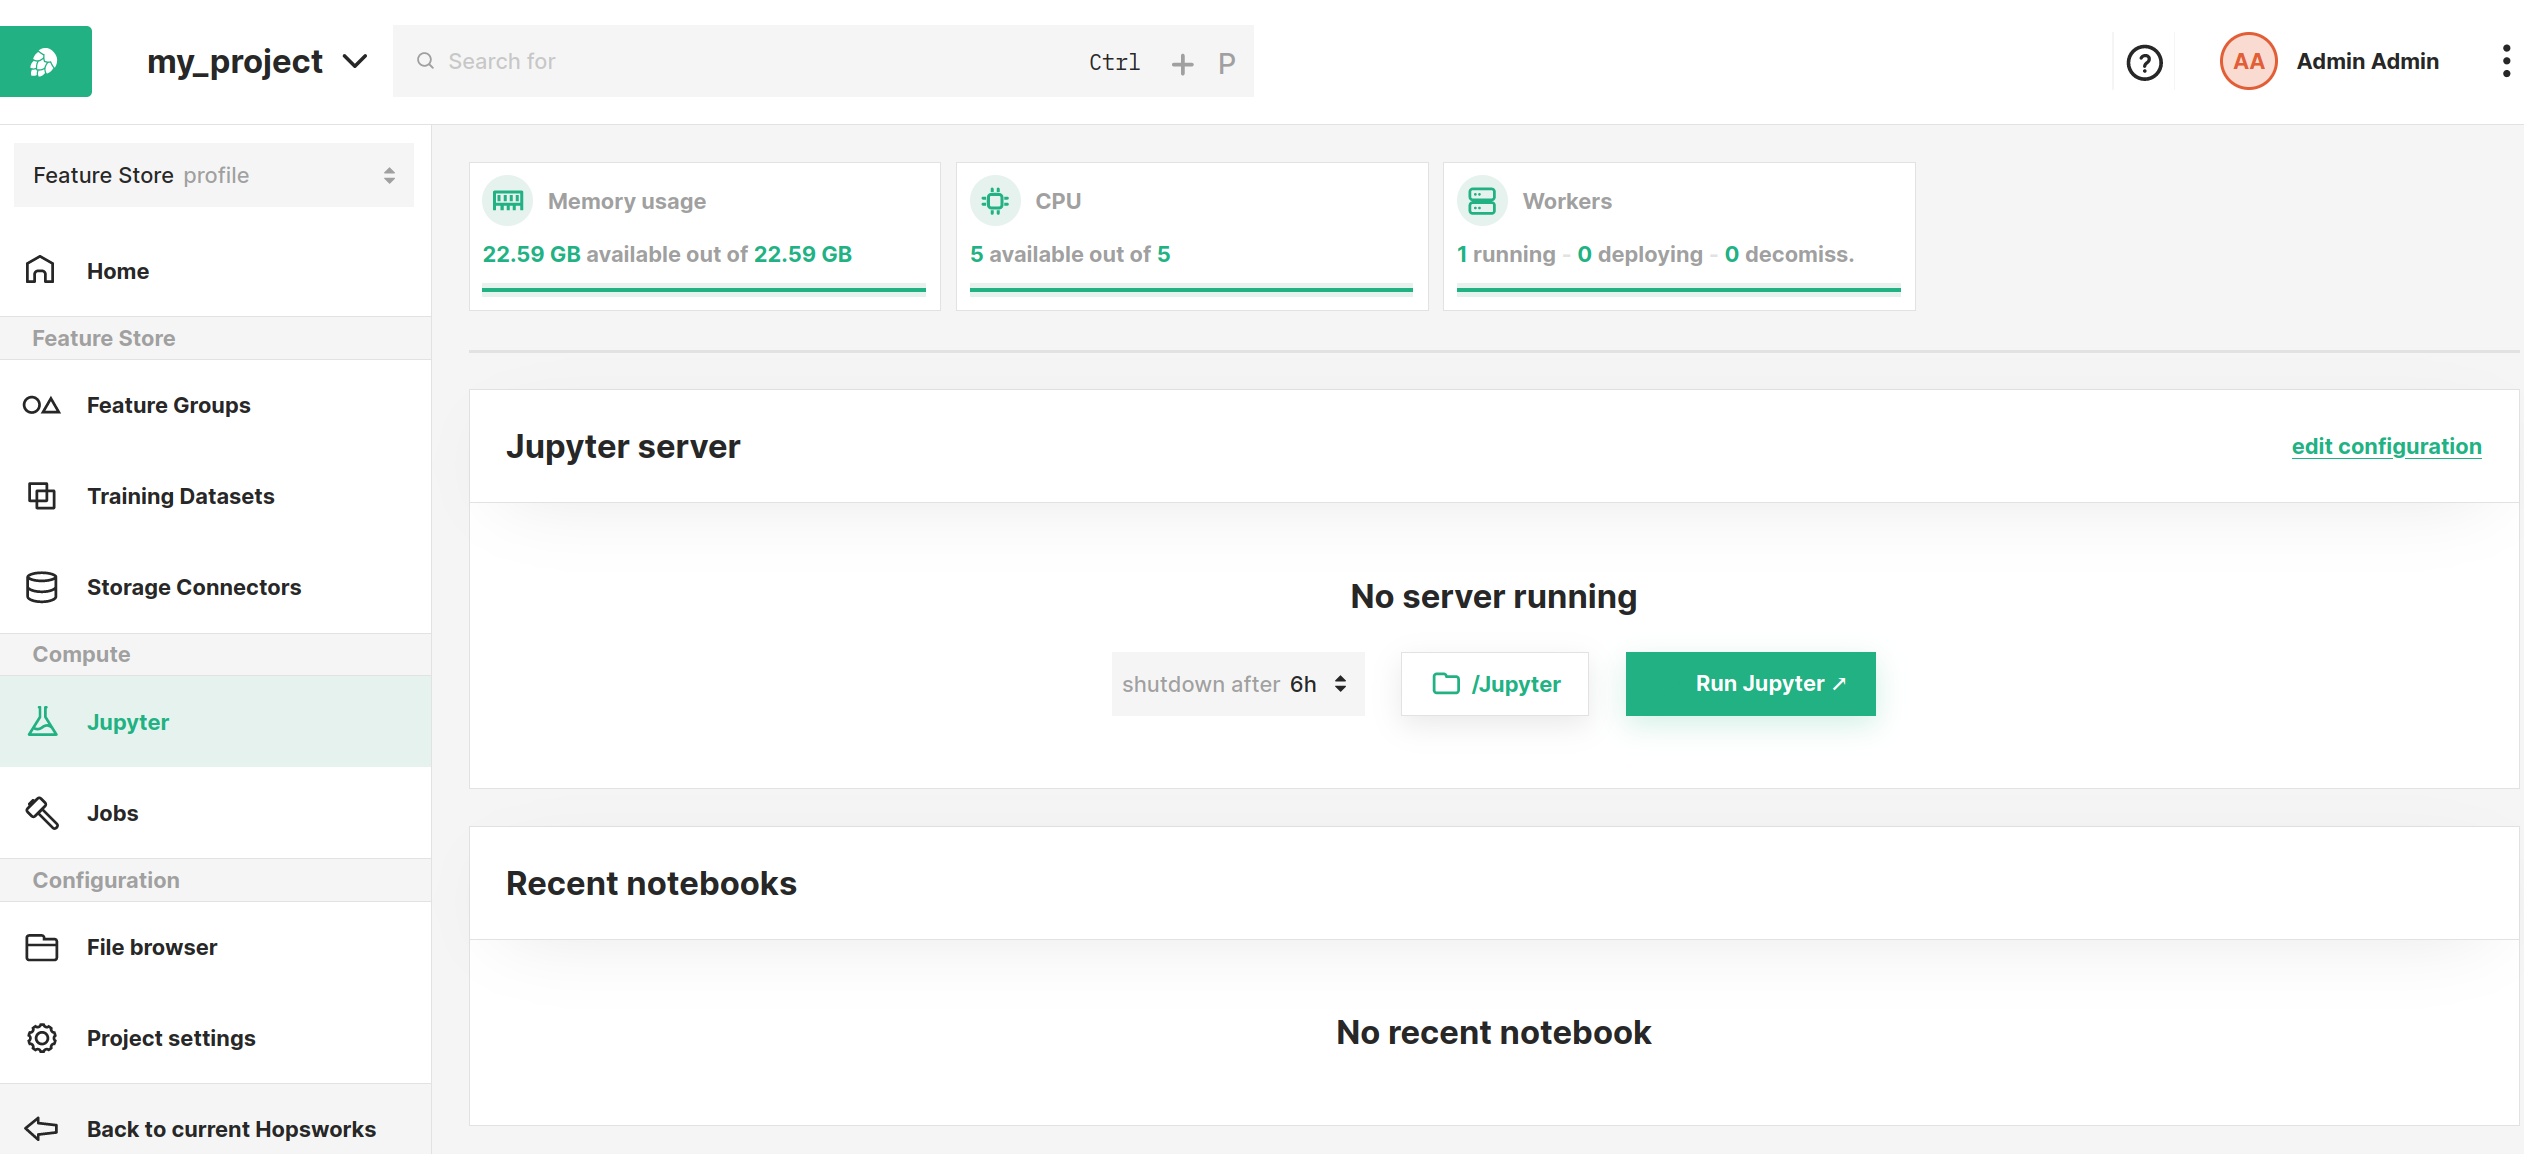
From this page, you can configure various options and settings to start Jupyter with as described in the sections below.
Step 2 (Optional): Configure spark#
Next step is to configure the Spark properties to be used in Jupyter, Click edit configuration to get to the configuration page and select Spark.
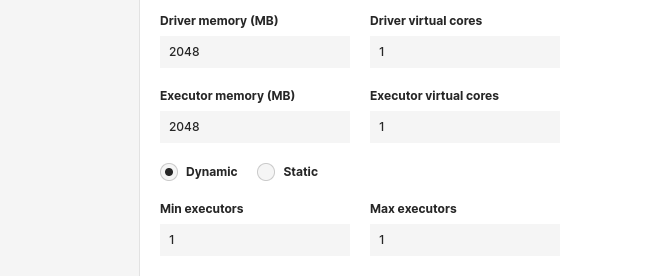
Resource and compute#
Resource allocation for the Spark driver and executors can be configured, also the number of executors and whether dynamic execution should be enabled.
-
Driver memory: Number of cores to allocate for the Spark driver -
Driver virtual cores: Number of MBs to allocate for the Spark driver -
Executor memory: Number of cores to allocate for each Spark executor -
Executor virtual cores: Number of MBs to allocate for each Spark executor -
Dynamic/Static: Run the Spark application in static or dynamic allocation mode (see spark docs for details).
Attach files or dependencies#
Additional files or dependencies required for the Spark job can be configured.
-
Additional archives: List of zip or .tgz files that will be locally accessible by the application -
Additional jars: List of .jar files to add to the CLASSPATH of the application -
Additional python dependencies: List of .py, .zip or .egg files that will be locally accessible by the application -
Additional files: List of files that will be locally accessible by the application

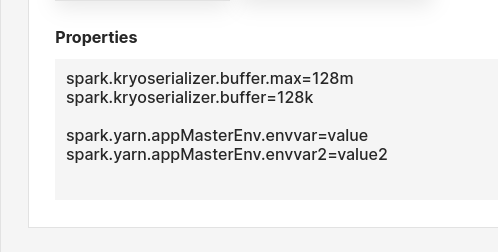
Line-separates properties to be set for the Spark application. For example, changing the configuration variables for the Kryo Serializer or setting environment variables for the driver, you can set the properties as shown below.
Click Save to save the new configuration.
Step 3 (Optional): Configure max runtime and root path#
Before starting the server there are two additional configurations that can be set next to the Run Jupyter button.
The runtime of the Jupyter instance can be configured, this is useful to ensure that idle instances will not be hanging around and keep allocating resources. If a limited runtime is not desirable, this can be disabled by setting no limit.
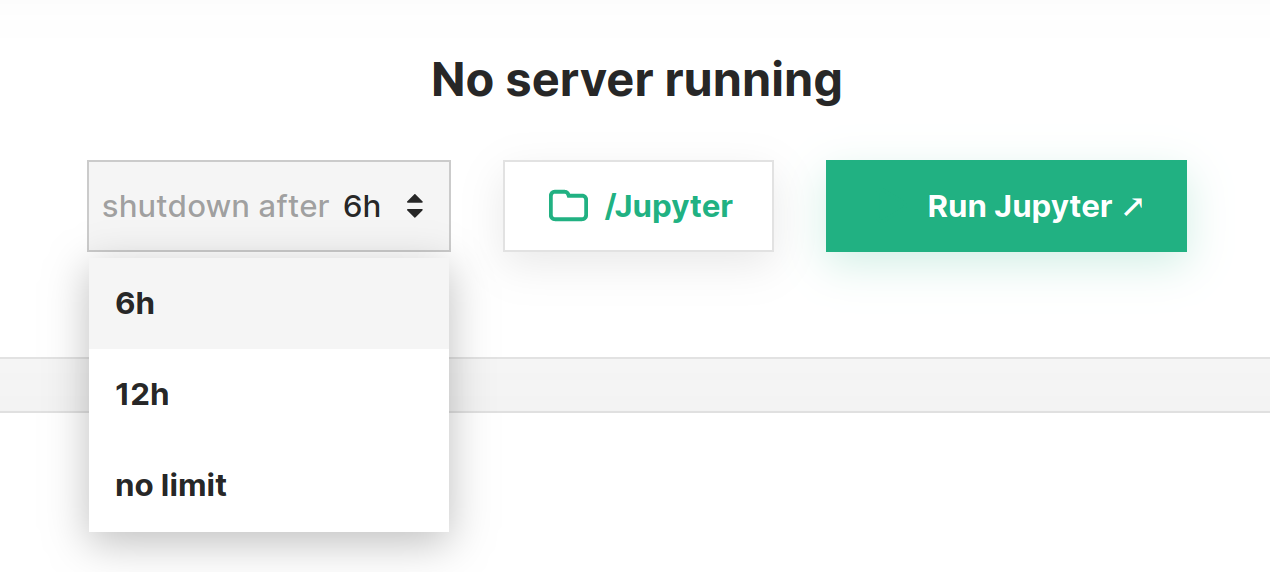
The root path from which to start the Jupyter instance can be configured. By default it starts by setting the /Jupyter folder as the root.

Step 4: Start Jupyter#
Start the Jupyter instance by clicking the Run Jupyter button.
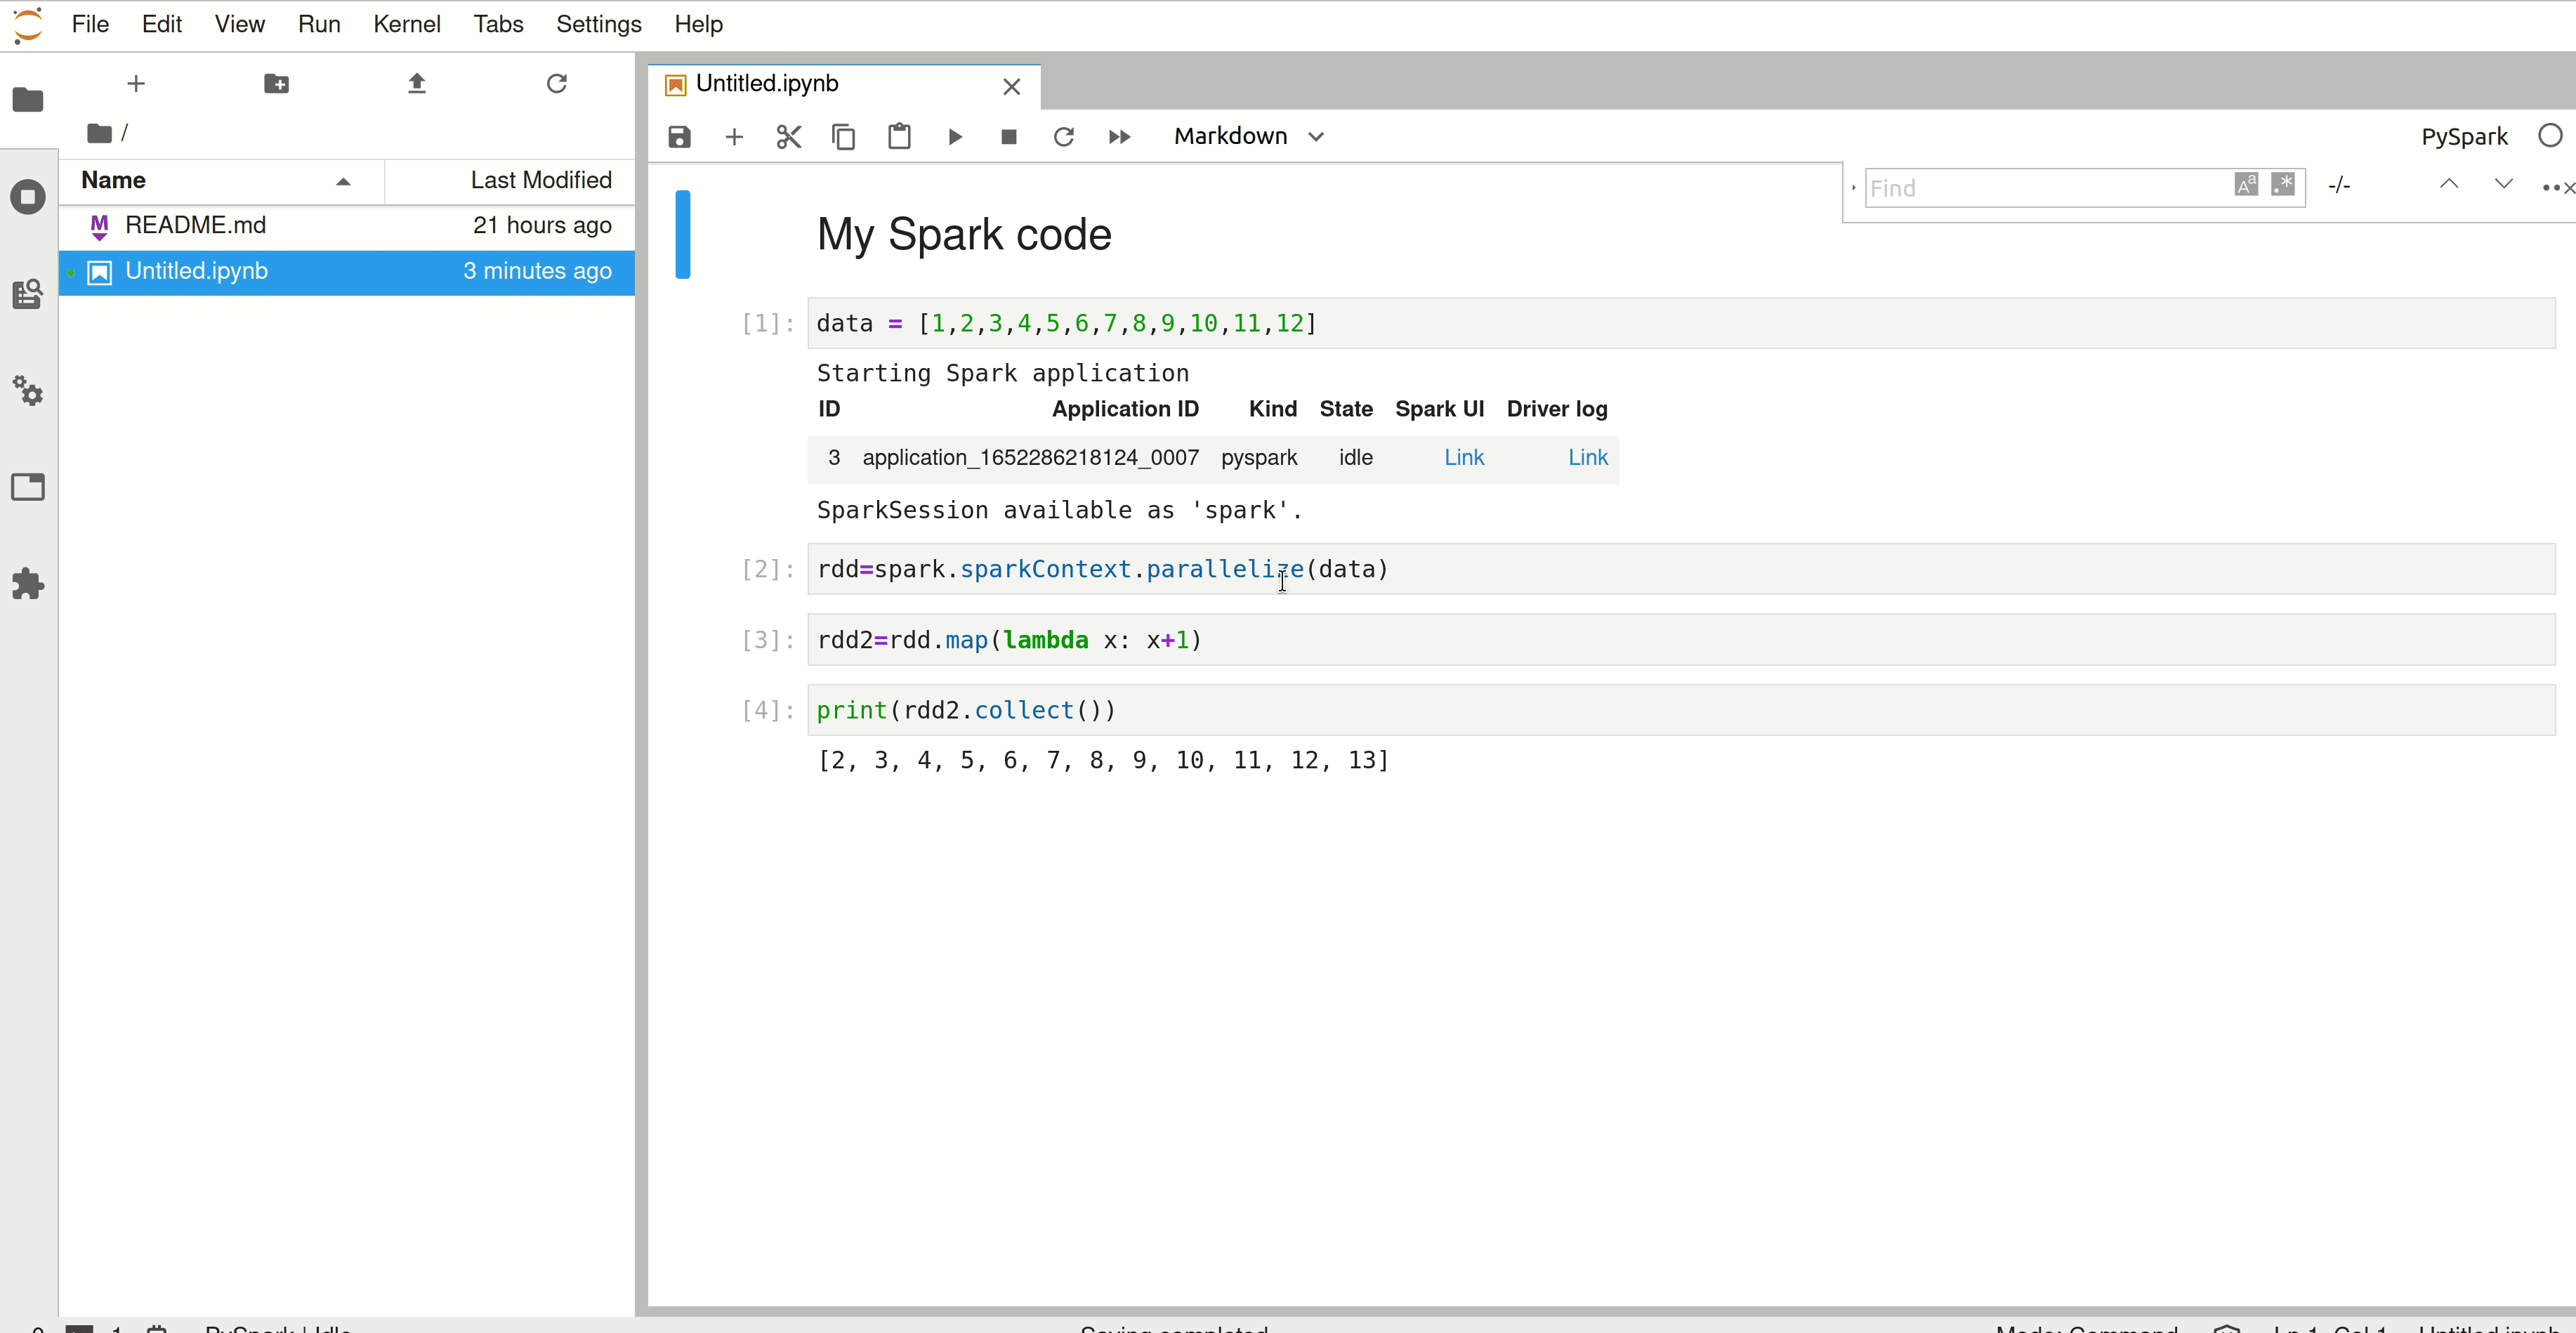
Step 5: Access Spark UI#
Navigate back to Hopsworks and a Spark session will have appeared, click on the Spark UI button to go to the Spark UI.
Conclusion#
In this guide you learned how to configure and run a Spark application in Jupyter. You can now follow this guide to install a library that can be used in a notebook.